Works great! Full response in the build thread, but thanks for the font size tip! I had neglected that. 20 seems too big so maybe I’ll try 18.
Hi All,
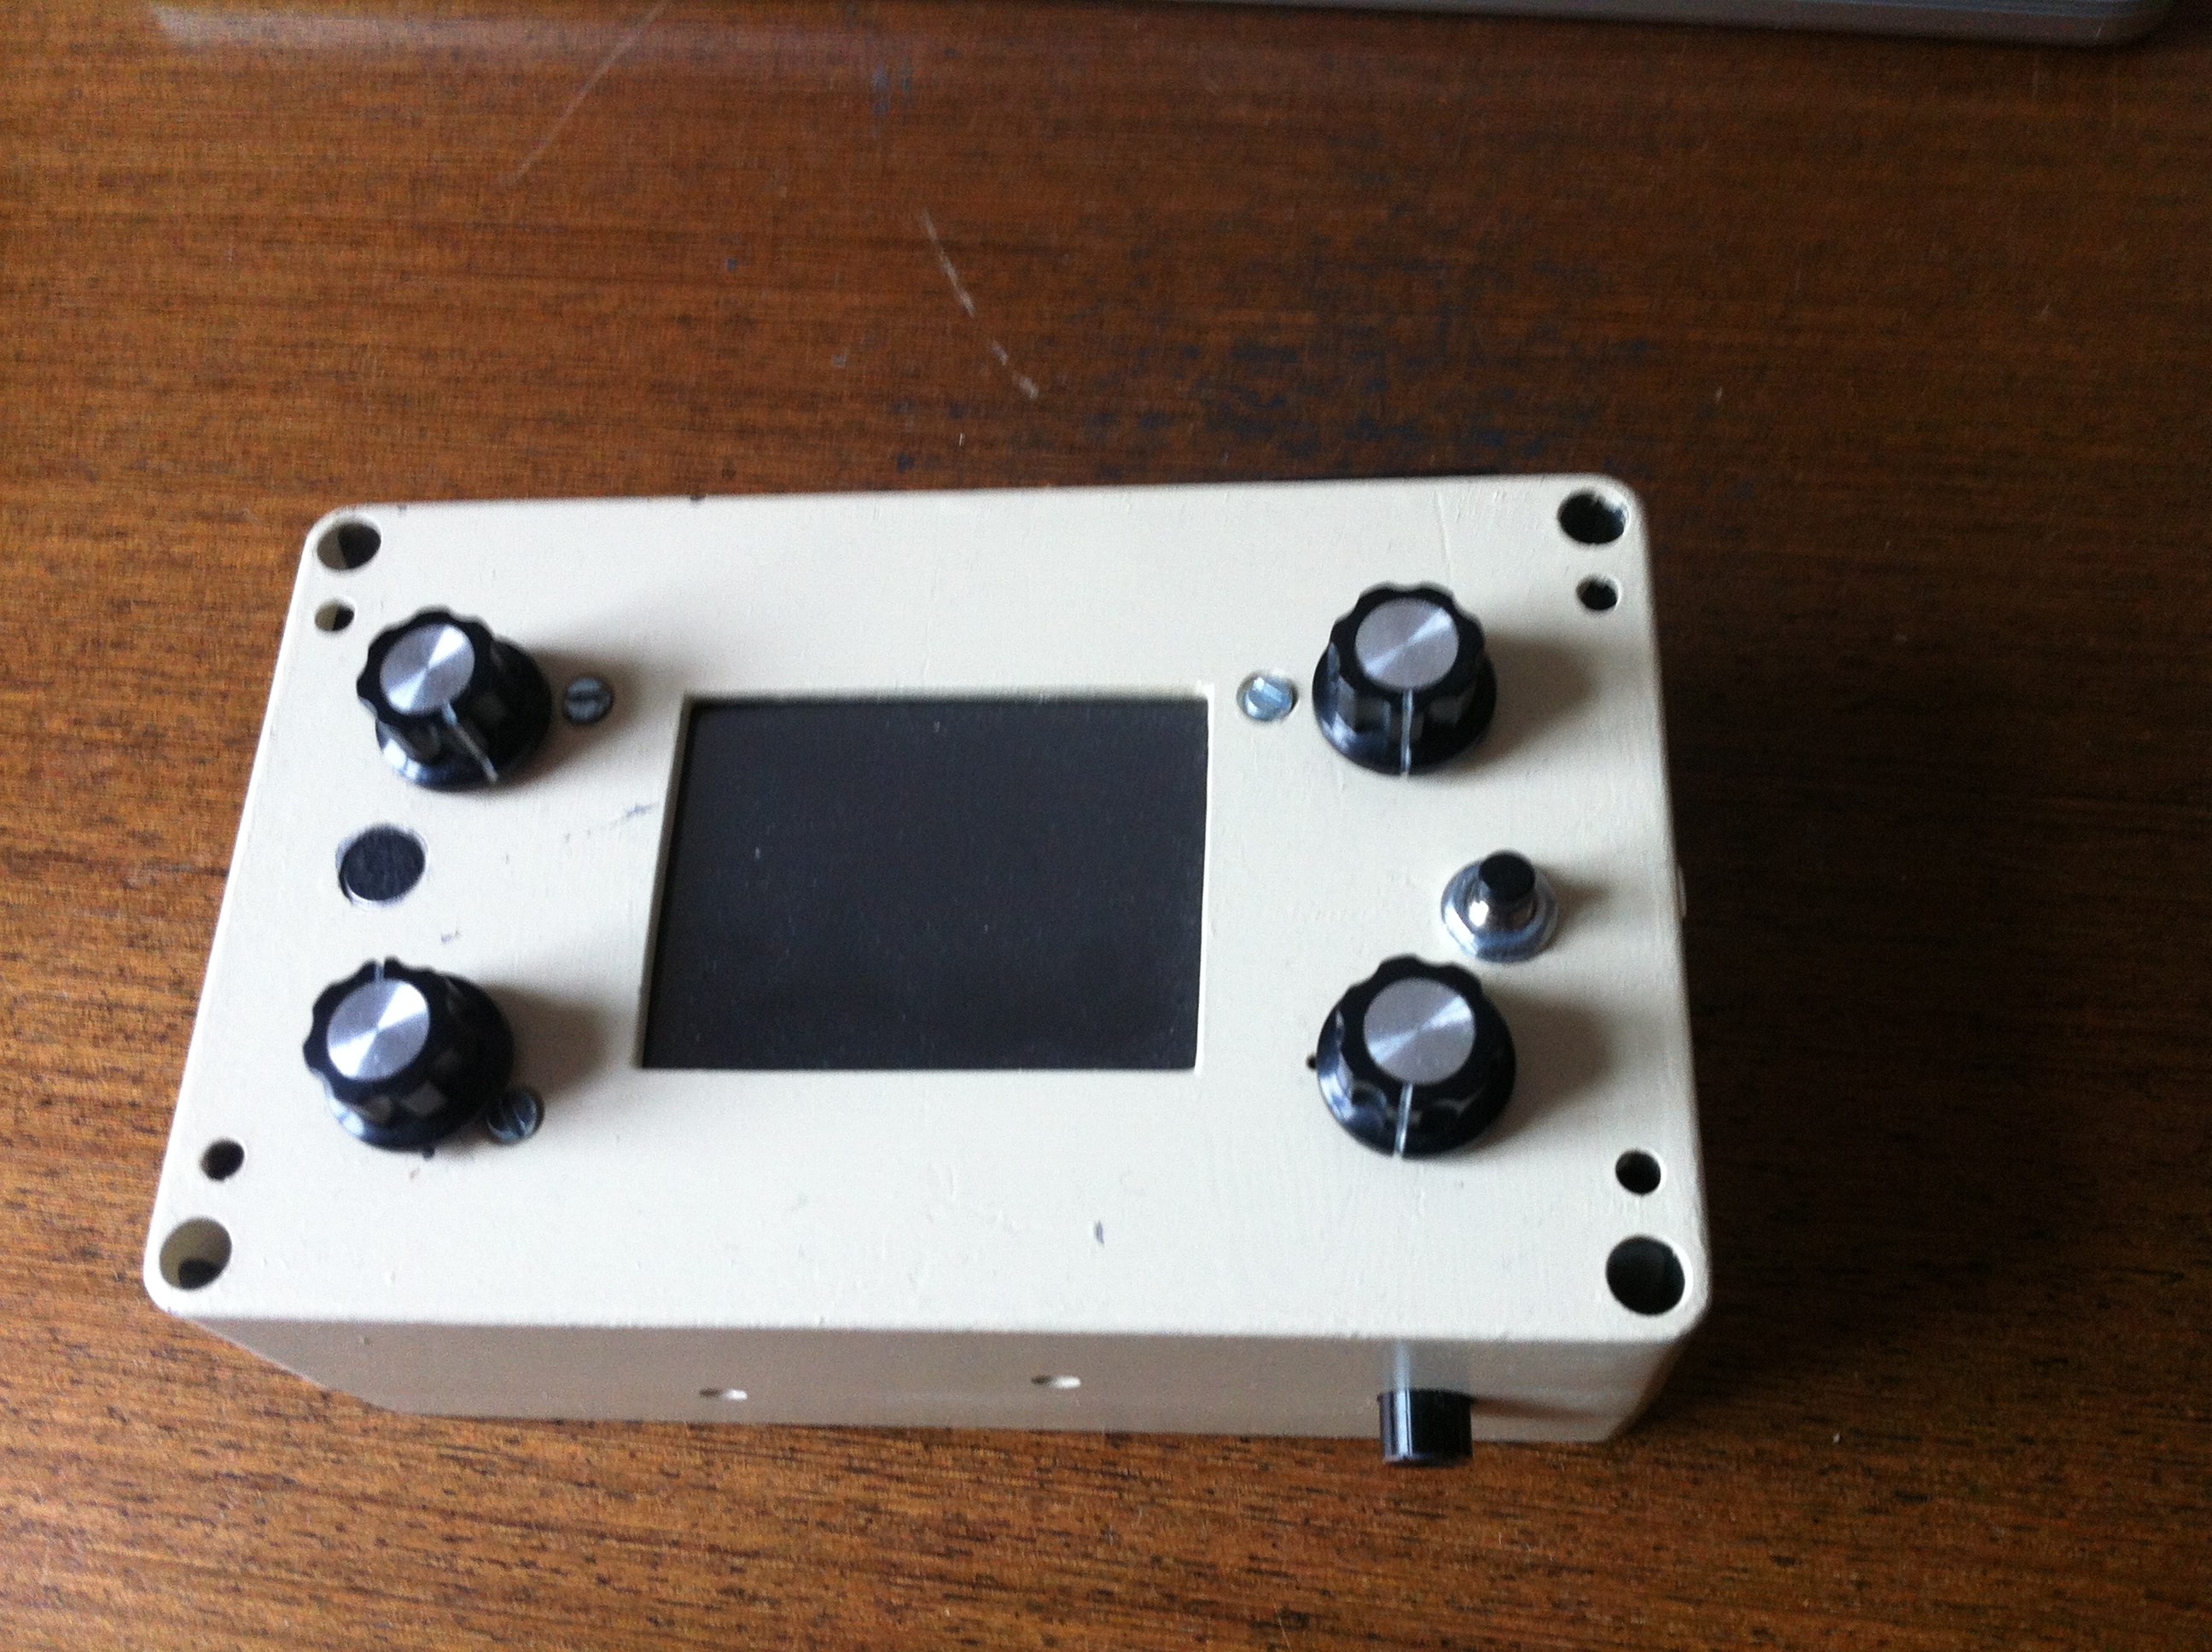
I’ve just assembled my Zynthian with 5 inch screen.

The touch interface is active, but it is a bit ‘erratic’ so I included the encoders. I designed the covers in Blender & printed them as part of a college project.
The screen connection is with HDMI which spared some GPIOs. So this design doesn’t need an IO Expander. I made a little breakout board to connect to the encoders. There are many 5 inch displays available on Ebay, but I took this one => http://www.ebay.co.uk/itm/5inch-LCD-Touch-Screen-Display-HDMI-800x480-FOR-Raspberry-Pi-B-B-Pi2-Board-/331707690771 If you look carefully at the pictures, they show that the RPi is mounted upside down, so the 40 pin GPIO port is still visible. This makes it easier to mount the DAC.
The fireside glow in the case comes from a 12V-5V converter. I tried for a long time to power the Zynthian from a 5V USB phone charger but I couldn’t find a combination of charger & cable that would function, since the voltage drop over the cable was too high. So I’ve got an old 12V ‘wall-wart’ supply that I’m regulating down to 5V inside the box. The result is very robust.
Whoops! I forgot to add the knobs…
5 Likes
Congratulations @Andy!! You are a brave maker!! 
- I like your rotary layout. With a big display like this i think is a good idea putting it on top & bottom sides.
- I don’t like the case color
 … but as we say in spanish, “para gustos, colores”
 … but as we say in spanish, “para gustos, colores”
Have you updated the software? If not, you should do it ASAP. And do it twice!! Also update the “library”.
After doing so, you will have new features, like the new multi.layer engine and the webconf utility that you can use to increase the font size.
Finally … could you send some photo of the inner and back sides? It would be nice to see how you solved the details.
Kind Regards!
I don’t like the colour of the case either! I’m not too impressed with our 3D printer. I tried a few times to make a print with bright red ABS-PC, but these failed. The prints in the picture are using ‘transparent’ PLA which is much easier to print with, but not as durable.
Here are some more pictures…
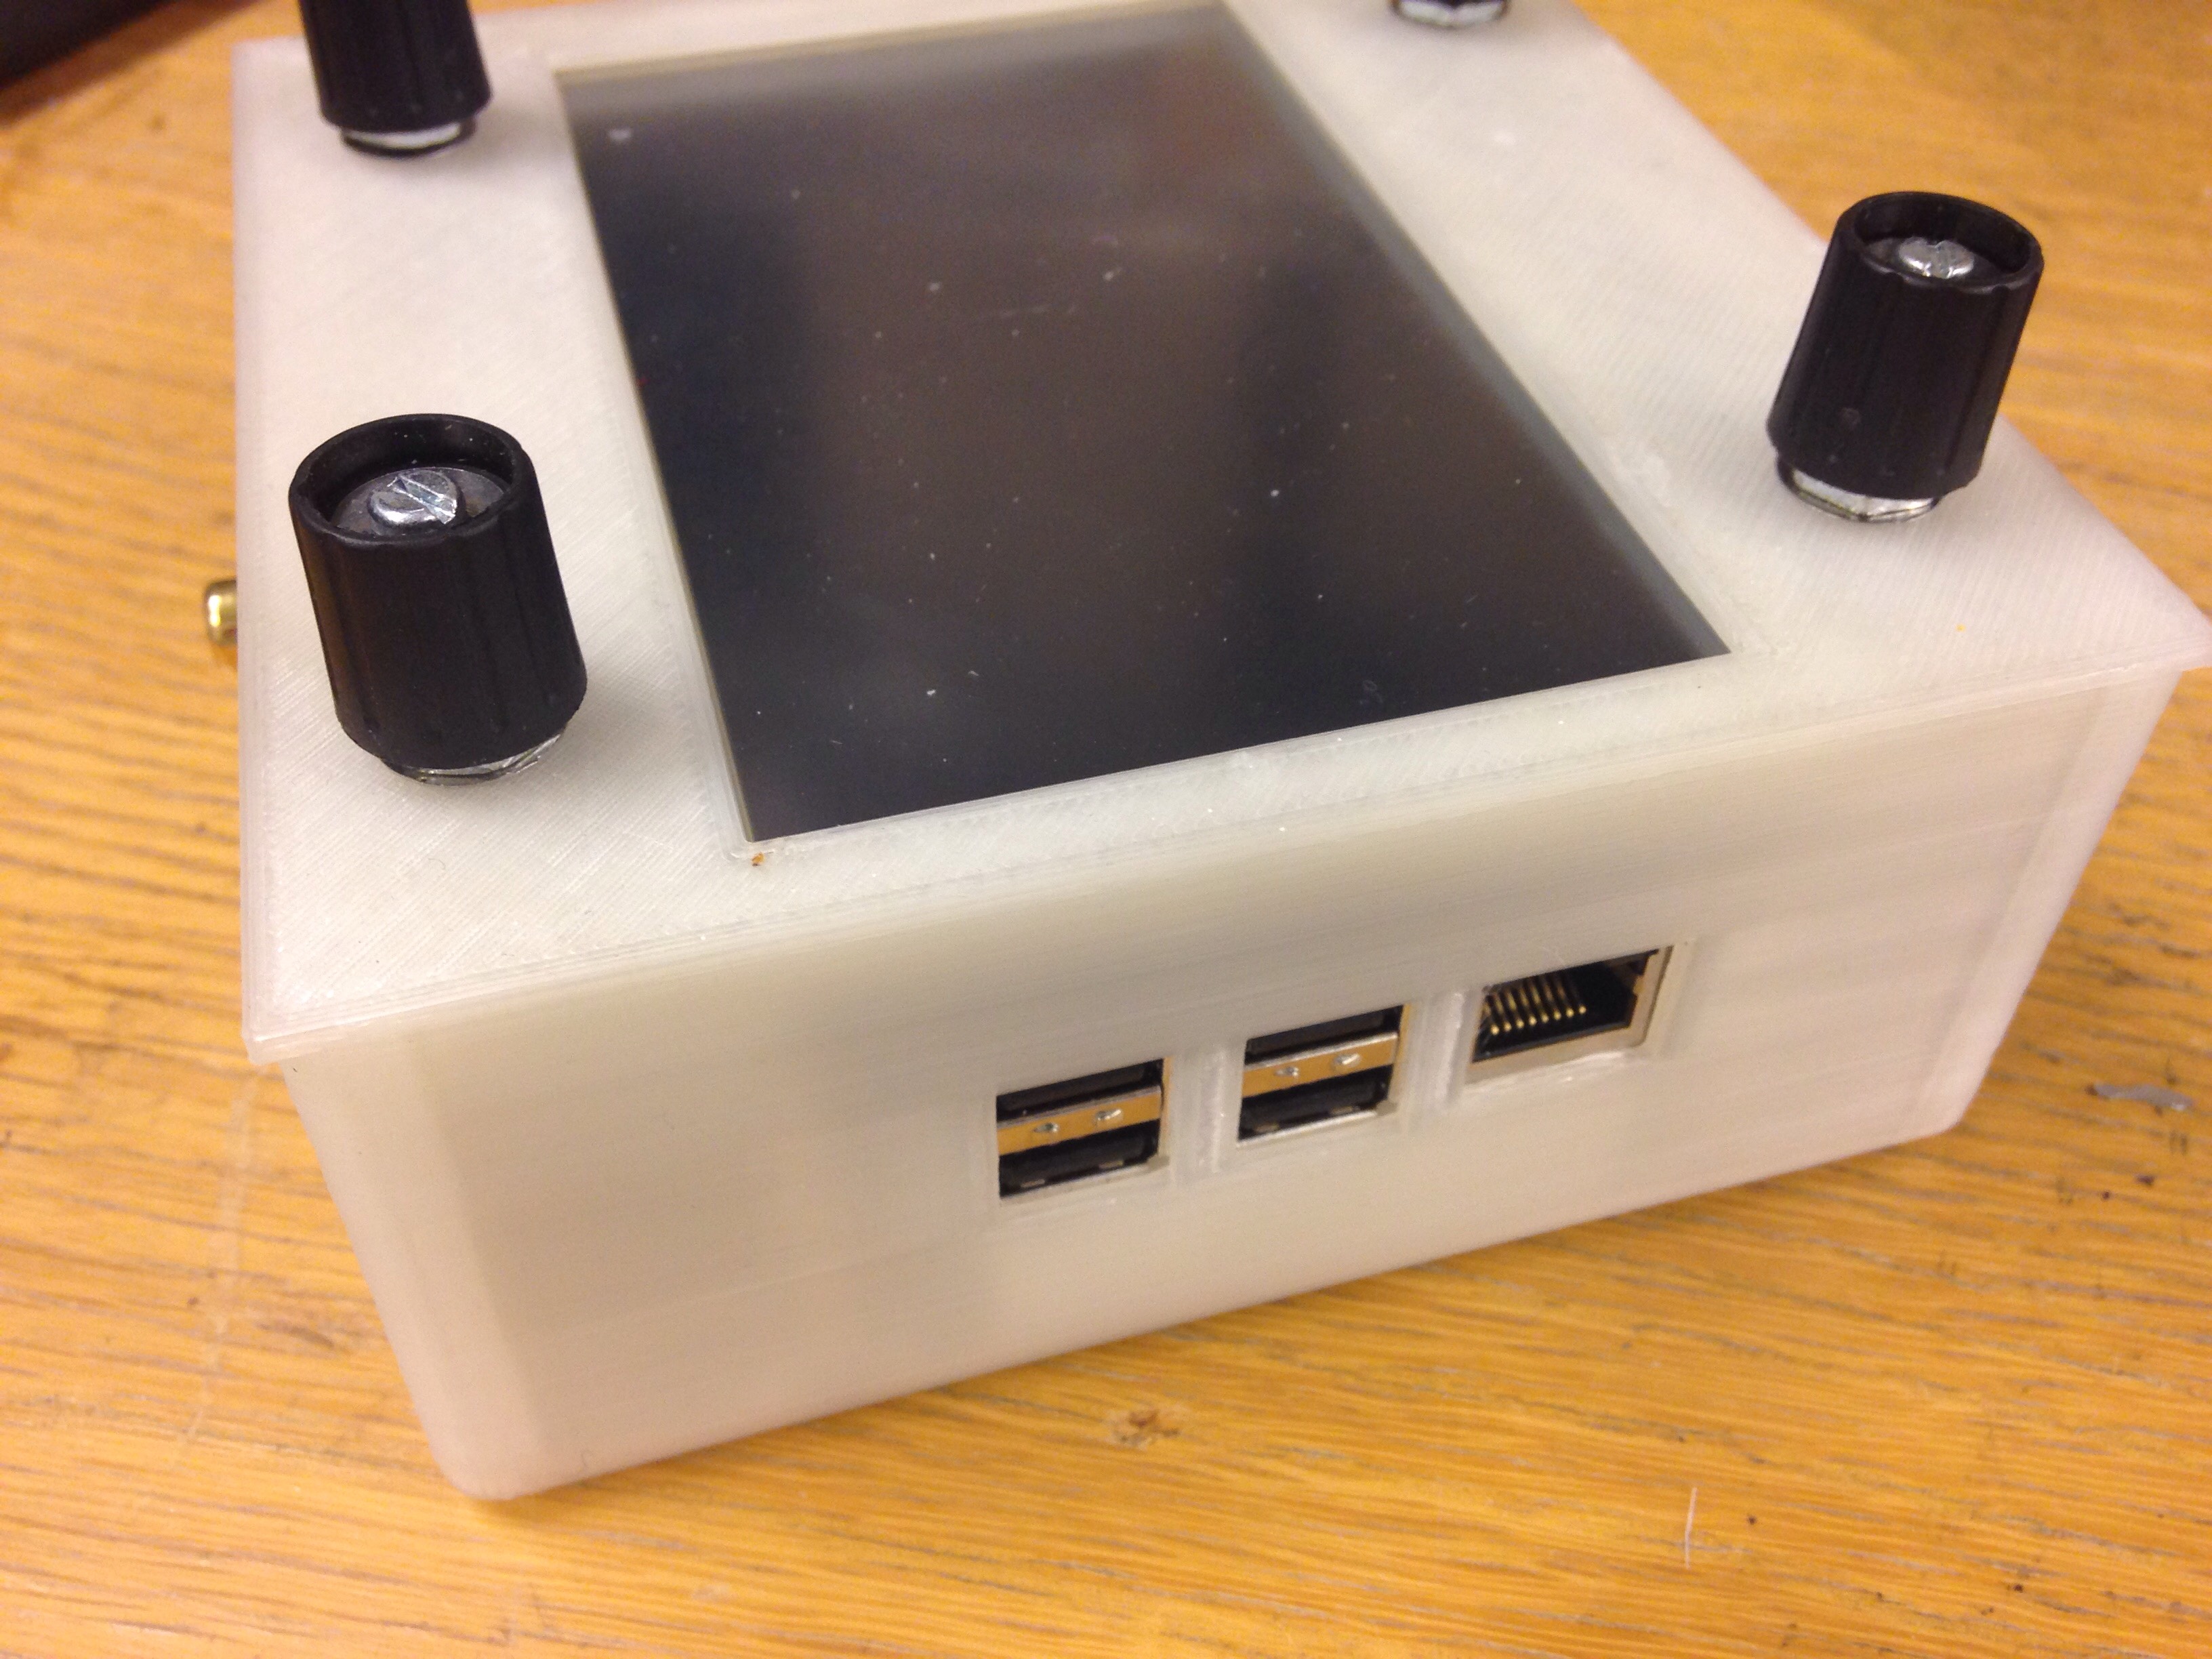
Here is the side with the USB & Ethernet ports visible.

This is the back with the power & audio connections. There’s another hole for me to mount the midi port.
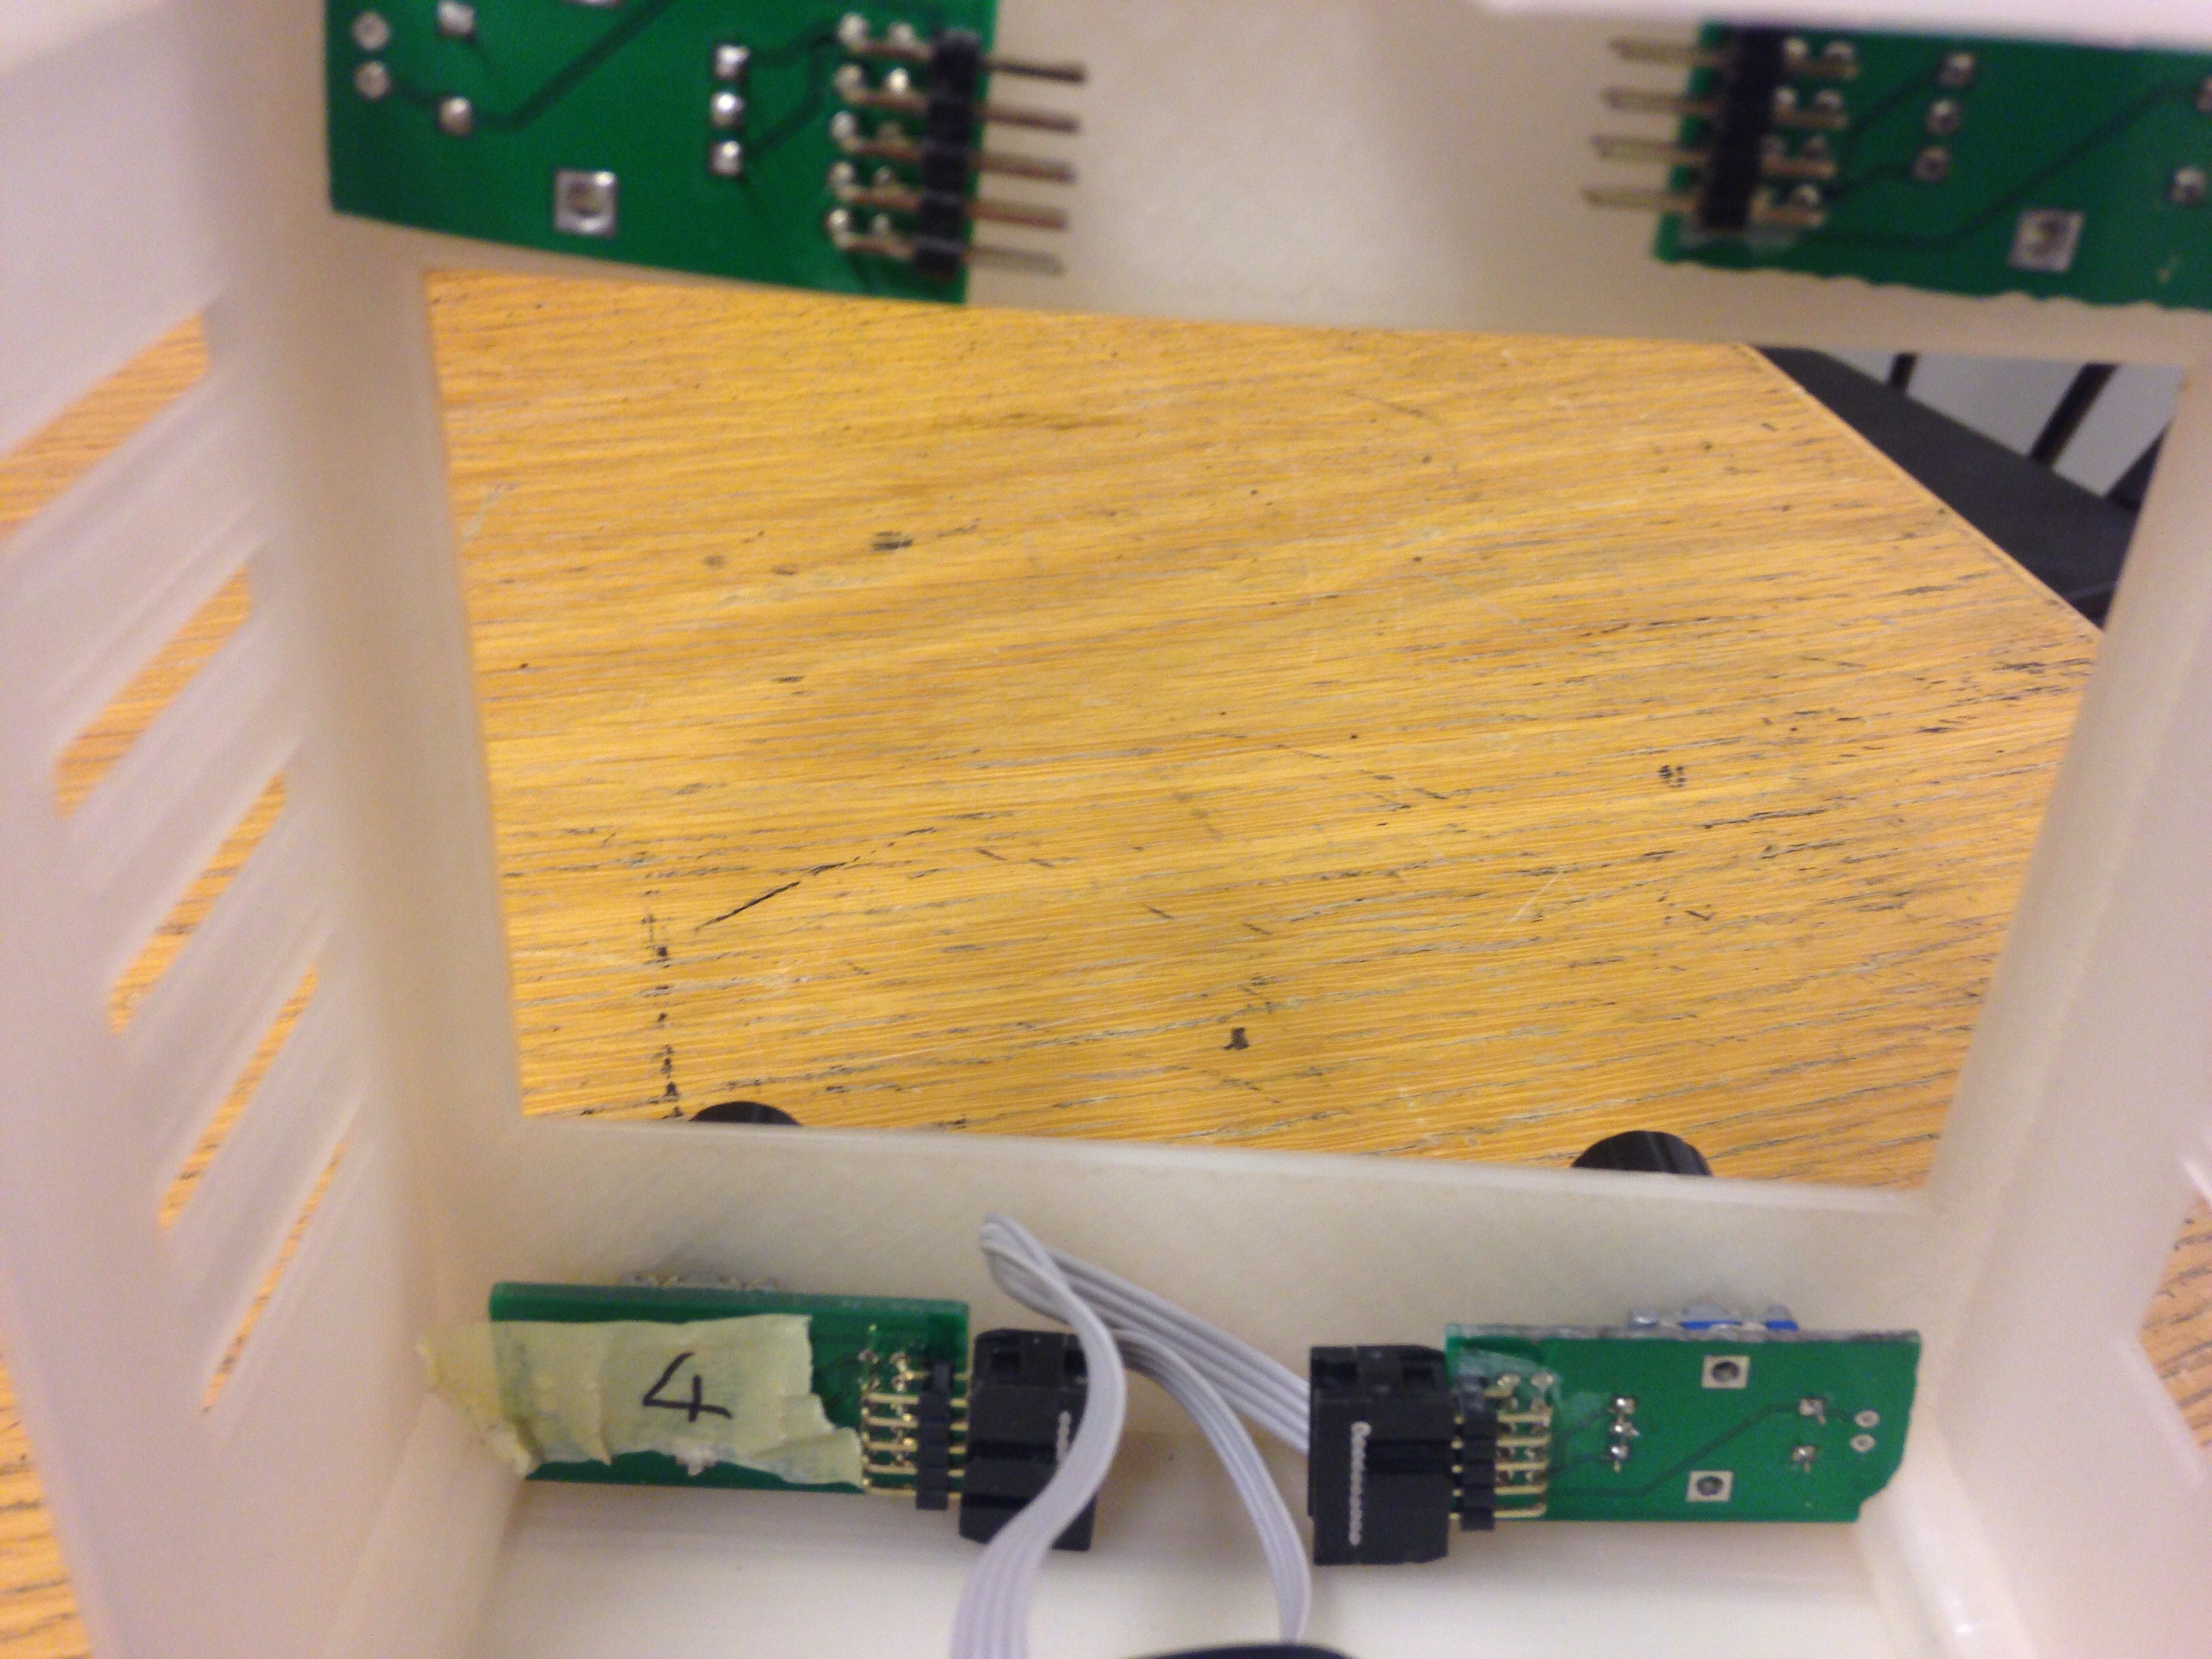
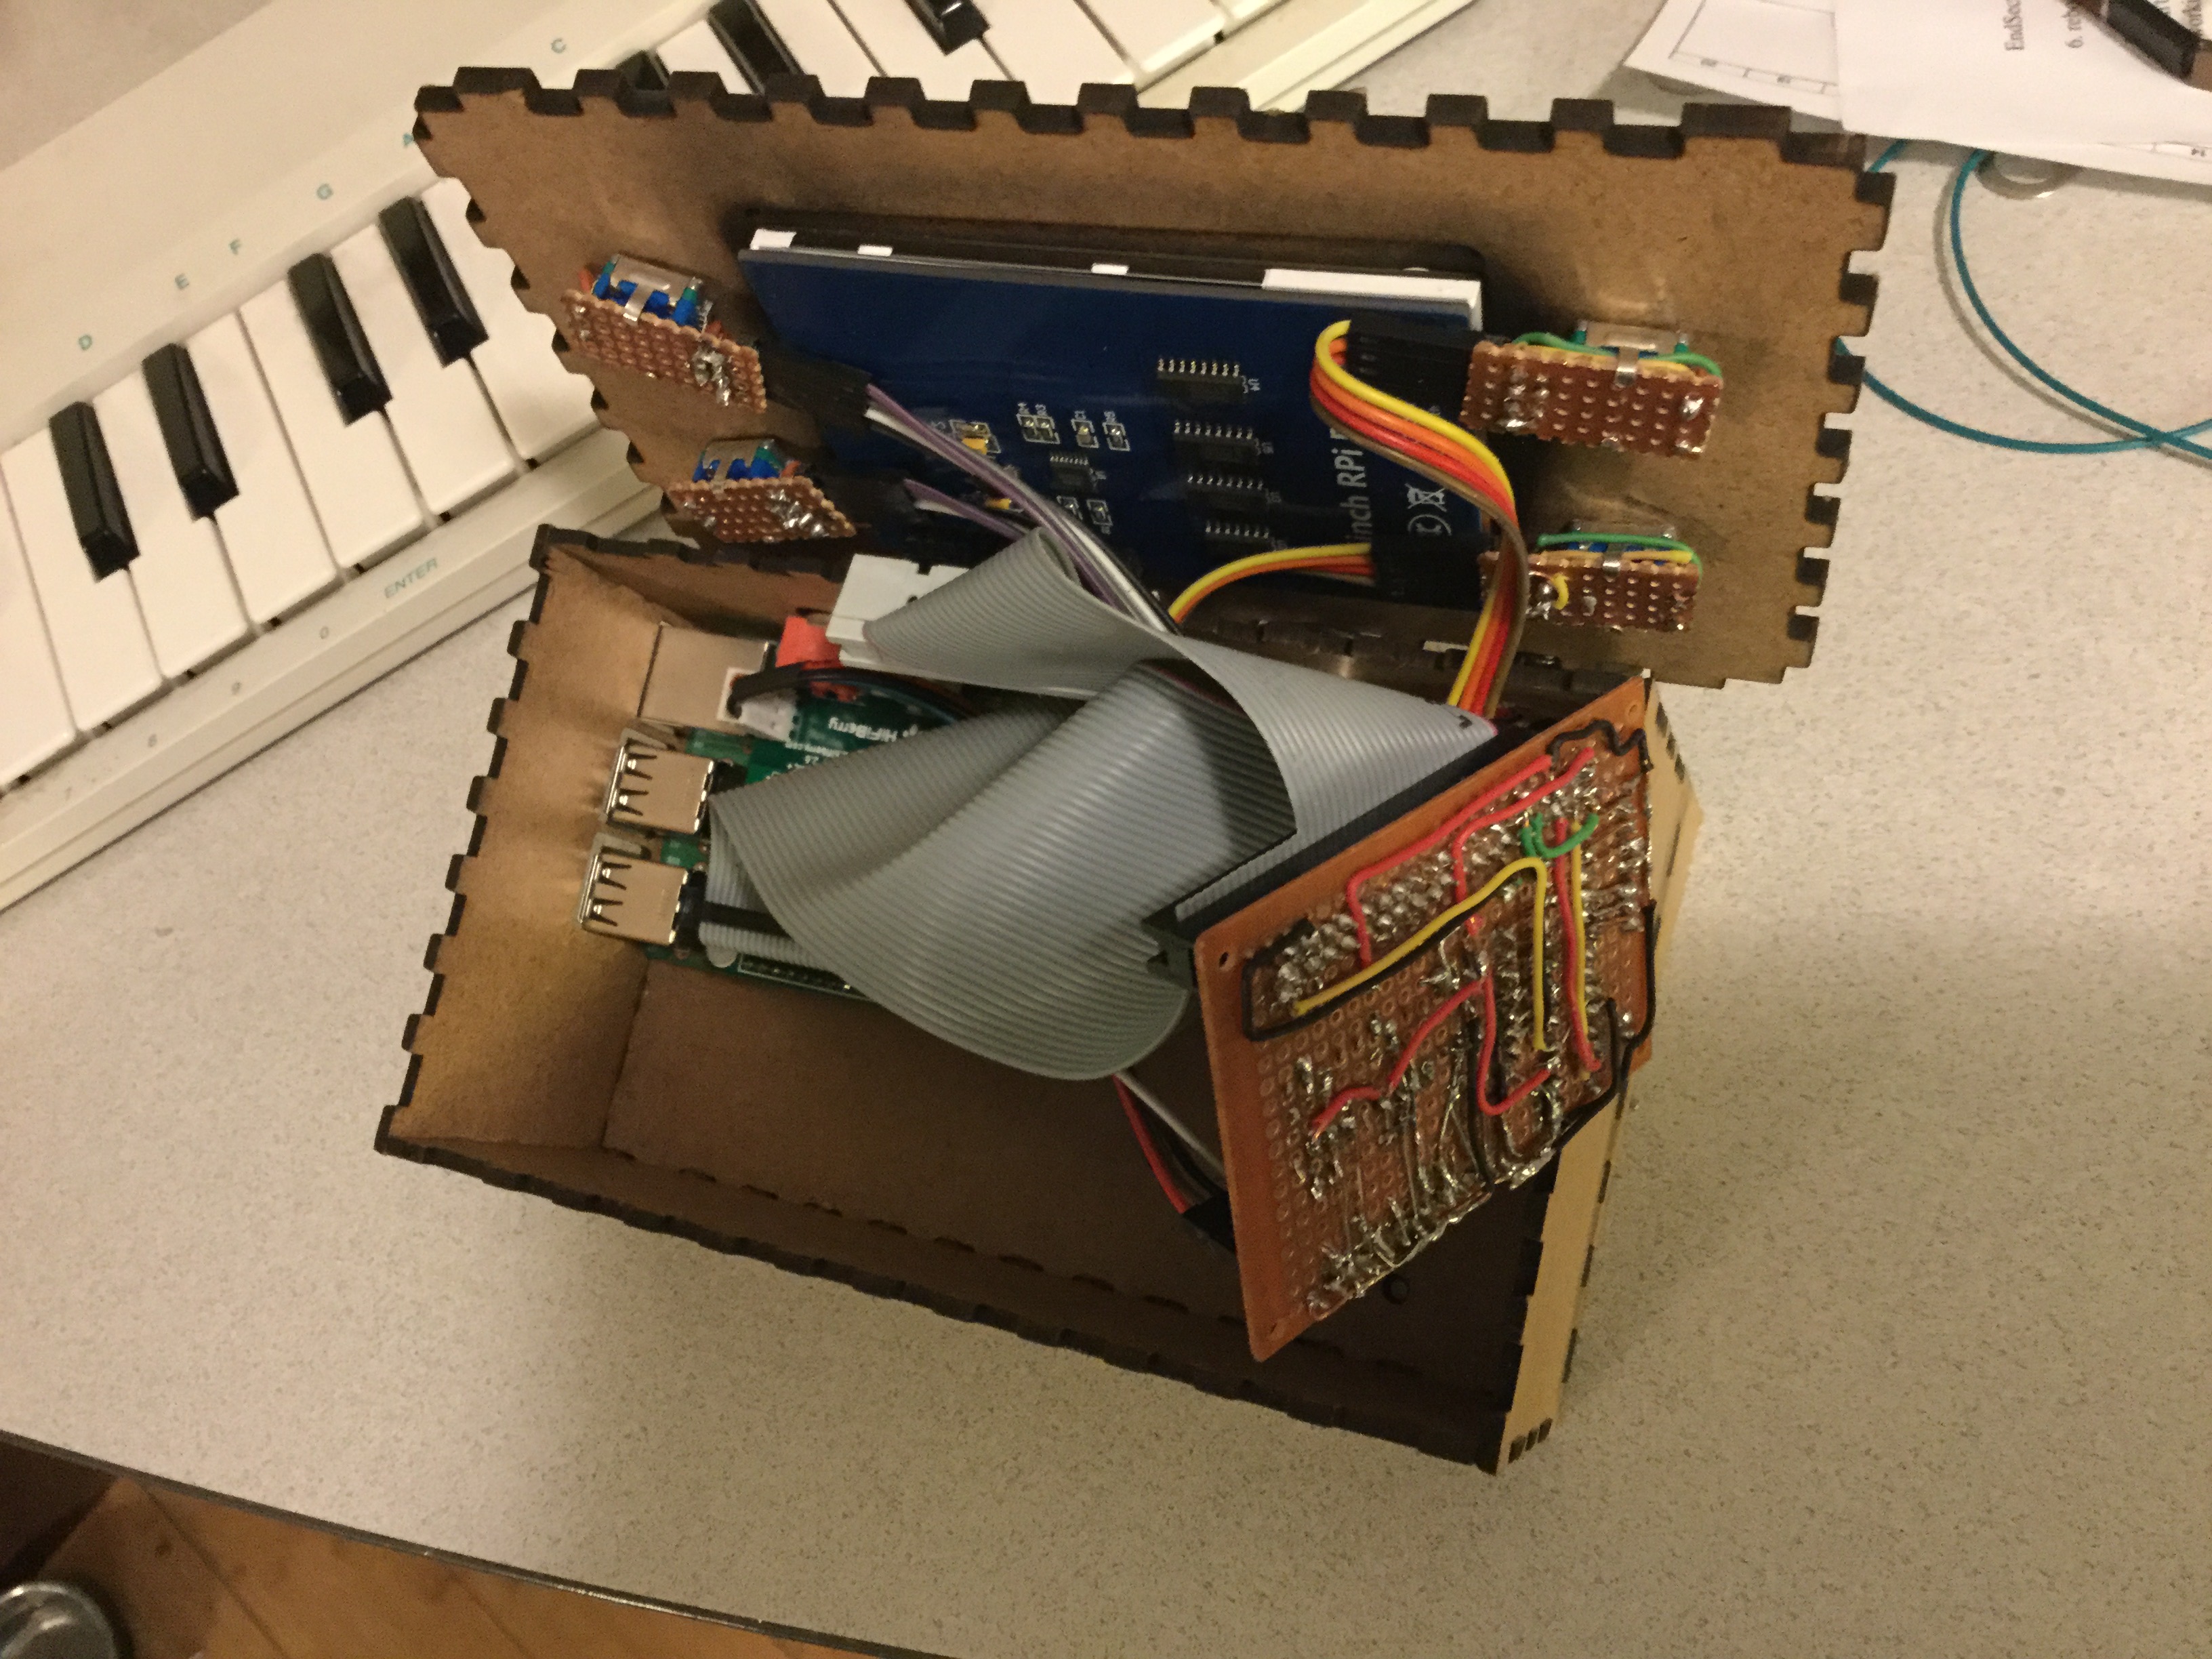
Here are the encoders inside the lid. It’s a tight squeeze and I had to dremel the corner of my PCB away to get it to fit. The IDC headers are a bit bigger then needed, but I had a whole pile of them left over from an earlier project. You can also see the vent holes in the case to help with airflow.
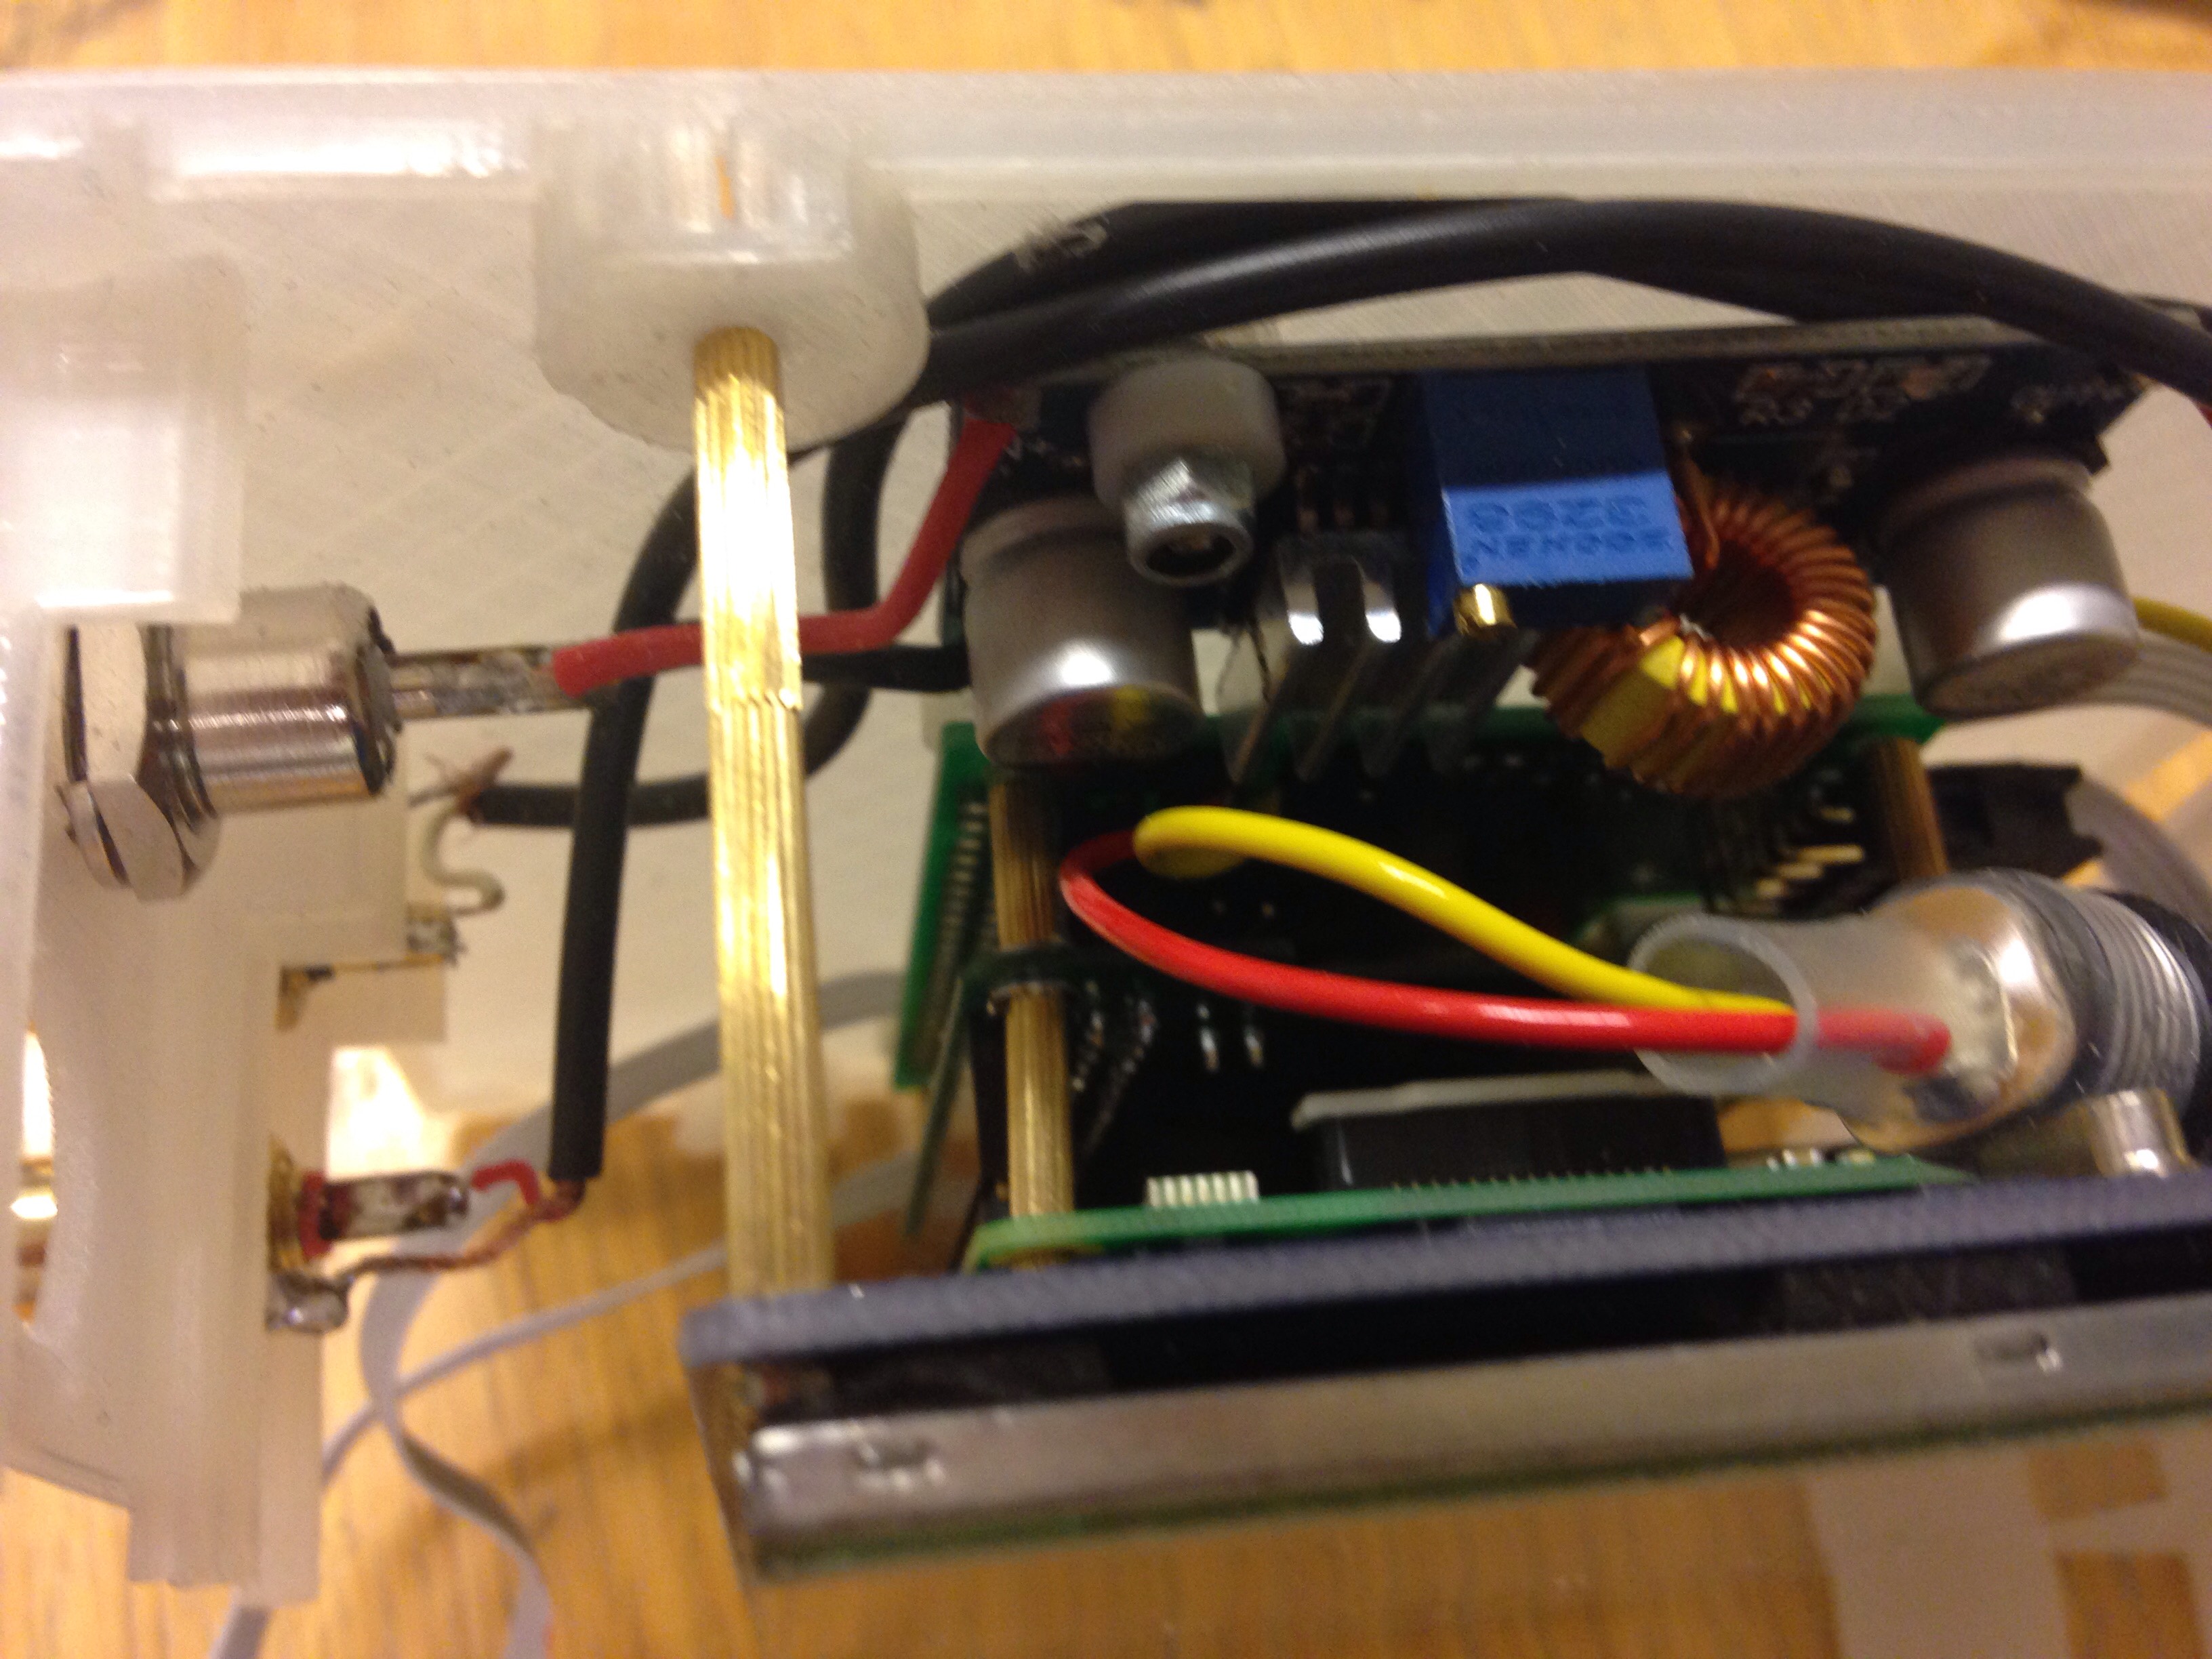
This is the 12-5V converter board. The ugly yellow & red wires are connecting 5V to the RPi via my adapter board.

Finally, the stack of the display, the RPi, the HifiBerry & encoder breakout board. This 5 inch display has the RPi mounted ‘upside down’ so that I can plug the HifiBerry & encoder boards directly to the RPi without a 40 way ribbon cable. They are sandwiched together with metal standoffs. I did plan to push the standoffs into the back cover, but the assembly is solid enough without them. I like the mini Hdmi-Hdmi connector that came with the display since it’s a lot smaller than a regular HDMI cable.
Now this Zynthian is working & I’m already dreaming up the next one. After struggling to squeeze everything into a small package, I’m now thinking about using a 19 inch rack.
4 Likes
Nice work! Thanks for posting the photos of the internals and how you mounted everything.
Hi All,
Here is another little Zynthian box 
It is built with 5 inch hdmi display and pcm5102 dac from aliexpress.
I tried to make it as compact as possible:
Tested successfully on some open air gig! 
And…
That was great!!!
Thank you so much @jofemodo and all the Zynthian team for making this nice project available!
I’ve made some modifications of software to improve stability for stage work, including LinuxSampler upgrade to version 2.0.
I couldn’t make any install scripts, but I have rewritten some LS Engine code to make it run smoothly
And I want to share my work if it could make Zynthian better!
Zynthian is great!
22 Likes
Hi @Schpion!
Your ZynthianBox is magnific! Simply i falled in love with it … 
Please, could you give more details about your amazing case and also some photos of the inner side?
Regarding your improvements, please, fork the official repository in github and commit your changes, if possible, separating every functional change in a different commit . In such a way, everybody can test your changes and it should be easier to integrate with the official repository.
Kind Regards!
P.S: I’m really impacient to test your changes … jejeje!
I just added you ZynthianBox to our map:
AFAIK, your Zynthian Box is the first in Russia … congratulations!! ![]()
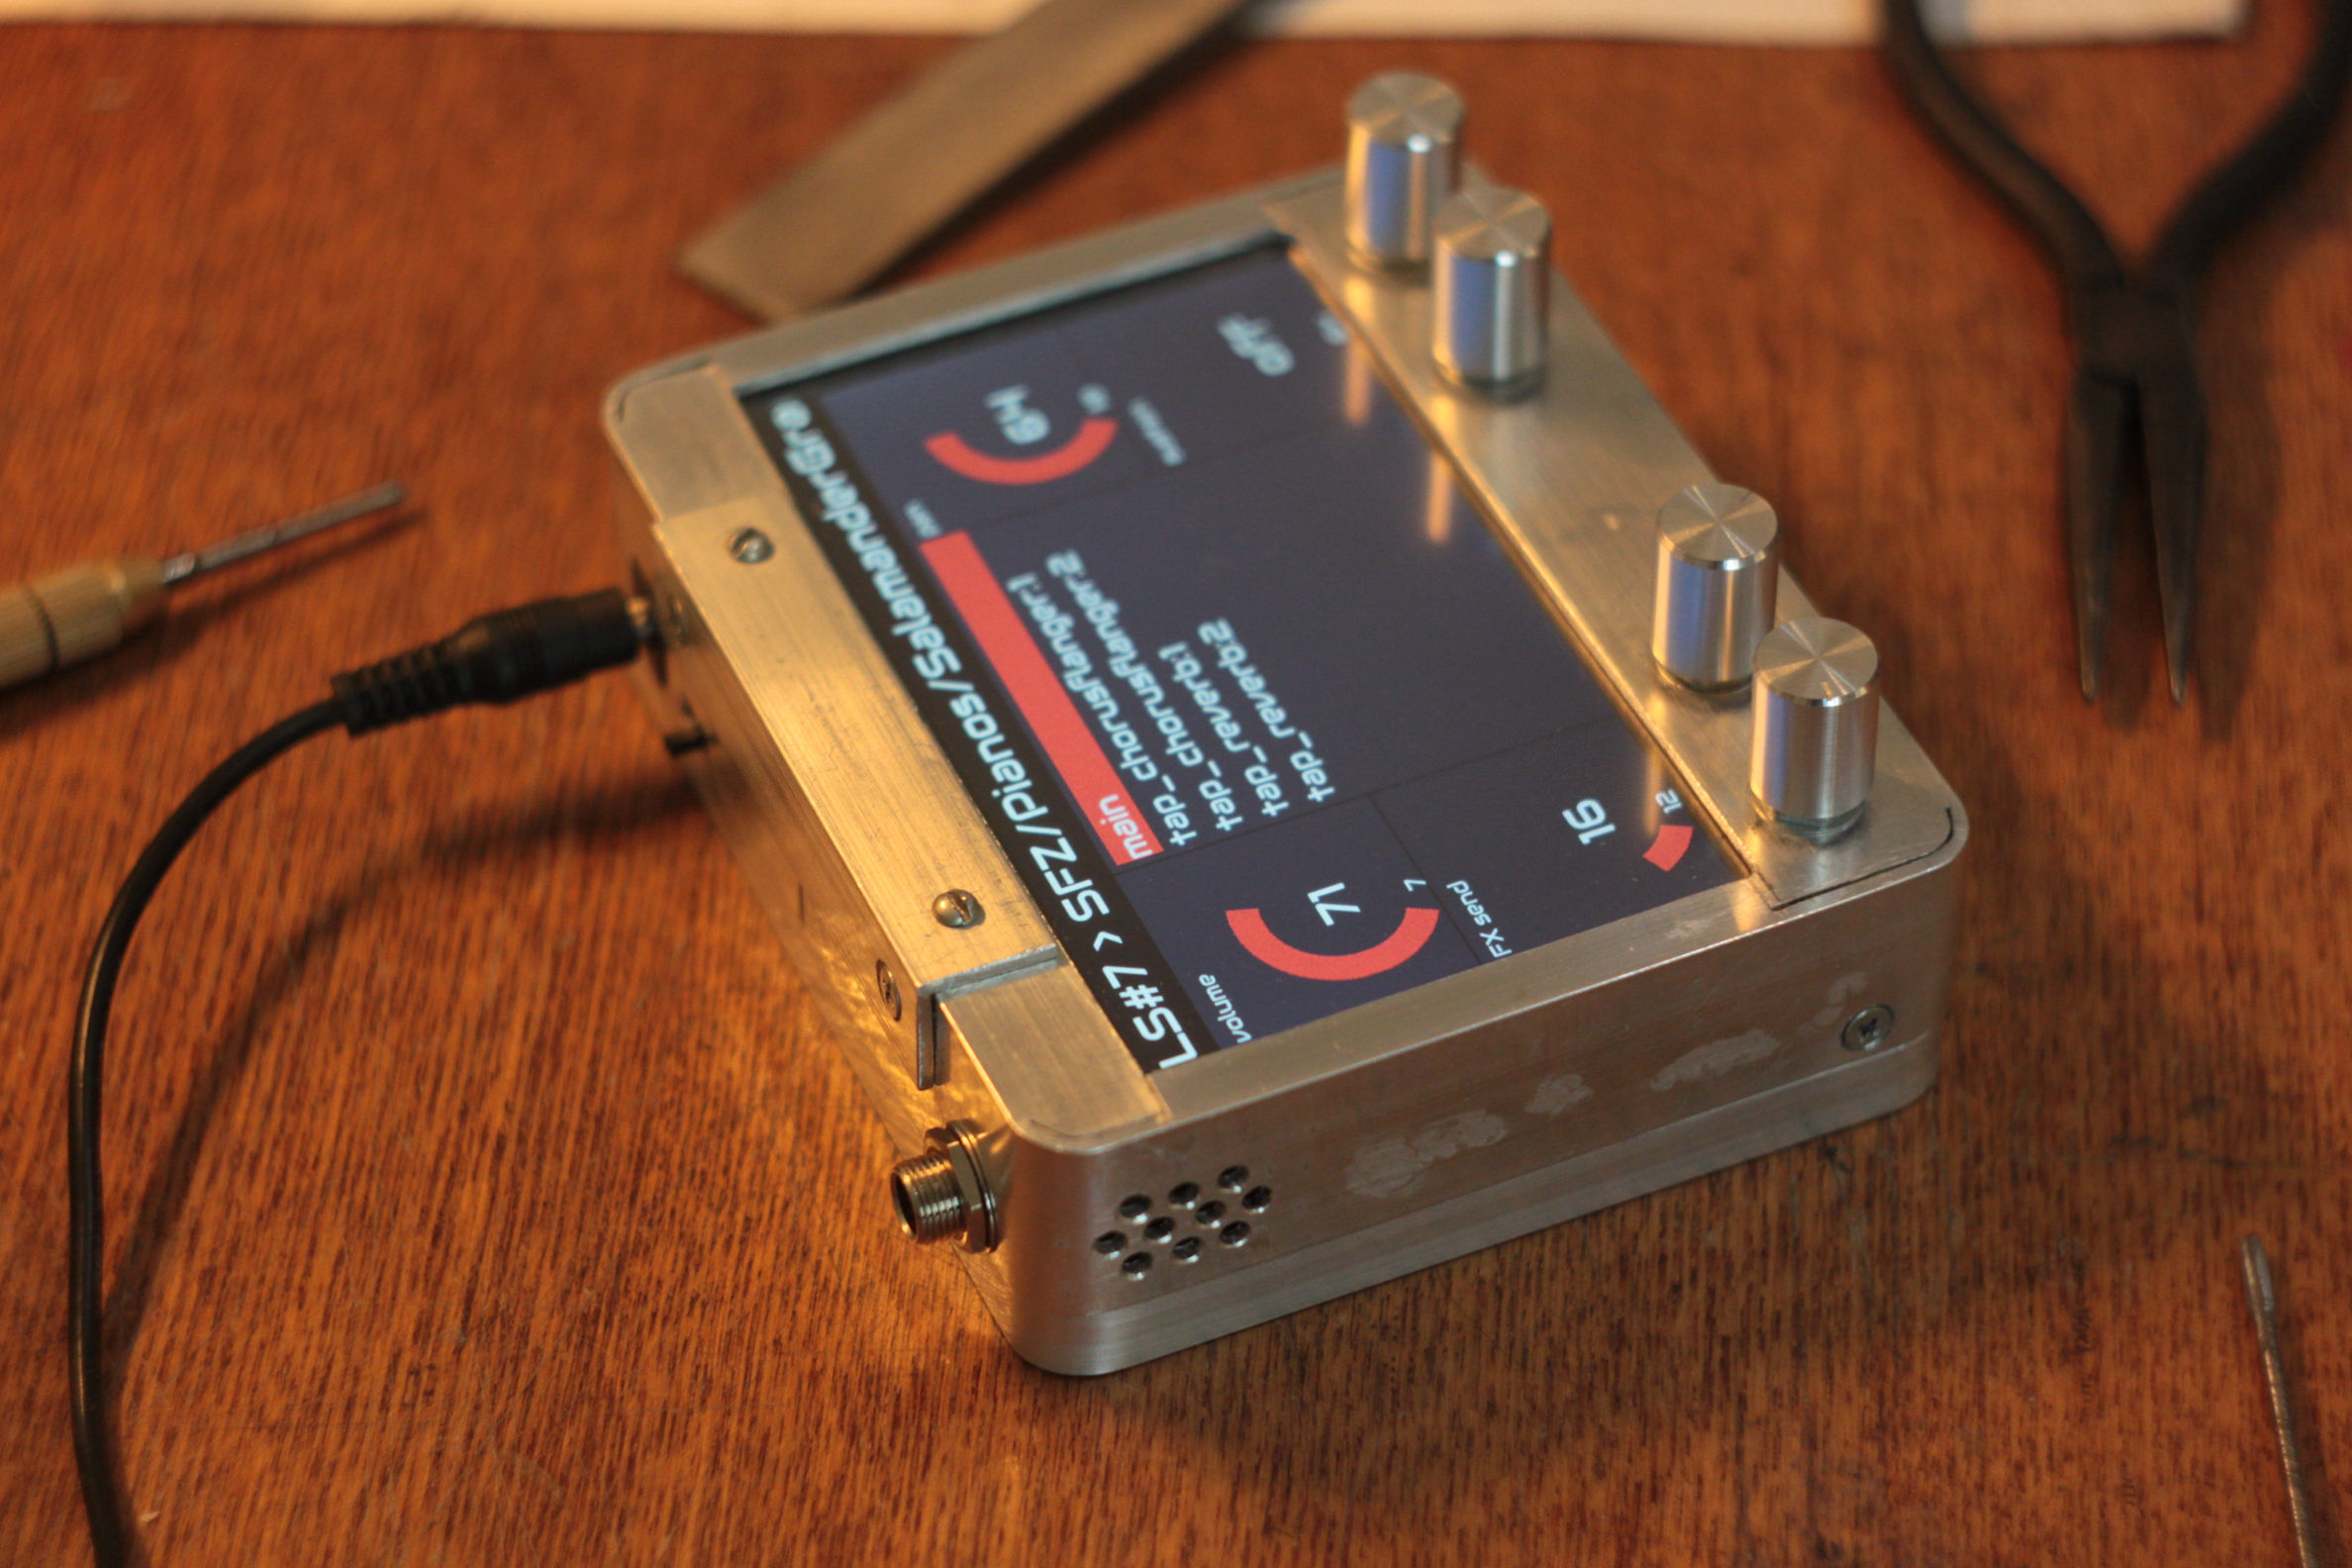
Hi!
Sorry for late reply…
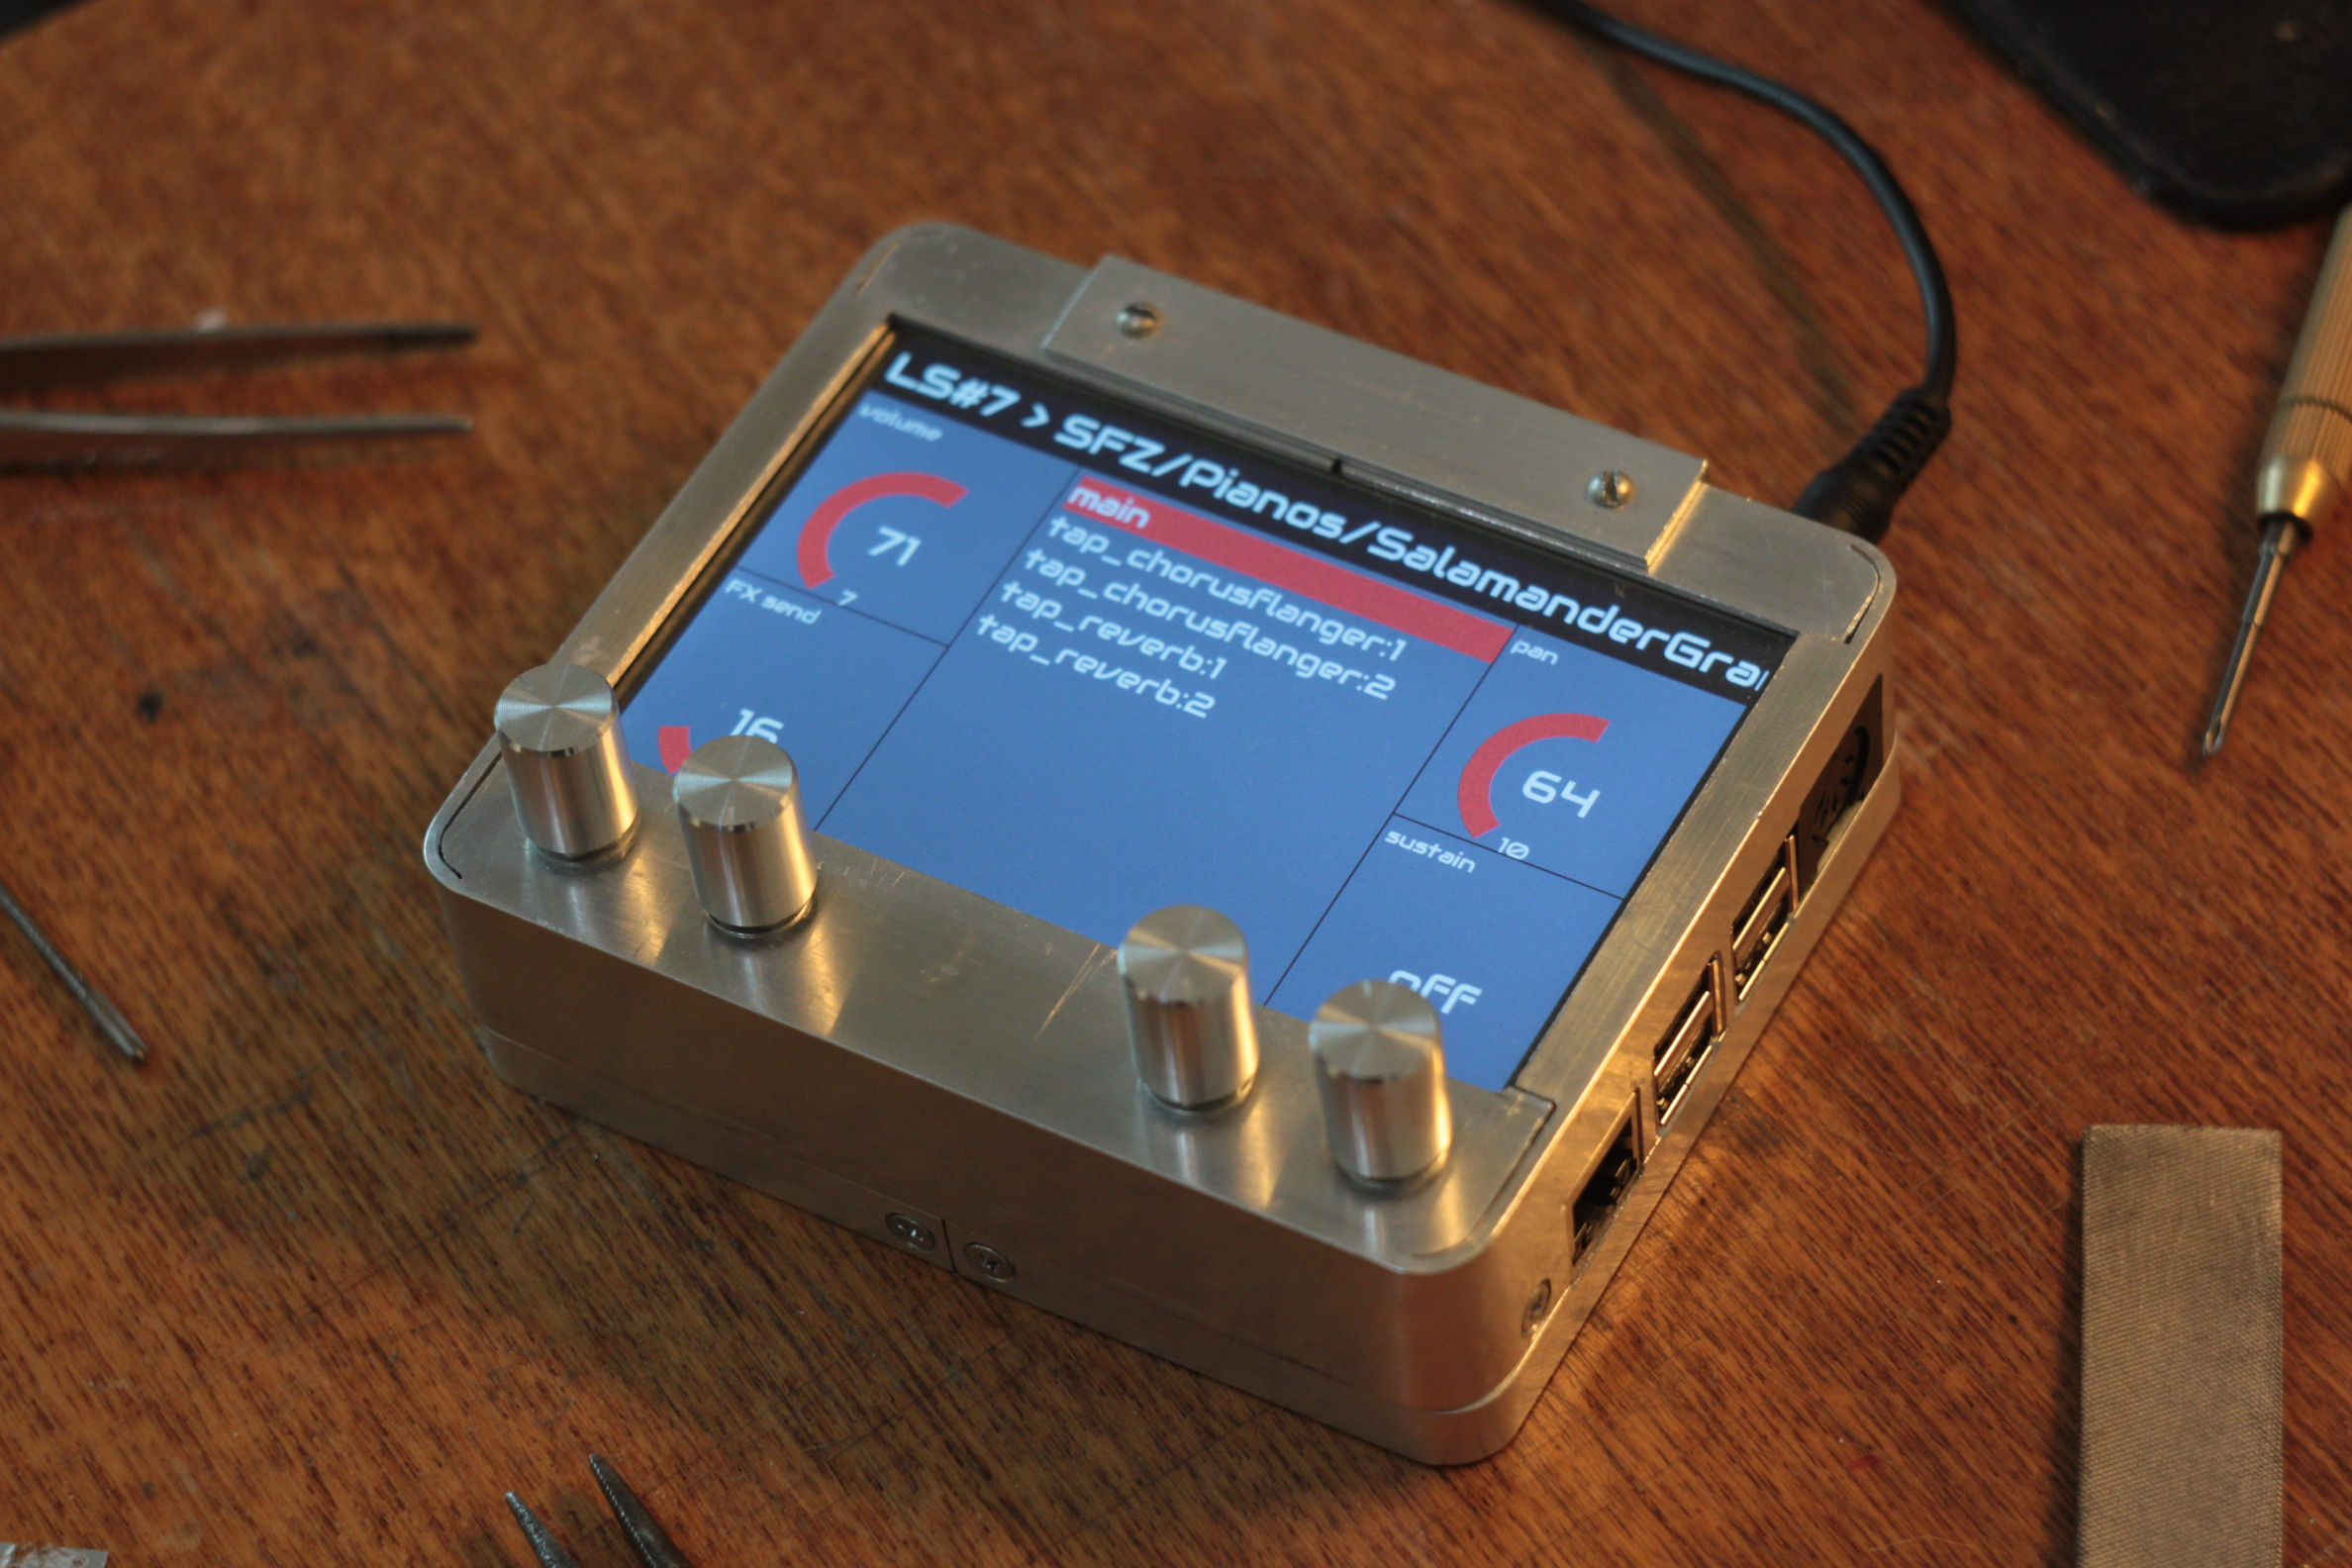
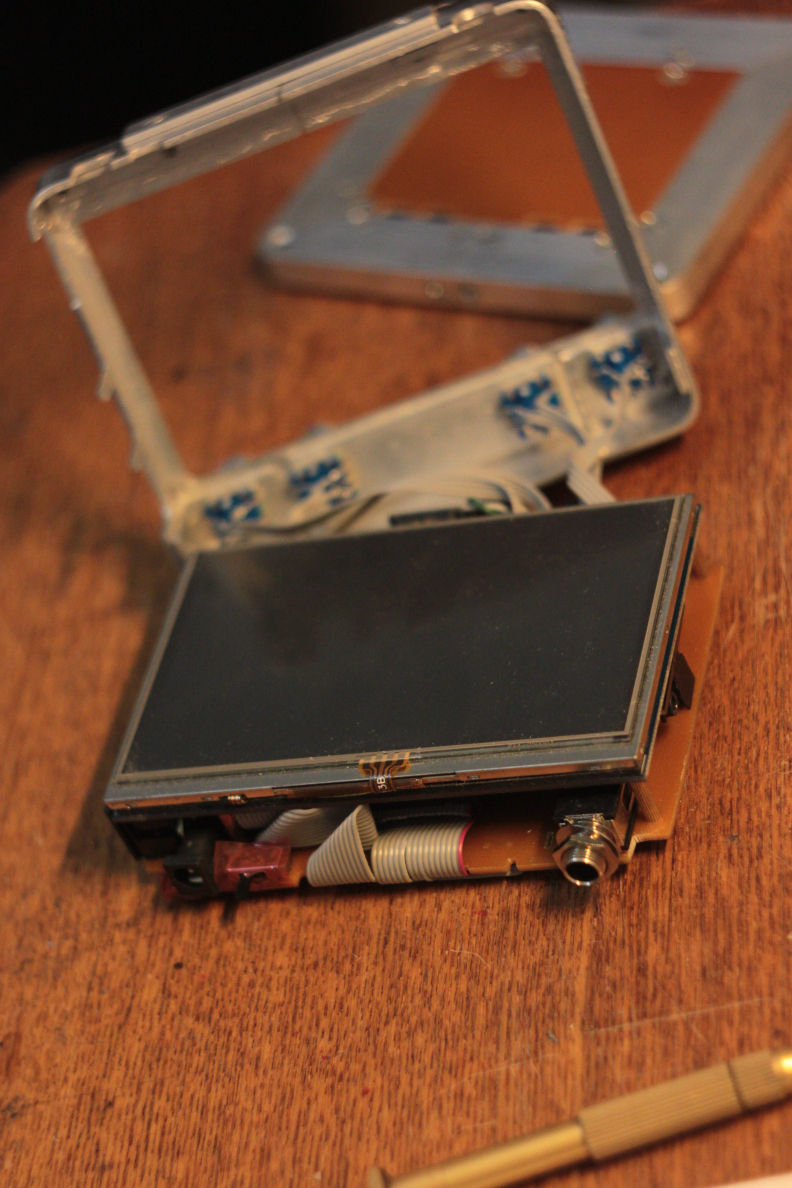
I’ve made this case from aluminum angle bars:
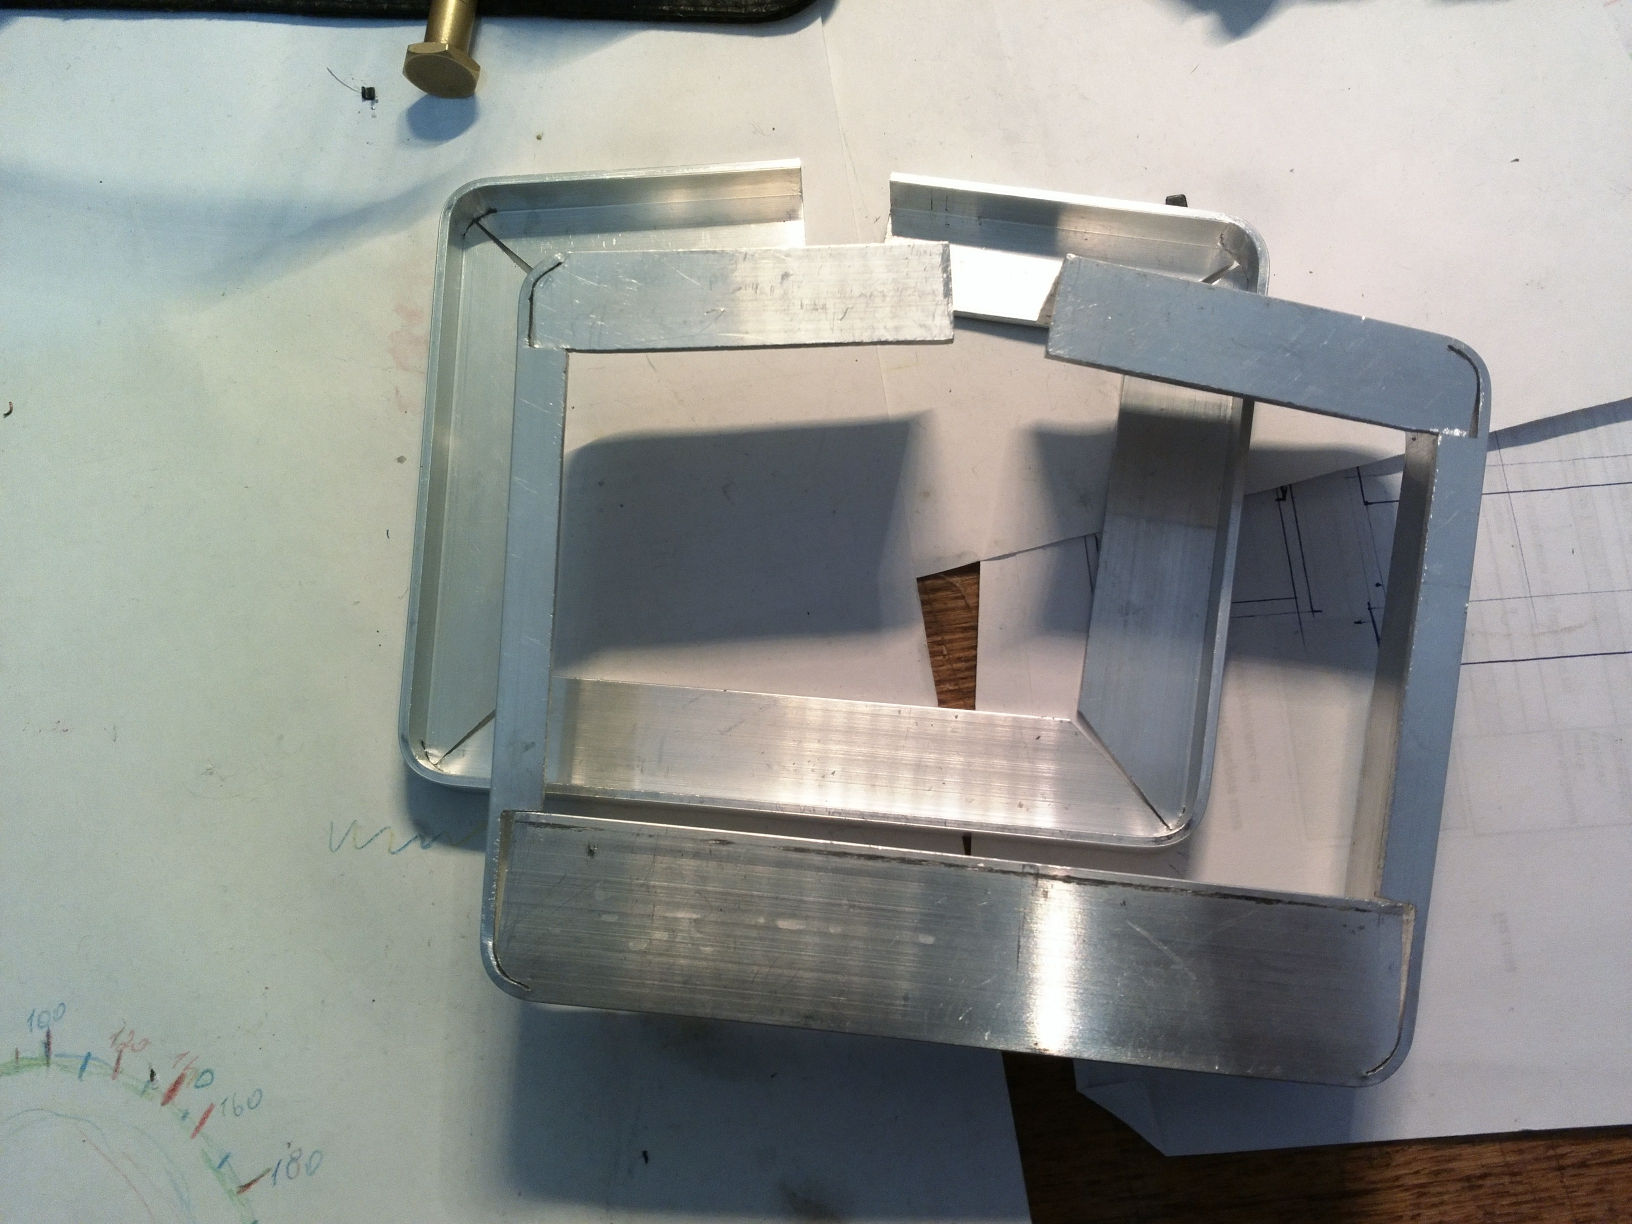
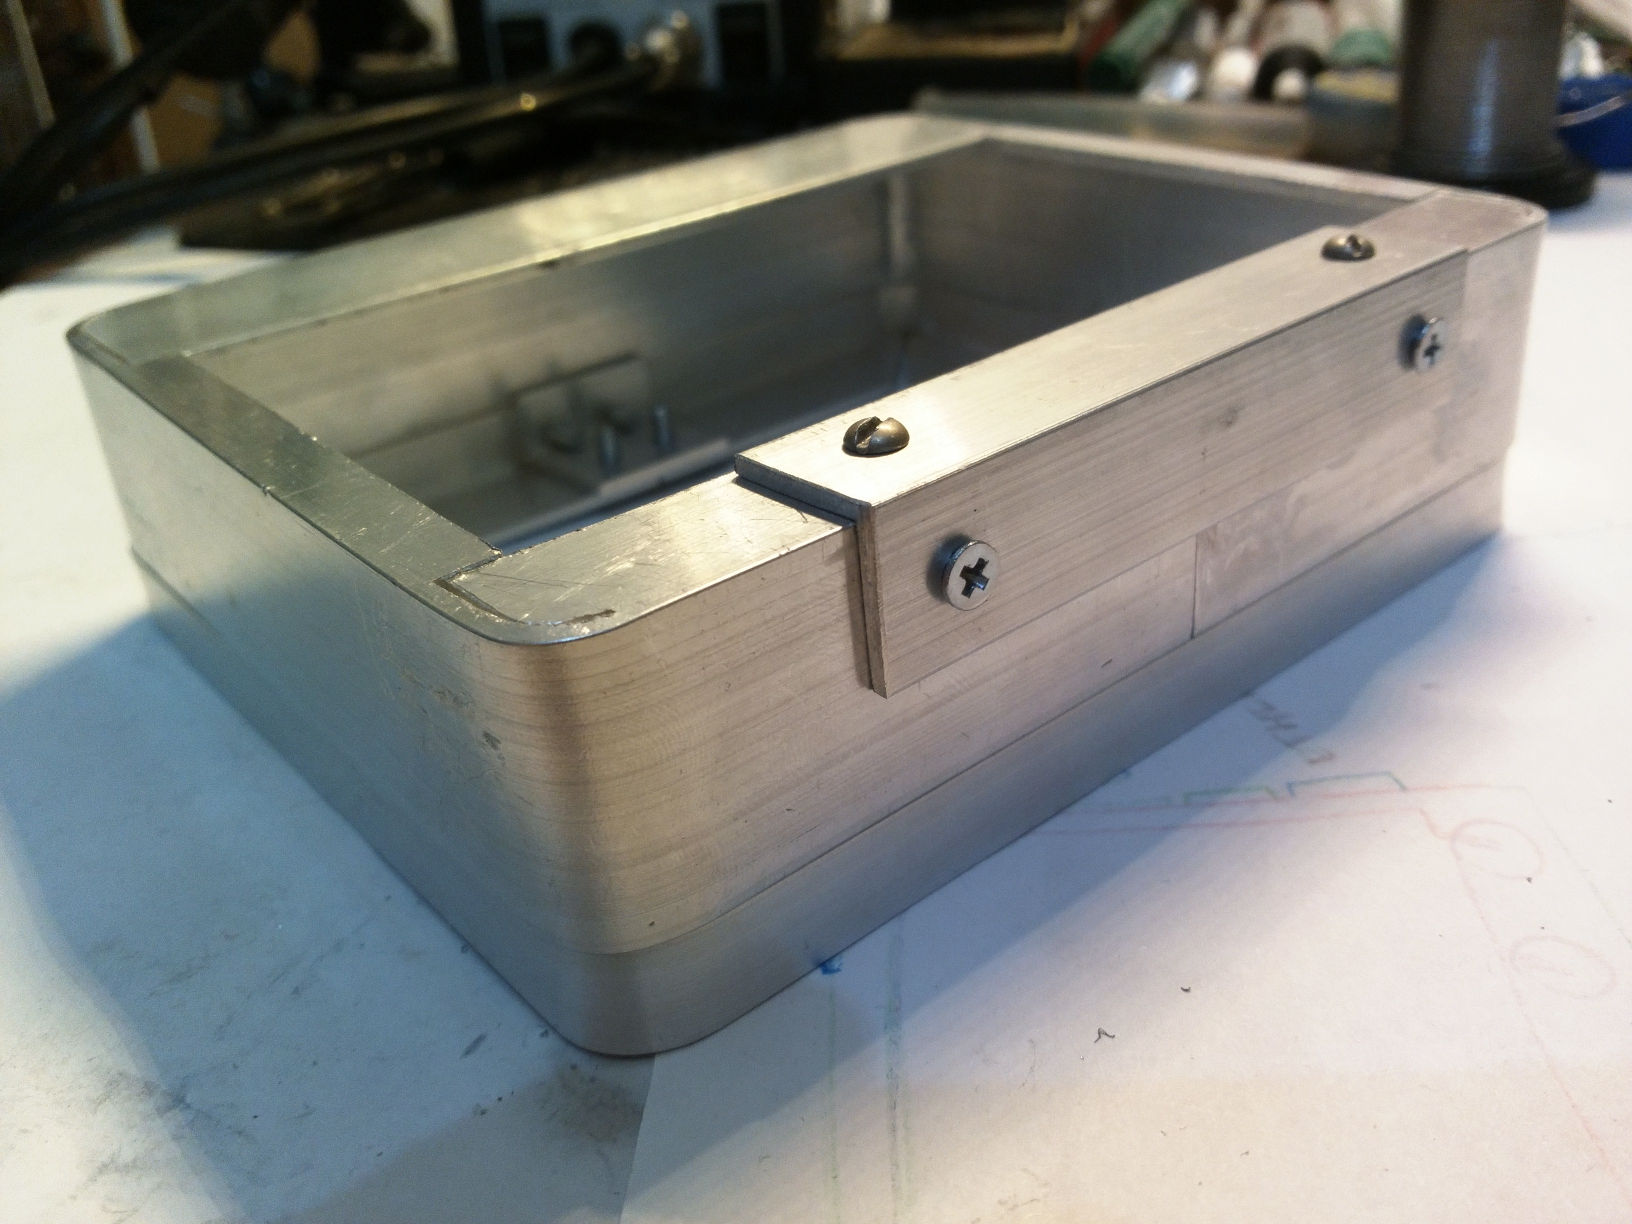
It was a little bit tricky to get exact fit with the LCD and all the PCB’s.
But it seems that I had a big luck, and all parts fit nicely
Now, let’s go to the inner side 
The boards are assembled together with the LCD’s stock screws and simply put into the top part of the case:
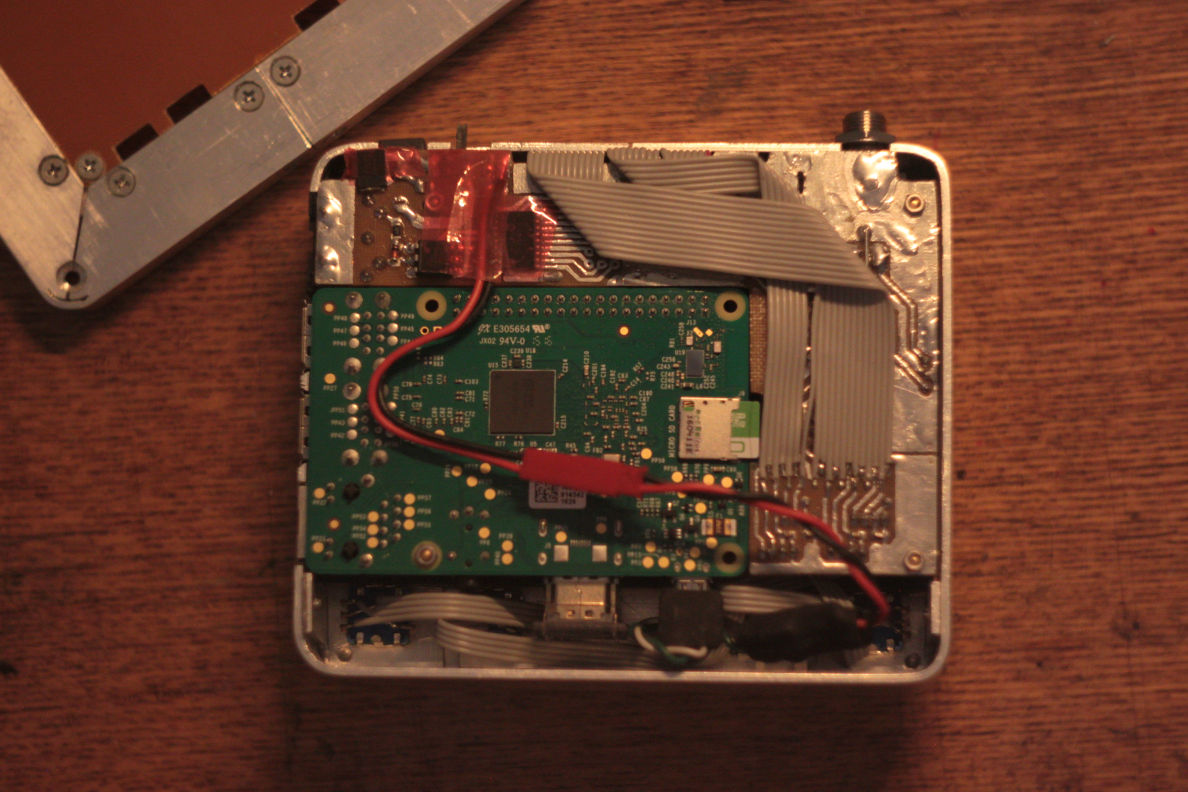

The connection between RPi and the custom board is made with two connectors, flat cable and some soldering:
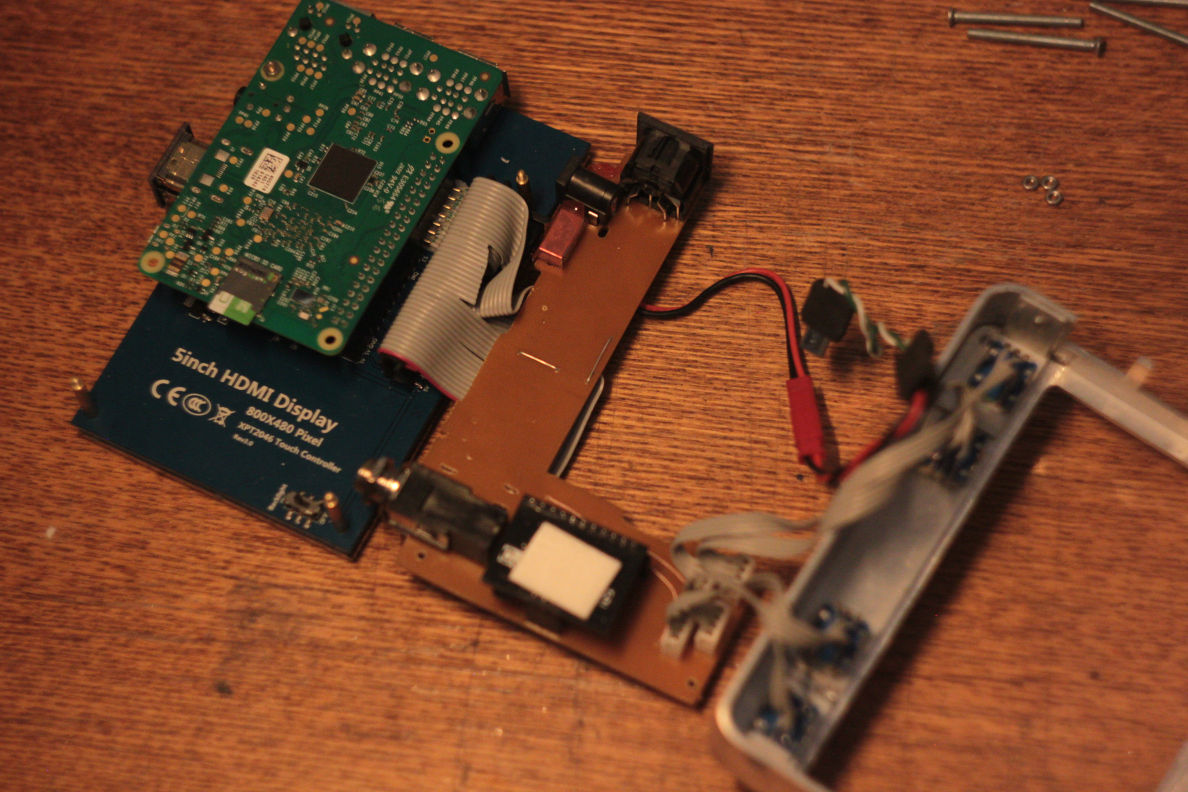
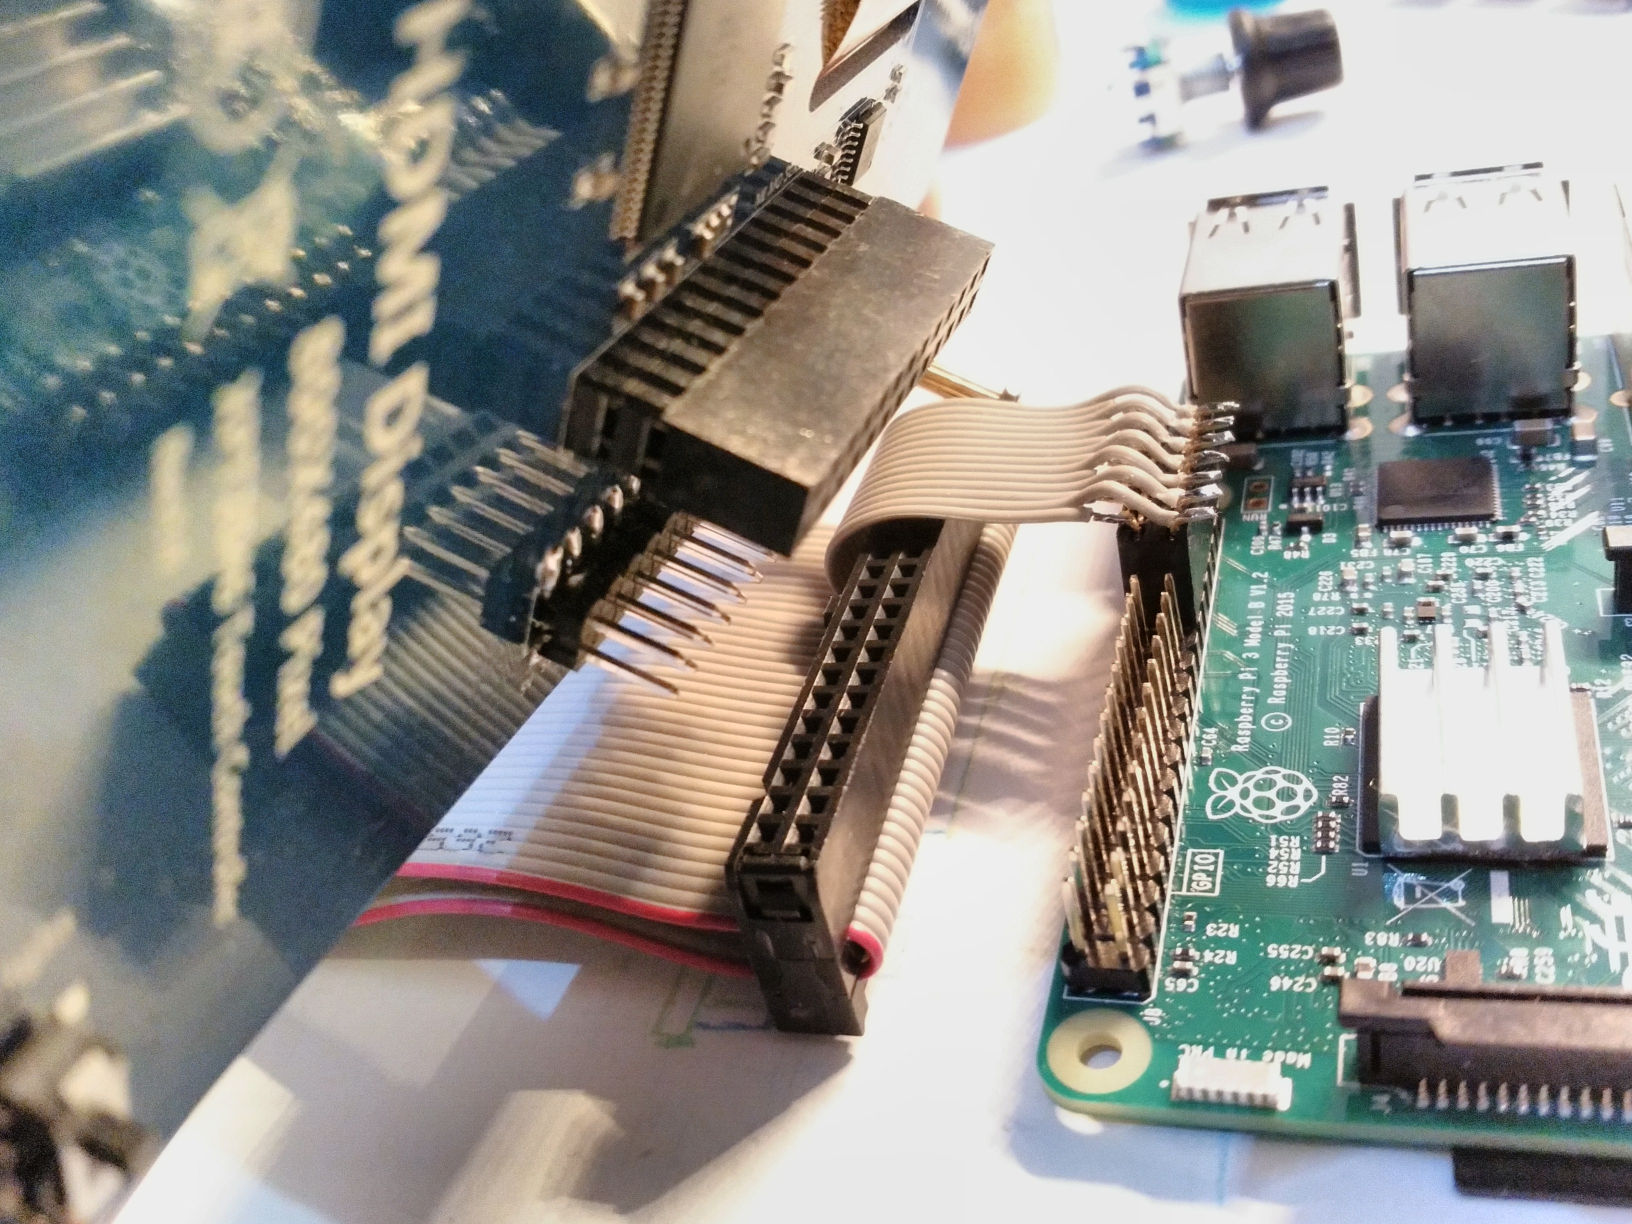
That wasn’t an easy task to connect all the pins to the cable 
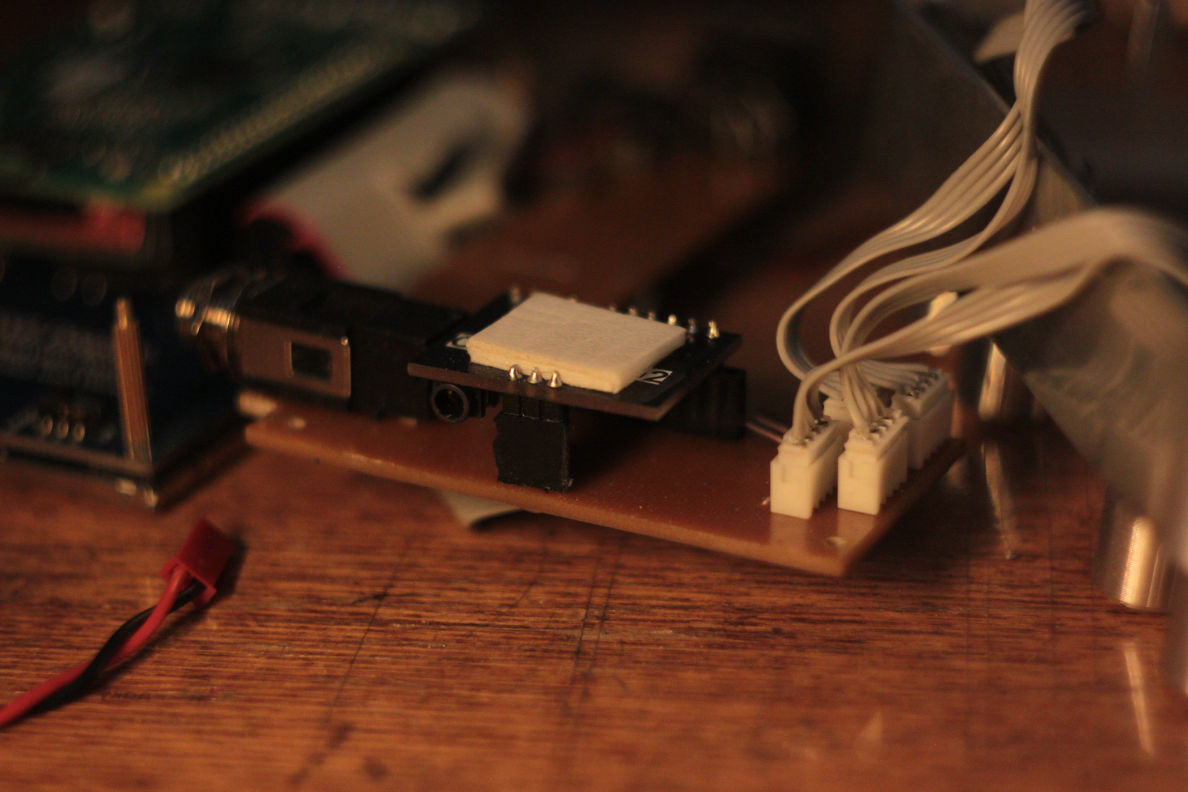
This little black board is PCM5102 DAC. It is marked ‘CJMCU-5102’.

The 5V step-down converter accepts wide range of input voltages and provides stable power to Raspberry Pi.
7 Likes
P.S. …the internals could be much simpler with the new wiring on MCP23017 
hey Schpion! Your Zynthian looks magnificent! Could you or someone explain to me how exactly you can setup a power supply like this? What parts you need and how to put them together? Or direct me somewhere where this is explained? I don’t want to destroy my rapsberry by doing somthing wrong

Jajaja! I never thought that the packaging box could be used in such a way!! Respect!! 
2 Likes
Hi
My first zynthian box,
Raspberry pi3, official 7» touch and modmypi «case»
Still waiting for my Audioinjector card, so not yet heard this thing… got it booting when selecting hifiberry dac…
_
Summary
Todo: wire the encoders/understand witch gpio’s to use… (screen does not use any gpio’s afaik), so i’ll try to wire the encoders without any addon card… so far… no sucsess
_
Update: Wired switches directly to GPIO, but left out switch 1 and 2. I have 4 encoders going and two switches (as it covers my needs well)
Audioinjector simply works well 

6 Likes
Finally I came to photograph my Zynthian aswell! I’m pretty happy with the housing, but if I would have known it would take me so long, I would have just bought it with the case haha!

5 Likes
What does the switch do?
its an additional select button! Because often when i pressed the select turning knob i accidentally turned it and then i selected the menue or present over/under it
1 Like
Hello Zynthianers!
I’ve been lurking on this forum for quite some time, but the time for my first post has finally arrived. Firstly, thanks so much to jofemodo and this community for all your excellent work! You inspired me to build my first Zynthian!
While the case is still in prototype stage, I was blown away today. The last chips I was waiting for to complete by build arrived yesterday. I plugged them into the ic sockets on my home-built all-in-one board, connected the parts together, tested and IT WORKED! Here are some photos and a short video of my build (that’s my son playing - all I can do is make noise on a keyboard!). Like I said, I will make a new case to make things fit better, but I’m so pleased that it’s functional!
Regards,
wolfpaw
P.S. I think this may be the first Zynthian in Canada!
6 Likes
Hi @wolfpaw98!
Congratulations!! And welcome !!
What display are you using? Have you re-designed the lasser-cutter case for a bigger display?
Regards,