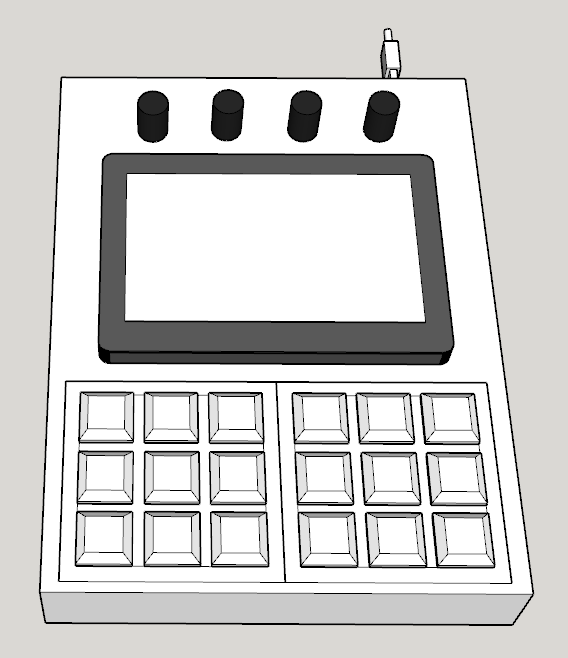
I have had a Rpi5 for a few months now and was going to build a kit when they became available. But then I spent money on more gear and figured I’d build a custom setup to fit in with what I have. The enclosure will bs sized 165mm wide by 210mm deep to fit in with my Novation Circuit Tracks and Rhythm. I may extend it deeper as space is pretty tight so far.
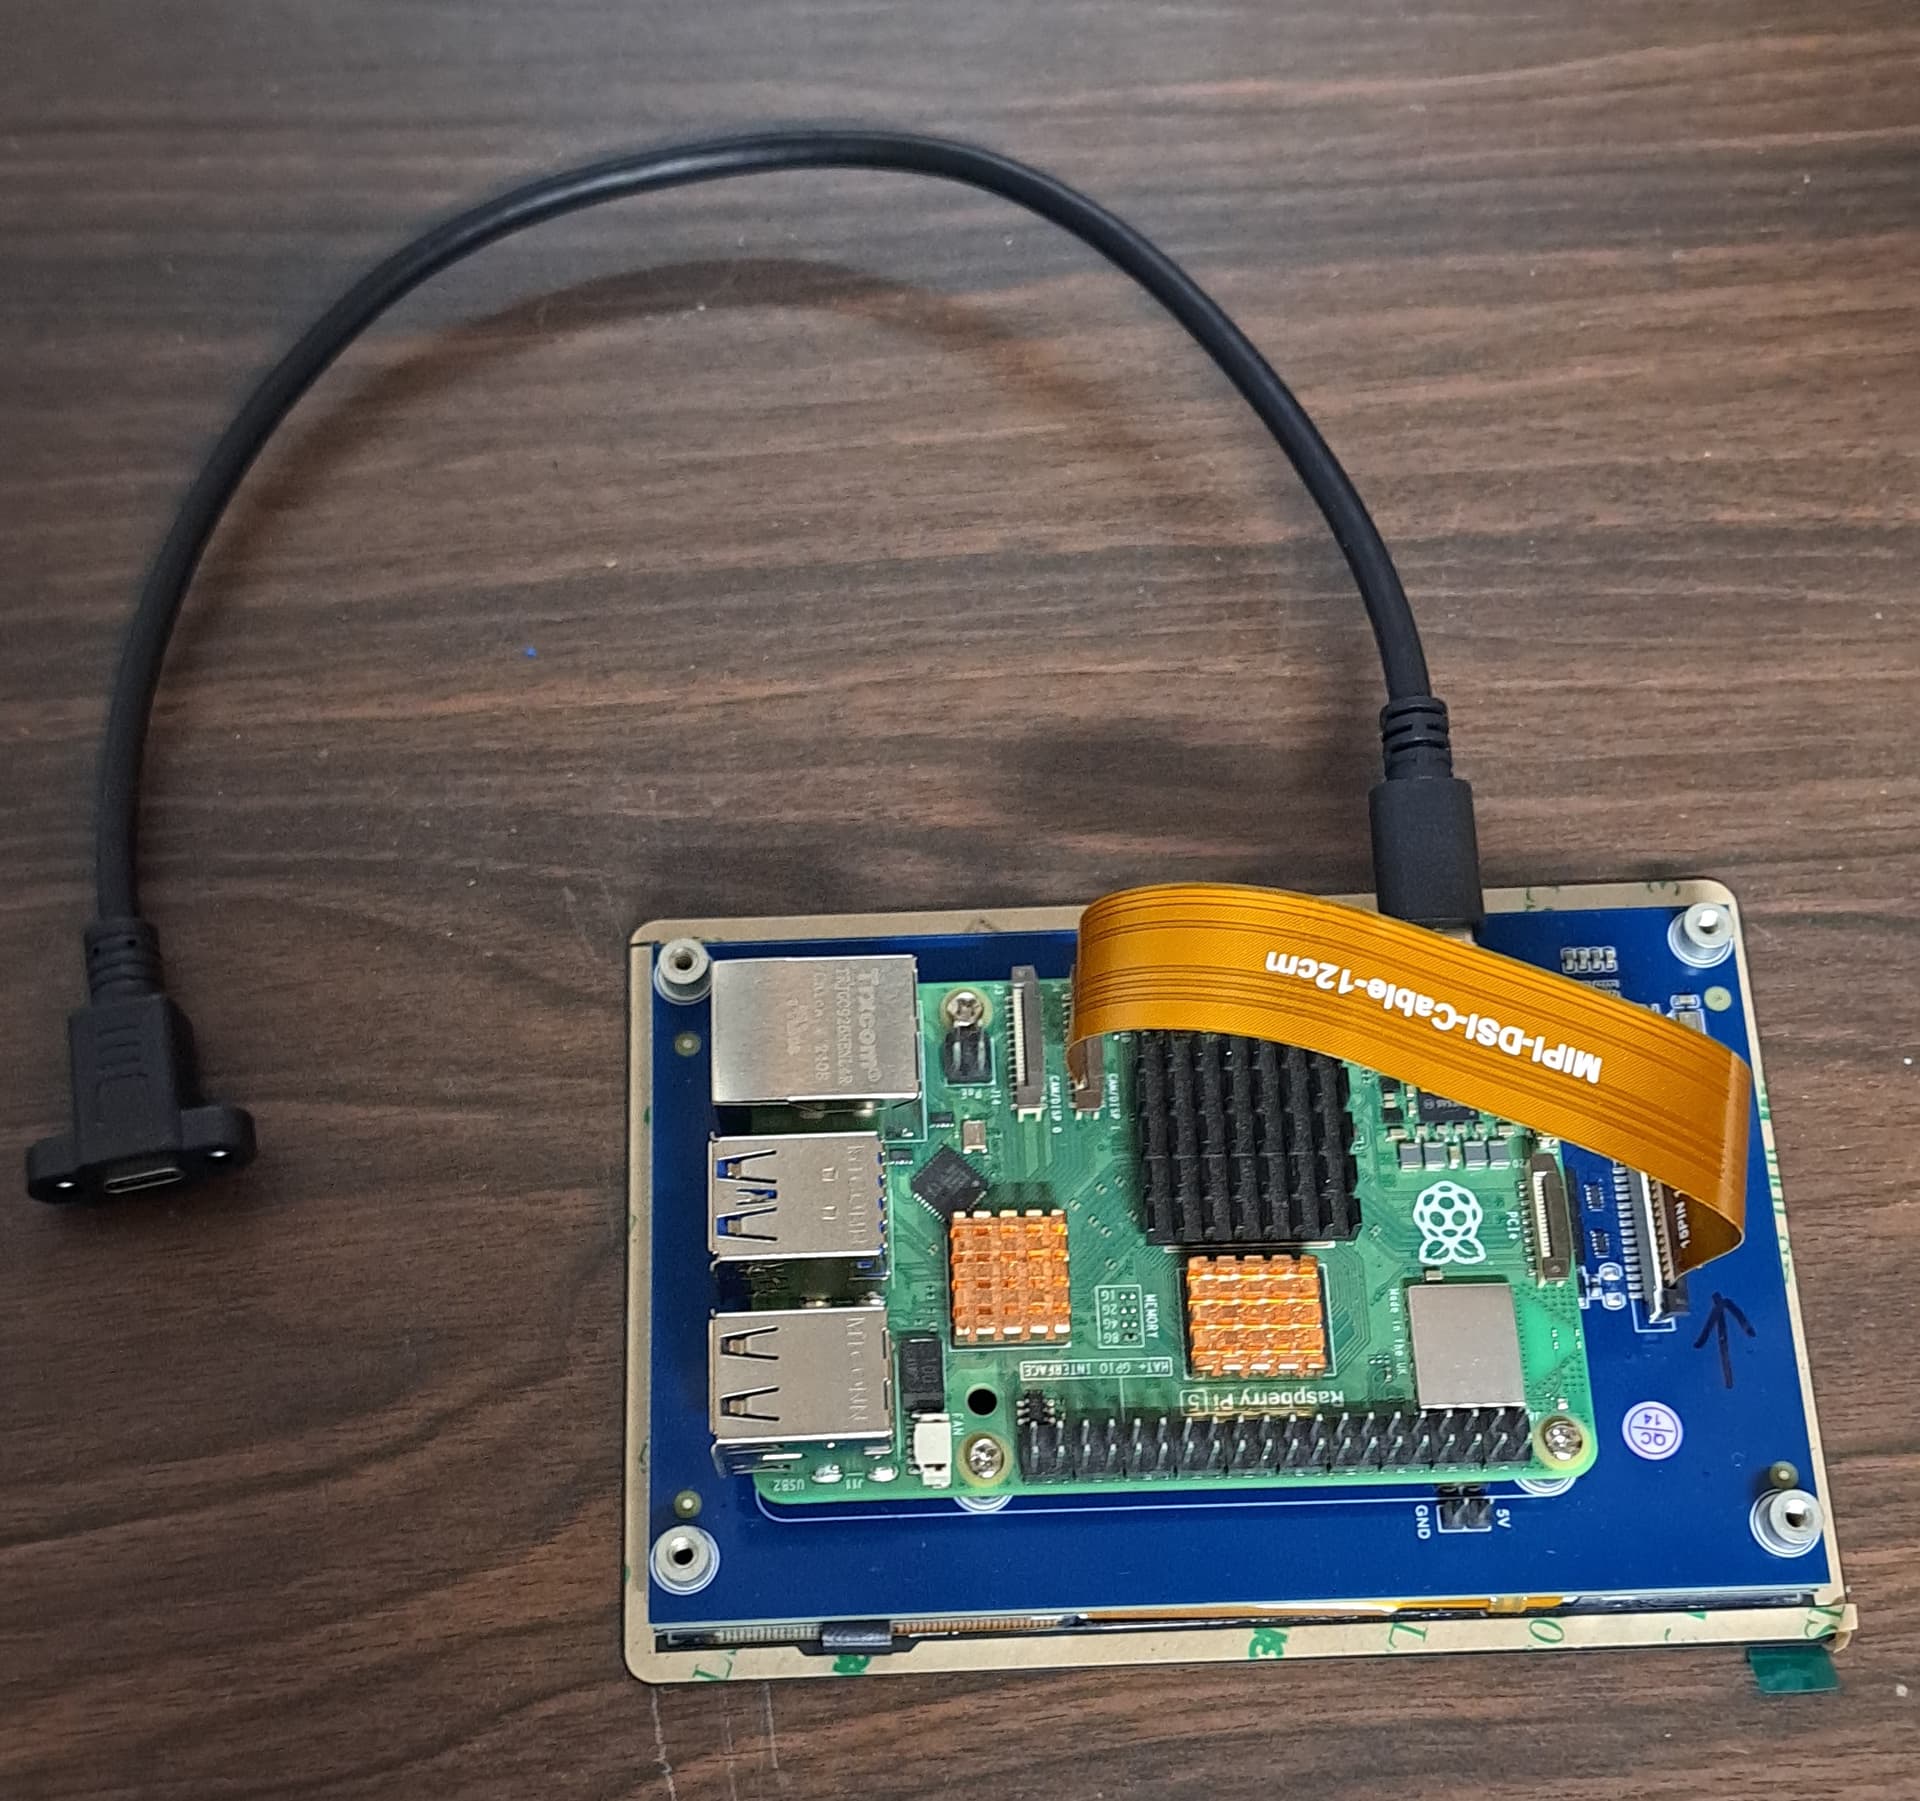
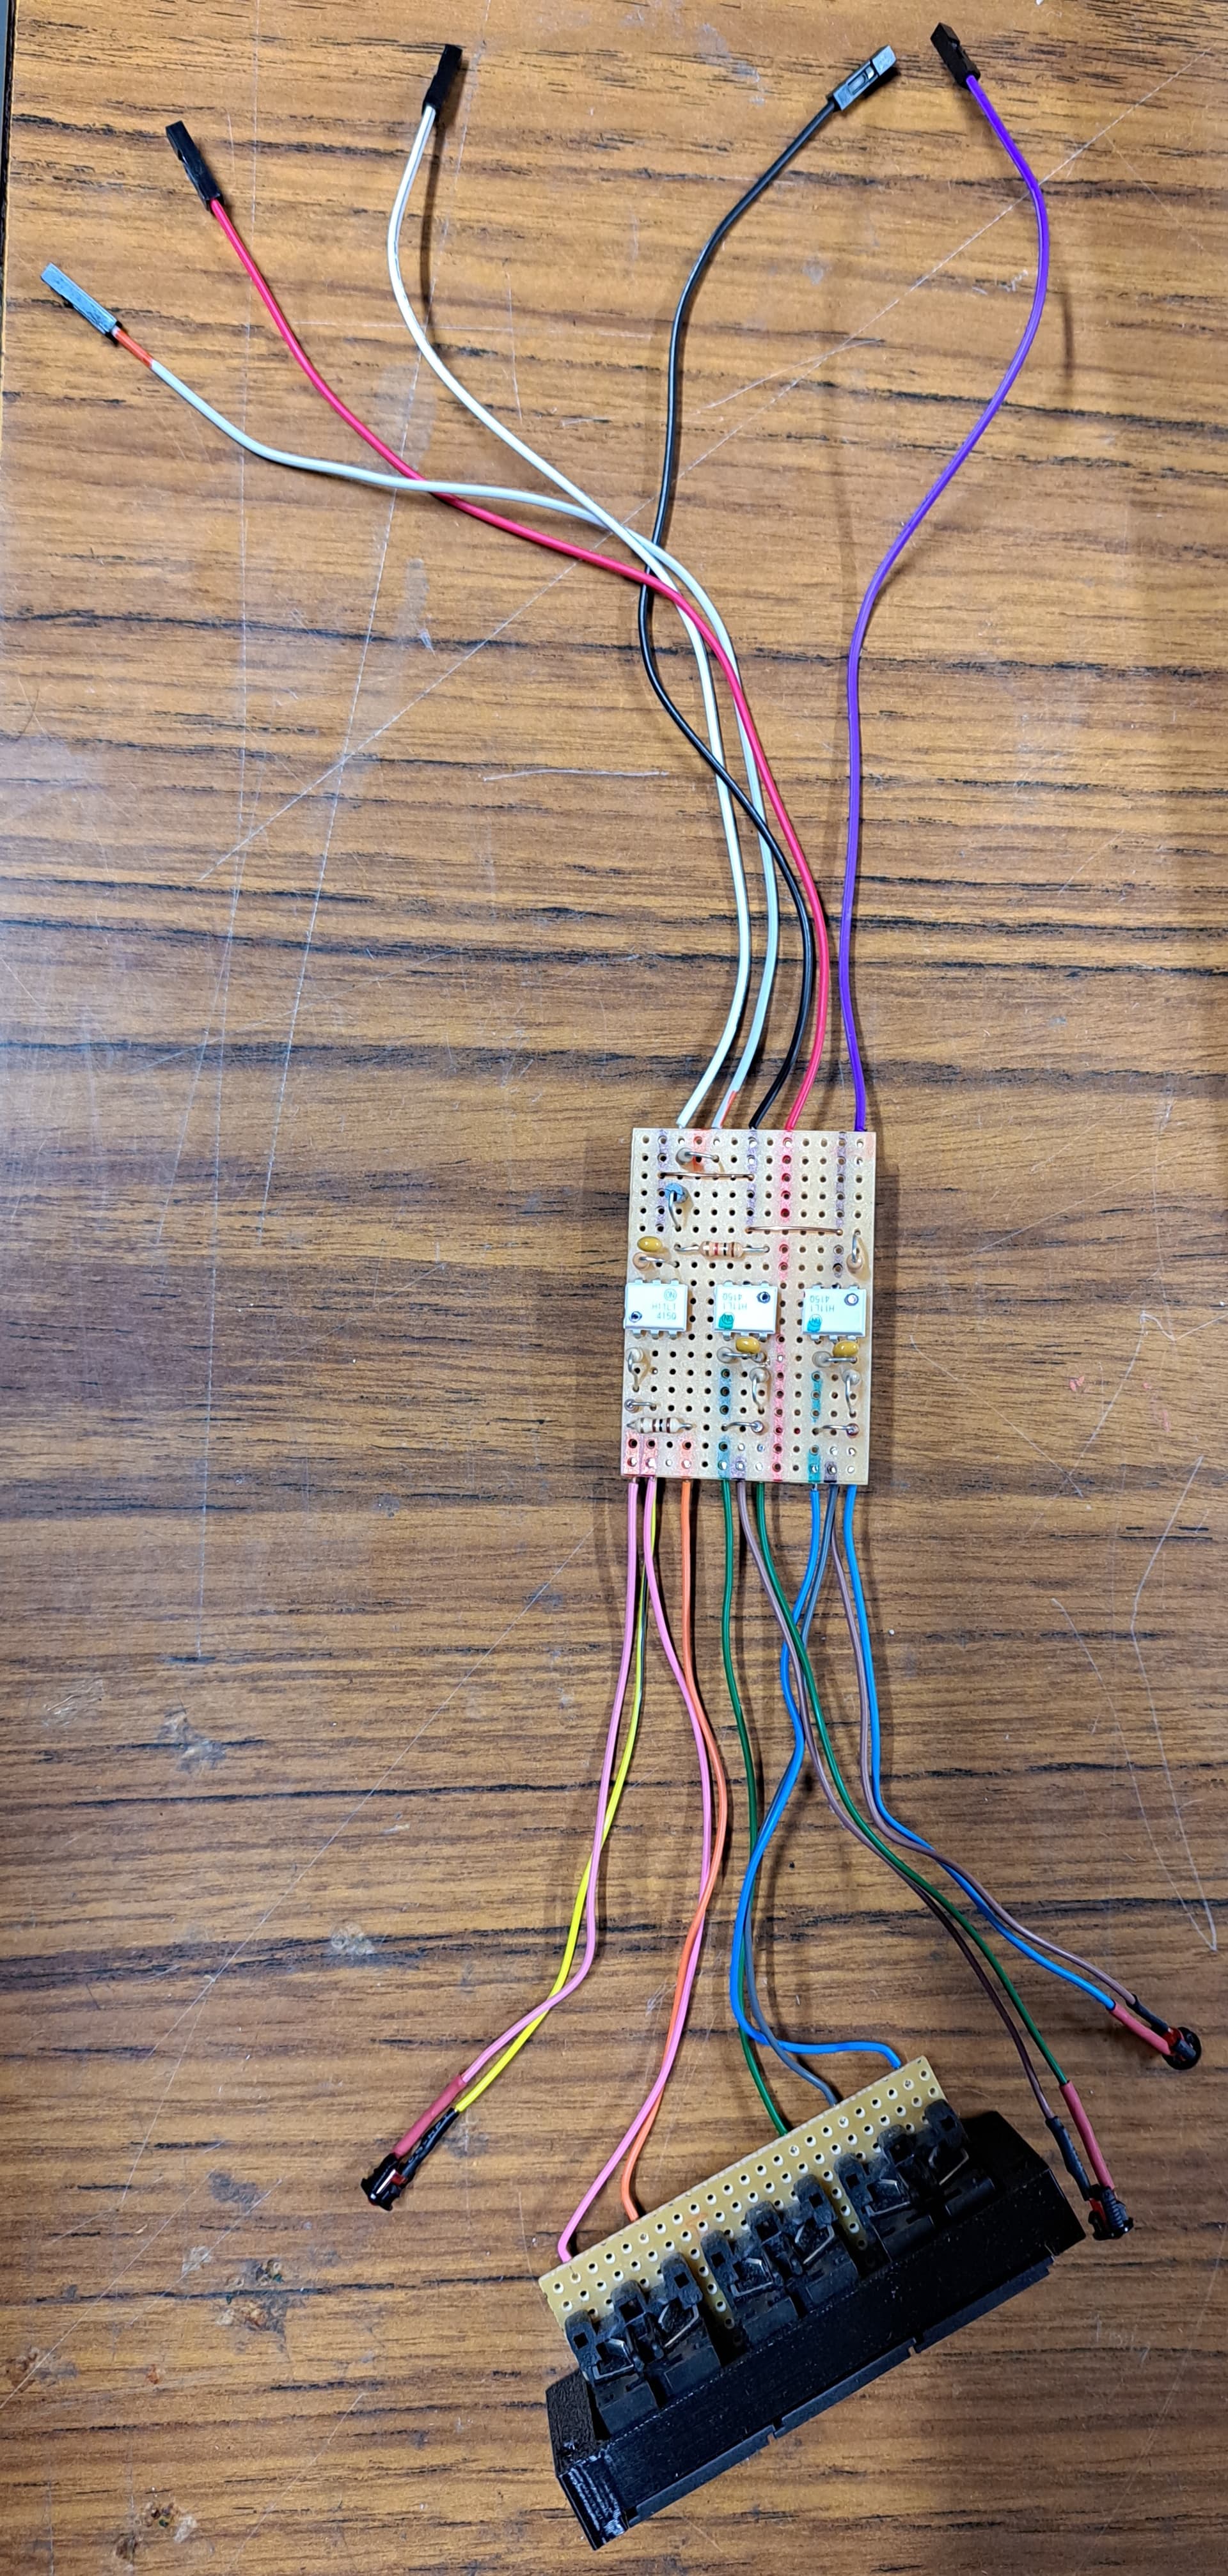
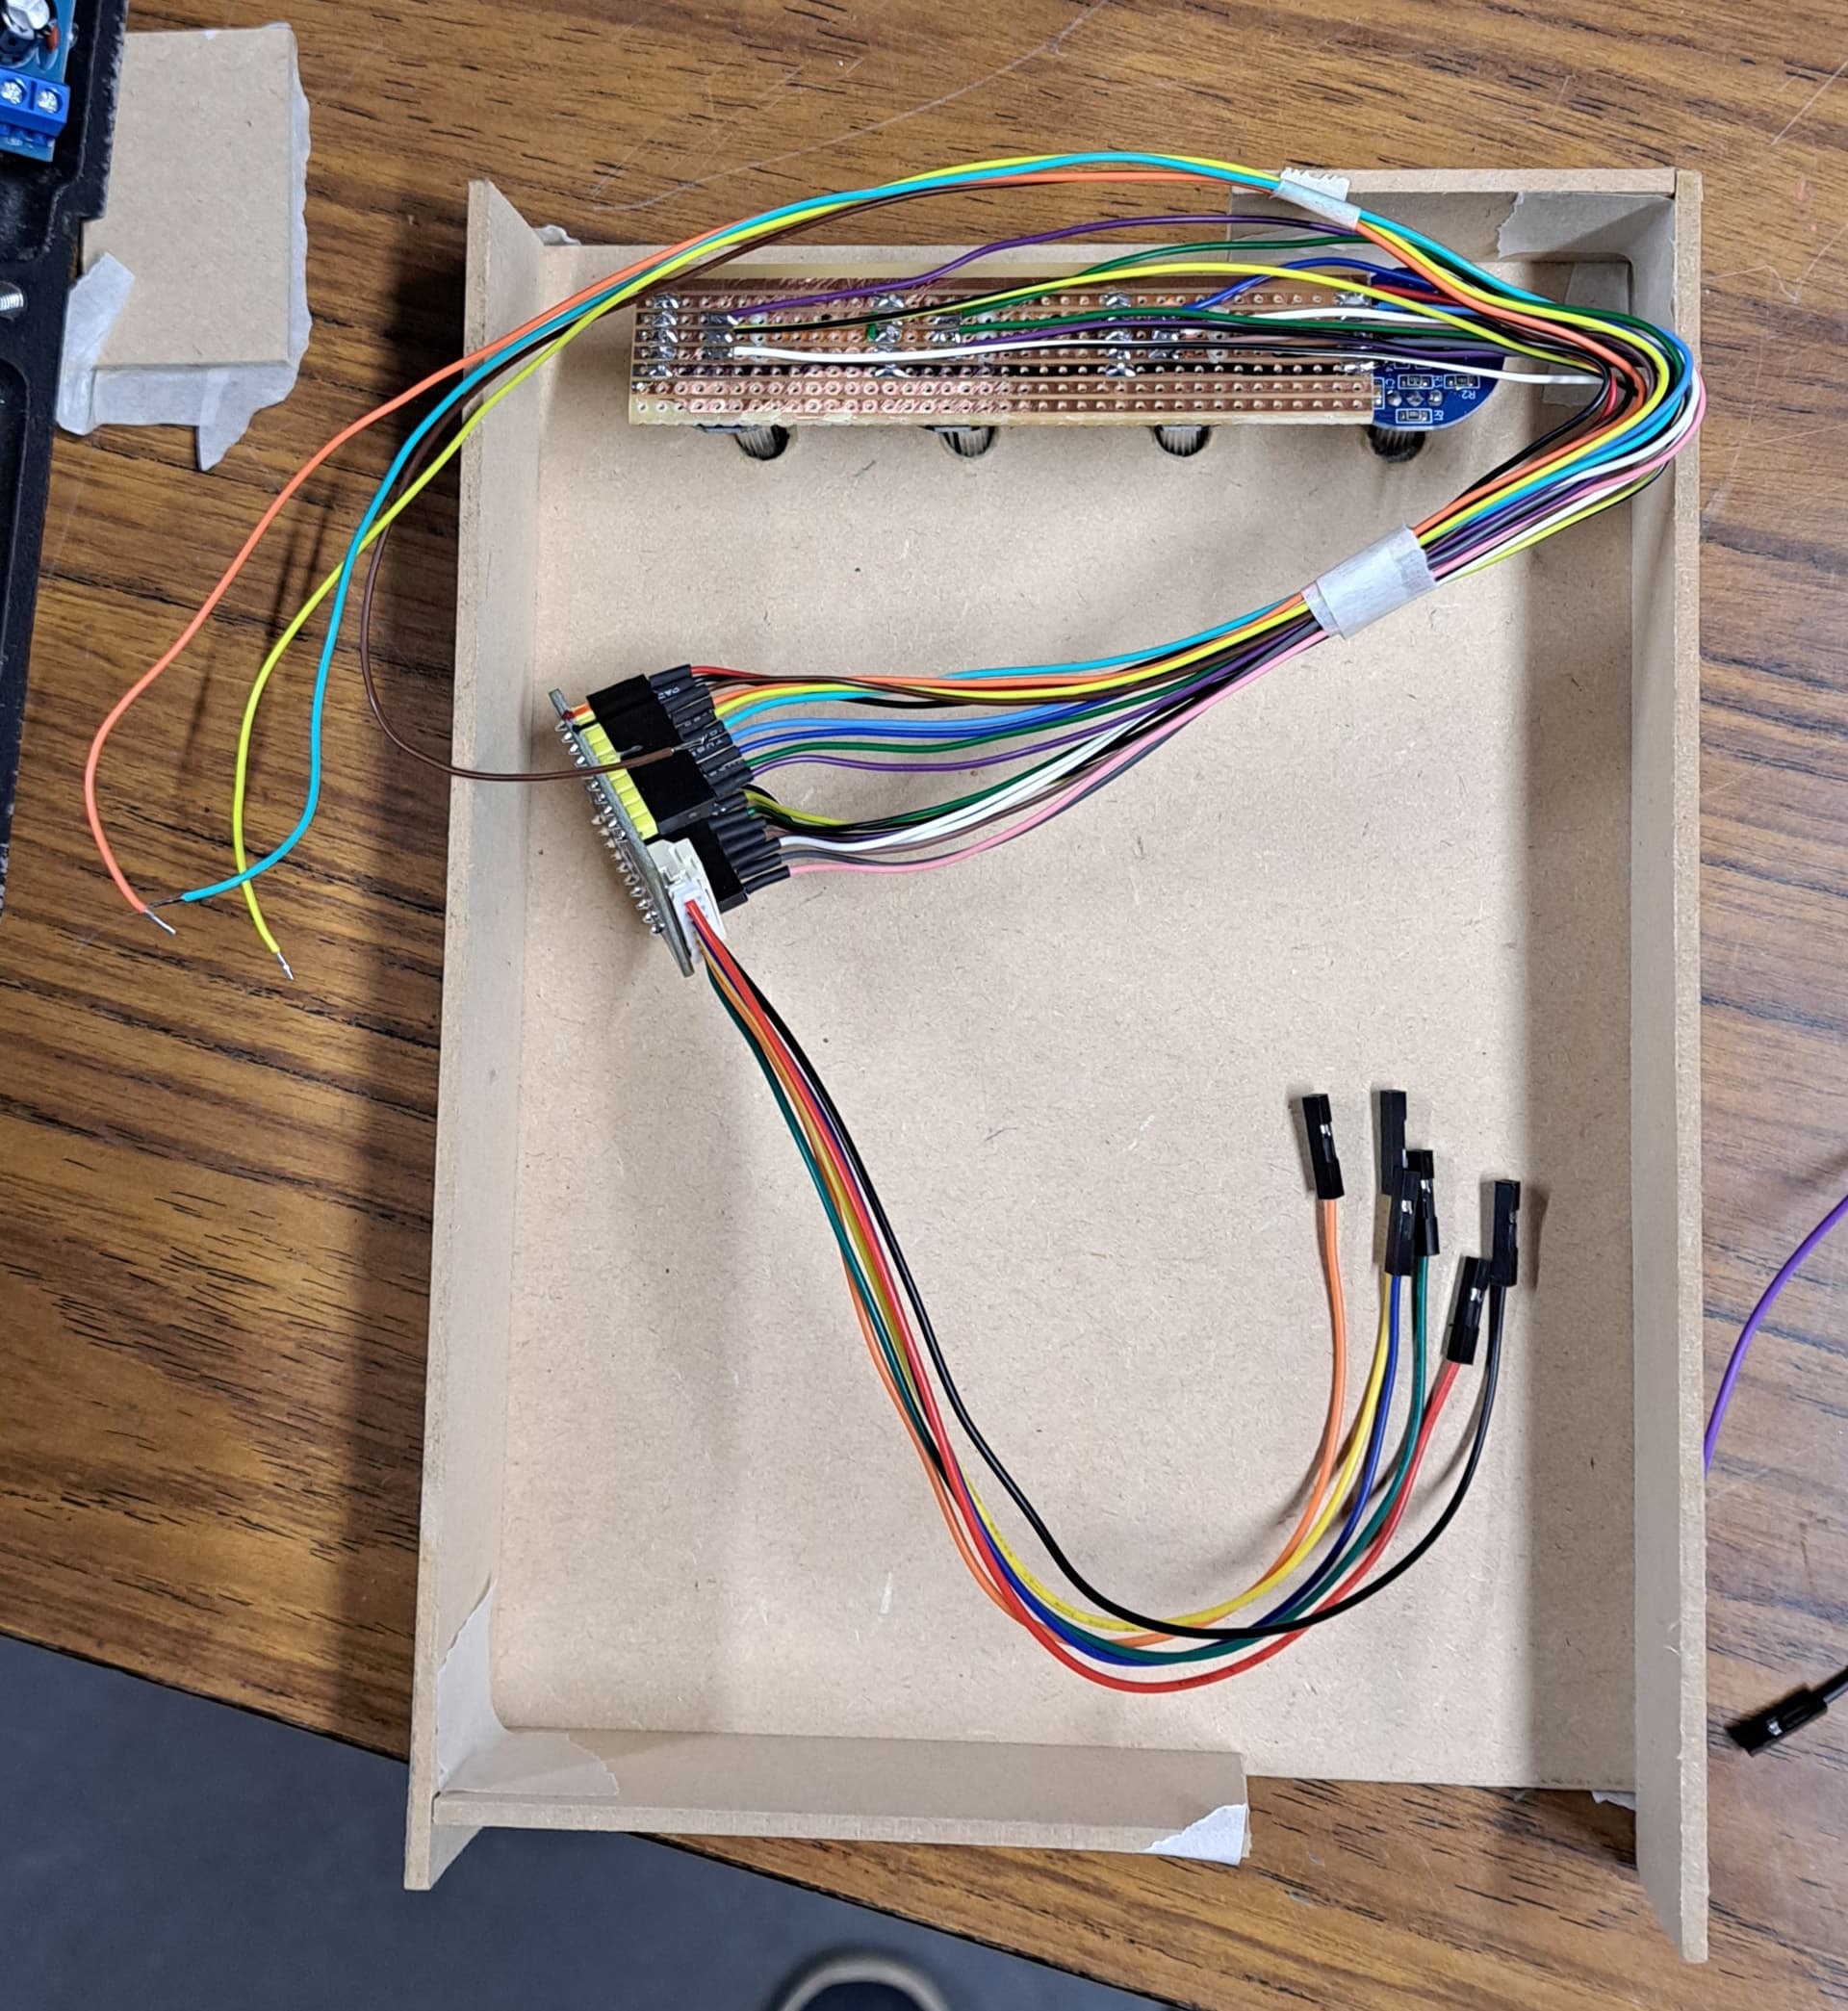
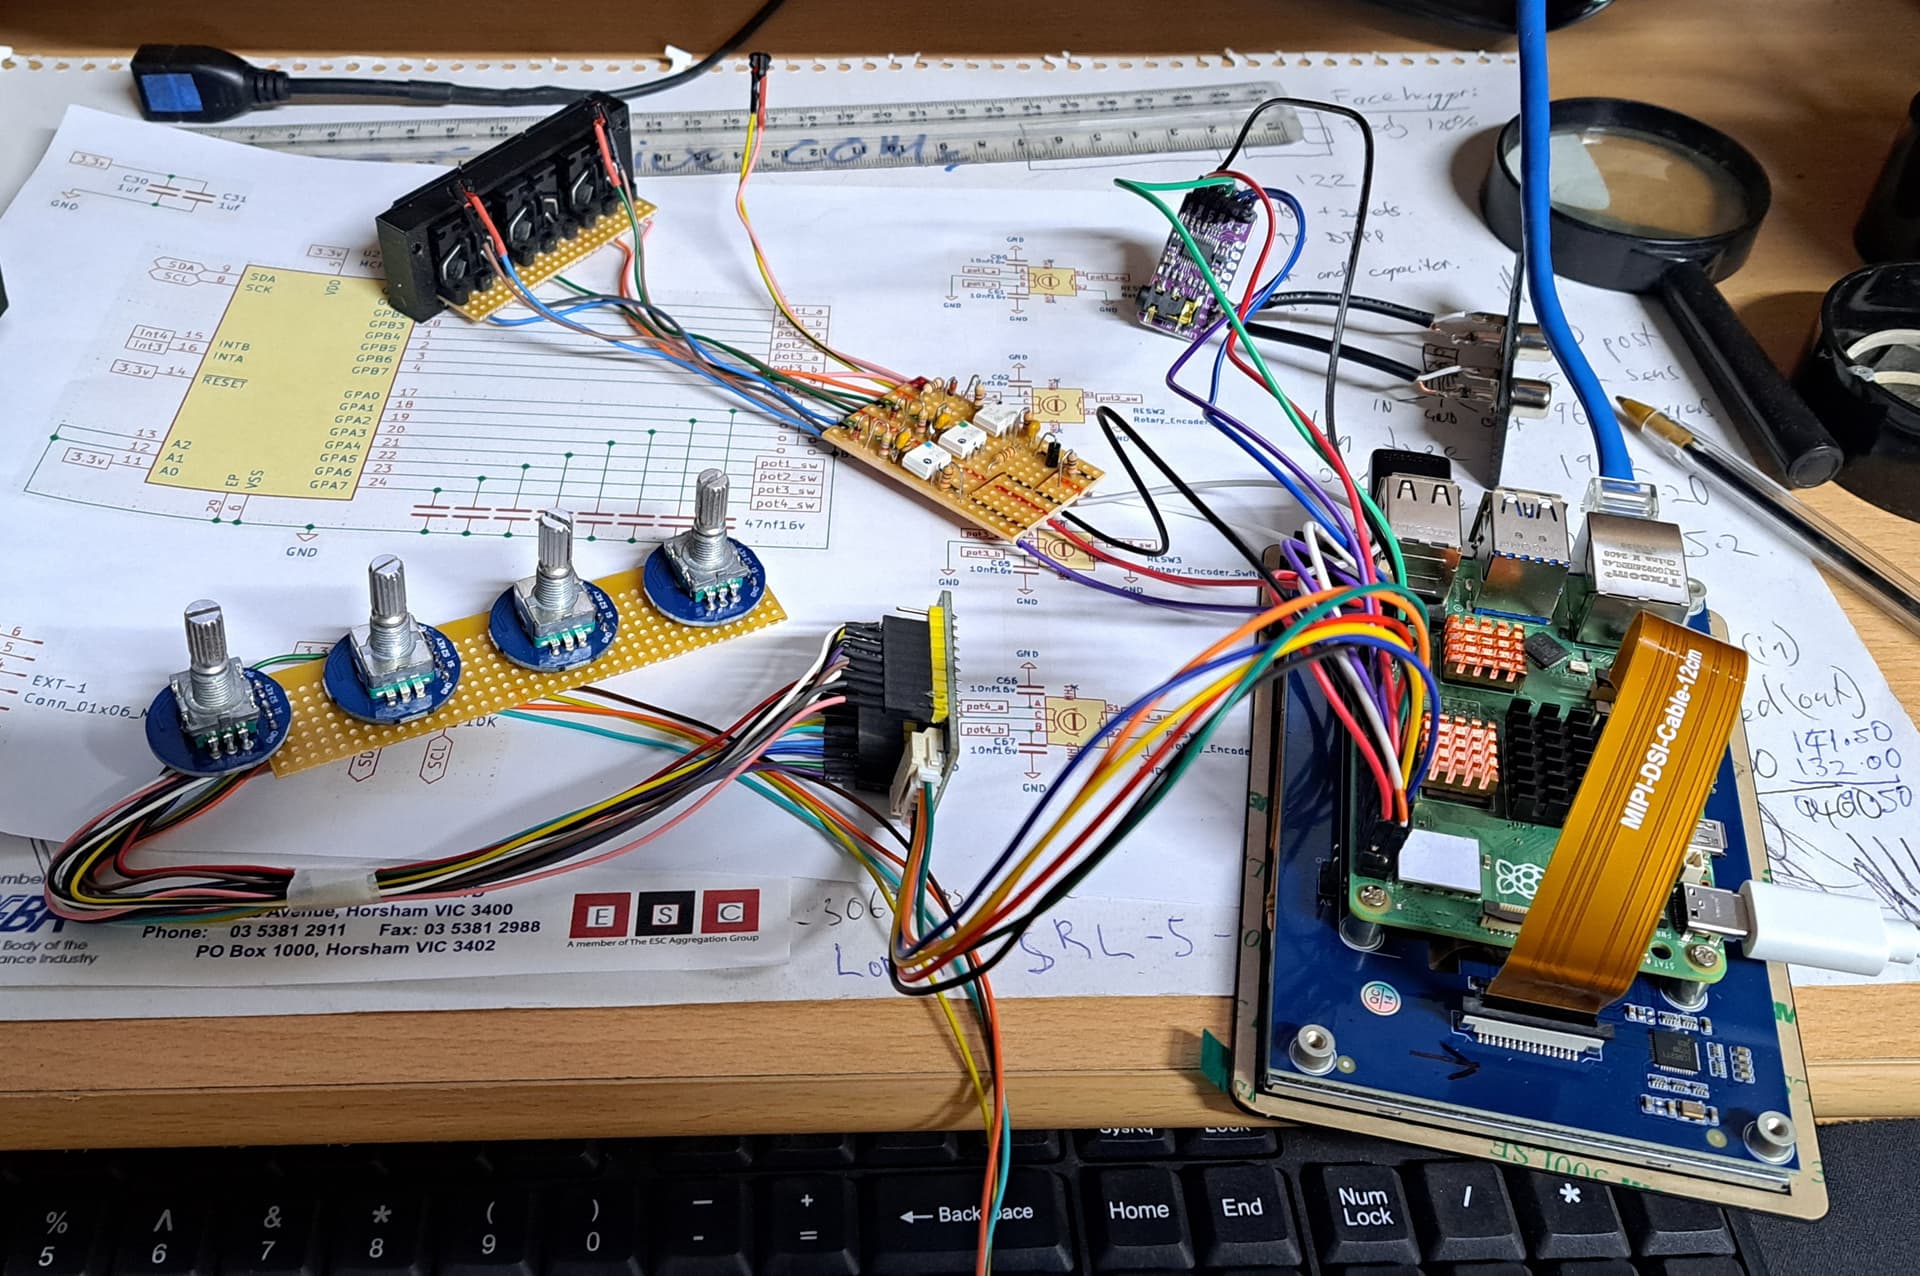
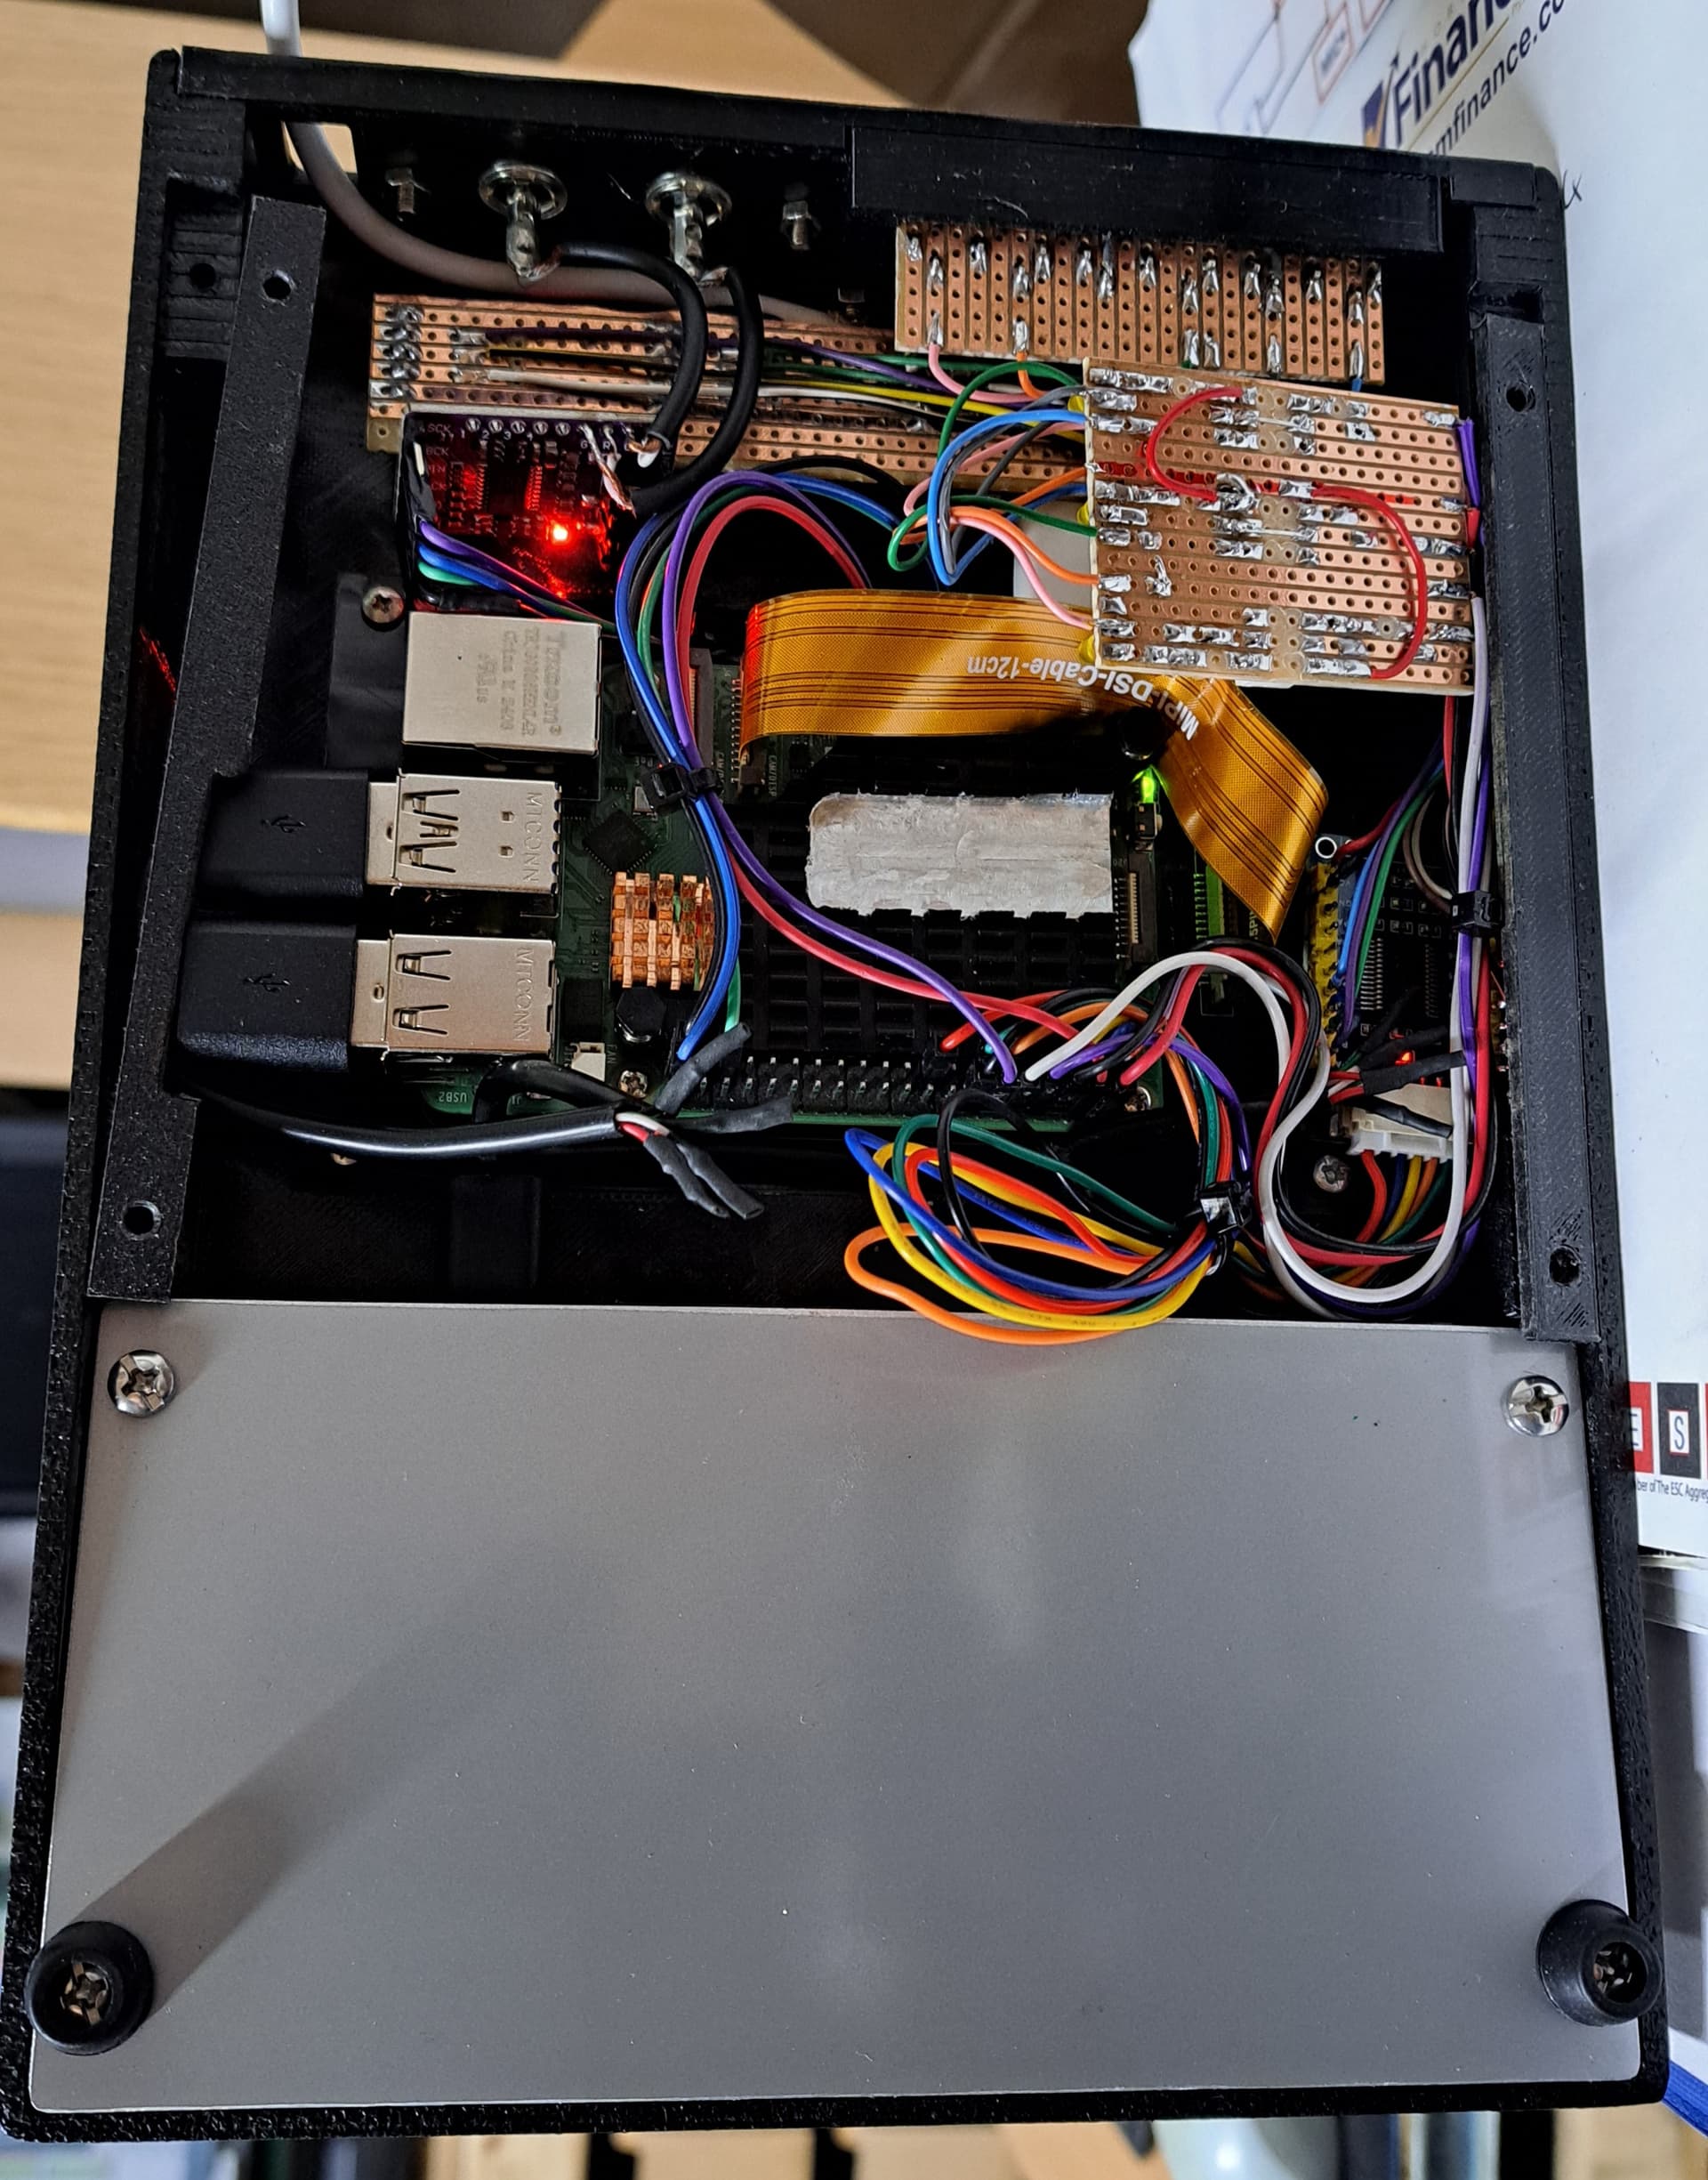
So far I have made a four rotary encoder interface, PCM5102 and MIDI in/thru/out boards. There is a WaveShare 5inch touch display with the Rpi5 mounted to the back.
For the main buttons I’m looking at a USB macro keypad, most likely a 12 key (2X6) version. I have 4 extra buttons wired from the rotary encode interface but I’m not sure If I’ll use them at this stage.
The case may be 3D printed, or built from an aluminium top plate with wood base. Once I get it all working I’ll finalise the case size/layout and start on that.
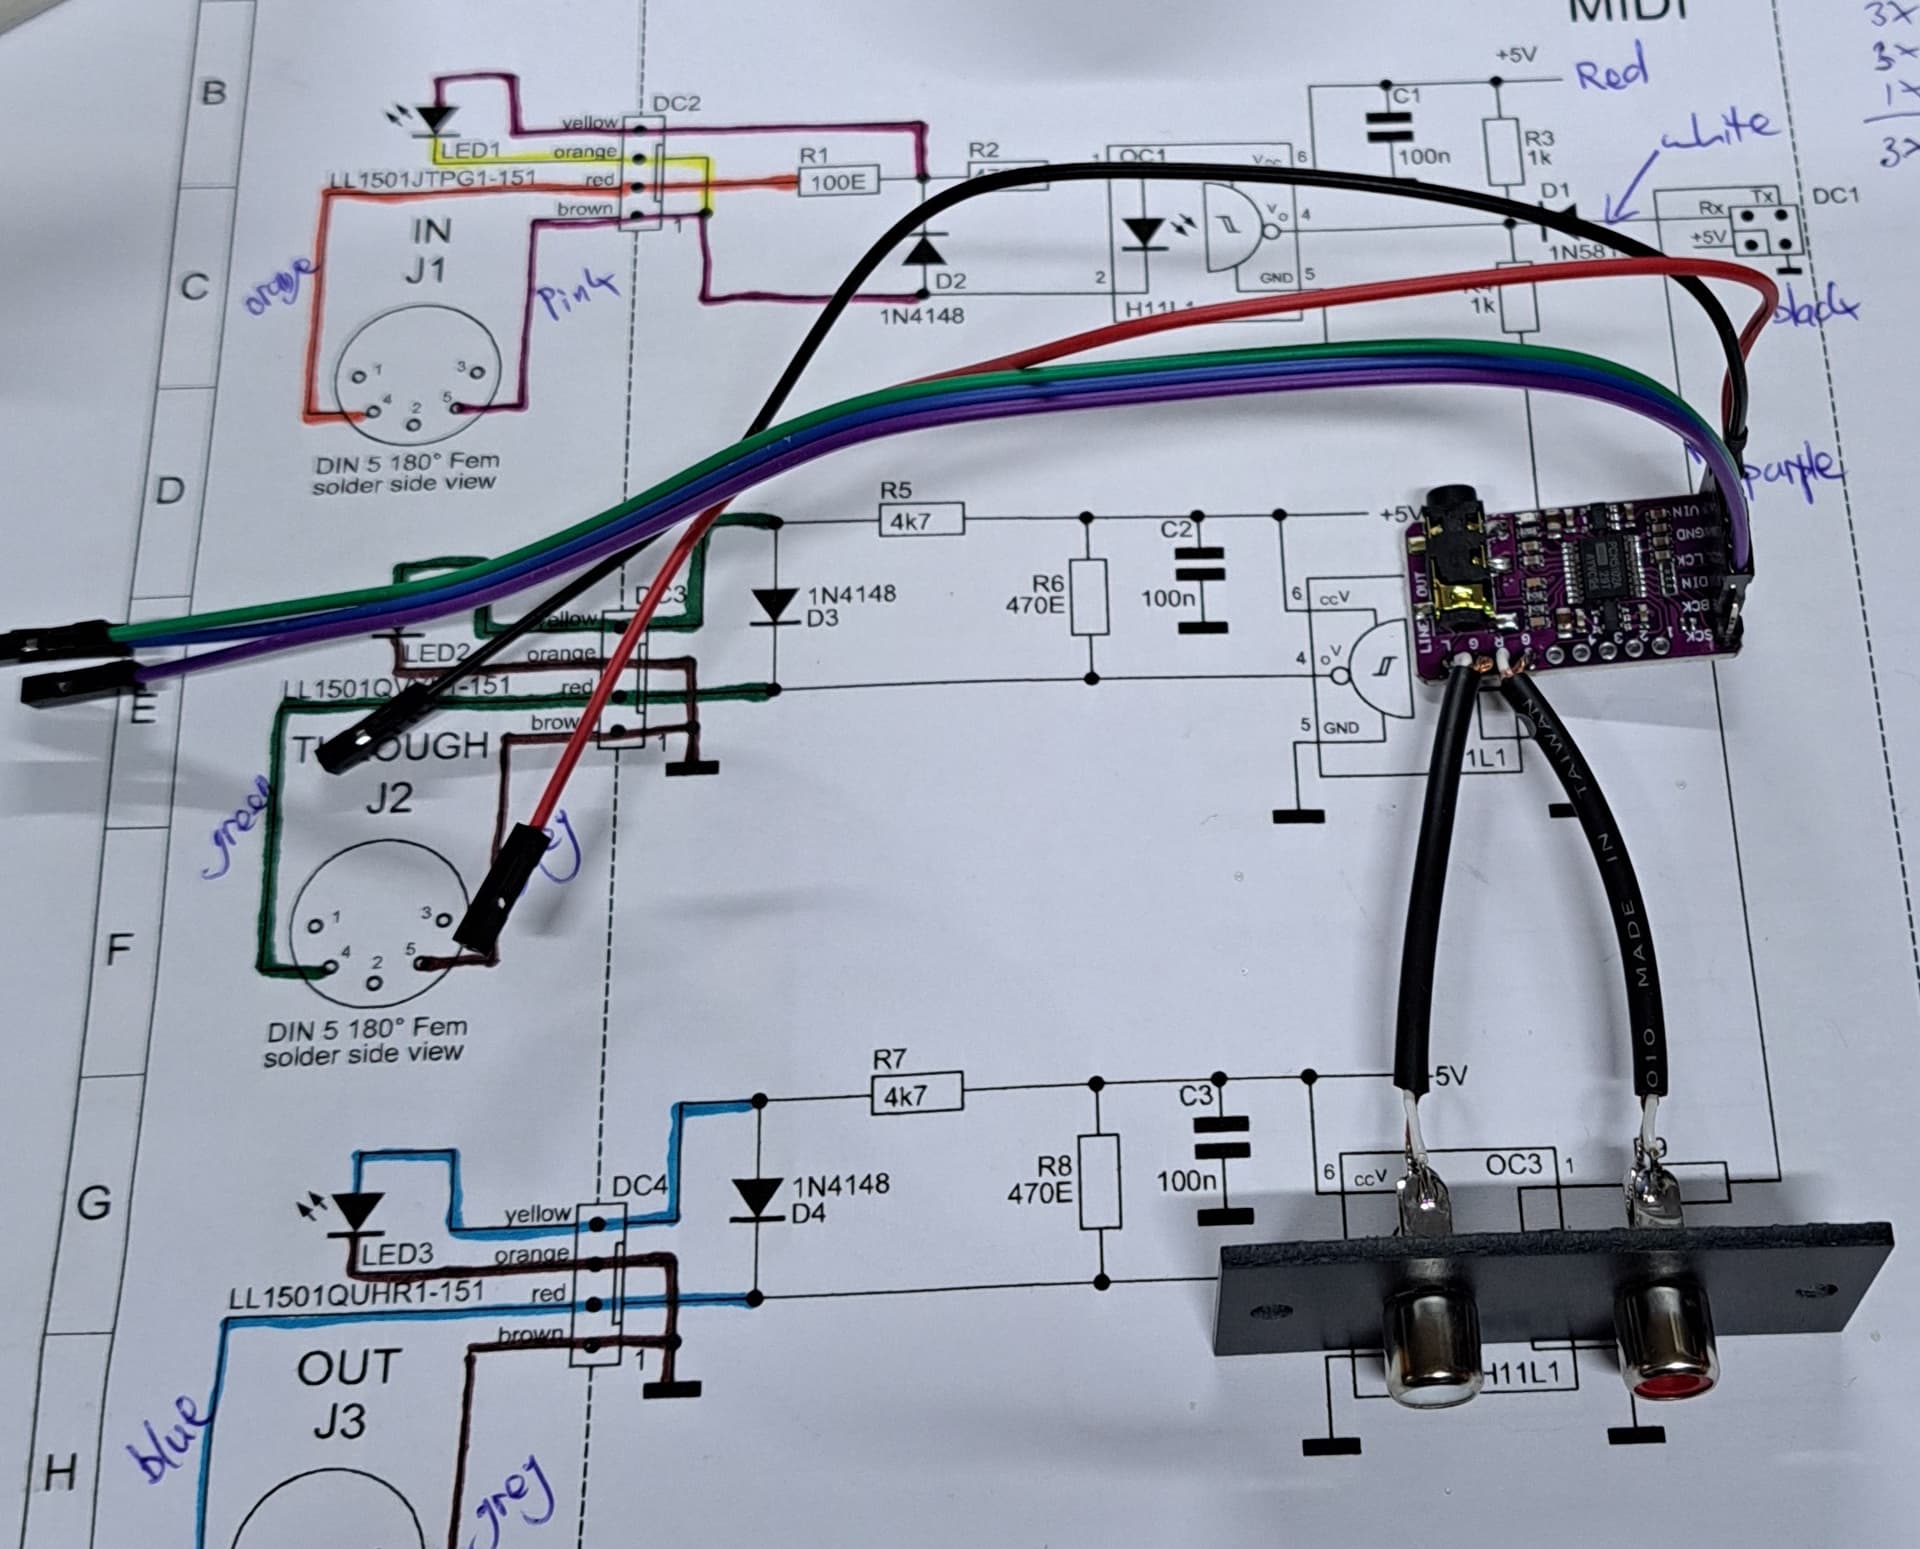
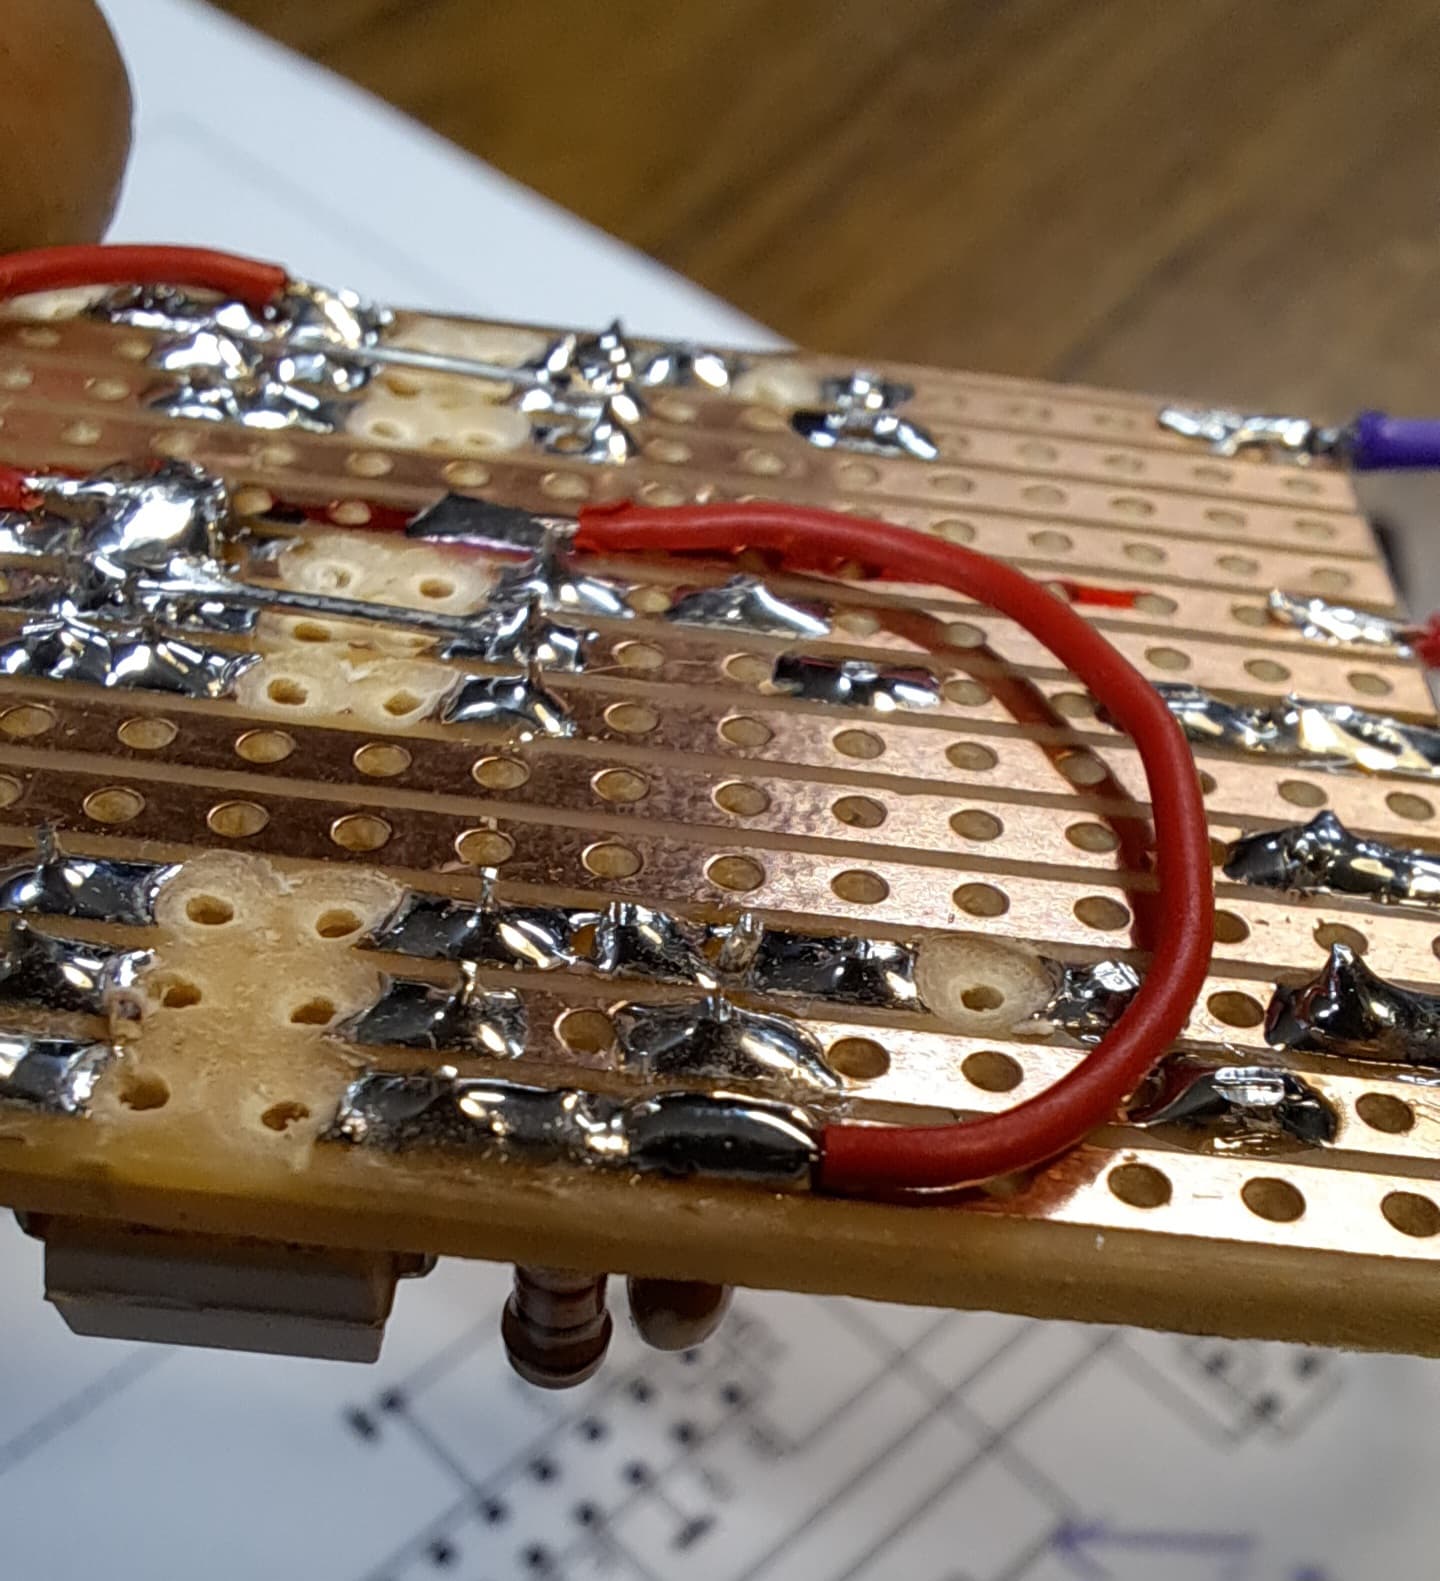
Spent a couple more hours hooking up and testing each module. Found problems with incorrect solder bridges on the PCM5102, which I thought I knew! An unsoldered leg of a 1K resistor meant the MIDI thru was not working. Figured out how to send MIDI out of the Zynthian to an external synth after a bit. Lastly got the encoders set up after deciphering wpi vs physical pin mapping and encoder addressing.
Next is to test a USB keyboard and figure out how many buttons I want/need
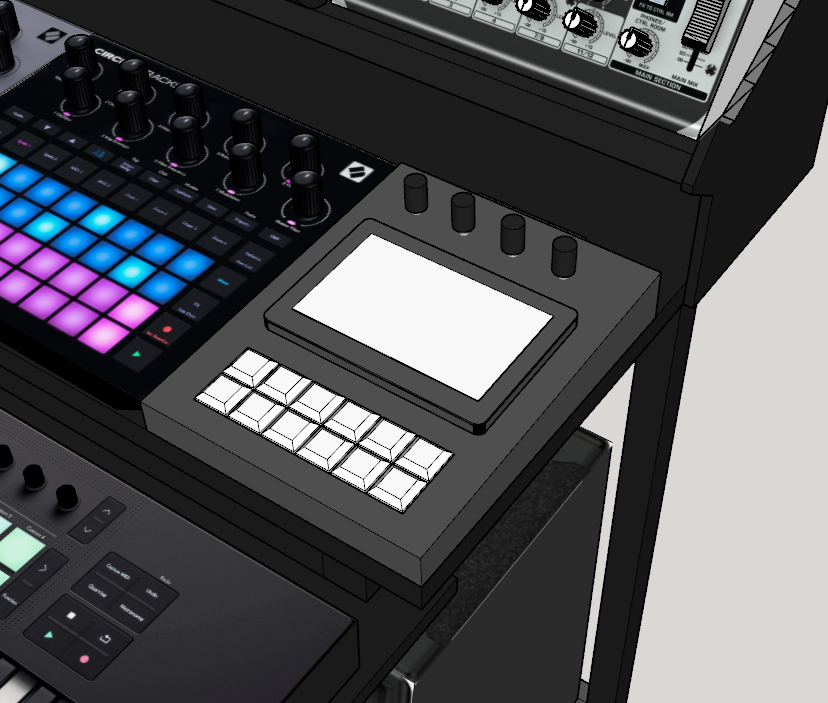
Finally decided on a button setup, going to use two 9 button macro keypads, giving 18 buttons to use. Hopefully it all fits in ok.
I have many ideas for labelling the buttons, from 3D printing custom keycaps, to waterslide decals or laser engraving. I will do some tests while I wait for the keypads to arrive.
I would have done that if I had space for it, I’m wanting to fit this next to or inbetween existing gear so width is a limit. I have a Launchkey that has 8 encoders on it, in theory they’ll be what I use mostly for performance side of things. If I end up not liking the layout or gear changes I can rebuild
Hi. I have opened a thread on Raspberry forum, Under Graphics and Audio, Midi, I2C and Pi5. Basically I’m trying to build a small Europi-X, but then I saw Zytnhian had solved the Pi5 GPIO problems, and tried to ask the forums if anyone knew how to enable Midi… You have 3x octocoupler??? Why not just 1 for the input and a PNP for the OUT??? Plus a 7414 hex schmitt for midi tru would give you 5 midi tru… anyway… On that rasp blog, I uploaded some hybrid lines of code, just for the Midi implementation. I also have 1 digital Encoder, and 2 CV I/O, plus a DAC with Audio out, and another USb Jet-Li Usb soundcard with also a Mic line in If I wanted to. Do you think it’s possible to post some code here??? I would love to see how you did to enable your Midi in and out… My code is a mess… I would link it here but it’s easier to go to Rasp forum and check it there… Do you know where I could find a reliable Midi_Pi5 code??? Tnx, this is my first post on this forum…
Could you explain me why do you need an octo on the out also??? And how did you connect the four encoders circuit??? My DIY has only 1 enc, very simple circuit, DT > 10K >10K pullup > 0.1Pf to gnd >GPIO
Basically I have only 1 universal encoder with an extra (pin 16) SPTD switch to change Midi controller mode to Keyboard mode, in Midi moder change C3 root note and press = Note ON. In KEY mode Enc clock = arrows L, R and enc-SW= enter
A 5" SPI touchscreen, 1 Midi TRS in , 1 Midi TRS out, and 2 Mono CV In (sync in) and CV out (sync out, etc), the Audio Hat+ DAC, and a small wood enclosure, with the AC Plug hidden inside. Installed Pi OS. I tried Patchbox first but it crashed with the pcm5201a. Just downloaded Zynthian OS… I play Cardinal a lot, it seems it’s also possible to run cardinal inside Zynthian as a LMM2 (VST?). That would be perfect for me. Raspberry forum don’t help me minimally.
Welcome to zynthianland! I hope you enjoy our chat!
We use exactly this in V3, V4 & V5… You should be looking to some older design (V2, right?).
Regarding how we interface MIDI from the RPi. We simply use the UART and load a specific overlay (midi-uart0) that sets the clock in such a way that you ask for 38400 but you get the MIDI baud rate (31150).
Then, we use ttymidi, that is a midi bridge between the uart and jack. That’s all. Zynthian is very “jackish”.
Finally, i would like to clarify that currently zynthian uses gpiod library to interface RPi GPIO.
For the I2C, we took the implementation from wiringPi.
We did like this because when we was integrating Pi5 with zynthian, WiringPi was orphaned and it was not clear if it’s going to be maintained. Luckily, it seems to have found good maintainers and the project now seems very active.
Should I have installed the main release or the Python version as what I did???
I got some cpu info error with Python version, maybe should uninstall and retry with the main branch… thanks for the info, I made a lot of progress!
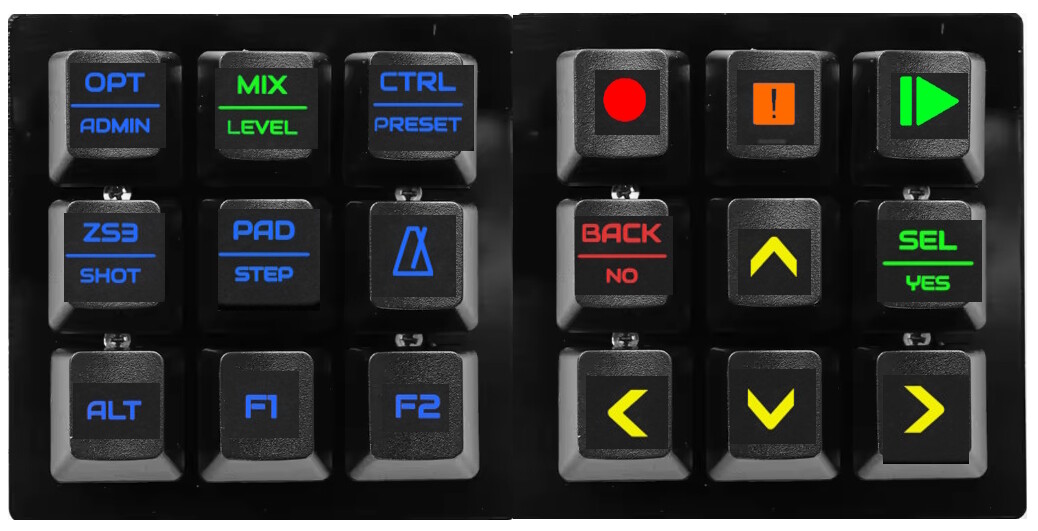
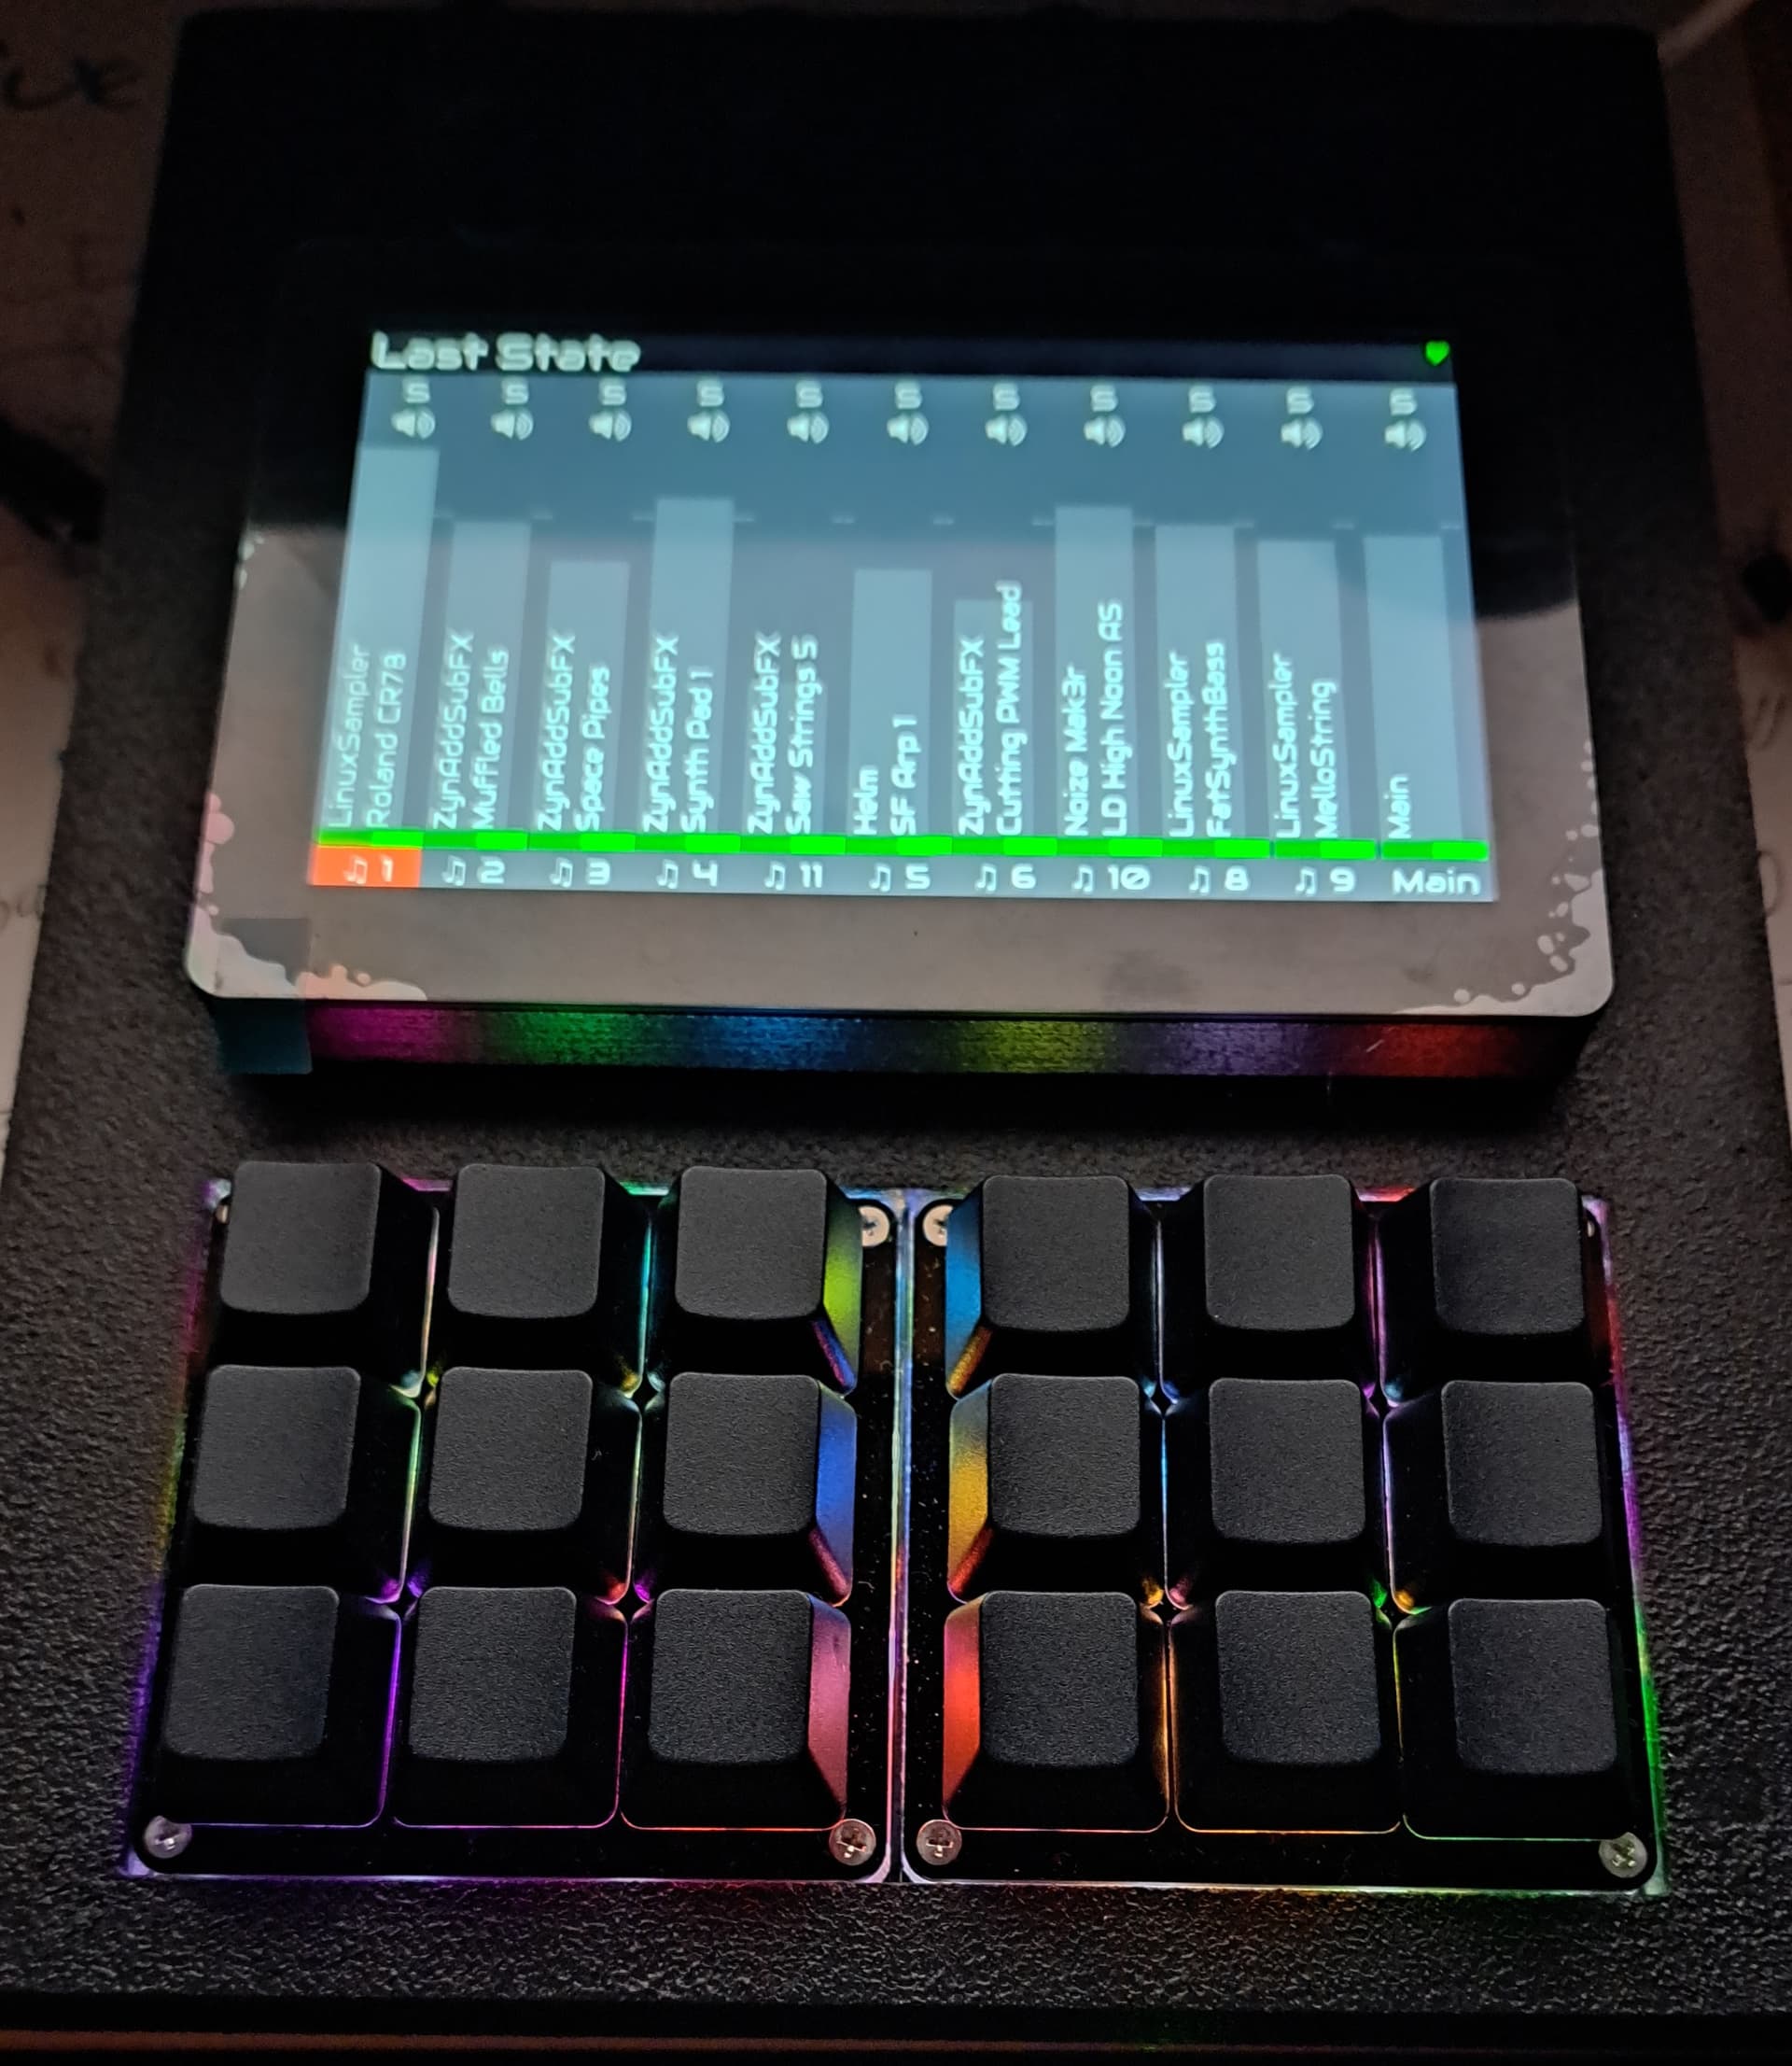
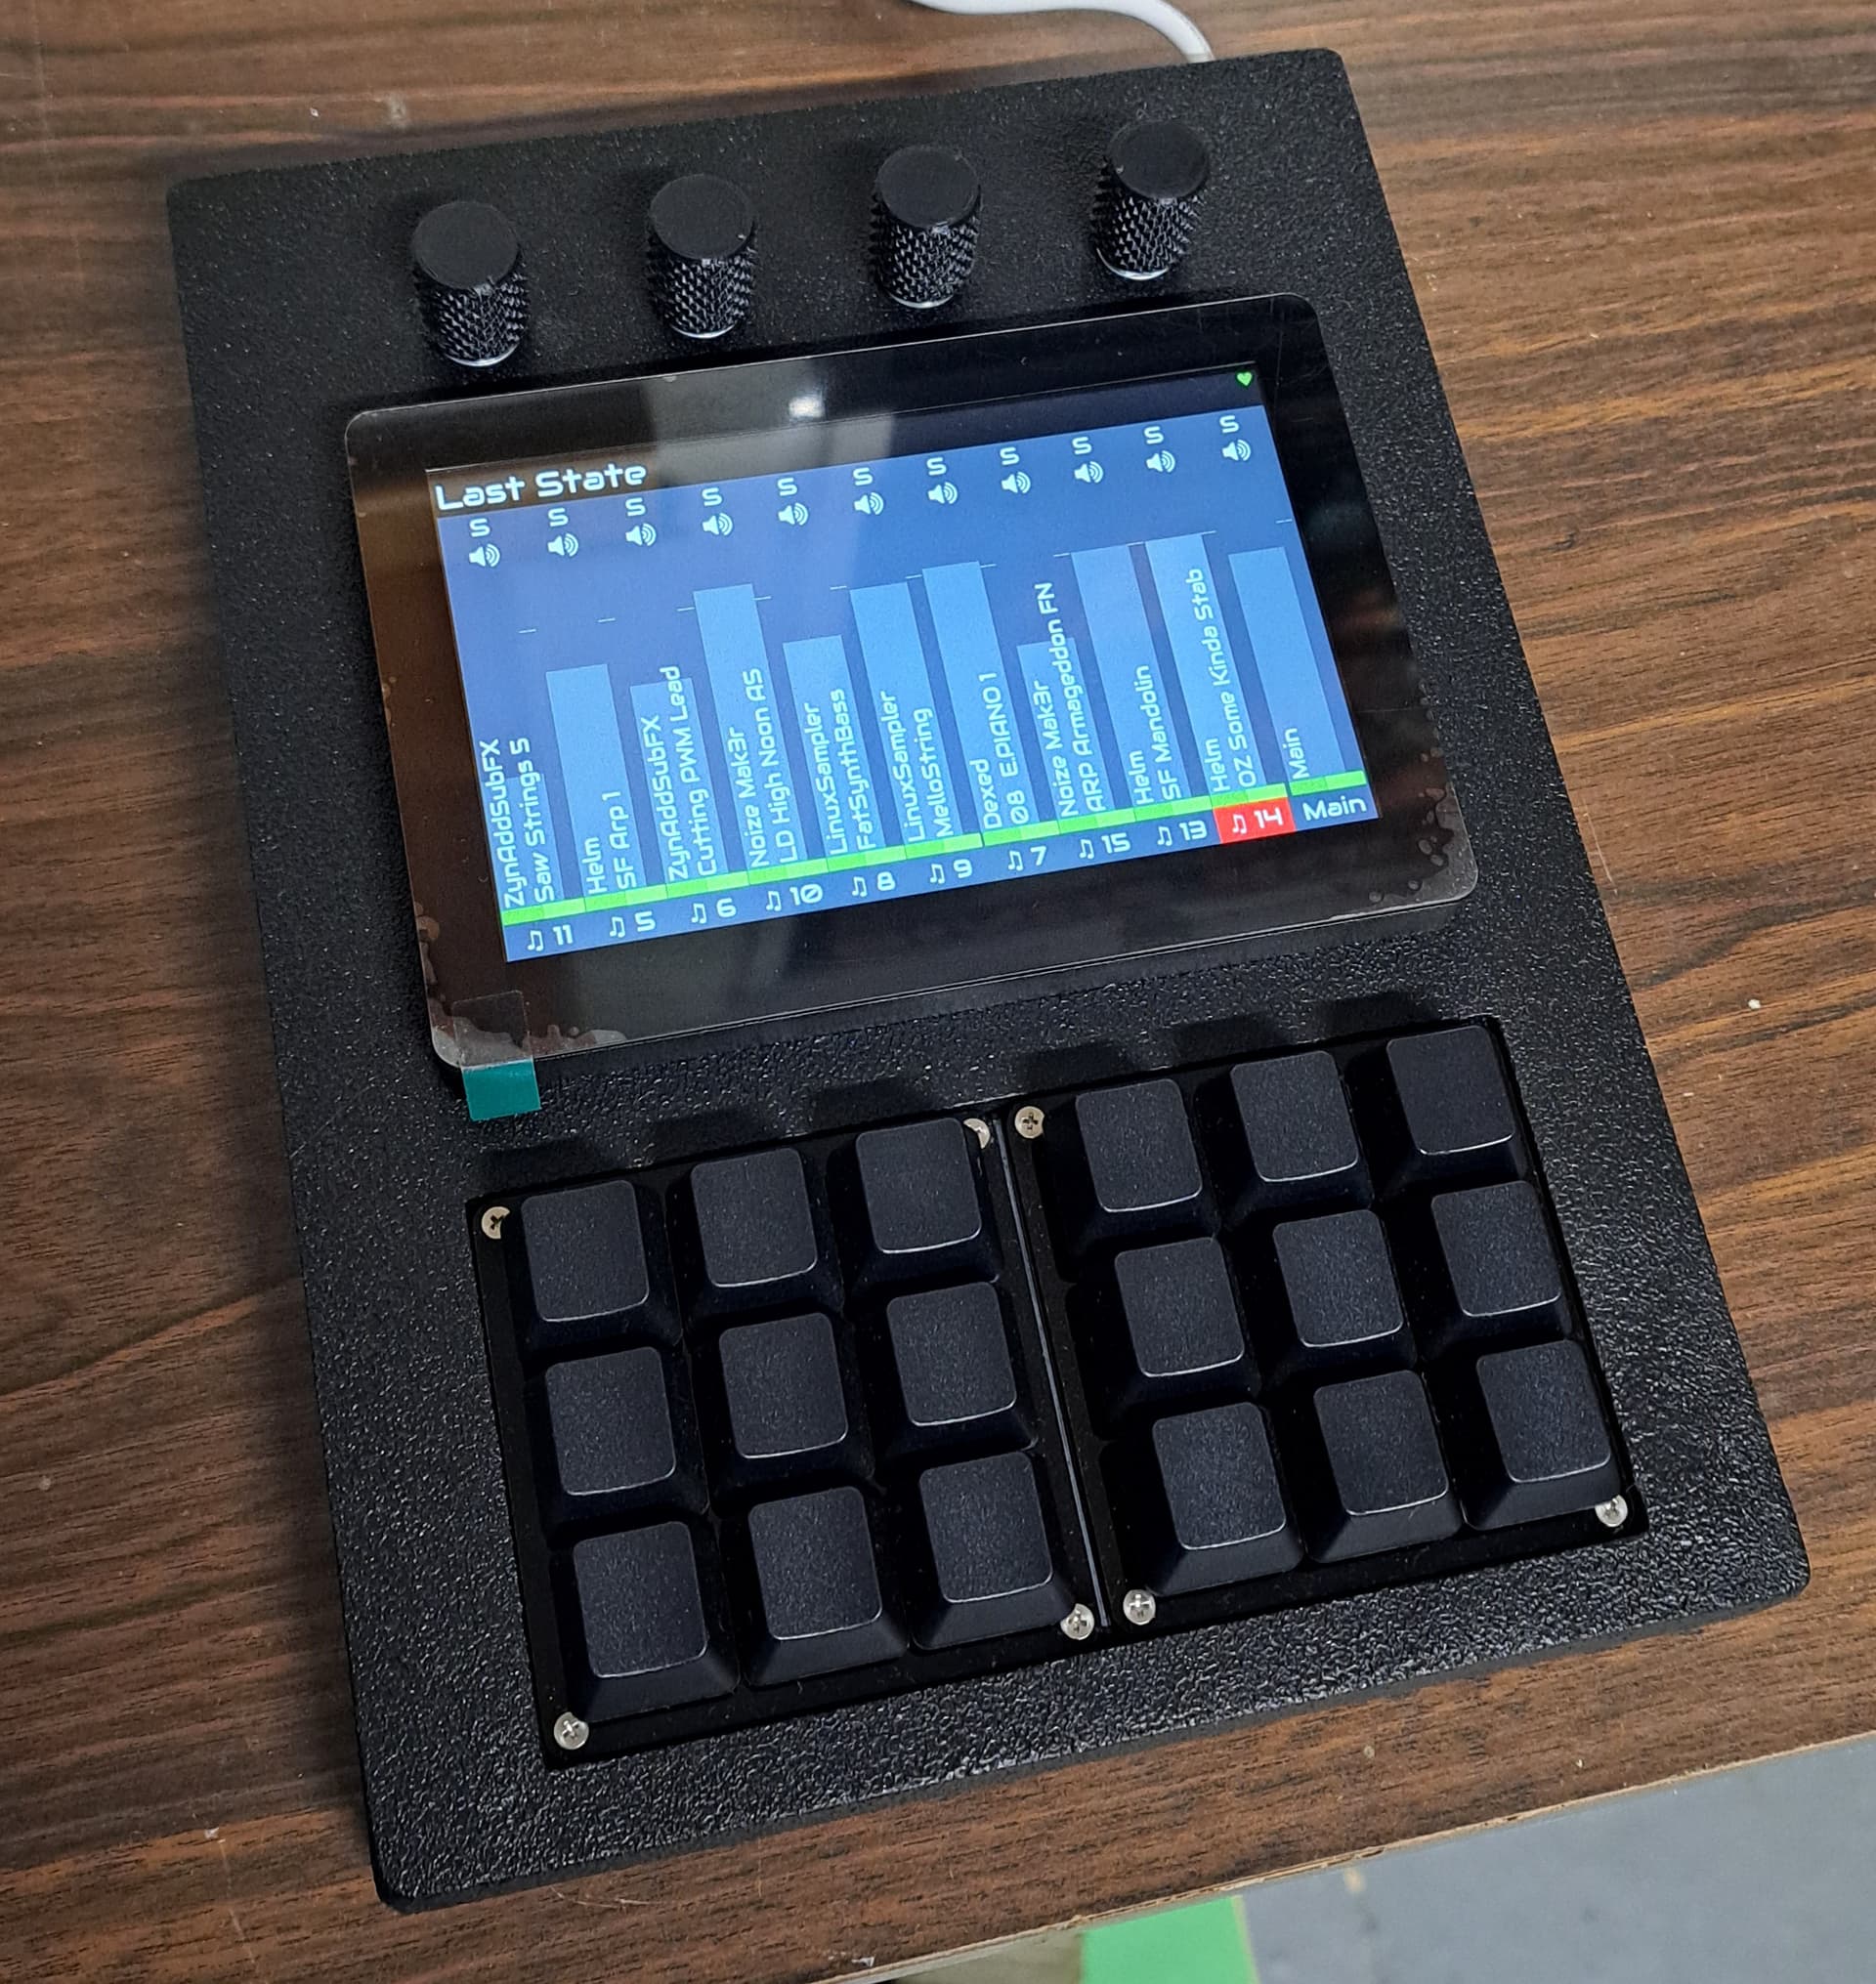
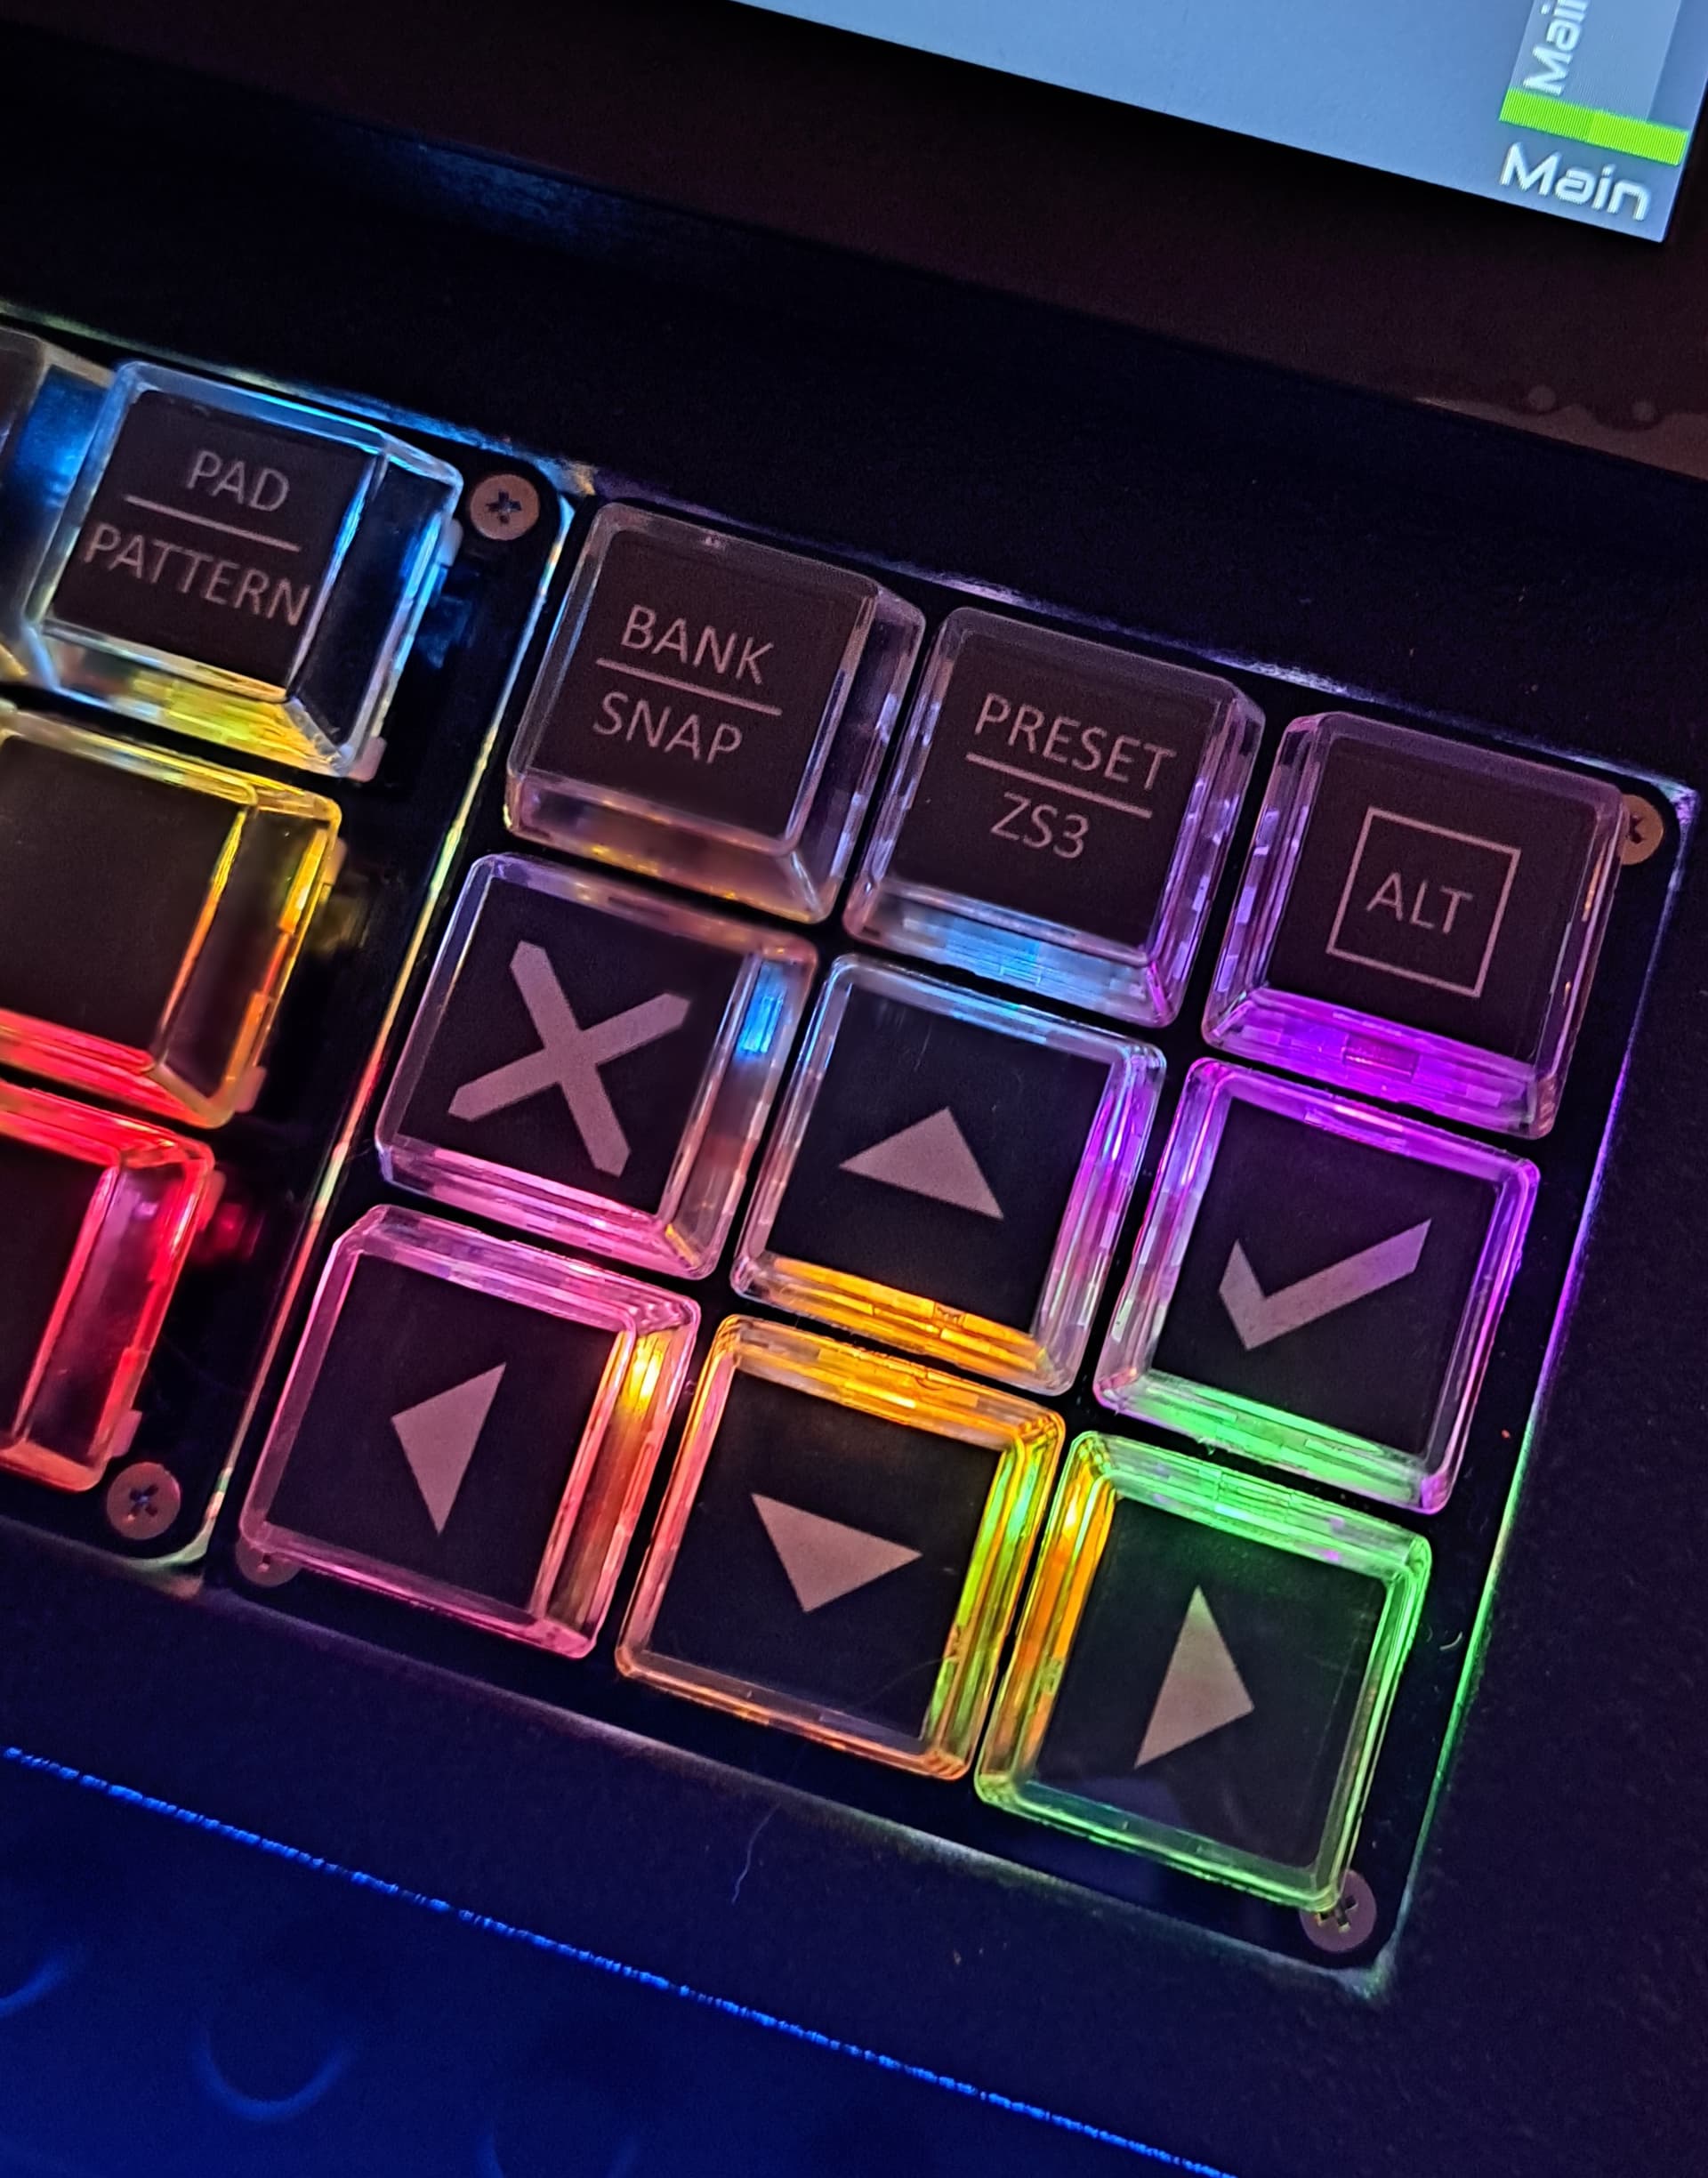
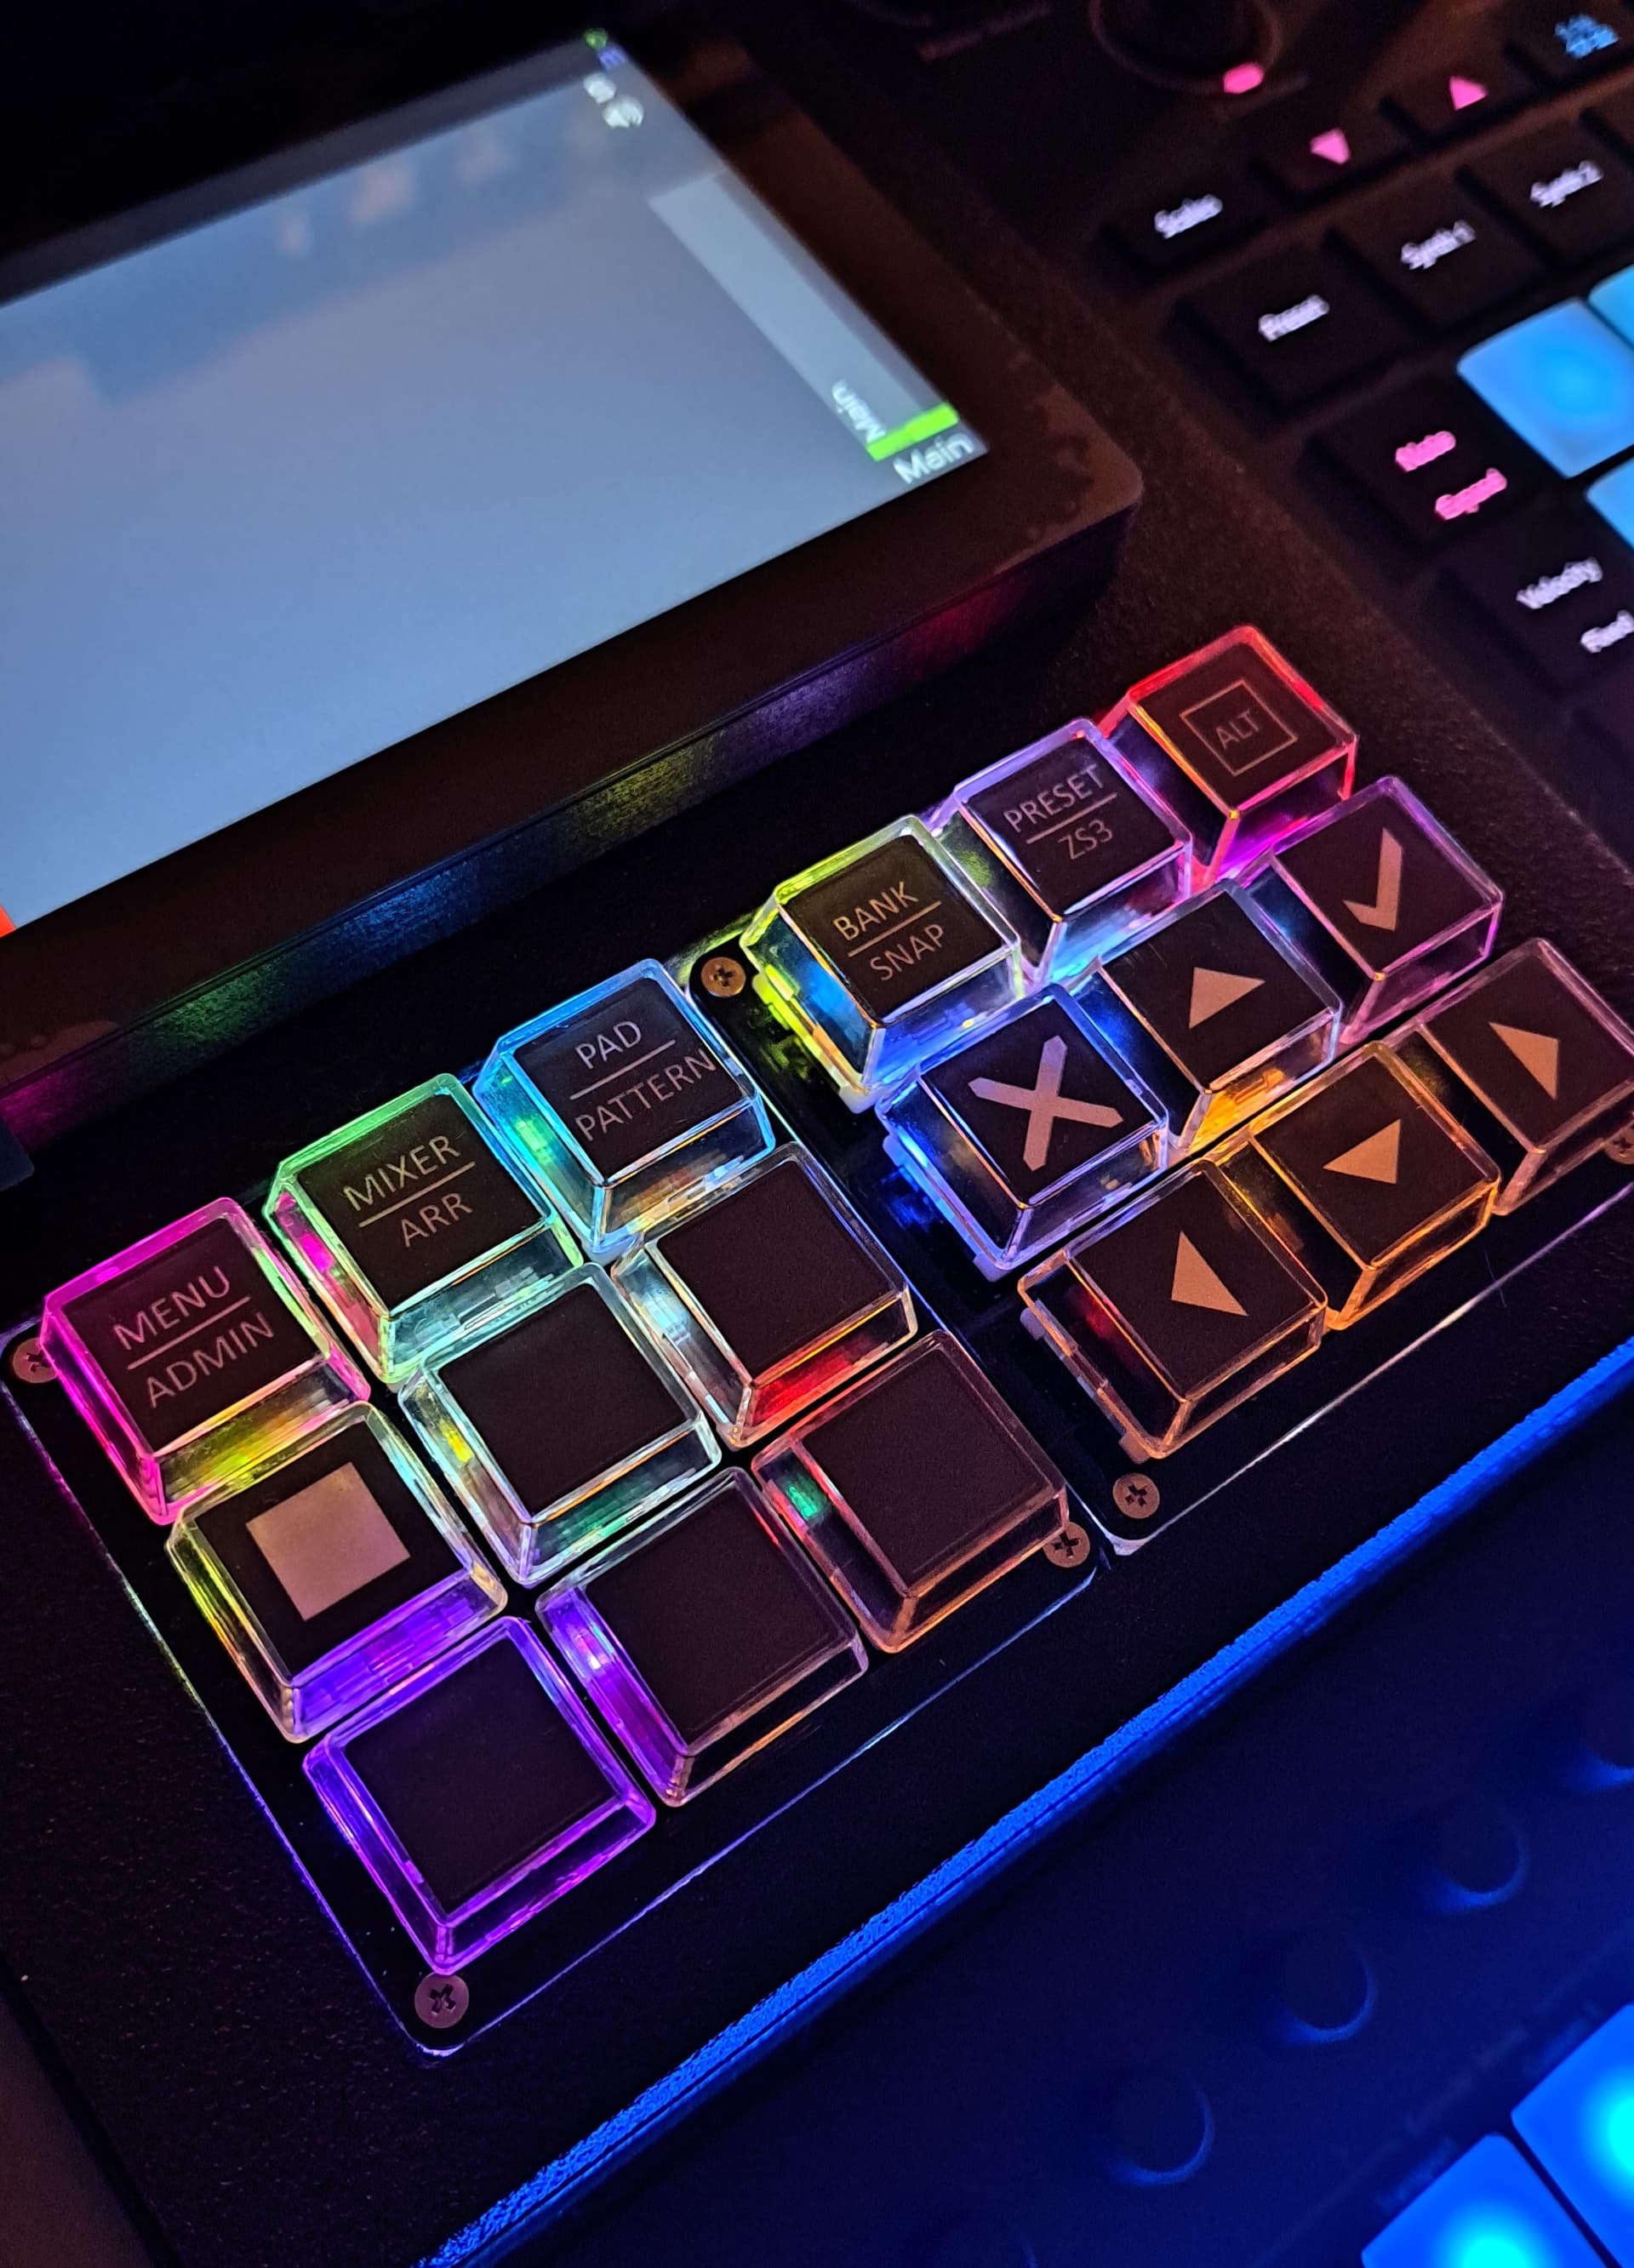
Keypads arrived and are great quality for the price. Easy to setup wia web interface, I have one as keys 1-9 and the other is A,B,C, ESC, Enter and arrow keys.
I have assigned most of the keys in the UI editor, only issue I am having is getting zynswitch 3 to work as the main ‘enter’ button, set as zynswitch 3,S but it does give two commands. eg. pressing it on the pianroll screen will create a note then remove it in the same press. I can assign to other keys and it does the same thing. I did try 3,R and 3,P but they did not work at all.
Same issue as sacred.goose was having in this thread.
It’s all in bits again now while I work on the case. Can post logs/video when that’s done.
Indeed, you are configuring it to be a short press only but it may be better to configure it as a switch that understands short, bold & long by configuring as zynswitch 3 (without the ‘,S’).
So I put everything back together with the case finished and found that the button was not working at all, reset it to ‘zynswitch 3’ and then it works fine! Haha I’m glad
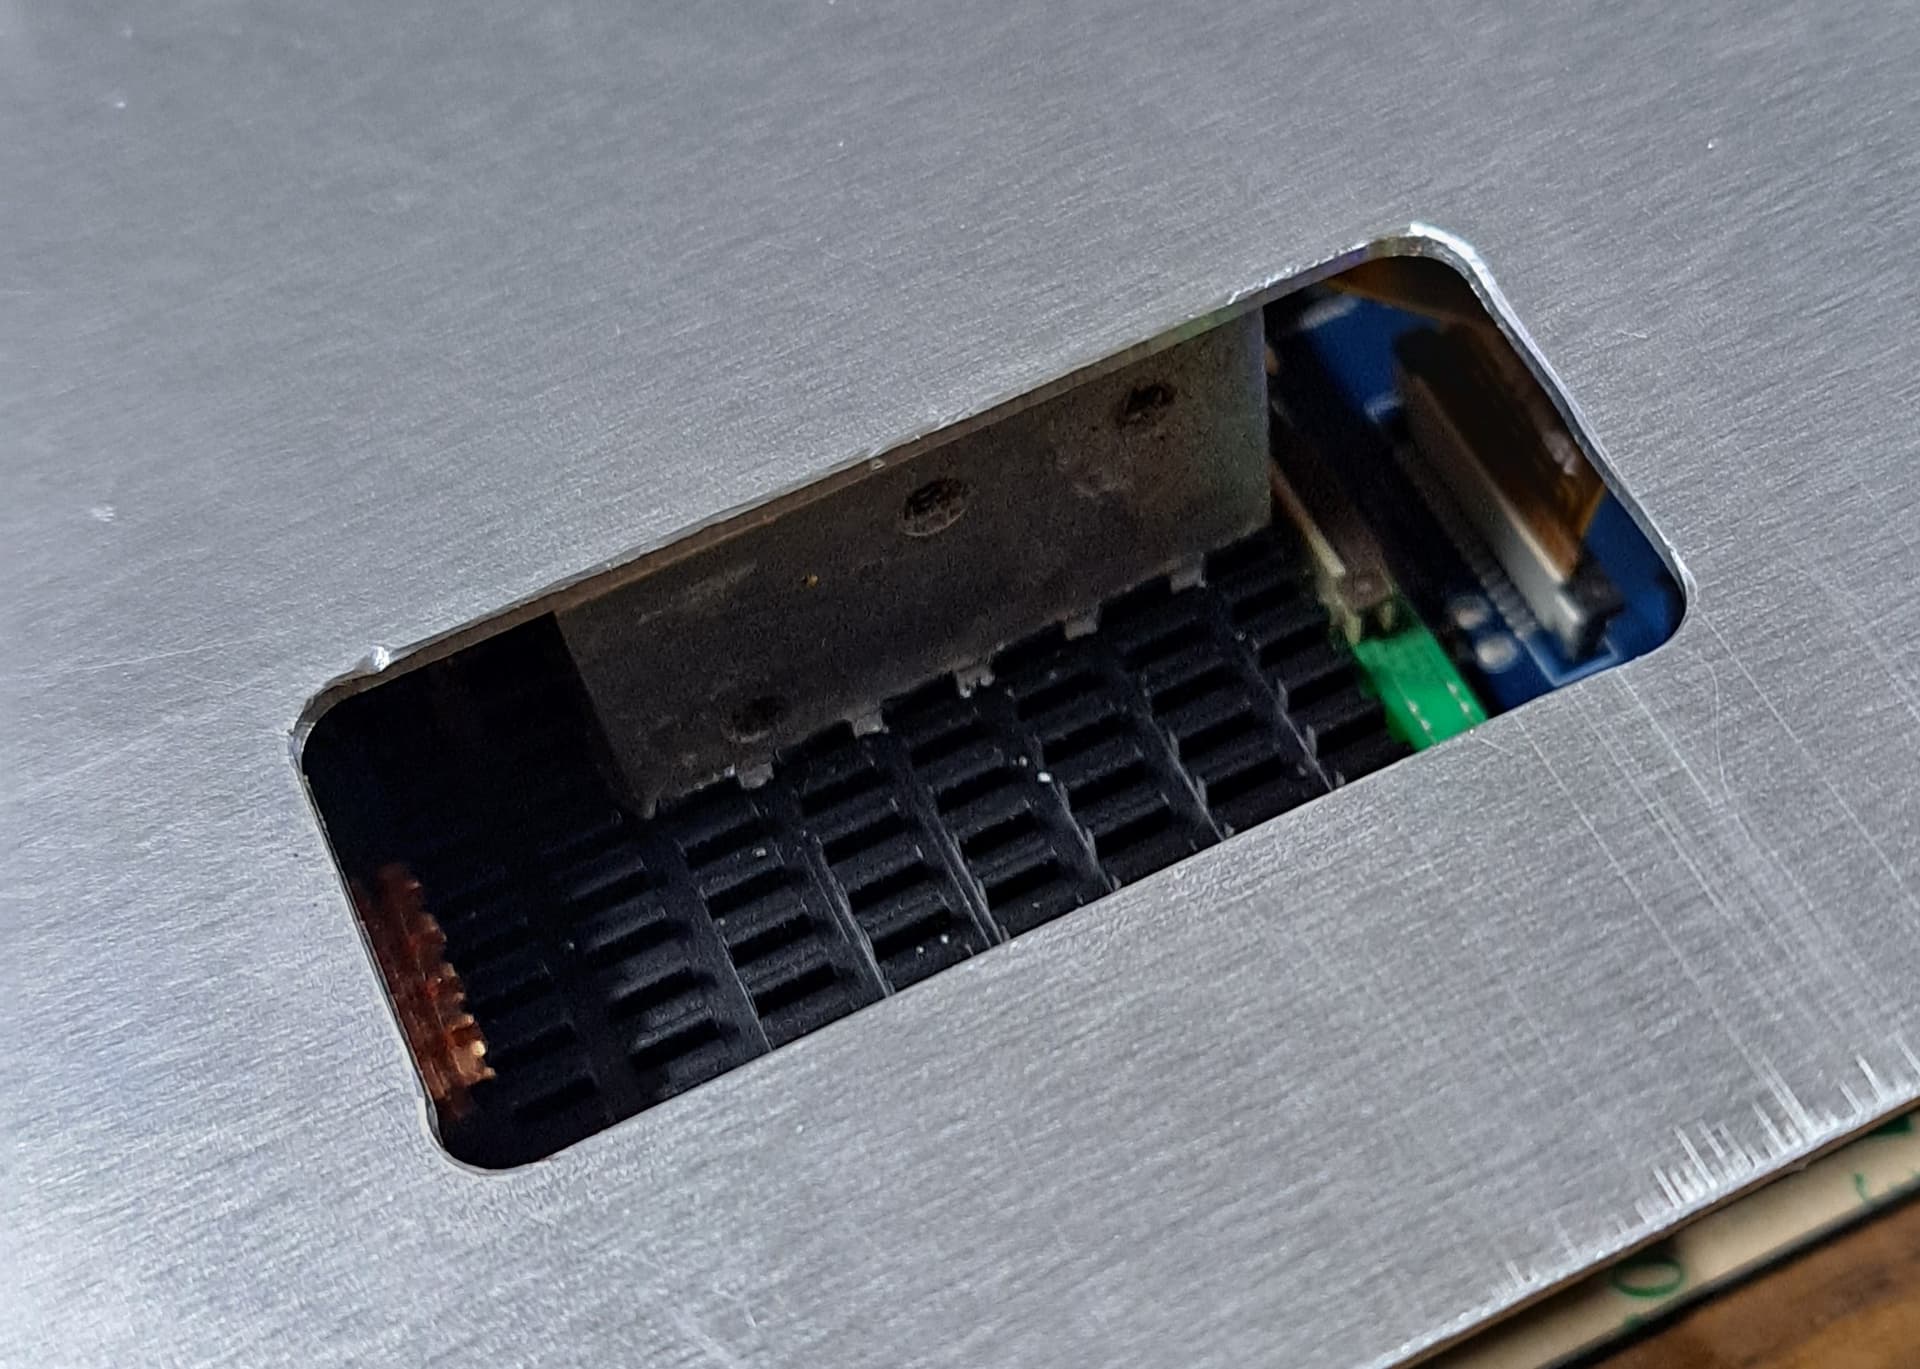
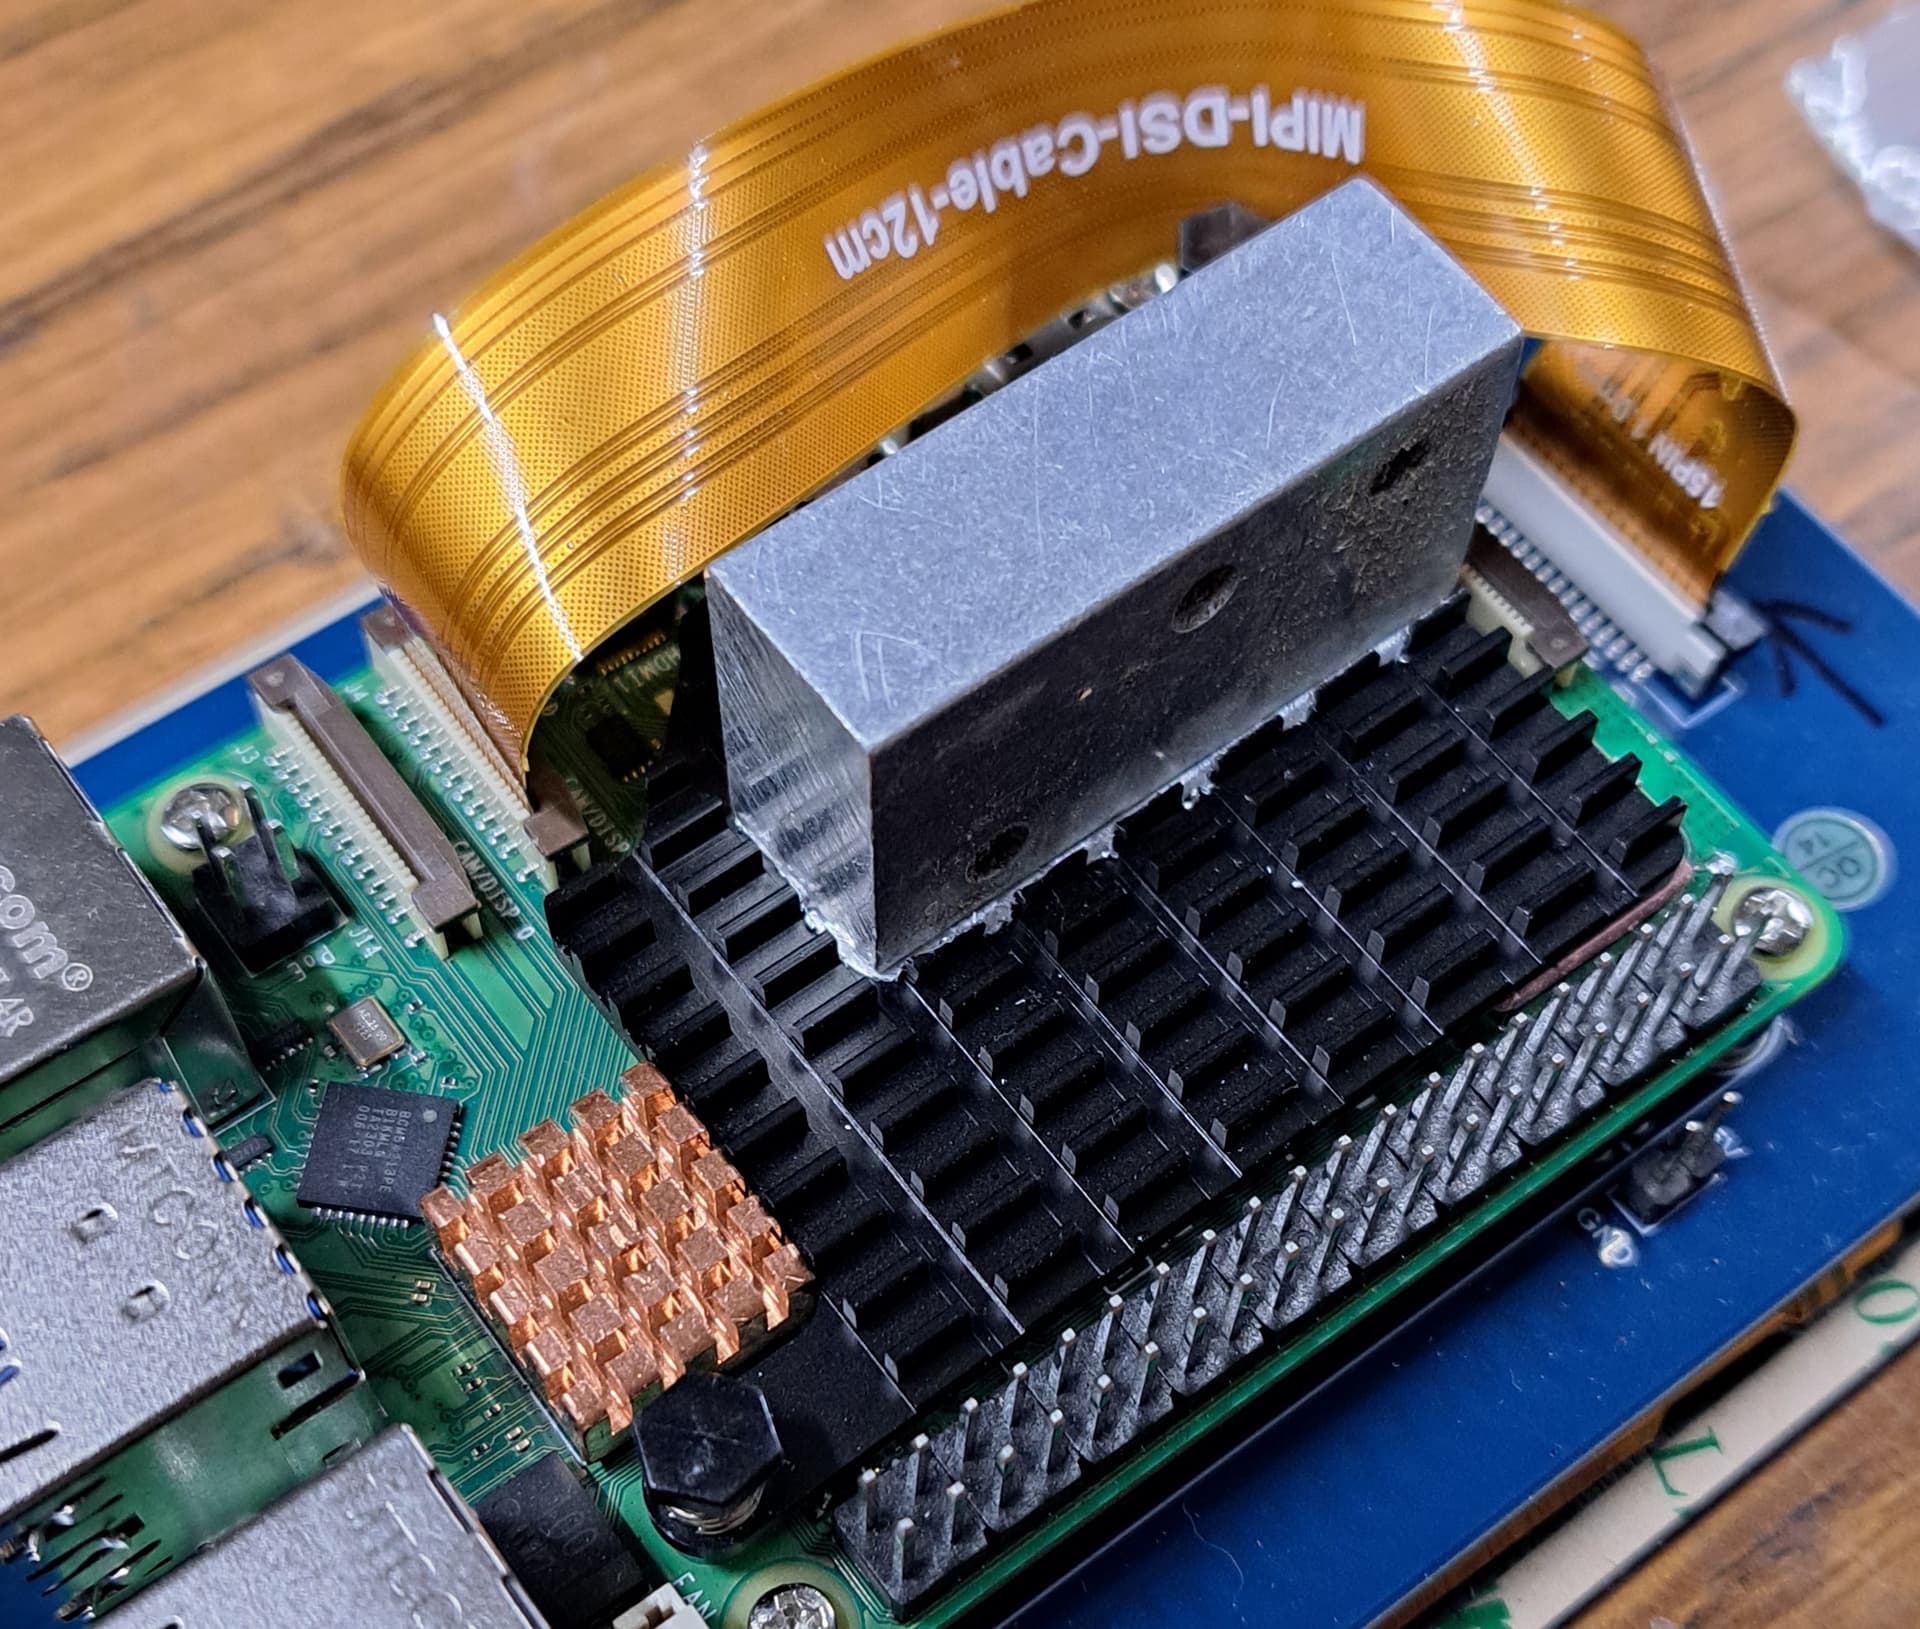
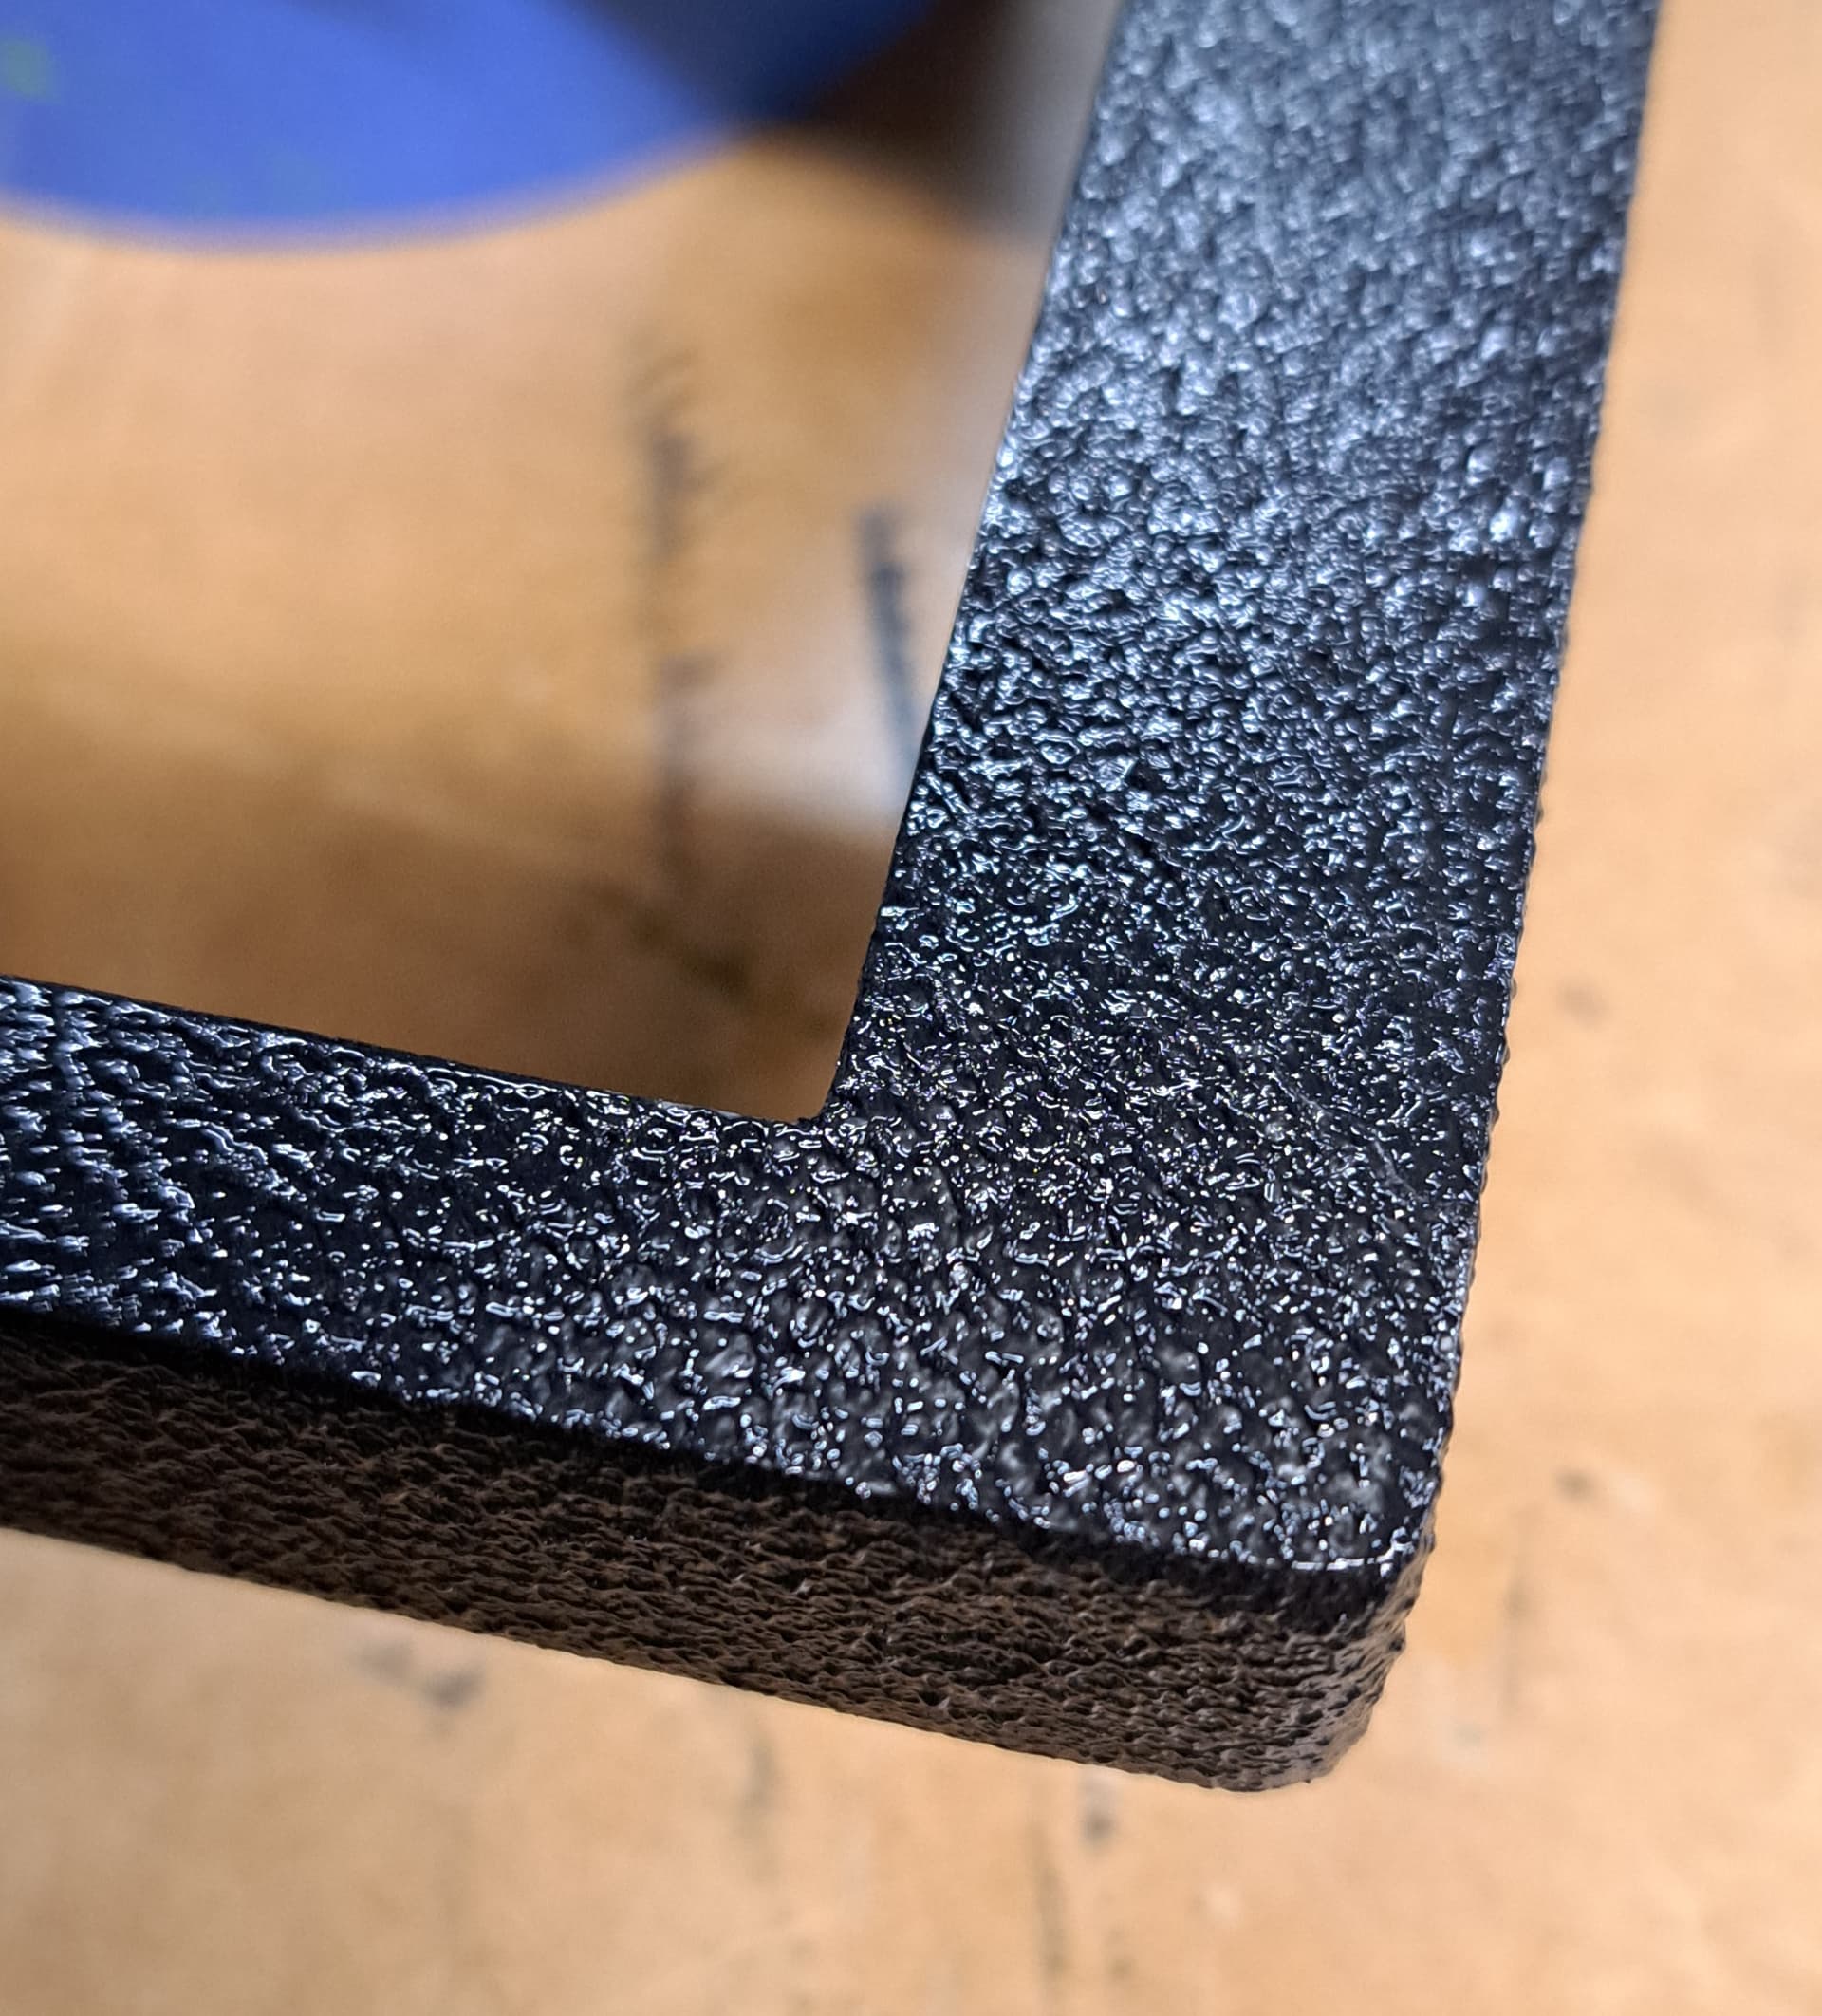
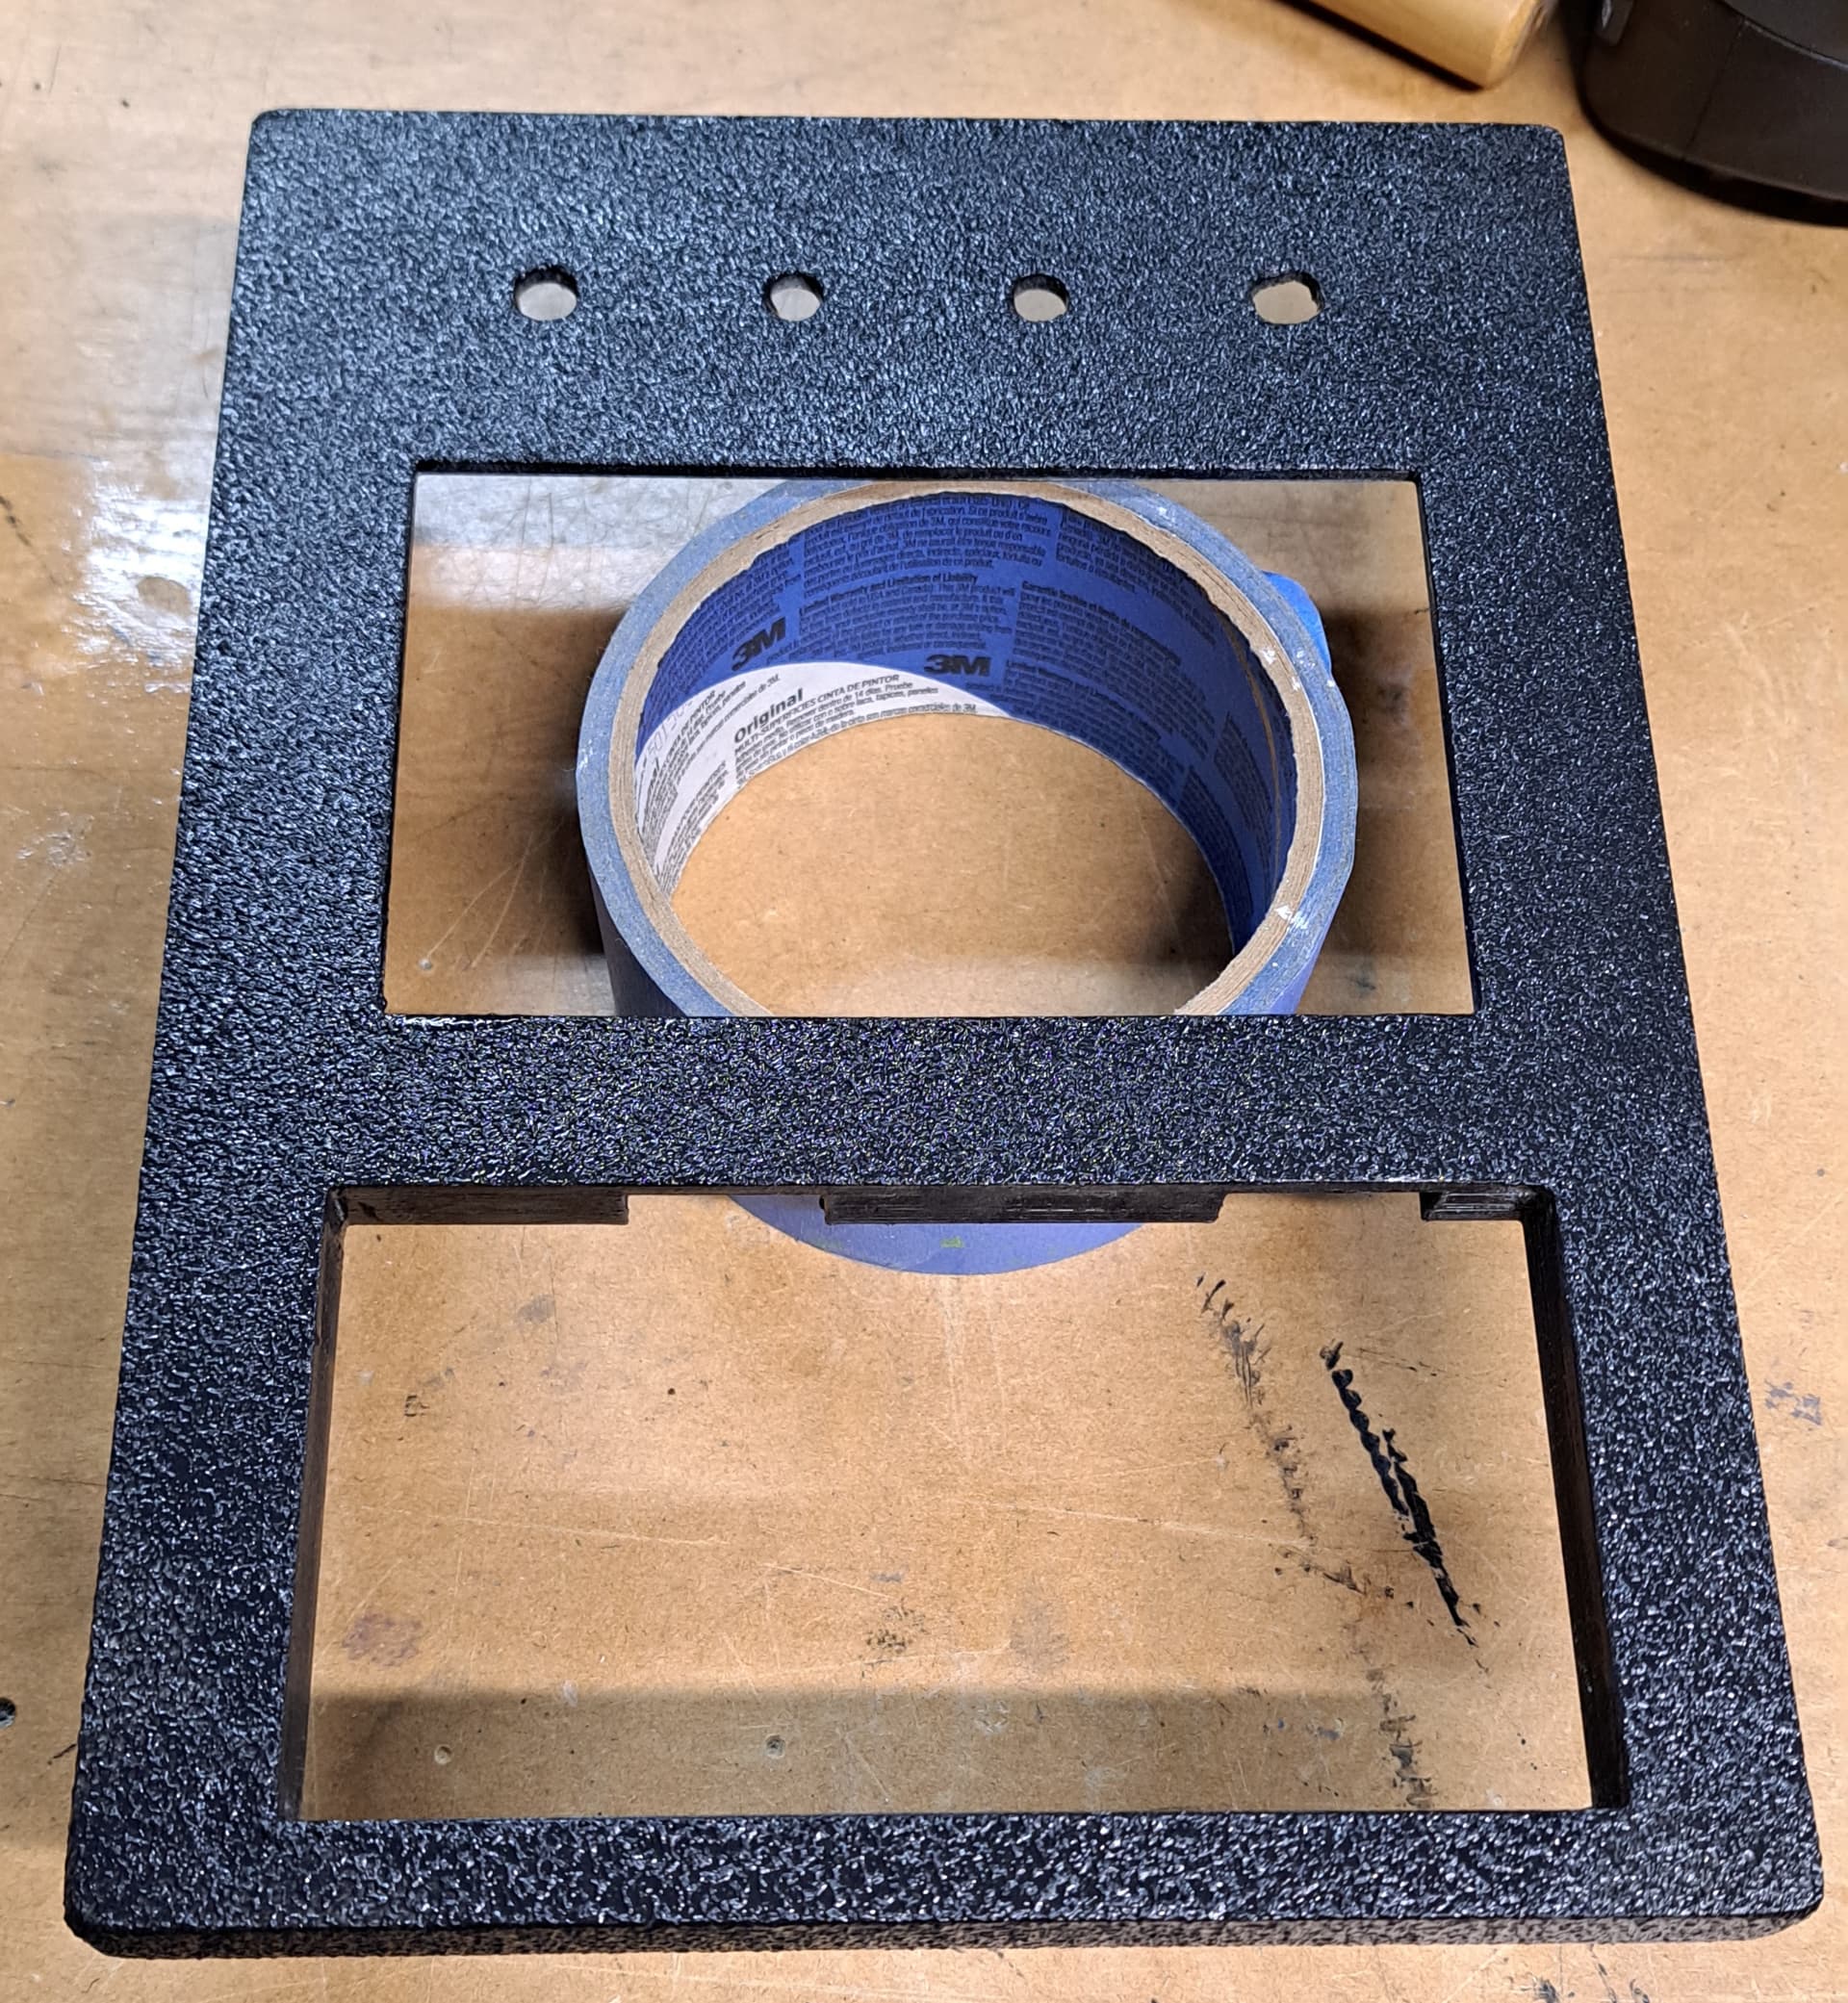
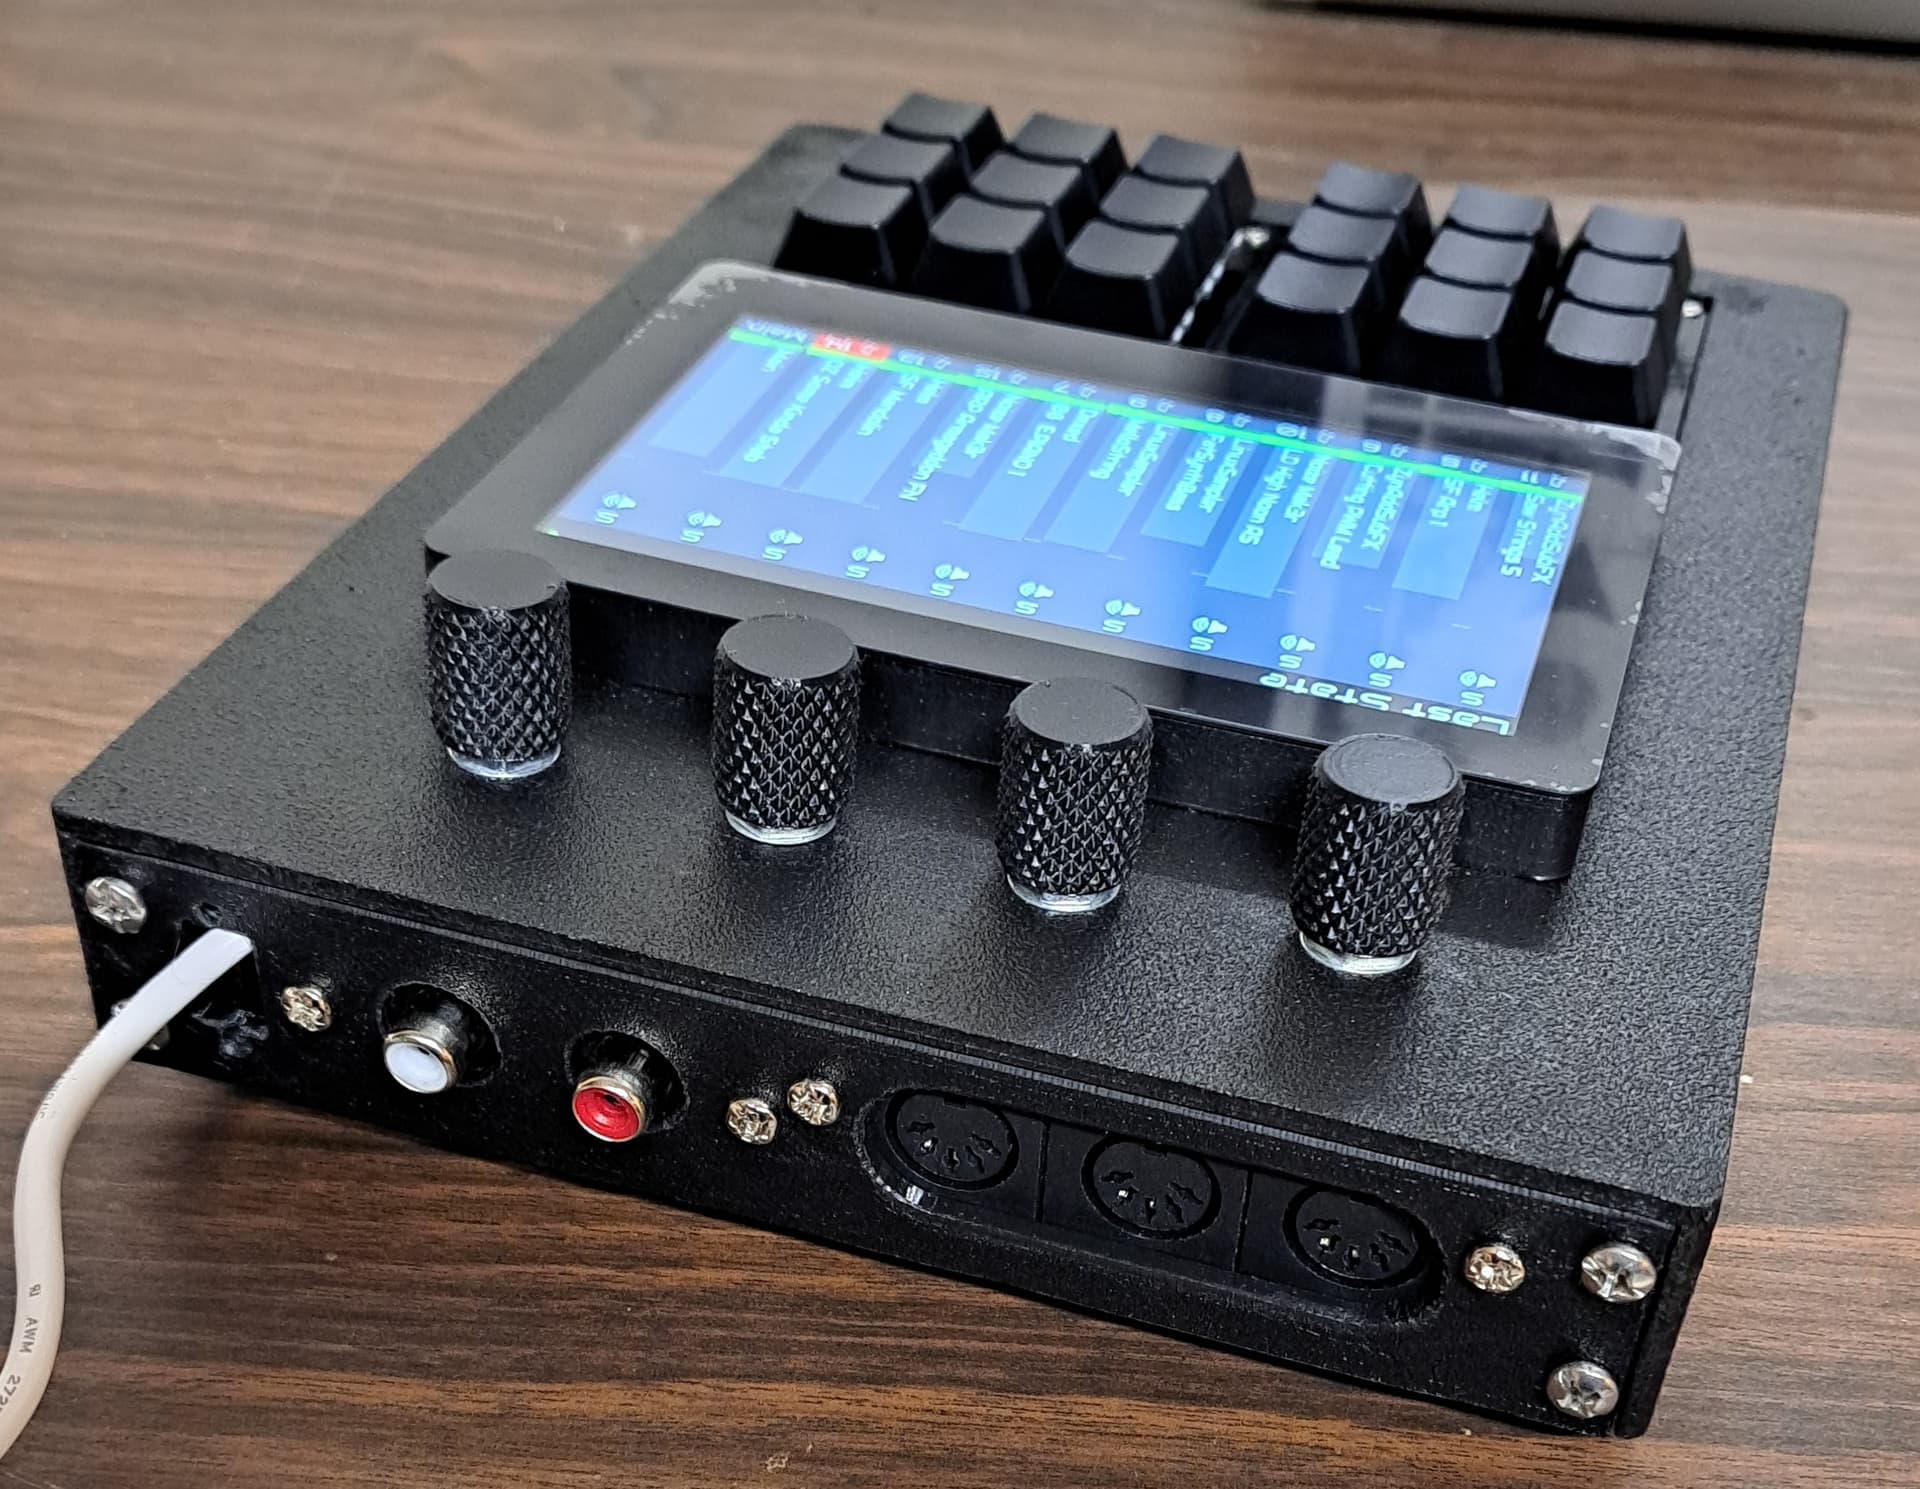
Case top is 3D printed in PETG, painted with Duratex speaker paint to give the texture. I machined the pi5 heatsink to allow a block of aluminium to make contact and touch the base which is 2mm aluminium sheet.
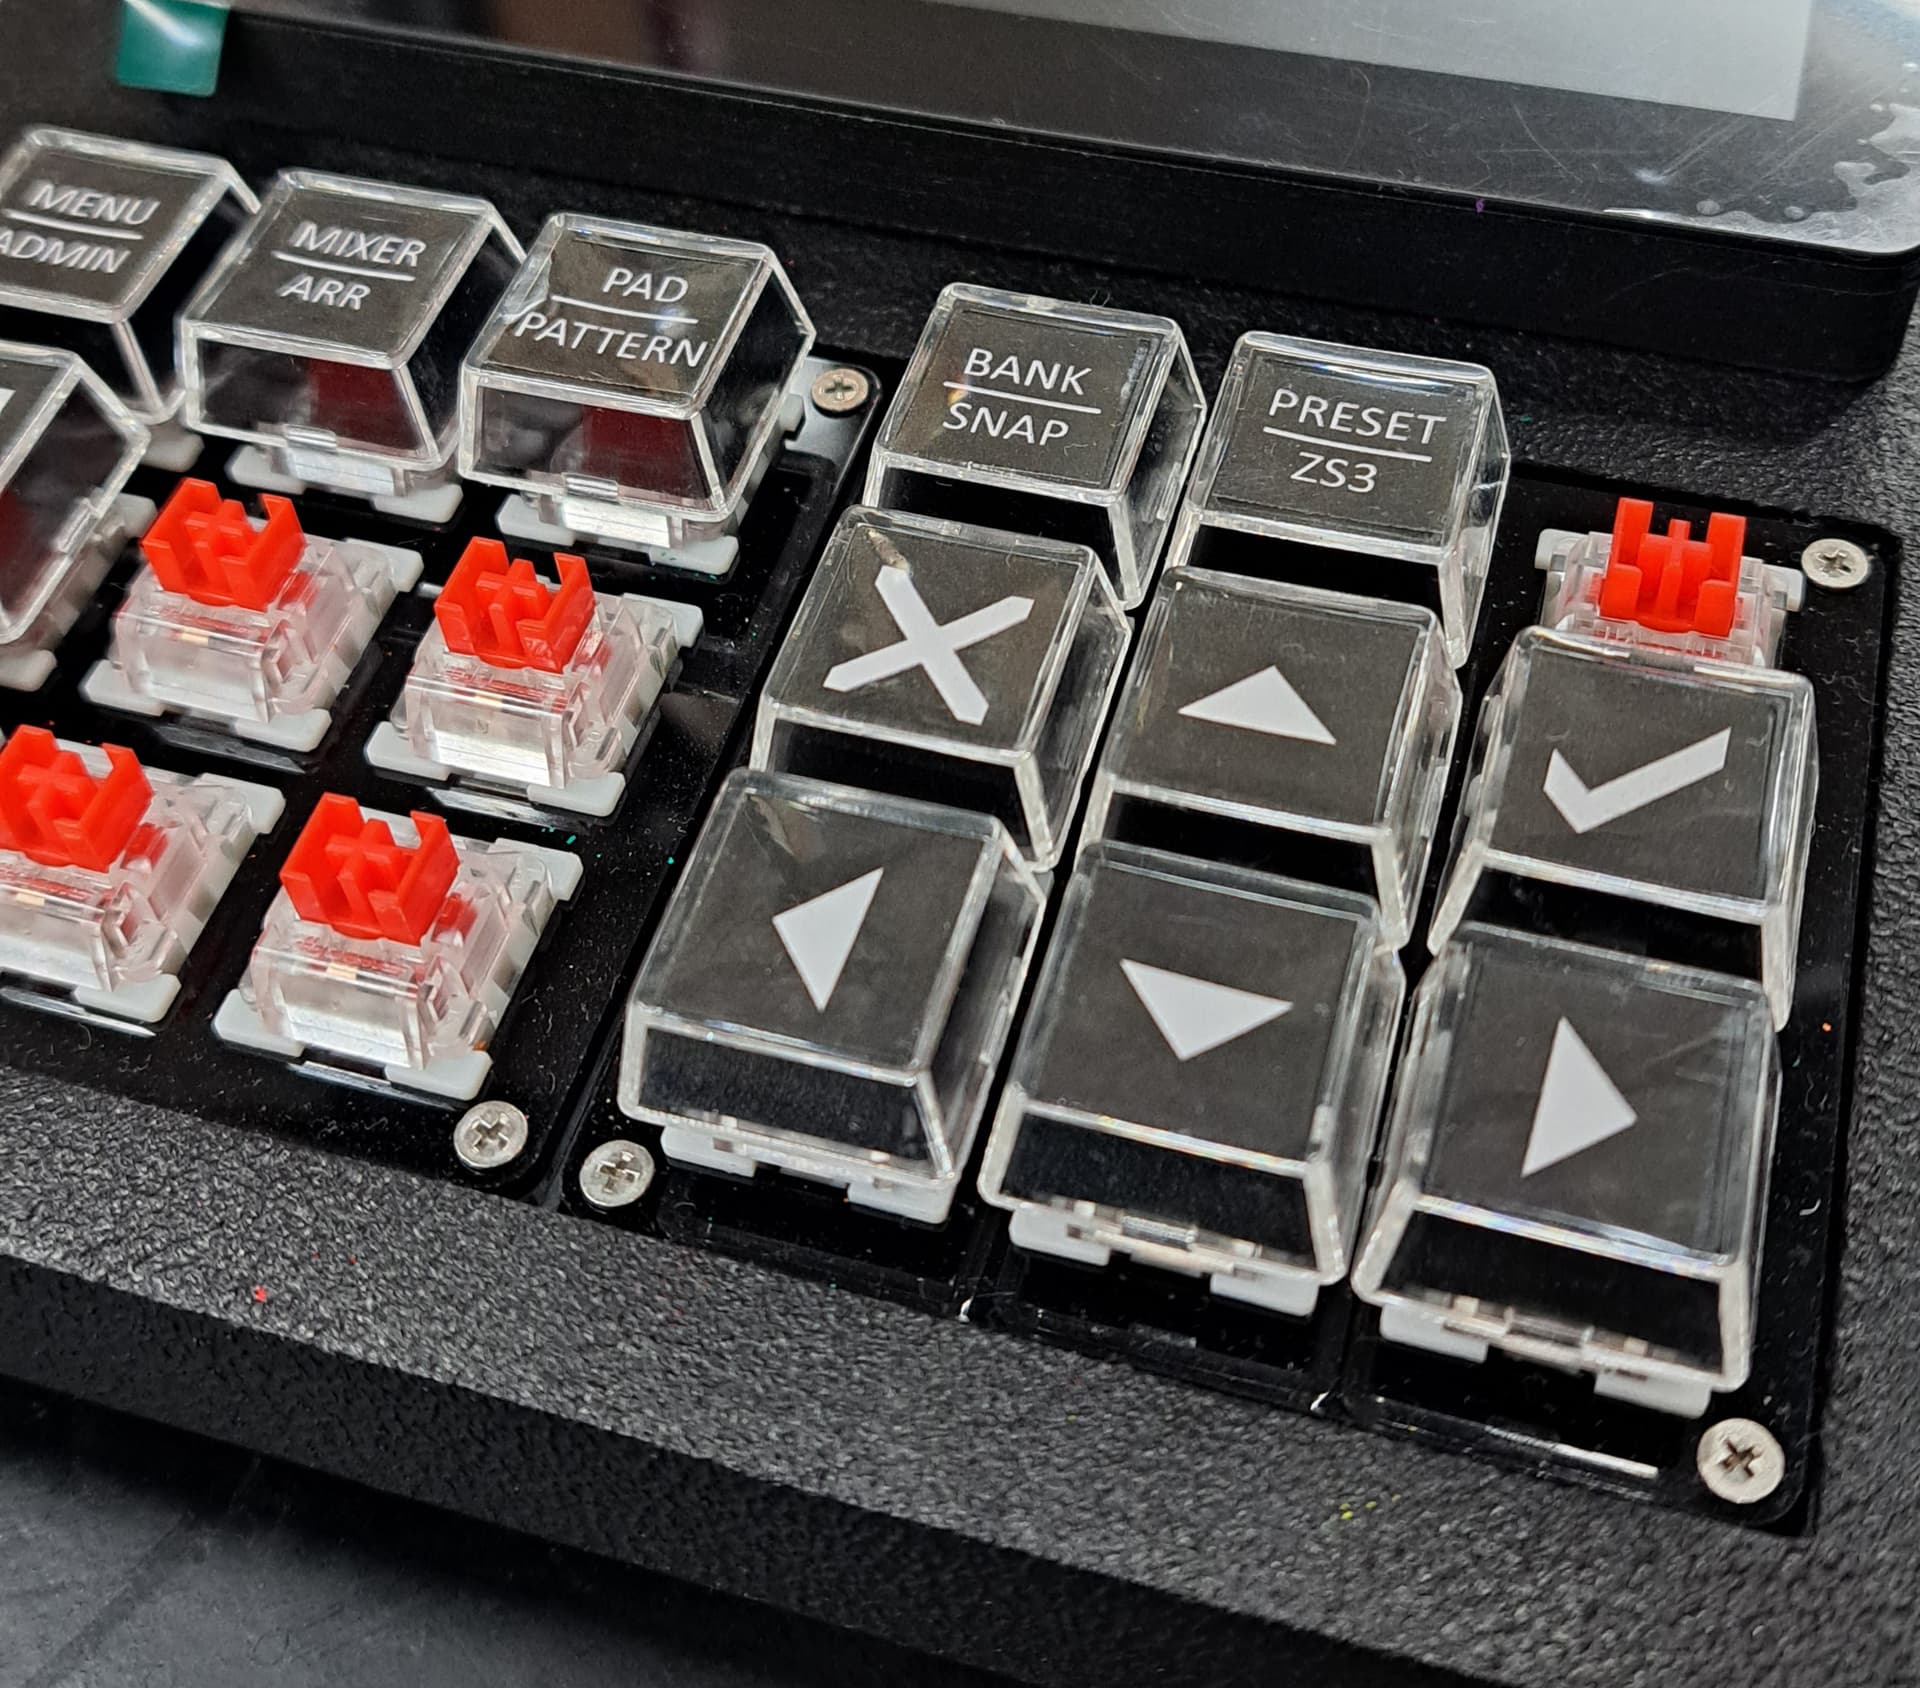
Replacing my hand painted keycaps with these ones. Black base with a clear cap. 12mmx12mm area inside. I’ve inkjet printed the labels on regular paper and cut out. More to do!