Success Cases

OMG! This zynthian recalls to my desktop computer. I will send you a photo on monday …
Congratulations, enjoy and of course, … :face_with_monocle:

1 Like

Damn @wyleu! I falled too … the illness is sticky!!

3 Likes

Hello Barnabas,
have always good trips with your brother and your zynthian !

Barnabas, nice case.

Try to go to the Elegoo page. I had to do research on my waveshare as well.
Or search the forum for rotate and touch.

Nice case!

Congrats to your brother :slight_smile:

Hi, everyone!
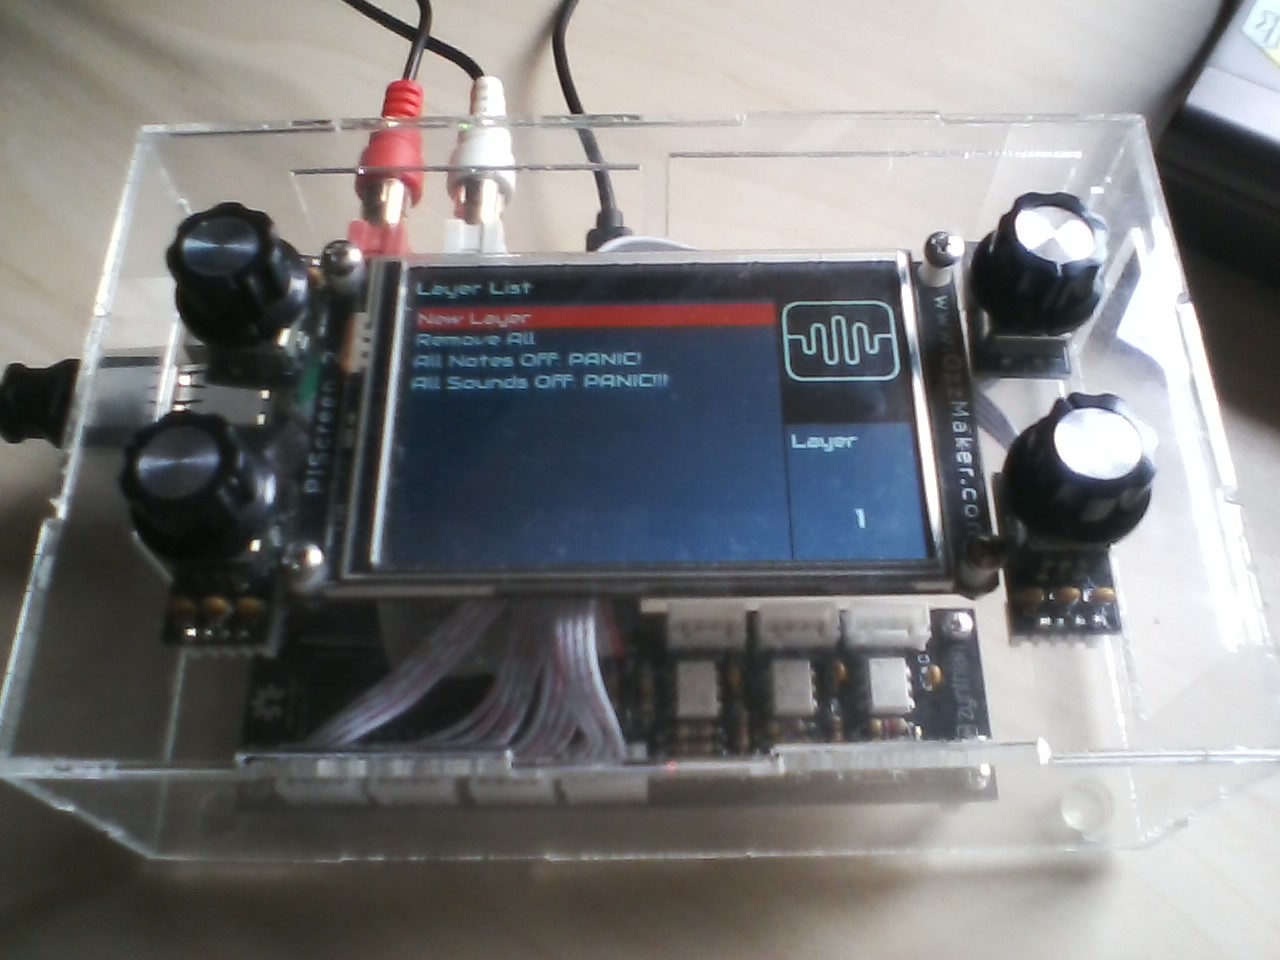
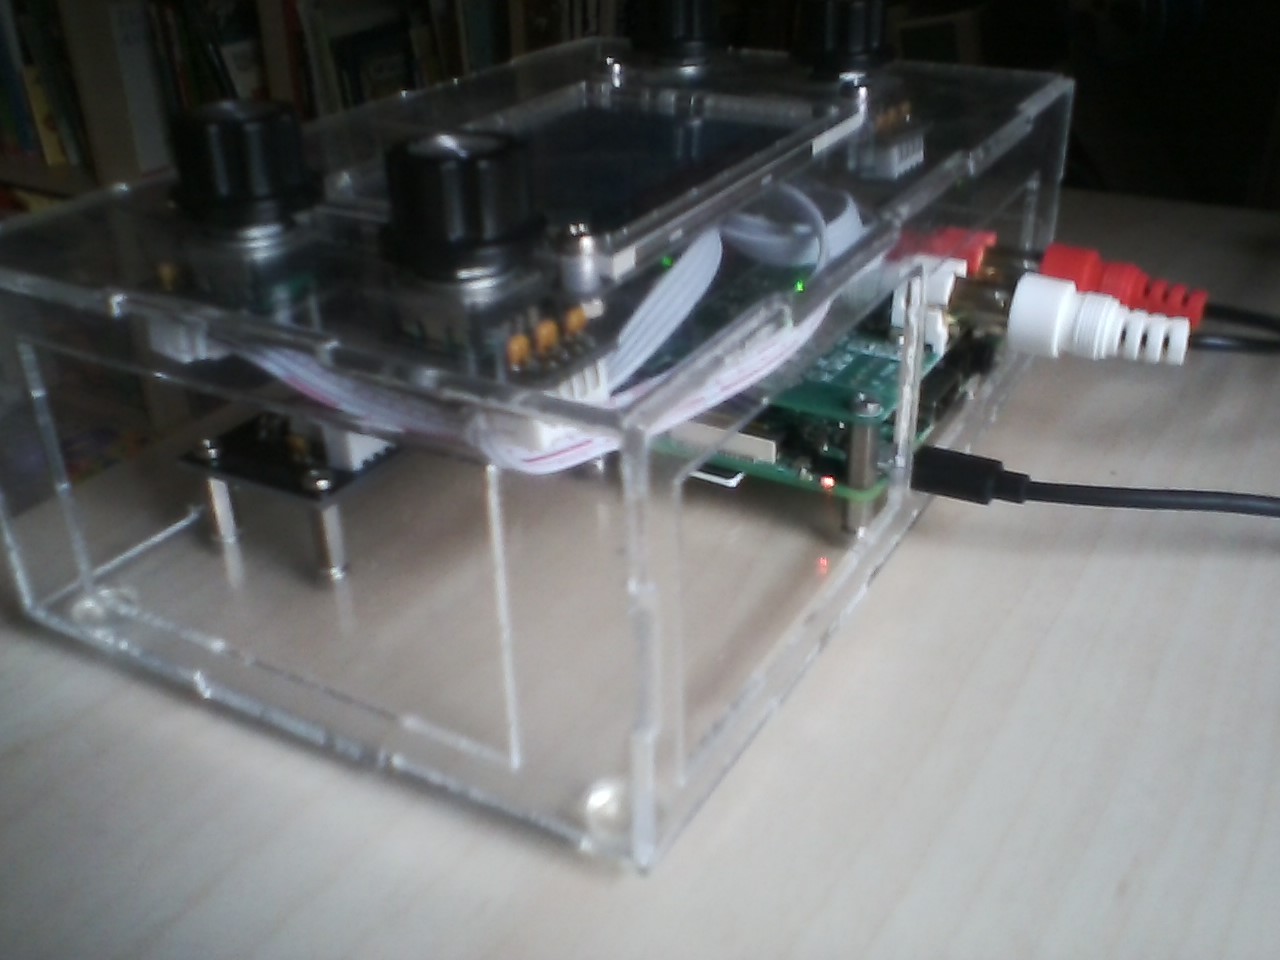
First time caller, long time listener! I bought a V2 Zynthian back in February. I built the case out of laser-cut acrylic.

Now, before Mr. @wyleu does that :face_with_monocle: thing to me…

10 Likes

Some notes on the music:

  • The sounds are all Zynthian-generated.
  • The sounds were synced/arranged/filtered/mastered in Ableton Live.

Enjoy!

4 Likes

Very nice! I love the anticipation of the build. Which voices did you use? The lead voice is particularly rich… And you deserve a :innocent:

2 Likes

Drums: SFZ > Drum Machines > Akai XR10.
Bass: ZynAddSubFX > Bass > Analogue Bass.
Arps: The only one I clearly remember is ZynAddSubFX > Collection > Sharp and Deep. There were more.
Main Lead: MOD-UI > Noize Mak3r > LD Neon Knife TUC.
Backup Lead: ZynAddSubFX > Collection > Overdrive.

3 Likes

Very nice!

Wonderful track and nice zynthian case, @Jtunes!

I just added it to the wiki’s Sound Demos section:

http://wiki.zynthian.org/index.php/Zynthian_Sound_Demos#Multi-Timbral_.2F_Multi-Layer_Demos

Congratulations!

1 Like

Several years ago my lovely wife brought me home a sick Yamaha P-60 which I lovingly disassembled and tried to repair. I managed to get the midi working (although the pcb was broken into three pieces), but I never managed to figure out what was wrong with the internal amp. Hence, it was silent and condemned to be a basic 88 key midi keyboard. Then, two years ago, I discovered the Zynthian. Immediately, I thought that the Zynthian would be a perfect way to breathe new life into the sad old P-60.
To get my feet wet in the Zynthian project, I first built a standalone Zynth and, more recently, some pedals and a switchbox. But my ultimate goal of resurrecting the P-60 never let me. Over the past few weeks, I’ve been retrofitting it with a RPi4-4GB based Zynth. Although the Zynth footprint is small and the P-60 case is large, there’s surprisingly little room for all the stuff! I even had to remove both speakers (which weren’t working anyway) from the P-60 to get all the components to fit. It’s still a work-in-progress, but I’m far enough along to share some photos:

Here’s a look at the 3.5" display retrofit into the P-60 case. I might still make some new knobs which better suit the aesthetics.

This is a view of the back i/o panels: on the left, midi thru, midi out and a midi connector for the switch box and to the right there are audio in and out jacks. For midi in, I soldered wires to the midi out on the P-60 pcb and routed them to the all-in-one board.

And now the stuff you hackers want to see: the guts.
To simplify the power connection, I installed a home mains power outlet into the P-60 to allow the wall-warts for both the P-60 and the RPi4 (it’s rather power hungry so it needs its own power source) to be plugged in. Now there’s only one cord from the P-60 to plug into the wall outlet and no wall-warts!


The RPi4 can be seen at the bottom standing on edge on the P-60 base (on a custom laser-cut mount). The audio card is an audioinjector. Unfortunately, there are no external connections to its volume controls at this time. The all-in-one board can be seen just below the screen. It’s mounted on a laser-cut base screwed into the speaker mounts. It’s an original all-in-one board to which I’ve added a wiring harness for the switch box.

I still have to figure out how to attach the display into the P-60 case. Right now it’s held in place with tape. And I need to check that all ios are functional. One other thing to investigate is the switch box wiring. My stand-alone Zynth had all 4 switches working, but only two are working on the P-60, even when switching out the two all-in-one boards. I’m running the stretch image on the standalone whereas the P-60 is on Buster. More investigation is required. I also have some wiring to tidy up. But it’s working! Can’t wait to load up some OB-X sounds and get one of my brood to play Jump! (Unfortunately, I don’t play keyboards or piano - but I have fun making noise - and building!)


12 Likes

I don’t have any nice photos yet (it looks exactly like it does on the web site anyway), but I do have a success case. I got the V3 Kit last week and built it in about an hour. I’ve been playing around with it since mostly controlling it through my Korg Electribe 2 Sampler or Zaquencer. The sound and diversity of synths, the hardware-like controls, and everything about it is very impressive. I’m having a ton of fun with it. There are a bunch of patches that make great starting places for drones and other parts of the kind of music I like to make.

If I can suggest a couple of additions based on my week’s experience. I’d love to see Amsynth (https://amsynth.github.io/) added as a synth engine. It’s a really easy to use subtractive synthesis engine. It has a ton of presets/patches, and is really easy to edit and write new patches. The control configuration seems like it would be pretty easy to adapt to the Zynthian too. The other addition I’d like to recommend is Giada (https://www.giadamusic.com/). I use a bunch of long samples in the music I’m making and it’s a great sample player/looper that I run on my laptop. It would be nice to have that built into the Zynthian too.

Anyway, even without these additions, the Zynthian is great and I’m looking forward to working with it for a long time.

Cheers,

Jim

2 Likes

That must generate a considerable sense of achievement! I particularly like the idea of re purposing keyboards like this as so much good stuff comes for free. In such circumstances it’s always nice to hear both how other people describe what you’ve done and the surprise that it can be done as well! It’s really nice to hear people explaining it on your behalf, and althou’ we all know that the praise of our closest partner is normally wrapped in several qualifiers, I suspect that your wife’s reaction would be very telling!!
Mind you Mrs Wyleu’s reactions would probably start with

1/ Why do we have to have that in the lounge ?
2/ Why did it take so long?

But then Mrs wyleu’s first reaction to music encountered in virtually any form is to turn it down, and glare at me… :slight_smile:

Well Done!!

2 Likes

Well Done , so open wide, say Rrrrrrrr and swallow this . . . … :face_with_monocle:

:smiley:

2 Likes

My fortune is that my wife is a musician :grin: so she is generally supportive and sometimes even brings me things like the old P-60 to fix. But point 2 is well appreciated.

2 Likes

I still have a synth, piano and digital piano (not working) in my living room and am frequently reminded that I cannot add to this collection. I need to put a Zynth inside the broken digital piano to make it useful. Similar story as @wolfpaw98 in that I got it gifted me and have managed to get MIDI working (by replacing the motherboard with a new self-programmed microprocessor).


Image: Before I started to fix it.

(I just dug out this picture and realised that it was taken in March 2018 so it has been 20 months - surely not too long?) My amp and speakers still work and there is much space so I should be able to fit this in. All I need is time. Anyone got any spare??? :wink: Maybe another project for Christmas break.

6 Likes

11 posts were split to a new topic: New Synth Engine: AMSynth

Road Worthy Zynth Done! (as much as any project could be.)
Custom DIY Zynth USB only, custom MCP_23017 circuit board, 7" official Pi Touch, RPi4. HiFi Berry DAC+. All items procured from Amazon…
Obligitory sound sample (Zynth only, 2 instruments one per keyboard controller)

Here it is in action at a practic session in the warehouse:


Studio style layout.

Side View with connectors: ELC, 1/4" Stereo out, 2x USB3, SD-Slot

Front Panel

Just in case, SD card access

Backside of front panel guts while building/experimenting:

Buttoned up case, ready to load-in for a gig.

Thanks to the Zynthian team for a great project!

15 Likes

My personal favorite feature on that thing is the power switch on the side. :+1: Very cool machine, @smiths73v3! Congrats!