Success Cases

Some notes on the music:

  • The sounds are all Zynthian-generated.
  • The sounds were synced/arranged/filtered/mastered in Ableton Live.

Enjoy!

4 Likes

Very nice! I love the anticipation of the build. Which voices did you use? The lead voice is particularly rich… And you deserve a :innocent:

2 Likes

Drums: SFZ > Drum Machines > Akai XR10.
Bass: ZynAddSubFX > Bass > Analogue Bass.
Arps: The only one I clearly remember is ZynAddSubFX > Collection > Sharp and Deep. There were more.
Main Lead: MOD-UI > Noize Mak3r > LD Neon Knife TUC.
Backup Lead: ZynAddSubFX > Collection > Overdrive.

3 Likes

Very nice!

Wonderful track and nice zynthian case, @Jtunes!

I just added it to the wiki’s Sound Demos section:

http://wiki.zynthian.org/index.php/Zynthian_Sound_Demos#Multi-Timbral_.2F_Multi-Layer_Demos

Congratulations!

1 Like

Several years ago my lovely wife brought me home a sick Yamaha P-60 which I lovingly disassembled and tried to repair. I managed to get the midi working (although the pcb was broken into three pieces), but I never managed to figure out what was wrong with the internal amp. Hence, it was silent and condemned to be a basic 88 key midi keyboard. Then, two years ago, I discovered the Zynthian. Immediately, I thought that the Zynthian would be a perfect way to breathe new life into the sad old P-60.
To get my feet wet in the Zynthian project, I first built a standalone Zynth and, more recently, some pedals and a switchbox. But my ultimate goal of resurrecting the P-60 never let me. Over the past few weeks, I’ve been retrofitting it with a RPi4-4GB based Zynth. Although the Zynth footprint is small and the P-60 case is large, there’s surprisingly little room for all the stuff! I even had to remove both speakers (which weren’t working anyway) from the P-60 to get all the components to fit. It’s still a work-in-progress, but I’m far enough along to share some photos:

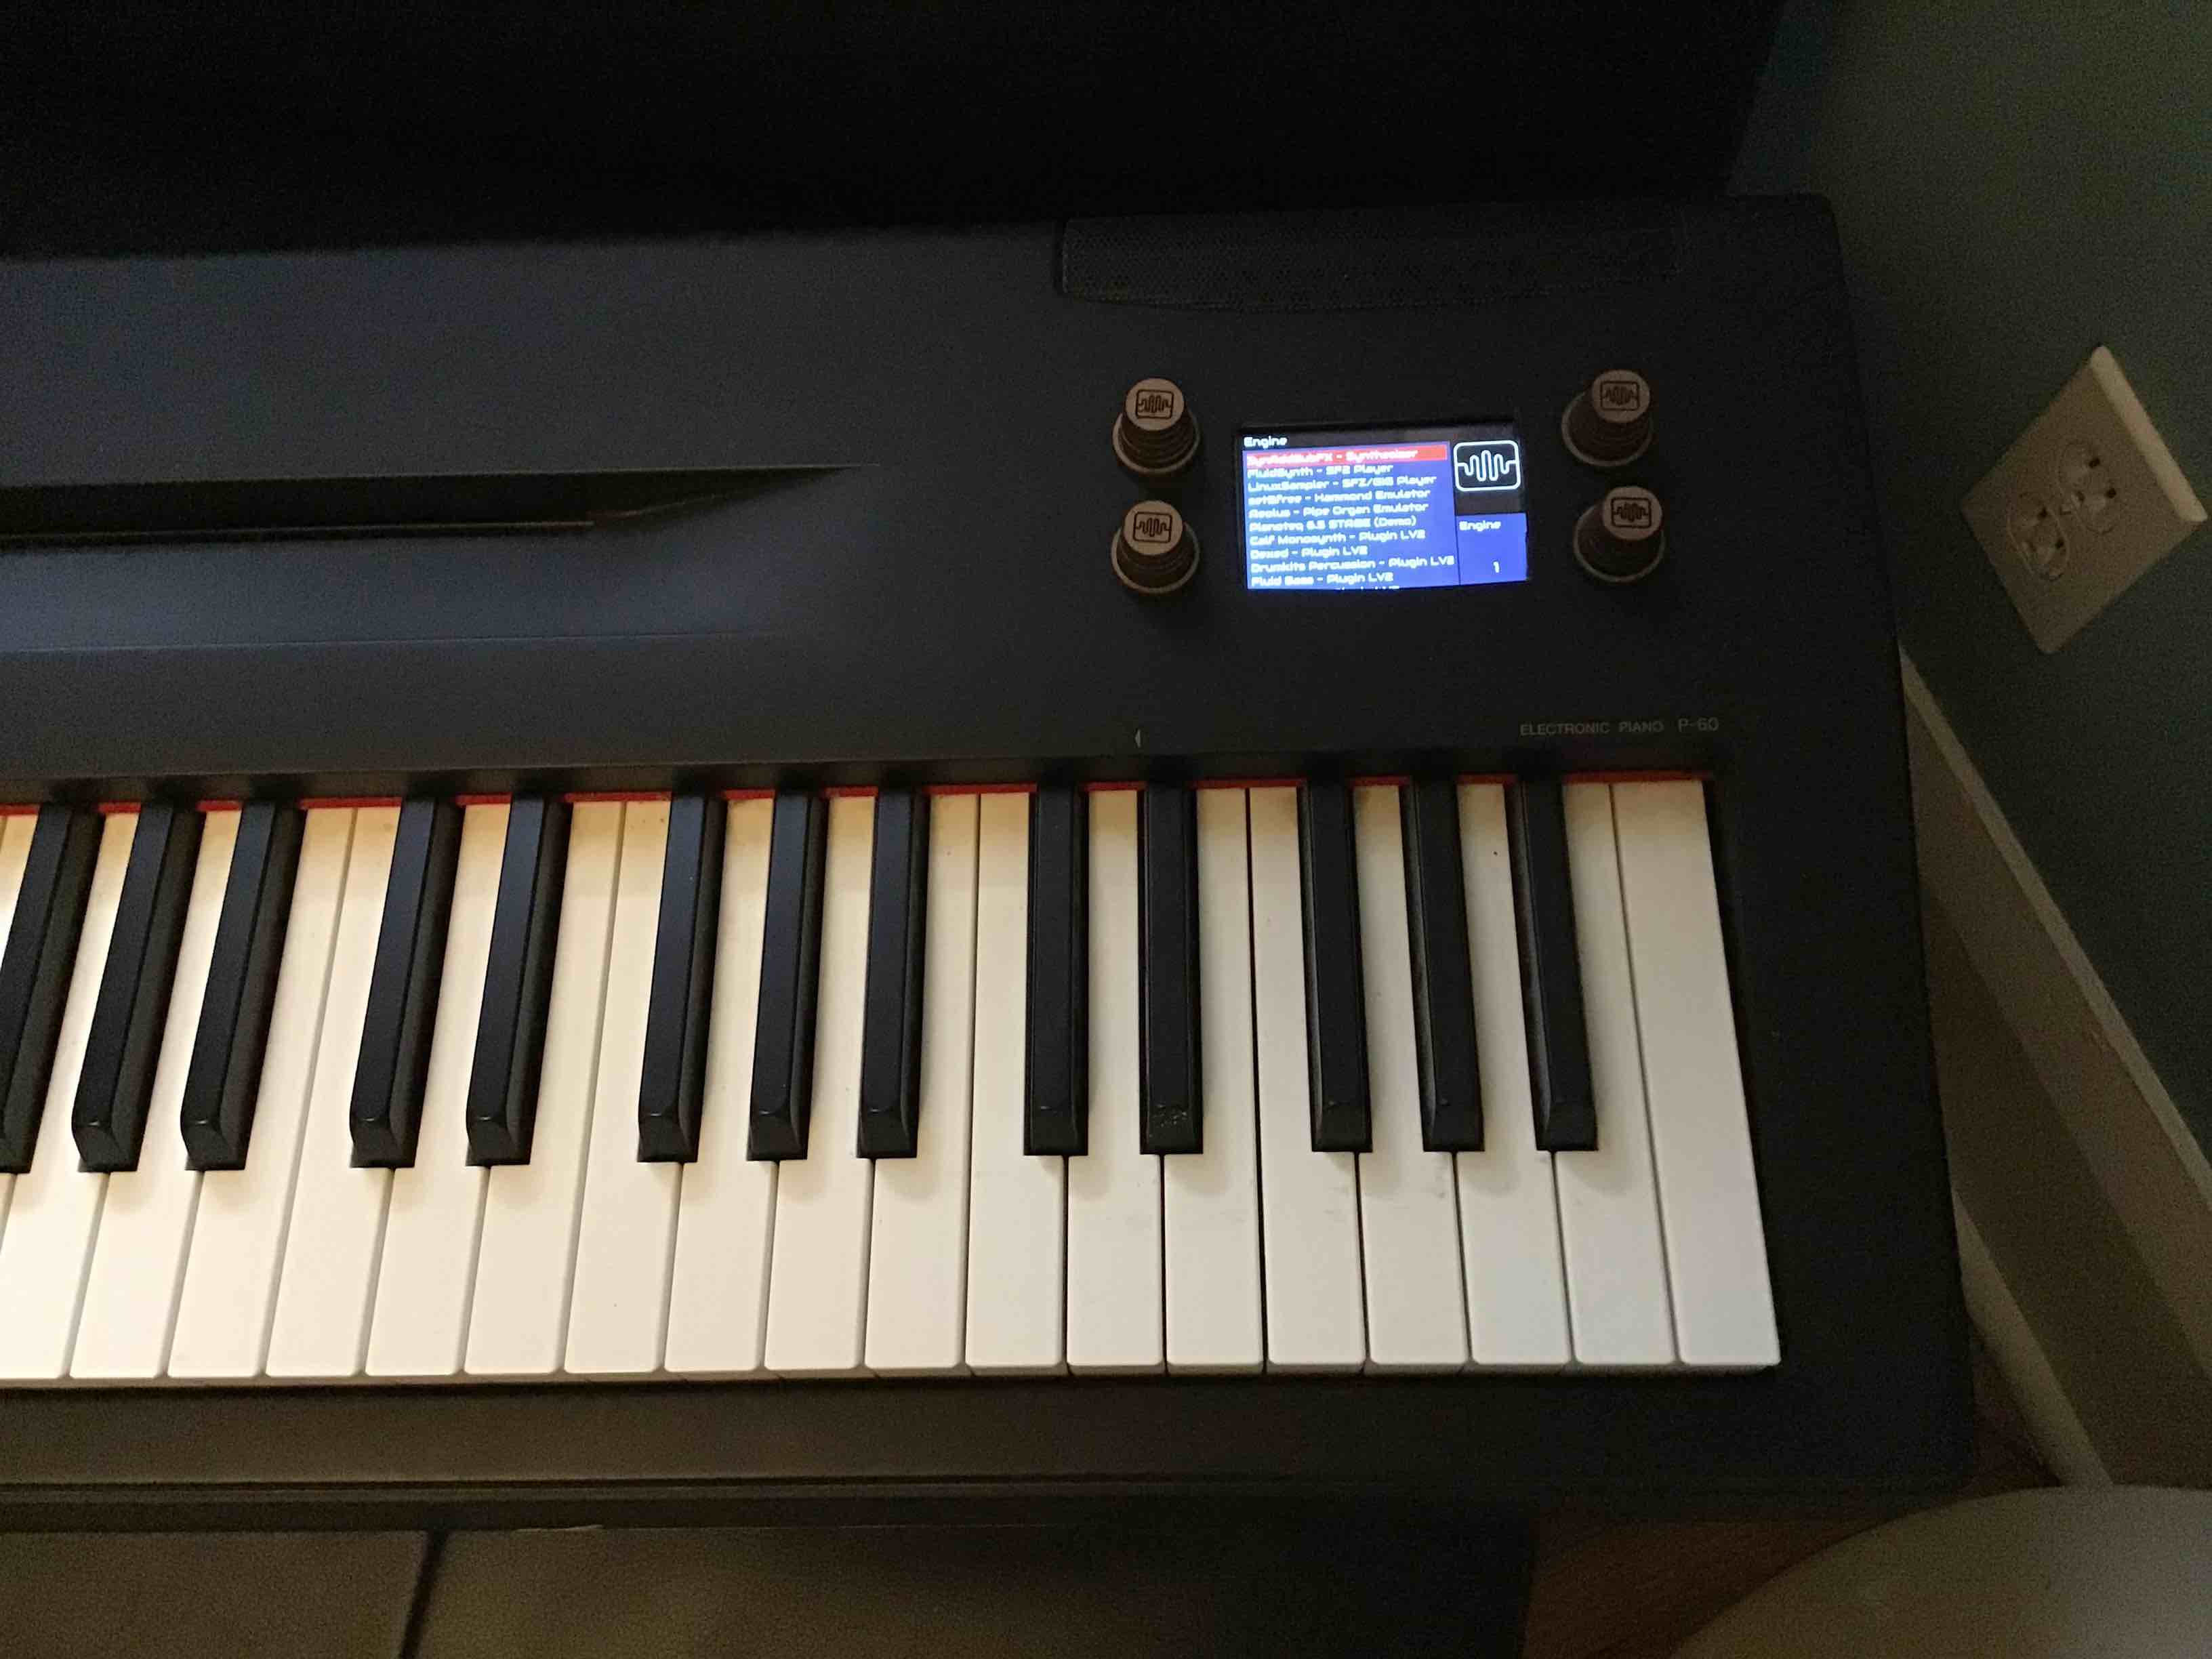
Here’s a look at the 3.5" display retrofit into the P-60 case. I might still make some new knobs which better suit the aesthetics.

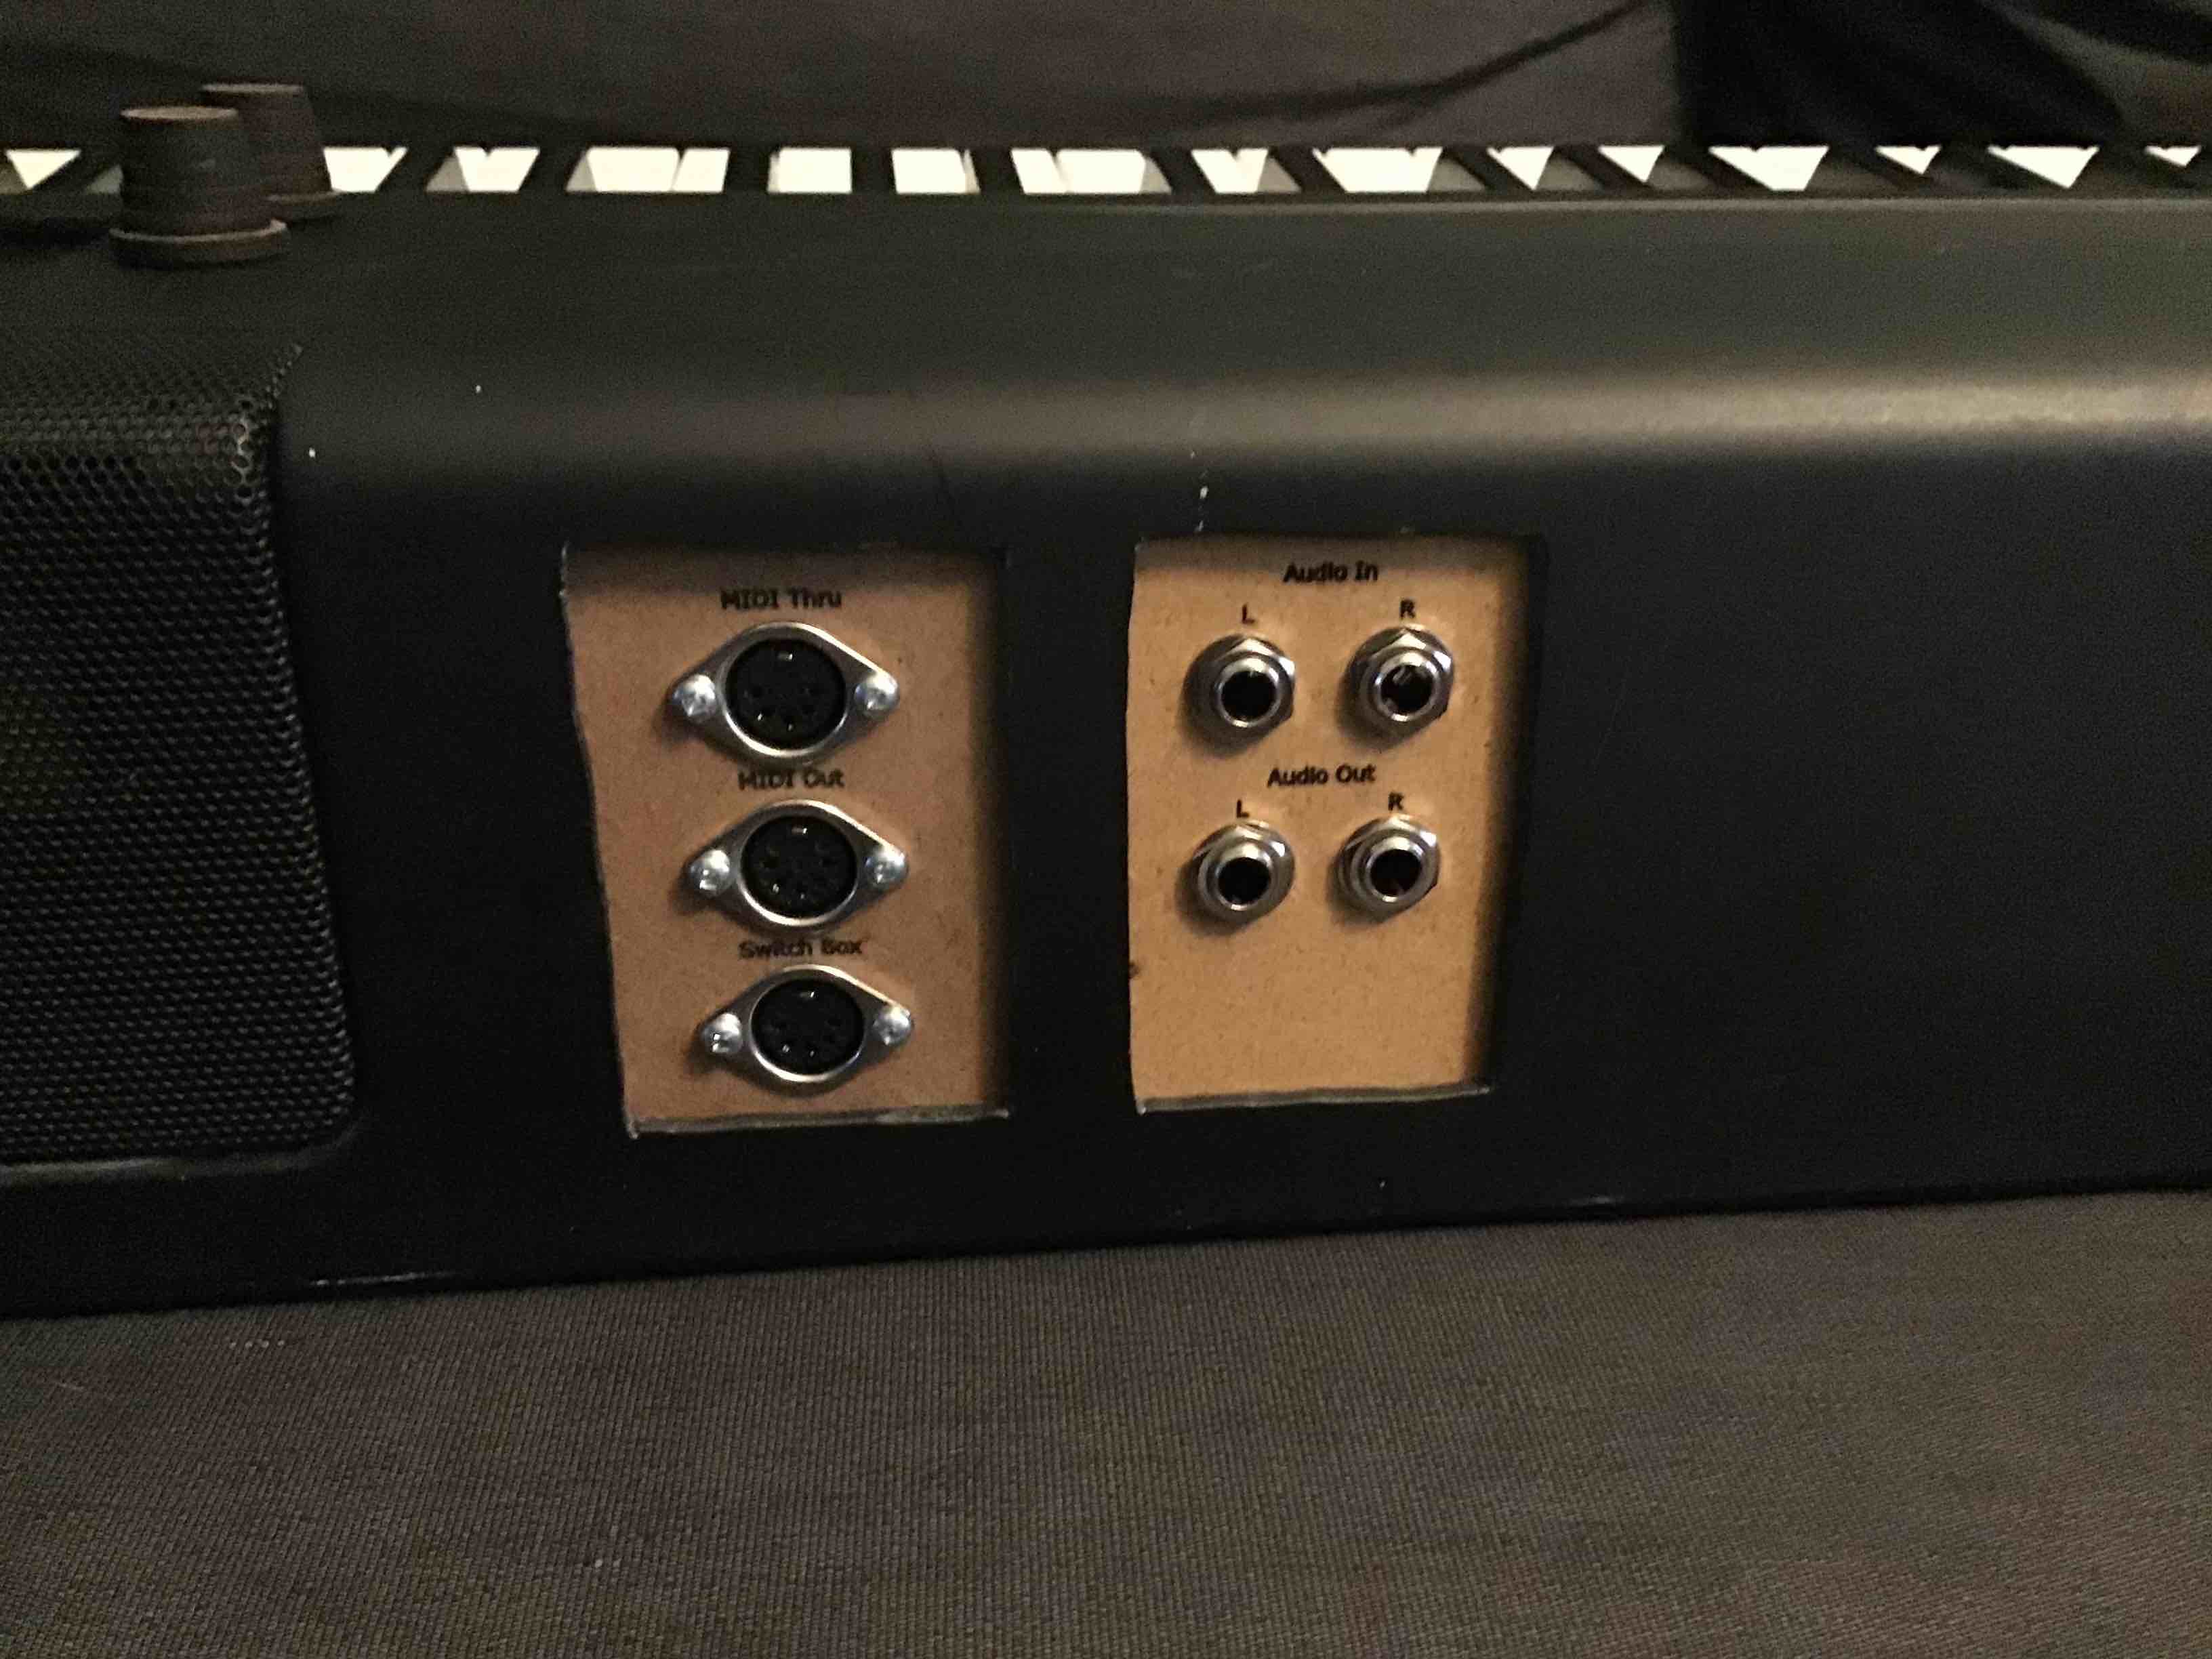
This is a view of the back i/o panels: on the left, midi thru, midi out and a midi connector for the switch box and to the right there are audio in and out jacks. For midi in, I soldered wires to the midi out on the P-60 pcb and routed them to the all-in-one board.

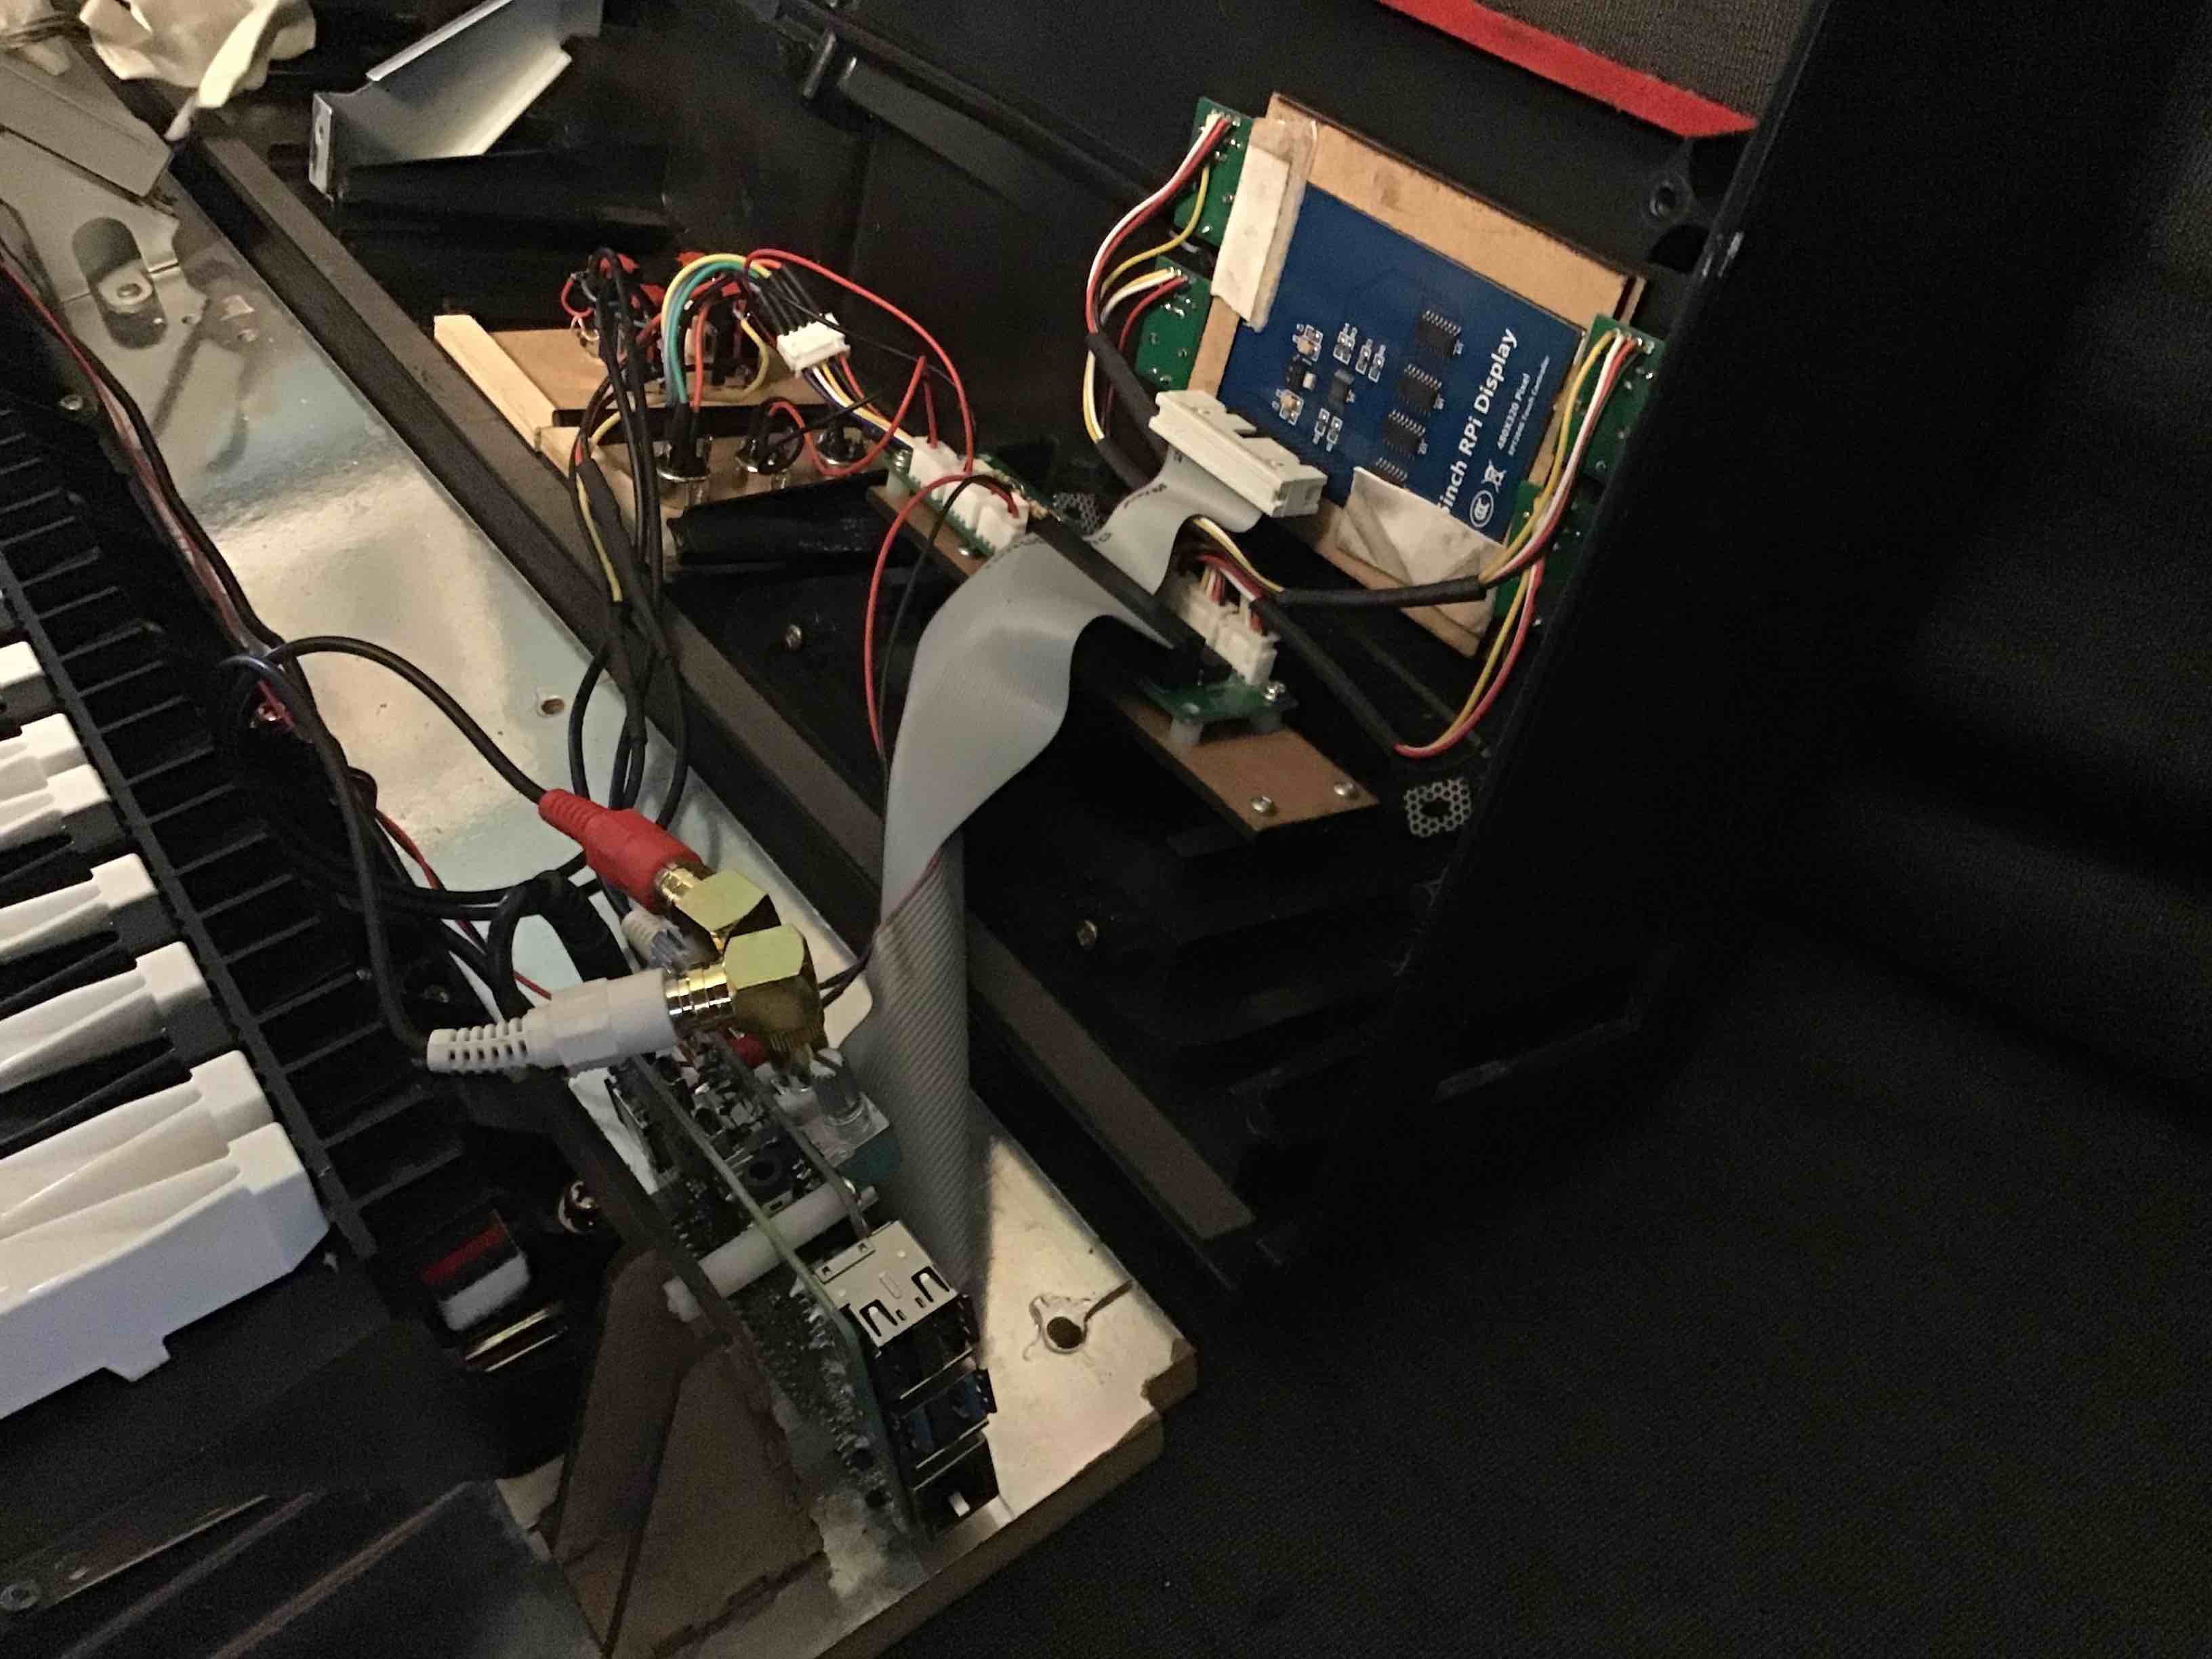
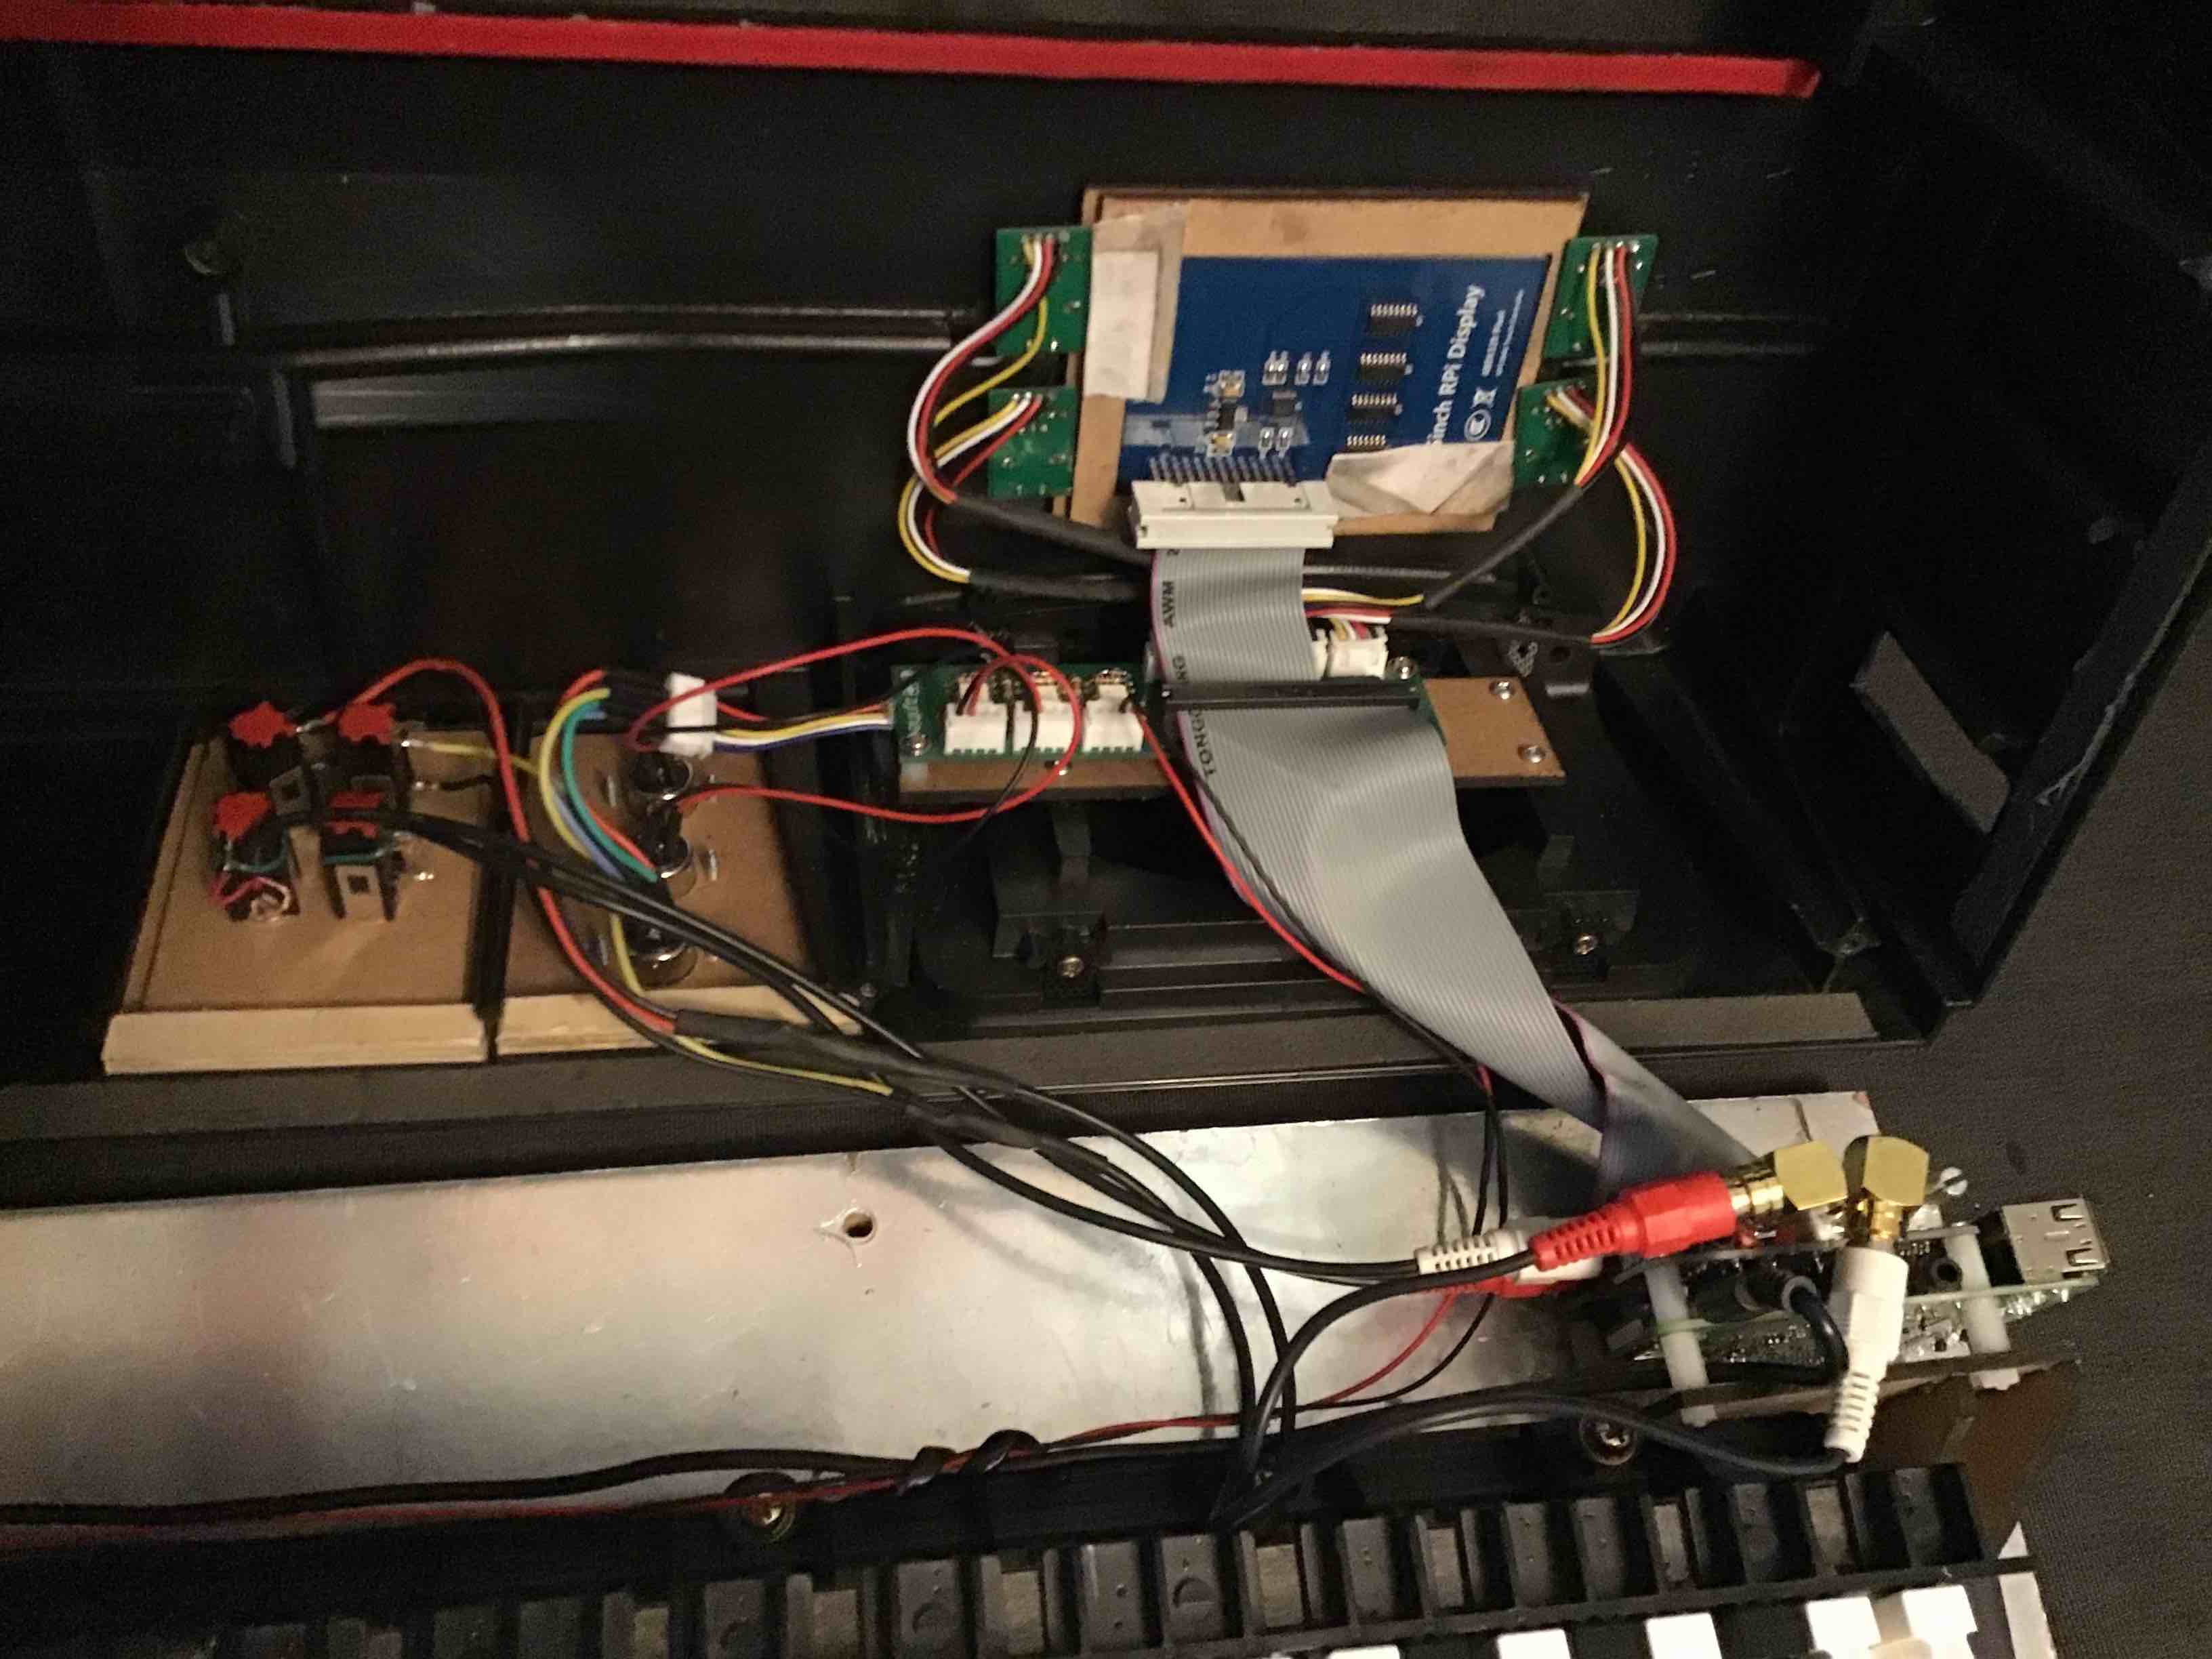
And now the stuff you hackers want to see: the guts.
To simplify the power connection, I installed a home mains power outlet into the P-60 to allow the wall-warts for both the P-60 and the RPi4 (it’s rather power hungry so it needs its own power source) to be plugged in. Now there’s only one cord from the P-60 to plug into the wall outlet and no wall-warts!


The RPi4 can be seen at the bottom standing on edge on the P-60 base (on a custom laser-cut mount). The audio card is an audioinjector. Unfortunately, there are no external connections to its volume controls at this time. The all-in-one board can be seen just below the screen. It’s mounted on a laser-cut base screwed into the speaker mounts. It’s an original all-in-one board to which I’ve added a wiring harness for the switch box.

I still have to figure out how to attach the display into the P-60 case. Right now it’s held in place with tape. And I need to check that all ios are functional. One other thing to investigate is the switch box wiring. My stand-alone Zynth had all 4 switches working, but only two are working on the P-60, even when switching out the two all-in-one boards. I’m running the stretch image on the standalone whereas the P-60 is on Buster. More investigation is required. I also have some wiring to tidy up. But it’s working! Can’t wait to load up some OB-X sounds and get one of my brood to play Jump! (Unfortunately, I don’t play keyboards or piano - but I have fun making noise - and building!)


12 Likes

I don’t have any nice photos yet (it looks exactly like it does on the web site anyway), but I do have a success case. I got the V3 Kit last week and built it in about an hour. I’ve been playing around with it since mostly controlling it through my Korg Electribe 2 Sampler or Zaquencer. The sound and diversity of synths, the hardware-like controls, and everything about it is very impressive. I’m having a ton of fun with it. There are a bunch of patches that make great starting places for drones and other parts of the kind of music I like to make.

If I can suggest a couple of additions based on my week’s experience. I’d love to see Amsynth (https://amsynth.github.io/) added as a synth engine. It’s a really easy to use subtractive synthesis engine. It has a ton of presets/patches, and is really easy to edit and write new patches. The control configuration seems like it would be pretty easy to adapt to the Zynthian too. The other addition I’d like to recommend is Giada (https://www.giadamusic.com/). I use a bunch of long samples in the music I’m making and it’s a great sample player/looper that I run on my laptop. It would be nice to have that built into the Zynthian too.

Anyway, even without these additions, the Zynthian is great and I’m looking forward to working with it for a long time.

Cheers,

Jim

2 Likes

That must generate a considerable sense of achievement! I particularly like the idea of re purposing keyboards like this as so much good stuff comes for free. In such circumstances it’s always nice to hear both how other people describe what you’ve done and the surprise that it can be done as well! It’s really nice to hear people explaining it on your behalf, and althou’ we all know that the praise of our closest partner is normally wrapped in several qualifiers, I suspect that your wife’s reaction would be very telling!!
Mind you Mrs Wyleu’s reactions would probably start with

1/ Why do we have to have that in the lounge ?
2/ Why did it take so long?

But then Mrs wyleu’s first reaction to music encountered in virtually any form is to turn it down, and glare at me… :slight_smile:

Well Done!!

2 Likes

Well Done , so open wide, say Rrrrrrrr and swallow this . . . … :face_with_monocle:

:smiley:

2 Likes

My fortune is that my wife is a musician :grin: so she is generally supportive and sometimes even brings me things like the old P-60 to fix. But point 2 is well appreciated.

2 Likes

I still have a synth, piano and digital piano (not working) in my living room and am frequently reminded that I cannot add to this collection. I need to put a Zynth inside the broken digital piano to make it useful. Similar story as @wolfpaw98 in that I got it gifted me and have managed to get MIDI working (by replacing the motherboard with a new self-programmed microprocessor).


Image: Before I started to fix it.

(I just dug out this picture and realised that it was taken in March 2018 so it has been 20 months - surely not too long?) My amp and speakers still work and there is much space so I should be able to fit this in. All I need is time. Anyone got any spare??? :wink: Maybe another project for Christmas break.

6 Likes

11 posts were split to a new topic: New Synth Engine: AMSynth

Road Worthy Zynth Done! (as much as any project could be.)
Custom DIY Zynth USB only, custom MCP_23017 circuit board, 7" official Pi Touch, RPi4. HiFi Berry DAC+. All items procured from Amazon…
Obligitory sound sample (Zynth only, 2 instruments one per keyboard controller)

Here it is in action at a practic session in the warehouse:


Studio style layout.

Side View with connectors: ELC, 1/4" Stereo out, 2x USB3, SD-Slot

Front Panel

Just in case, SD card access

Backside of front panel guts while building/experimenting:

Buttoned up case, ready to load-in for a gig.

Thanks to the Zynthian team for a great project!

15 Likes

My personal favorite feature on that thing is the power switch on the side. :+1: Very cool machine, @smiths73v3! Congrats!

Great job.

Love the case.

:slight_smile:

Hi, I just upgraded my V2-Kit to the latest raspberry Pi 4 B. Here is some report / pictures.

The performance of pianoteq is now so much better! After playing a while, cpu temperature rises to max. 65 °C ($ vcgencmd measure_temp).

The new image https://os.zynthian.org/ for Raspberry Pi 4B was taken from here, https://os.zynthian.org/2019-09-24-zynthianos-buster-lite-1.0.0-RC1.zip
Controllers didn’t work right away, because the default setting is Kit V3 instead of Kit V2.
After changing the setting via webconf tool to Kit V2, controllers still didn’t work, but a software update (triggered from zynthian menu) made them work.

Along with upgrading from Pi3B+ to Pi4B, I made some other changes:

  • modified the case to accomodate the different hdmi, power and usb / ethernet connections
  • added coaxial power connector
  • made wooden side elements and aluminum stand to give a more convenient viewing angle

One technical flaw resulting in undervoltage sign and a lot of clicks and glitches while playing pianoteq on raspberry pi 3 B+ was the poor power supply connection via micro USB. The power supply itself was capable of 3 Amperes, so that was fine. I soldered two wires to the respective “Test Pins” on the bottom of the raspberry Pi3B+. Now, power supply is very reliable, no undervoltage and not prone to mechanically loose contacts when touching the connector as it was the case for the micro USB power cable.

As that was very reliable, I made the same for the raspberry Pi4B, see following picture.

In my case, white cable is GND and brown cable is +5V. The other end of the cable goes to the coaxial power connector which you see in the aluminum case next to the original usb power connector. (Note: both connectors can still be used, but don’t power them at the same time as this could result in damaging your raspberry.)

The +5V Pins are labeled TP1, TP2 and TP3 on the board. You can chose any of them.
The GND-Pins are labeled TP7, TP8, TP9, TP12. Again, any of them is fine.

Here I compiled the information:

As for the case, though the original one is already very appealing, I thouhgt i looks a little bit ‘naked’, so I added two side panels and engraved them with the zynthian logo.

The attentive observer will notice that I accidently introduced a Pi phase shift in the right logo :sweat_smile:

There are no further mechanical modification needed for the original aluminum case. The case is held in place via the four screws on each side which kind of snap in to the respective dents in the wood.
The two wooden side panels are in turn held together by the aluminum plate.

Just an idea, some holes could be drilled into the bottom plates and a fan could be installed under the plate.


regards,
hal

13 Likes

Excellent work!!!
I have frequently looked at USB-C connectors and thought, 3 Amps yeah right!. It’s nice to have this confirmed or perhaps my prejudices tuned, either way I suspect you have implemented a hardware mod that will be copied by many of this slavishly devoted crew! I hereby christen it the hal mod! :prince:

You used a coaxial connector, I’ve found them pullout-able in a number of cases but the same is probably true for the Type C, so debate can rage! Would a decent steering diode in the coax line address the two power sources issue, or might the volts drop negate it ?

The Side panels are rather gorgeous! as the idea developed when did you realise you needed a hole for the usb, or did you start your thinking from there?
I don’t know if there’s any spec for space needed around a USB/Ethernet connector but I reckon it probably makes it easier to do simply by touch in the dark so that’s probably another win.
I’ve been looking a lot at display angle, and going back to the start of it all, the Mini moog model D made it a feature! when you see some of the suggested plastic cases they were going to wrap around it all, you have to admire the technical simplicity of the answer. So you’ve now got it adjustable by re-rendering ( is that a thing yet?) the mdf components, What kind of machine cut those out for you? I can’t look at and not think jigsaw, but that’s my age!

So congratulations it’s a thing of great beauty!

But there is, sadly, one outstanding issue. . .
After a cursory glance throu’ the dusty tomes in which we keep such ephemera, and ignoring your multiple false hits in the Van Halen Jump sample debacle, It appears that at no point have you uploaded any musical content :face_with_monocle:.

I will of course, as is customary, hand you the scroll :smiley:

Lovely piece of work!

Hi,

glad that you like it :blush:
Zynthian is such a cool project so it’s really fun to devote some time to it.

I also thought about a diode in the coax line but the lowest voltage drop is usually around 0.5 V, so that might be too much already.

It could be that the usb-c port provides a more reliable power-connection than the micro-usb on the old raspberry. I haven’t tried it out yet. Since I had already installed the DC socket, I continued to use it with the current rpi4.
By the way, there are also plugs with a safety nut:

lockplug

The hole in the side panel was considered right from the beginning. True, there needs to be some space around the plugs. I find all my USB-cables fitting, but on the other hand, it’s not that easy to pull out e.g. the wireless receiver for the keypad or to unlock the ethernet cable.

Your guess is right :slightly_smiling_face:, I made the panels using a jigsaw and I further processed it with a wood file and sandpaper. That would be an easy job for a wood cnc machine. For me, it took literally hours.

An audio contribution will follow very soon, promised :slight_smile:
regards, hal

3 Likes

My 19" Rack 1st try. Its ABS.
image

9 Likes

So I finally made my case - with mains PSU, silent 80mm fan to keep Pi4 cool and AudioInject Zero. If somebody likes it I have all .dxf files and shall gladly share (but no support whatsoever!!!).

18 Likes