Mains + battery-powered Zynthian with extended case
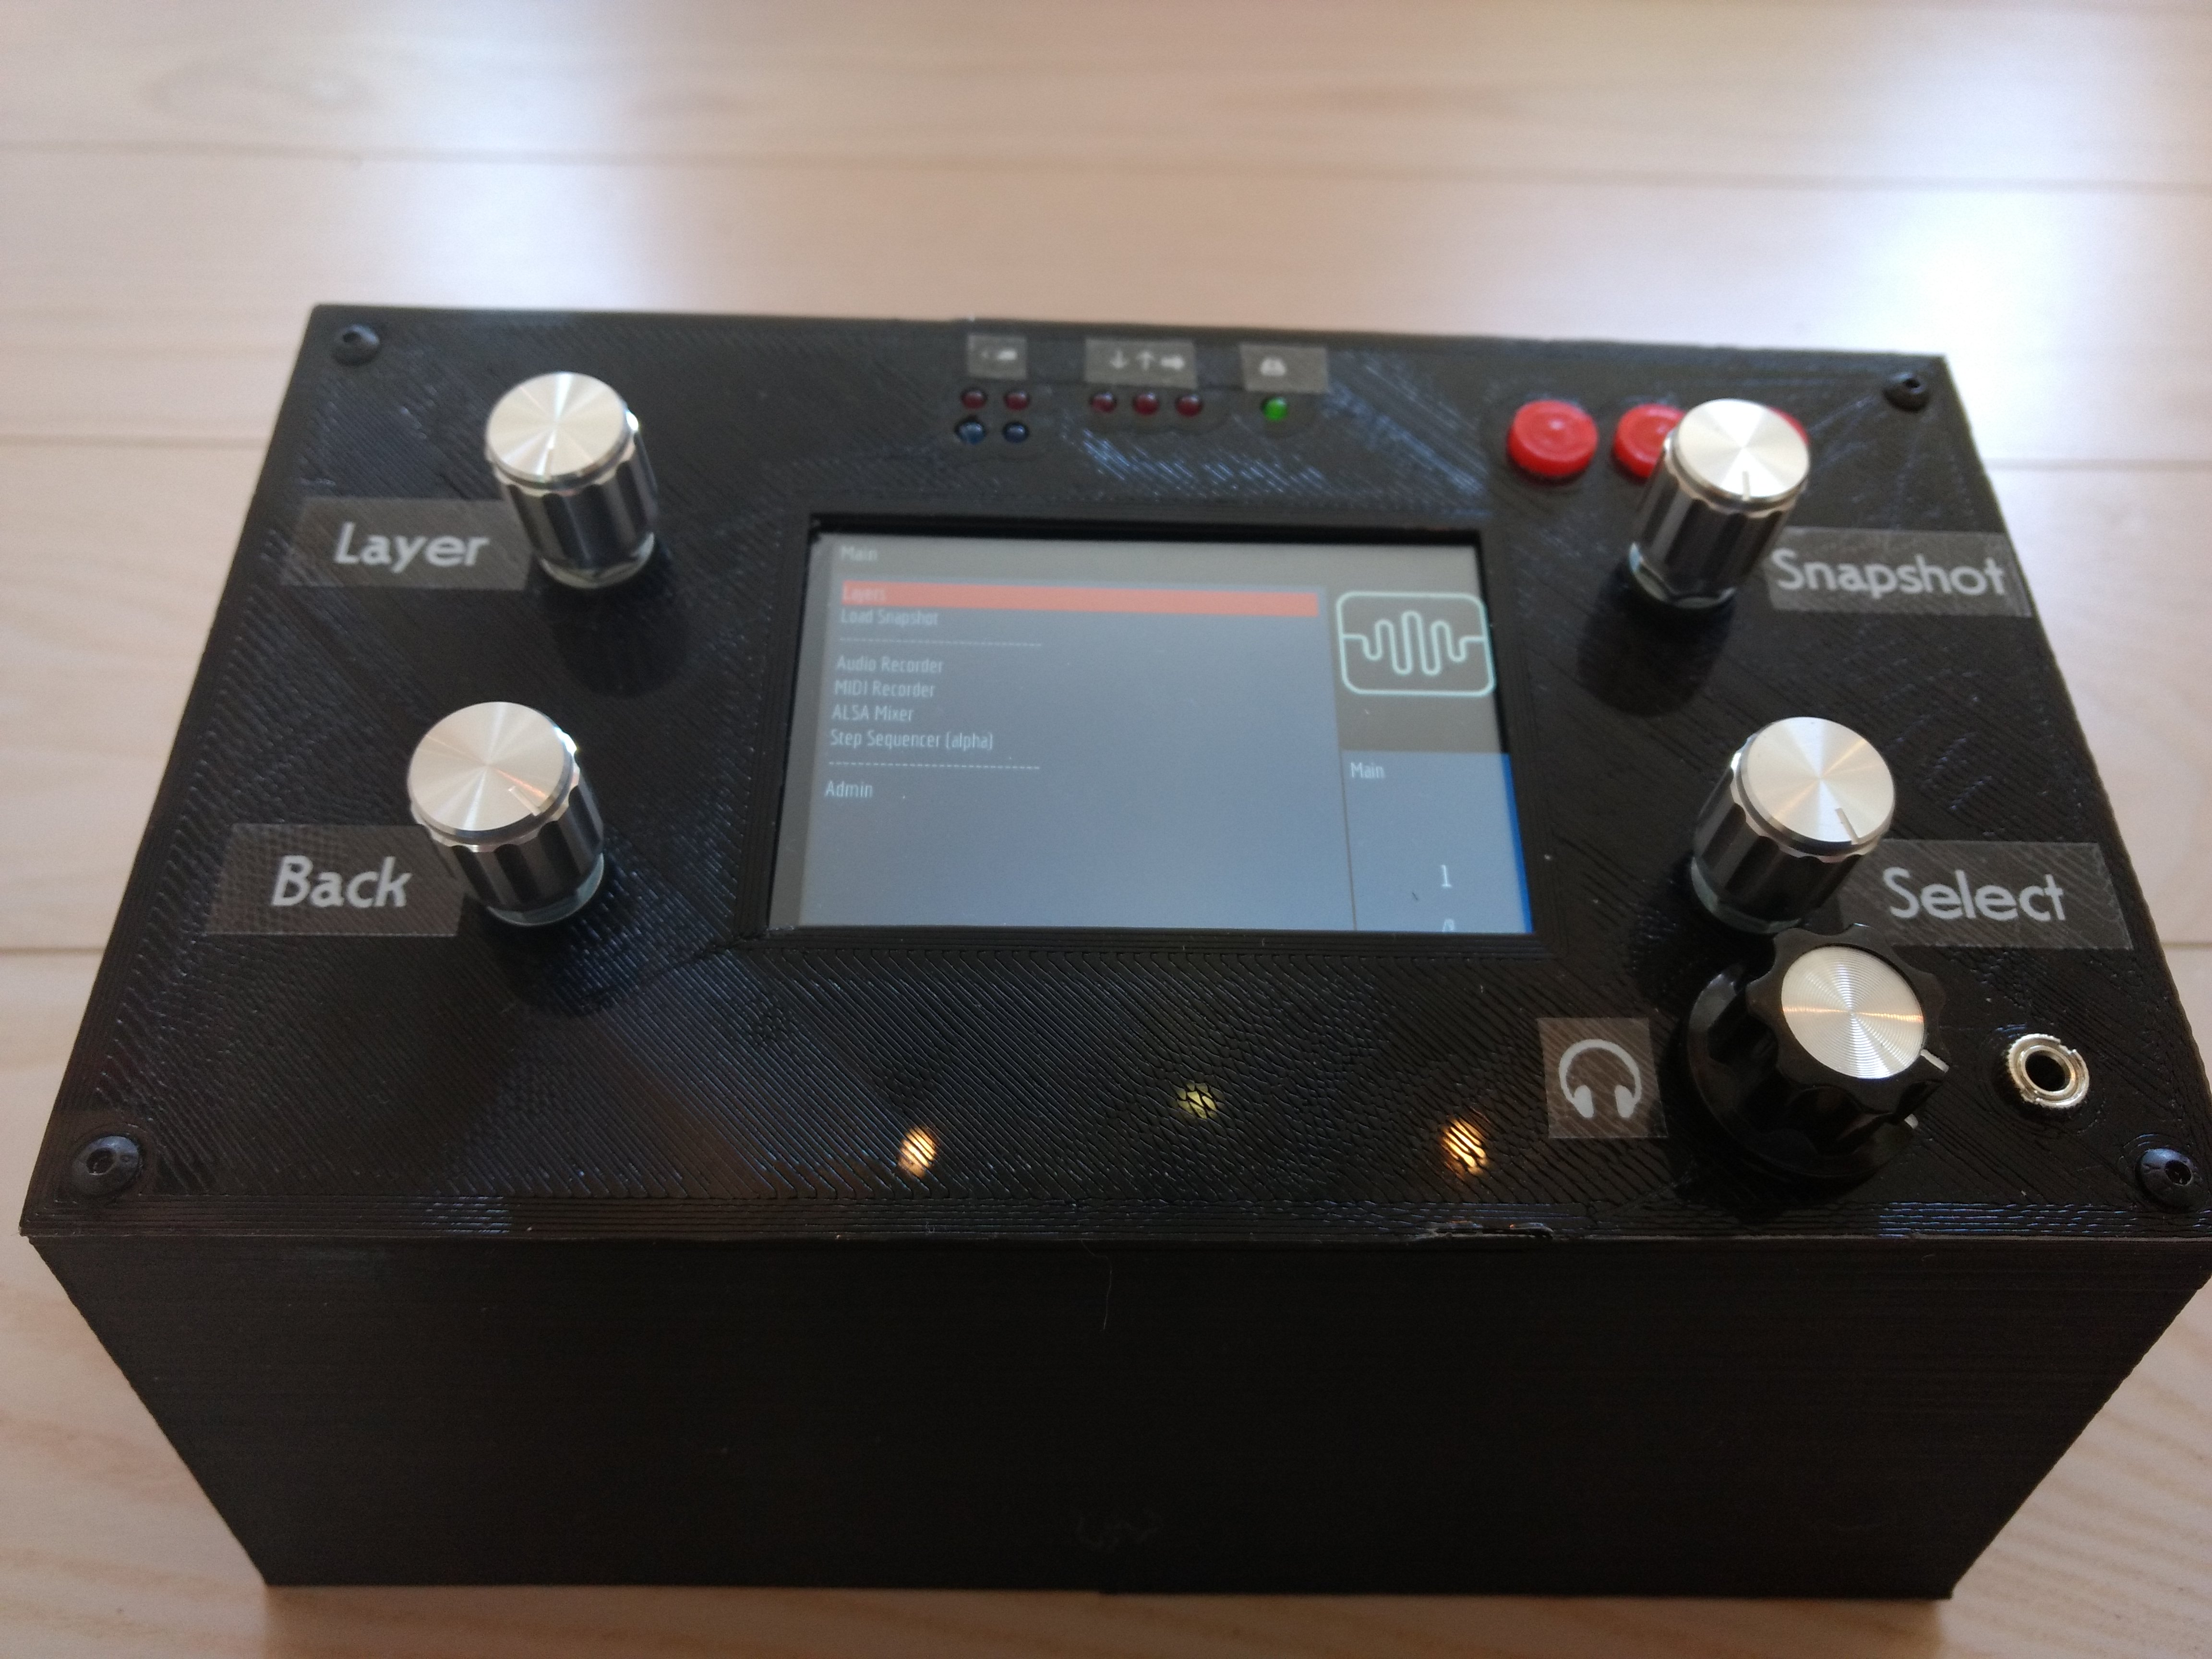
I’ve taken the usual standard Zynthian case as start, and remodelled it in OnShape here (needs an account to view), making the following modifications:
- Added 2x18650 LiPo batteries, with built-in 220V charger. Should run about 4 hours on batteries (~at 500mA, with 2x2000mAh capacity).
- Added buttons in the case for the 4 extra custom GPIO’s built into Zynaptik (3 buttons in the front, 1 in the back)
- Added a headphone amp and socket
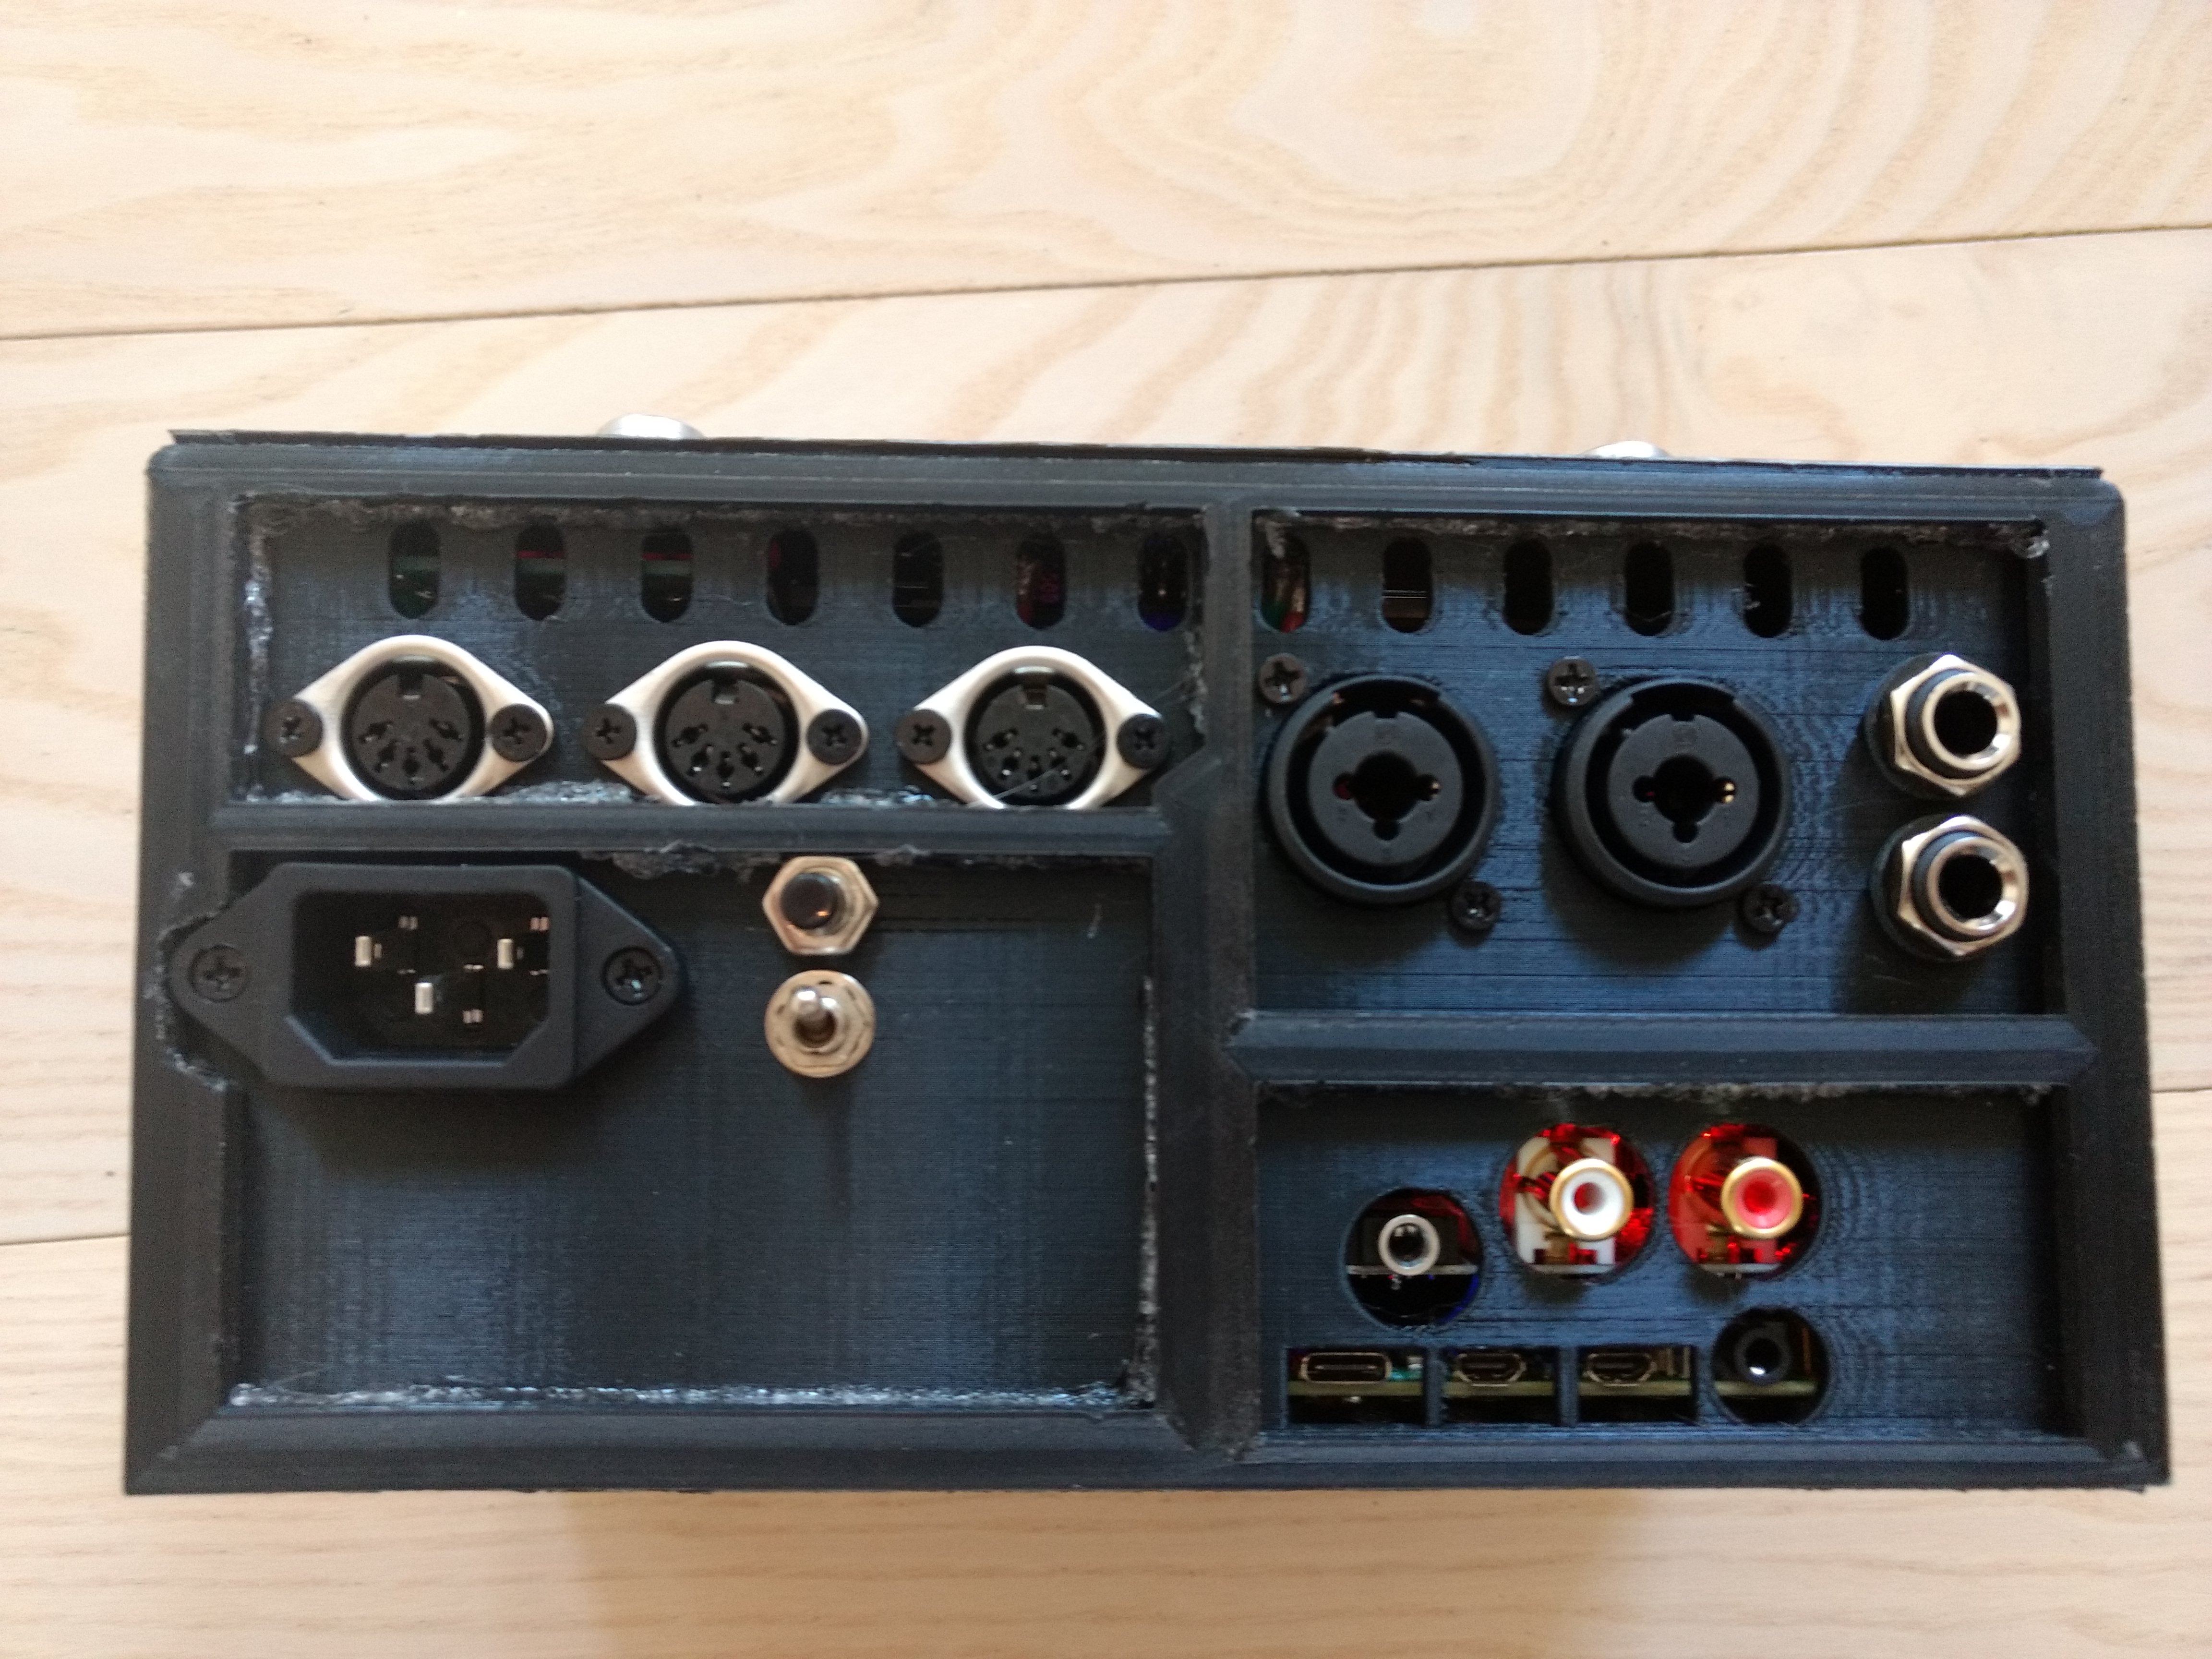
- Added balanced input sockets (XLR+jack)
- Added jack output sockets
- Moved MIDI activity lights to the front panel
- Added indicator lights for battery charging state and Raspberry PI activity
I can provide some pictures and descriptions of the internals if there’s interest 