![]()
![]()
![]()
4 Likes
Hi @dhrupadia_dad!
The best way to share while keeping your authorship & merit is making a github pull request to the zynthian-case repo:
- Fork the zynthian-case repo
- Add your folders/files
- Make a Pull Request
If you don’t want to follow this procedure, you can send me the files and i will do it for you, including an AUTHOR file inside the subfolder. But … i really prefer the first method ![]()
Thanks a lot for sharing!!
1 Like
Nobody wants to try to make a hybrid case for the Zynthian together with the mini keys keyboard controller? 

The best candidate for the keyboard I see the Midiplus Mini X series (I personally owe three of them - X2, X3 and X6). And it’s my dream to have it together with the Zynthian in one case… Black-orange of course 
2 Likes
I suspect it will be good audio sample … ![]()
![]()
1 Like
finally recorded some audio output 
5 Likes
Awesome case!
Great work
1 Like
Woah! A great job!
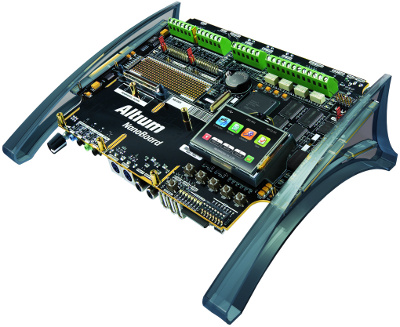
This fantastic case reminded me the “case” of the FPGA dev. board I loved most: the Altium Nanoboard 3000. Essential, but beautiful in its own way.
5 Likes
Hi @zynthianers!
@dhrupadia_dad sent to me the design files and ask me to upload to the github repository, so i did:
Enjoy!
3 Likes
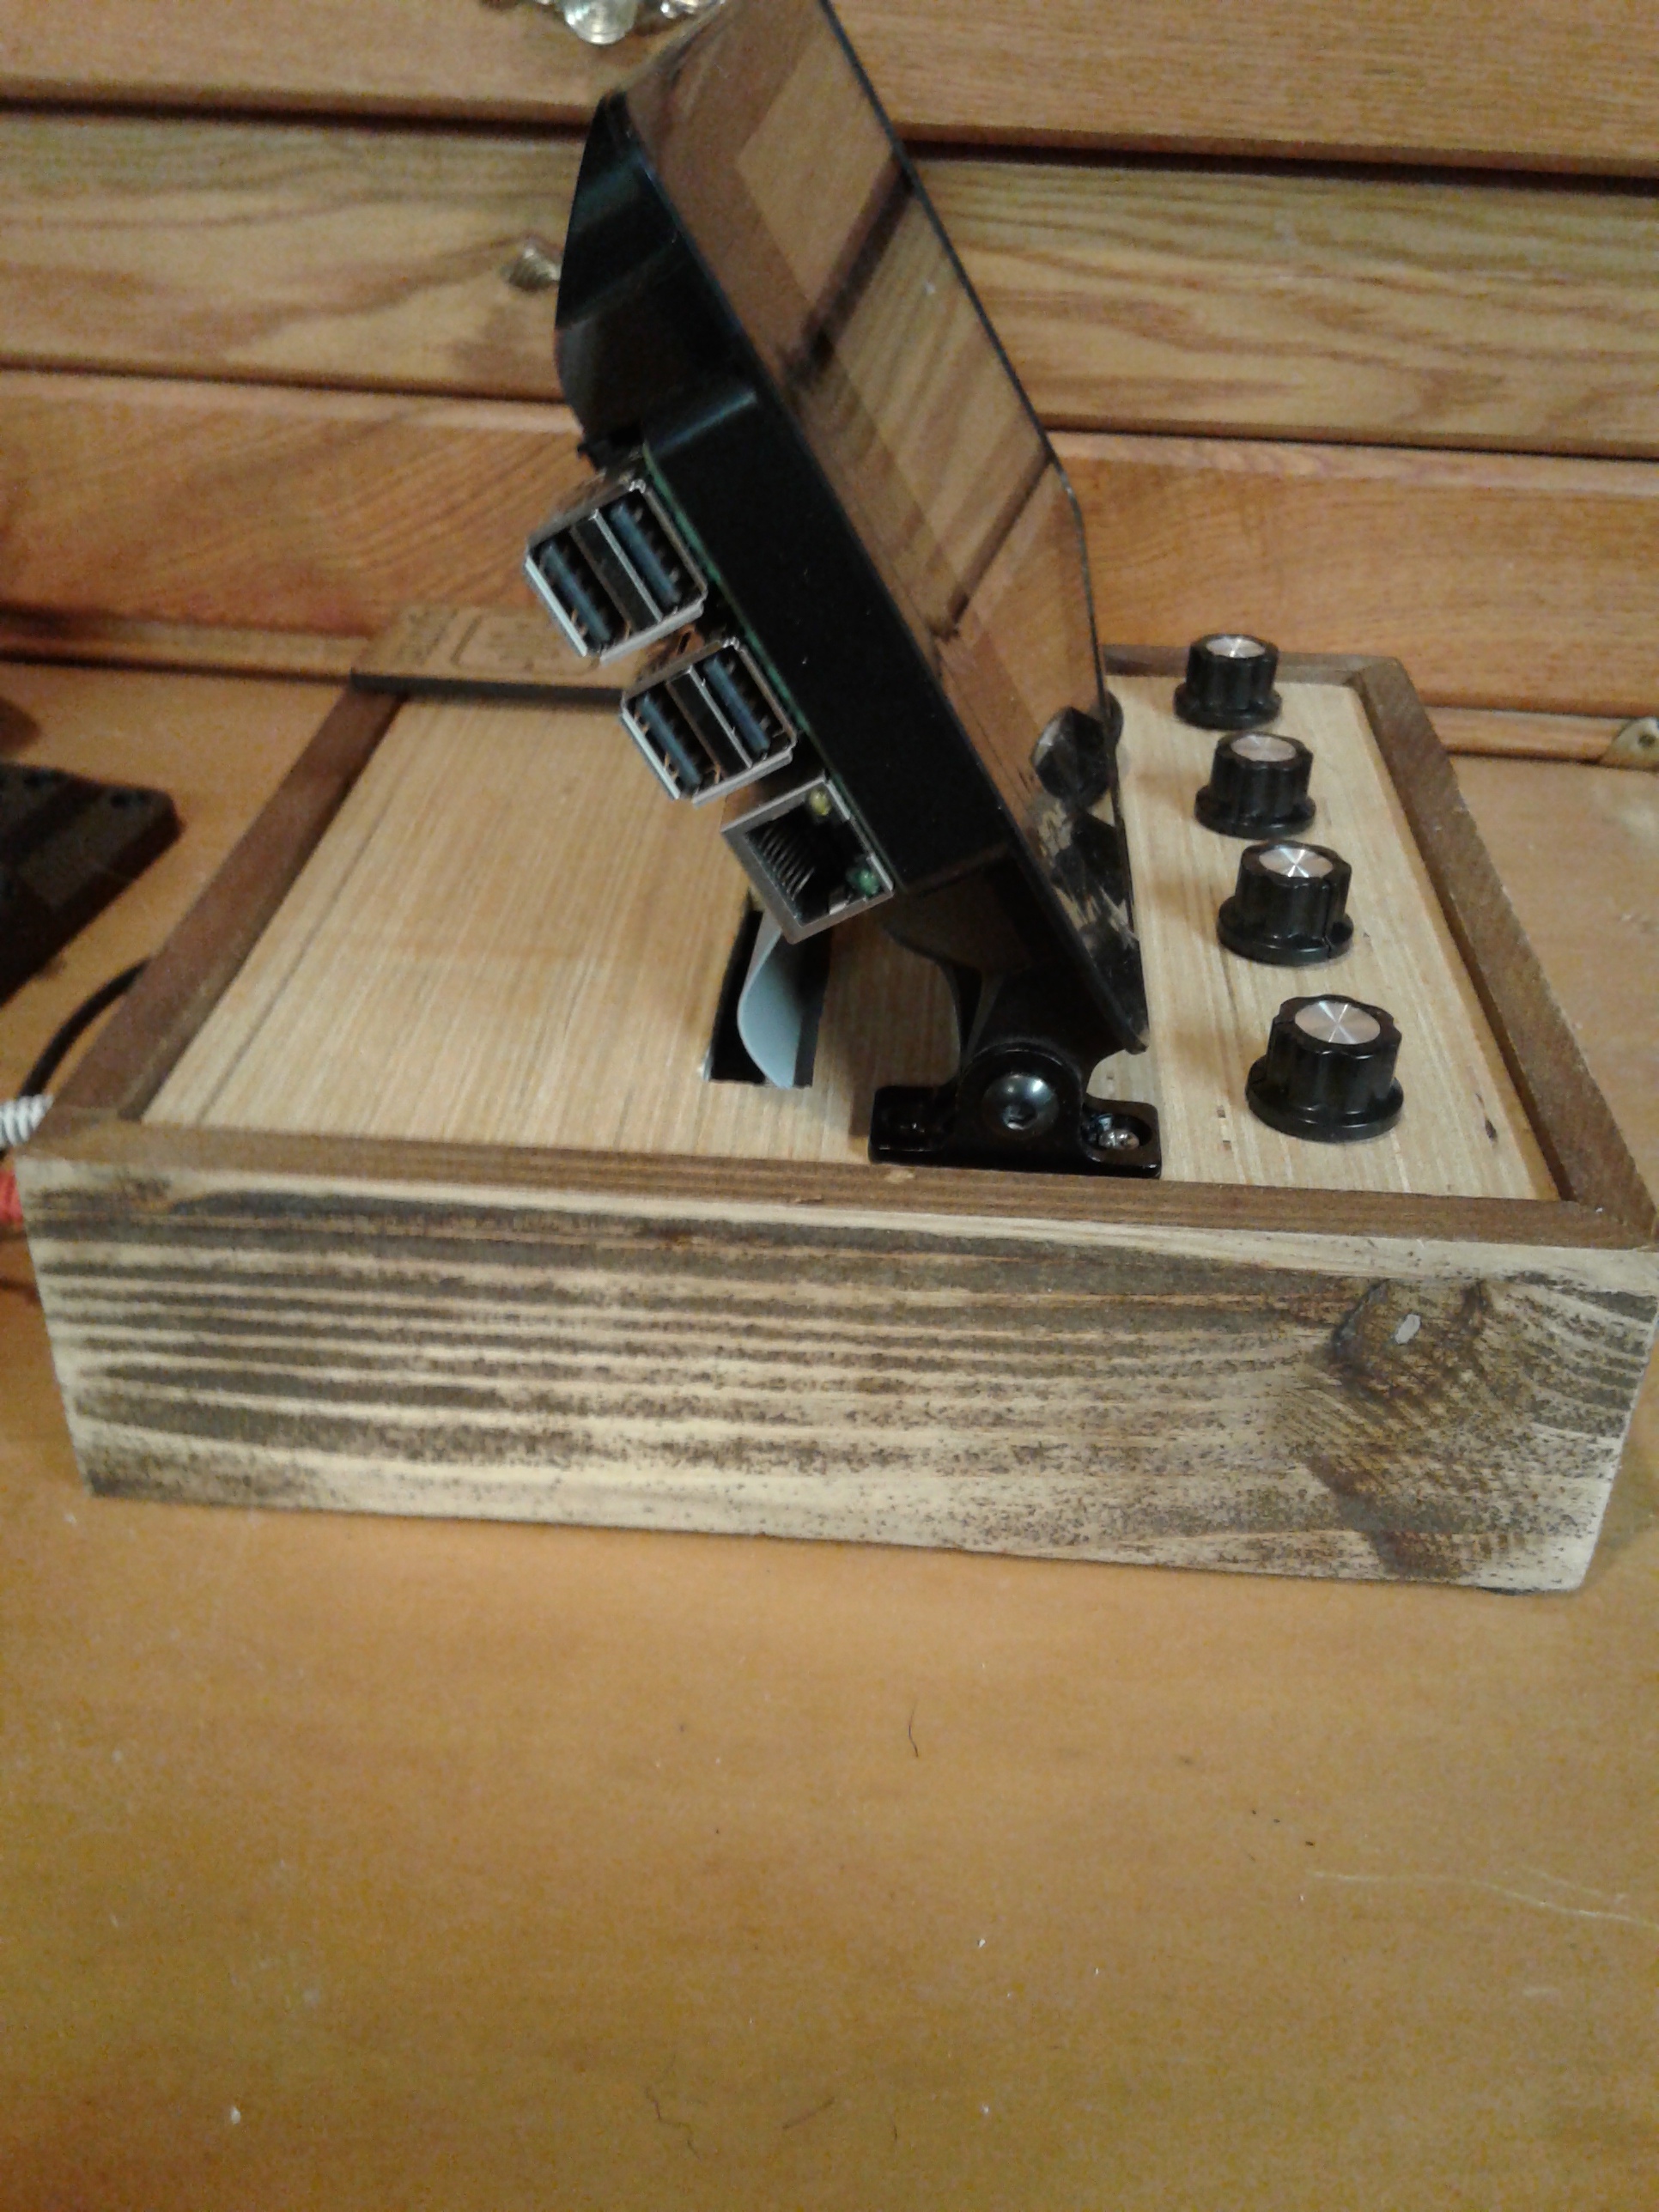
I have build a zynthian based on v2 all in one, and 7 inch touch screen. The display case allows for changing the display angle.
14 Likes
Cool! I think you would be better putting the RPi inside the main box. I have similar plans to hinge my 7" display. Memories of MiniMoog 
1 Like
Awesome box.
Well done
Similar to
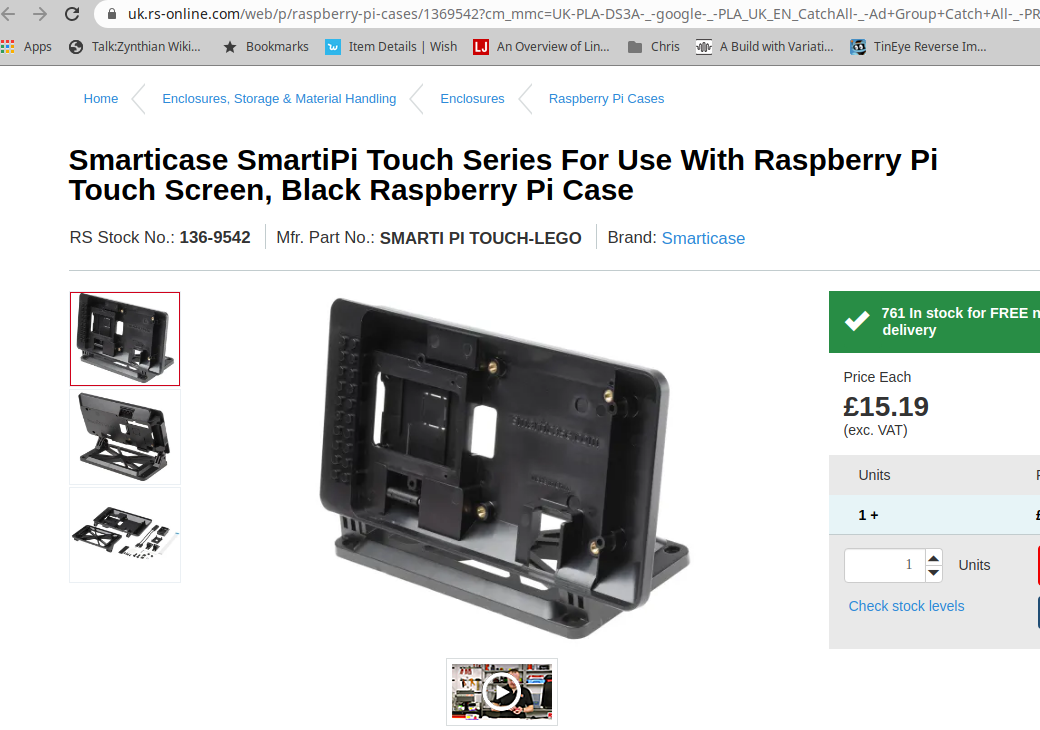
https://uk.rs-online.com/web/p/raspberry-pi-cases/1369542?cm_mmc=UK-PLA-DS3A--google--PLA_UK_EN_CatchAll--Ad+Group+Catch+All--PRODUCT_GROUP&matchtype=&pla-381930223918&s_kwcid=AL!7457!3!226080437215!!!g!381930223918!&gclid=Cj0KCQiAsbrxBRDpARIsAAnnz_PRXa1ONKKjunPDfADtrlDQZUCiX6auZDLq7FvmyyiLSr0F5mBPnW4aAogOEALw_wcB&gclsrc=aw.ds
I looked hard at these cases and always wanted to place the encoders either side of the display… Never managed to work out a method that felt right. . .
Your approach is pretty good !
2 Likes
Is this one the same size as that Zynthian screen?
Looks nice. Also having the pi away from the audio section should reduce noise and improve Wifi/bluetooth
The case above acomodates the 7 inch official r pi touch screen.
2 Likes
Hi everyone, first post which happens to be my build.
First spotting Zythian last year, it really caught my attention. Many a time I almost took the plunge on buying a V3 kit but despite the value for money, I just did not have the spare cash.
Then at Christmas I bought myself one of those Arduino mega kits from Amazon, and after a few weeks of playing around with components and circuits – I gave myself the challenge to build a Zynthian from scratch.
I already had a Raspberry Pi 3b knocking about and thought if I bought a cheap DAC and screen that would at least get me started, and if the software worked with the hardware, I could move on to the encoders and IO.
My first hurdle was the fact that I bought a clone DAC (PiFi DAC+) and it never had the GPIO pass-through. I was not comfortable soldering pins on top but luckily I managed to find one of these:
https://www.amazon.co.uk/gp/product/B07Z6MGVP3/
Not a cheap part, but it solved my problem and looked pretty neat too.
I had a working Zynthian though the touch screen was a pain to use and opted to use a USB keyboard to test things out.
Then I spend days pouring over the schematics of the various versions, reading forum posts and trying to plan how I would do the encoders. I almost caved in and bought the PCBs, but I stuck with it.
Using an old IDE cable and some new connectors I made a ribbon cable that connected both the screen and one of these T connectors:
Initially I put it in a breadboard for testing with a MCP23017 and to my surprise everything worked!
Well I had to work out which pins did which controller but I got there.
I had some issues sourcing the JST XH series connectors so I went with the JST PH series, however my local store only had the ends and crimps, so I had to hand crimp all the cables – which was fun
After a lot of testing and working out which encoder knob should be on each pin, I came up with this board design based on the all in one schematic.

Then this for the controller boards
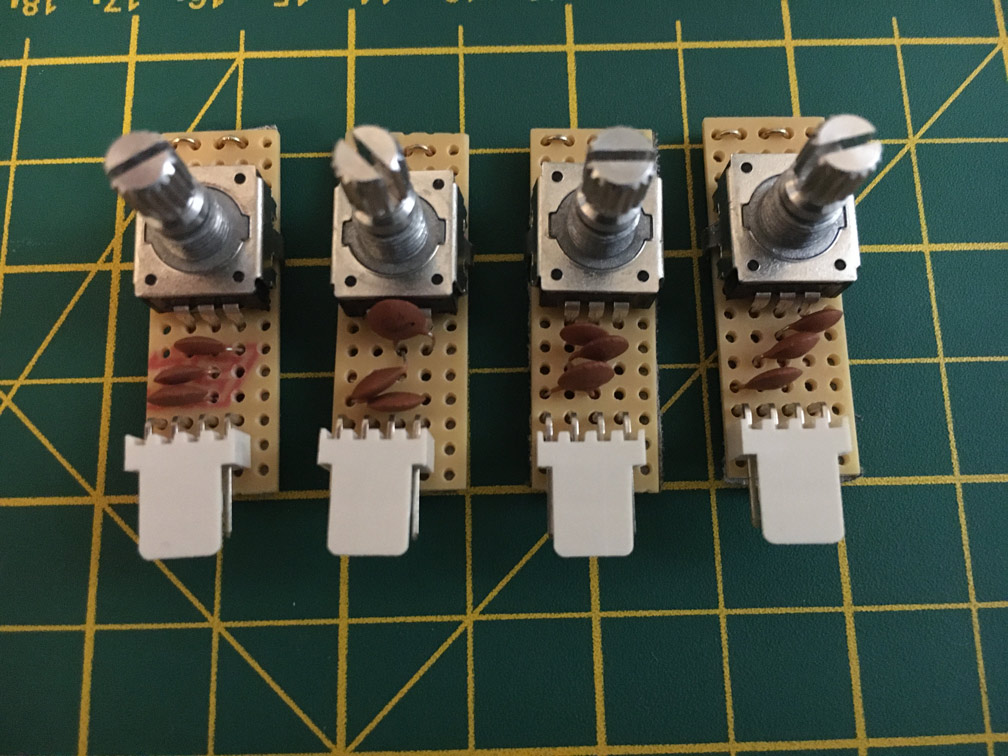
More in Part 2
6 Likes
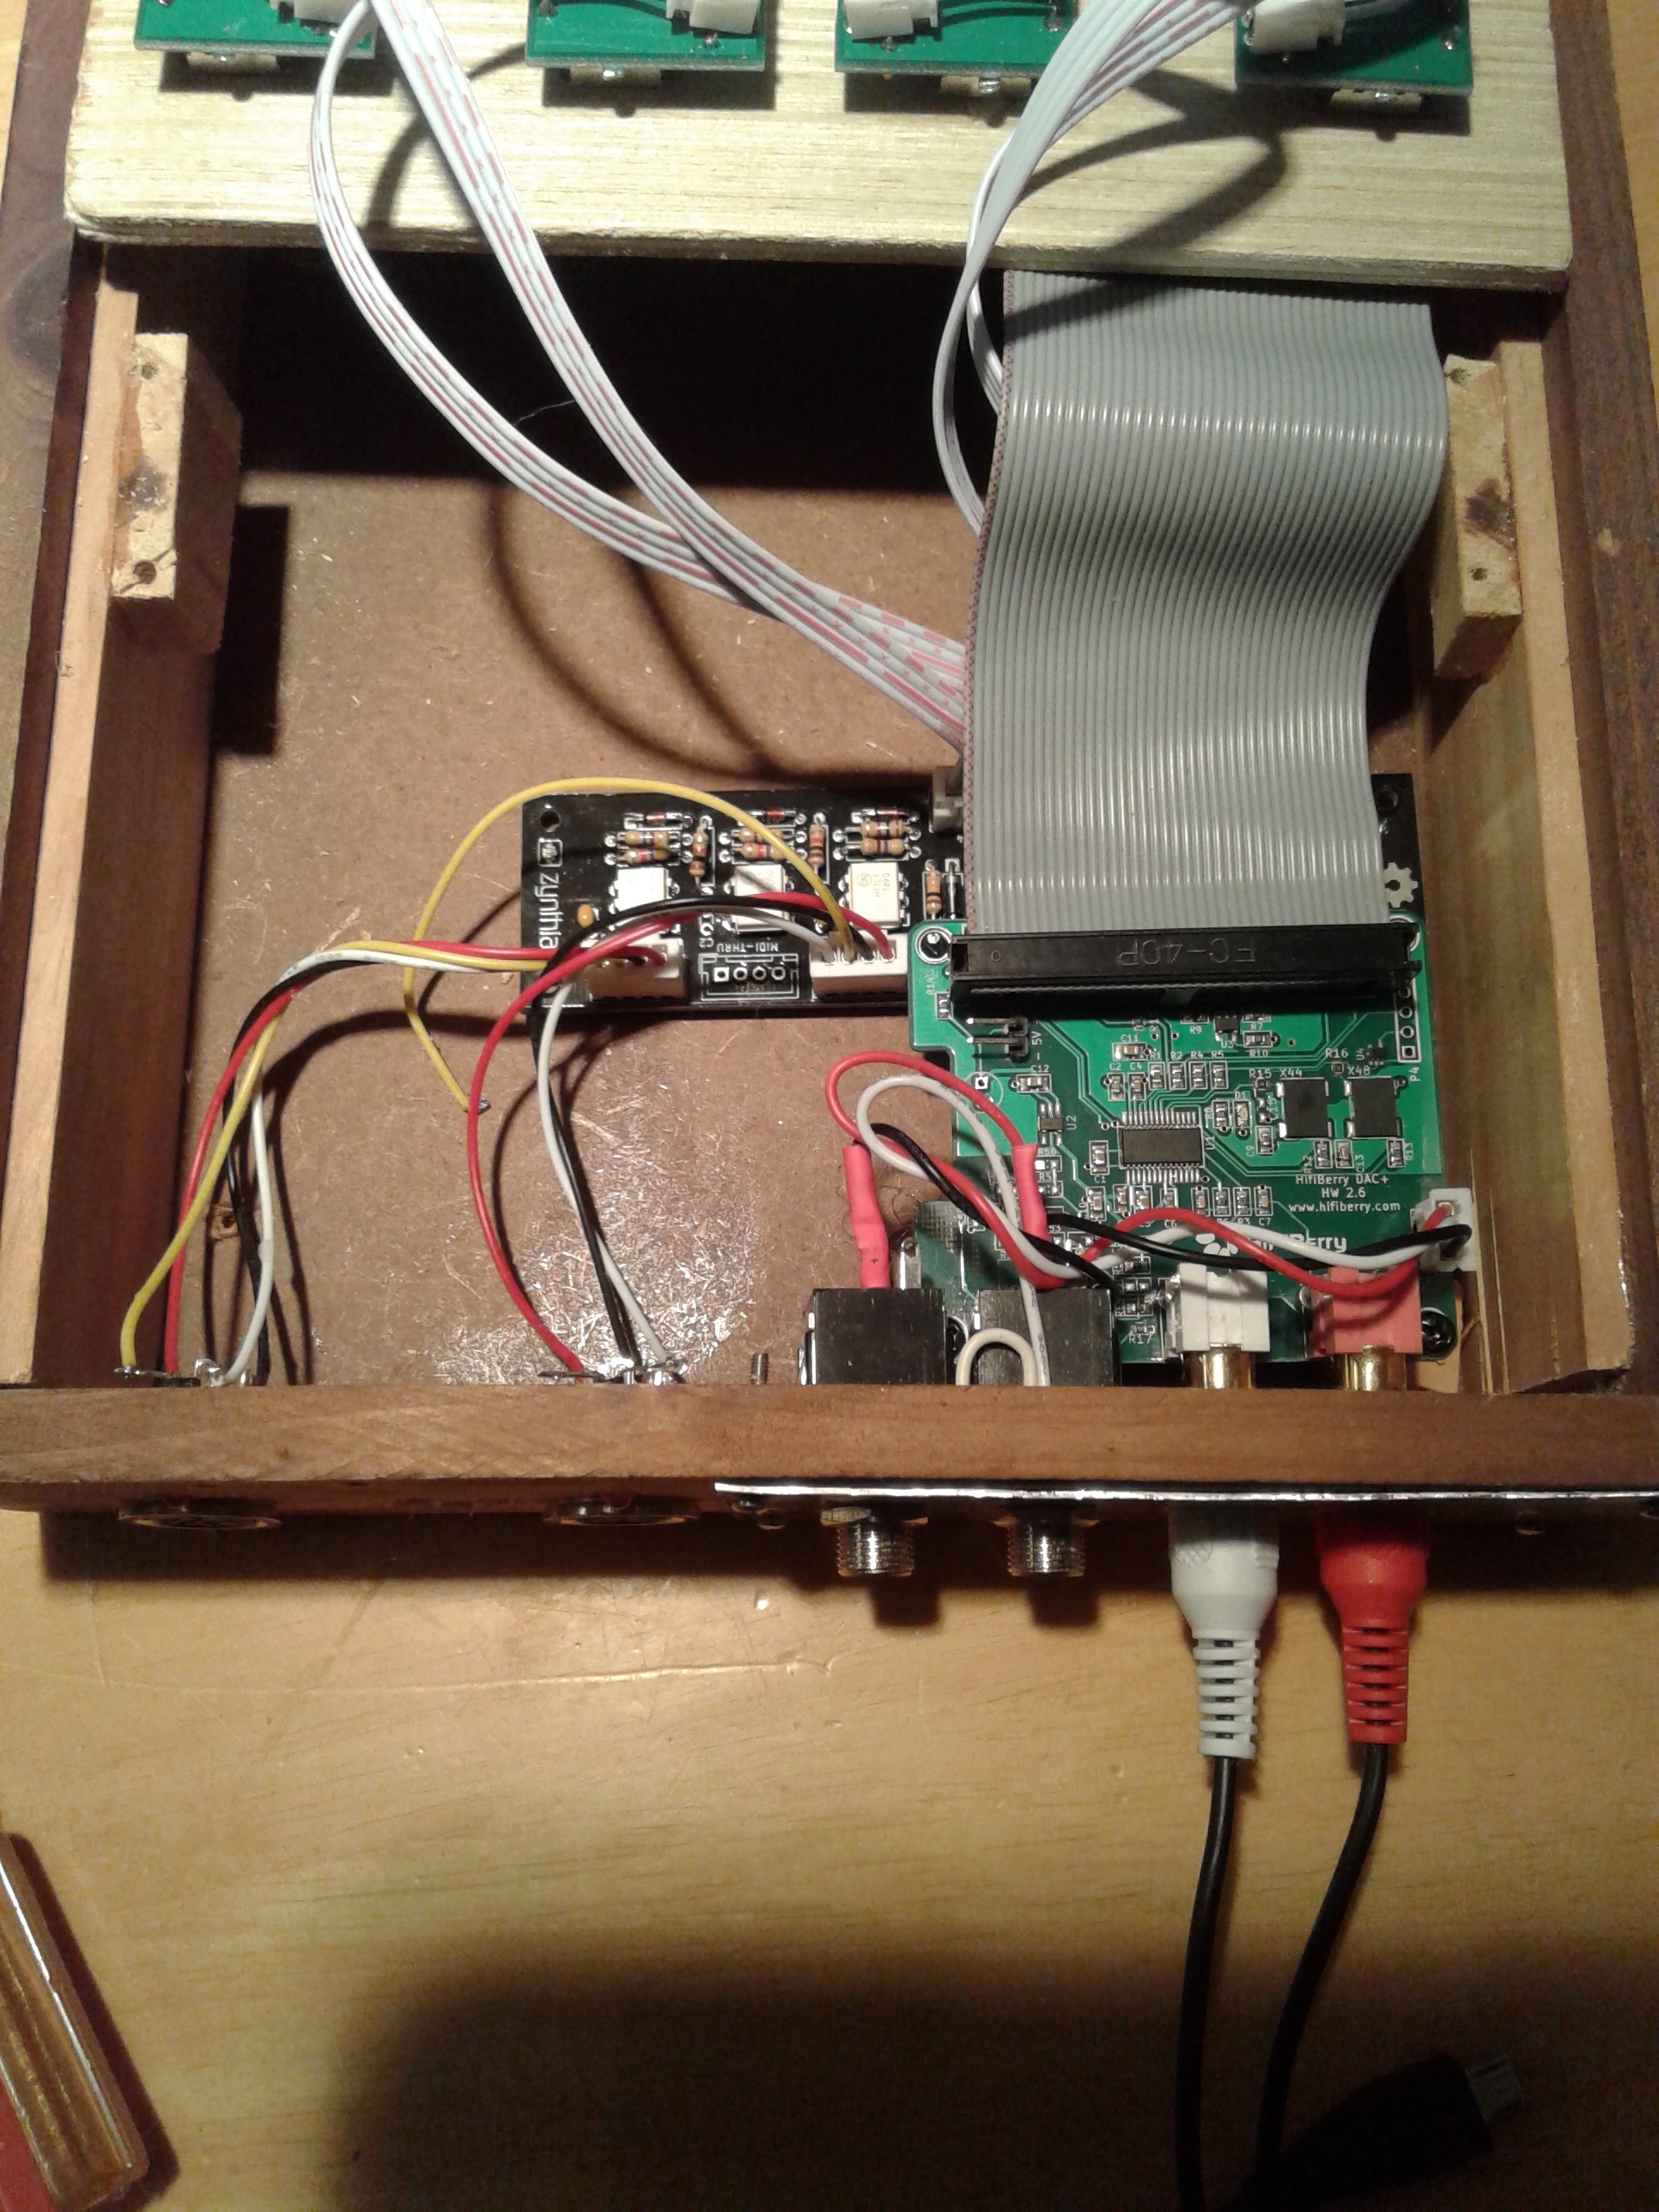
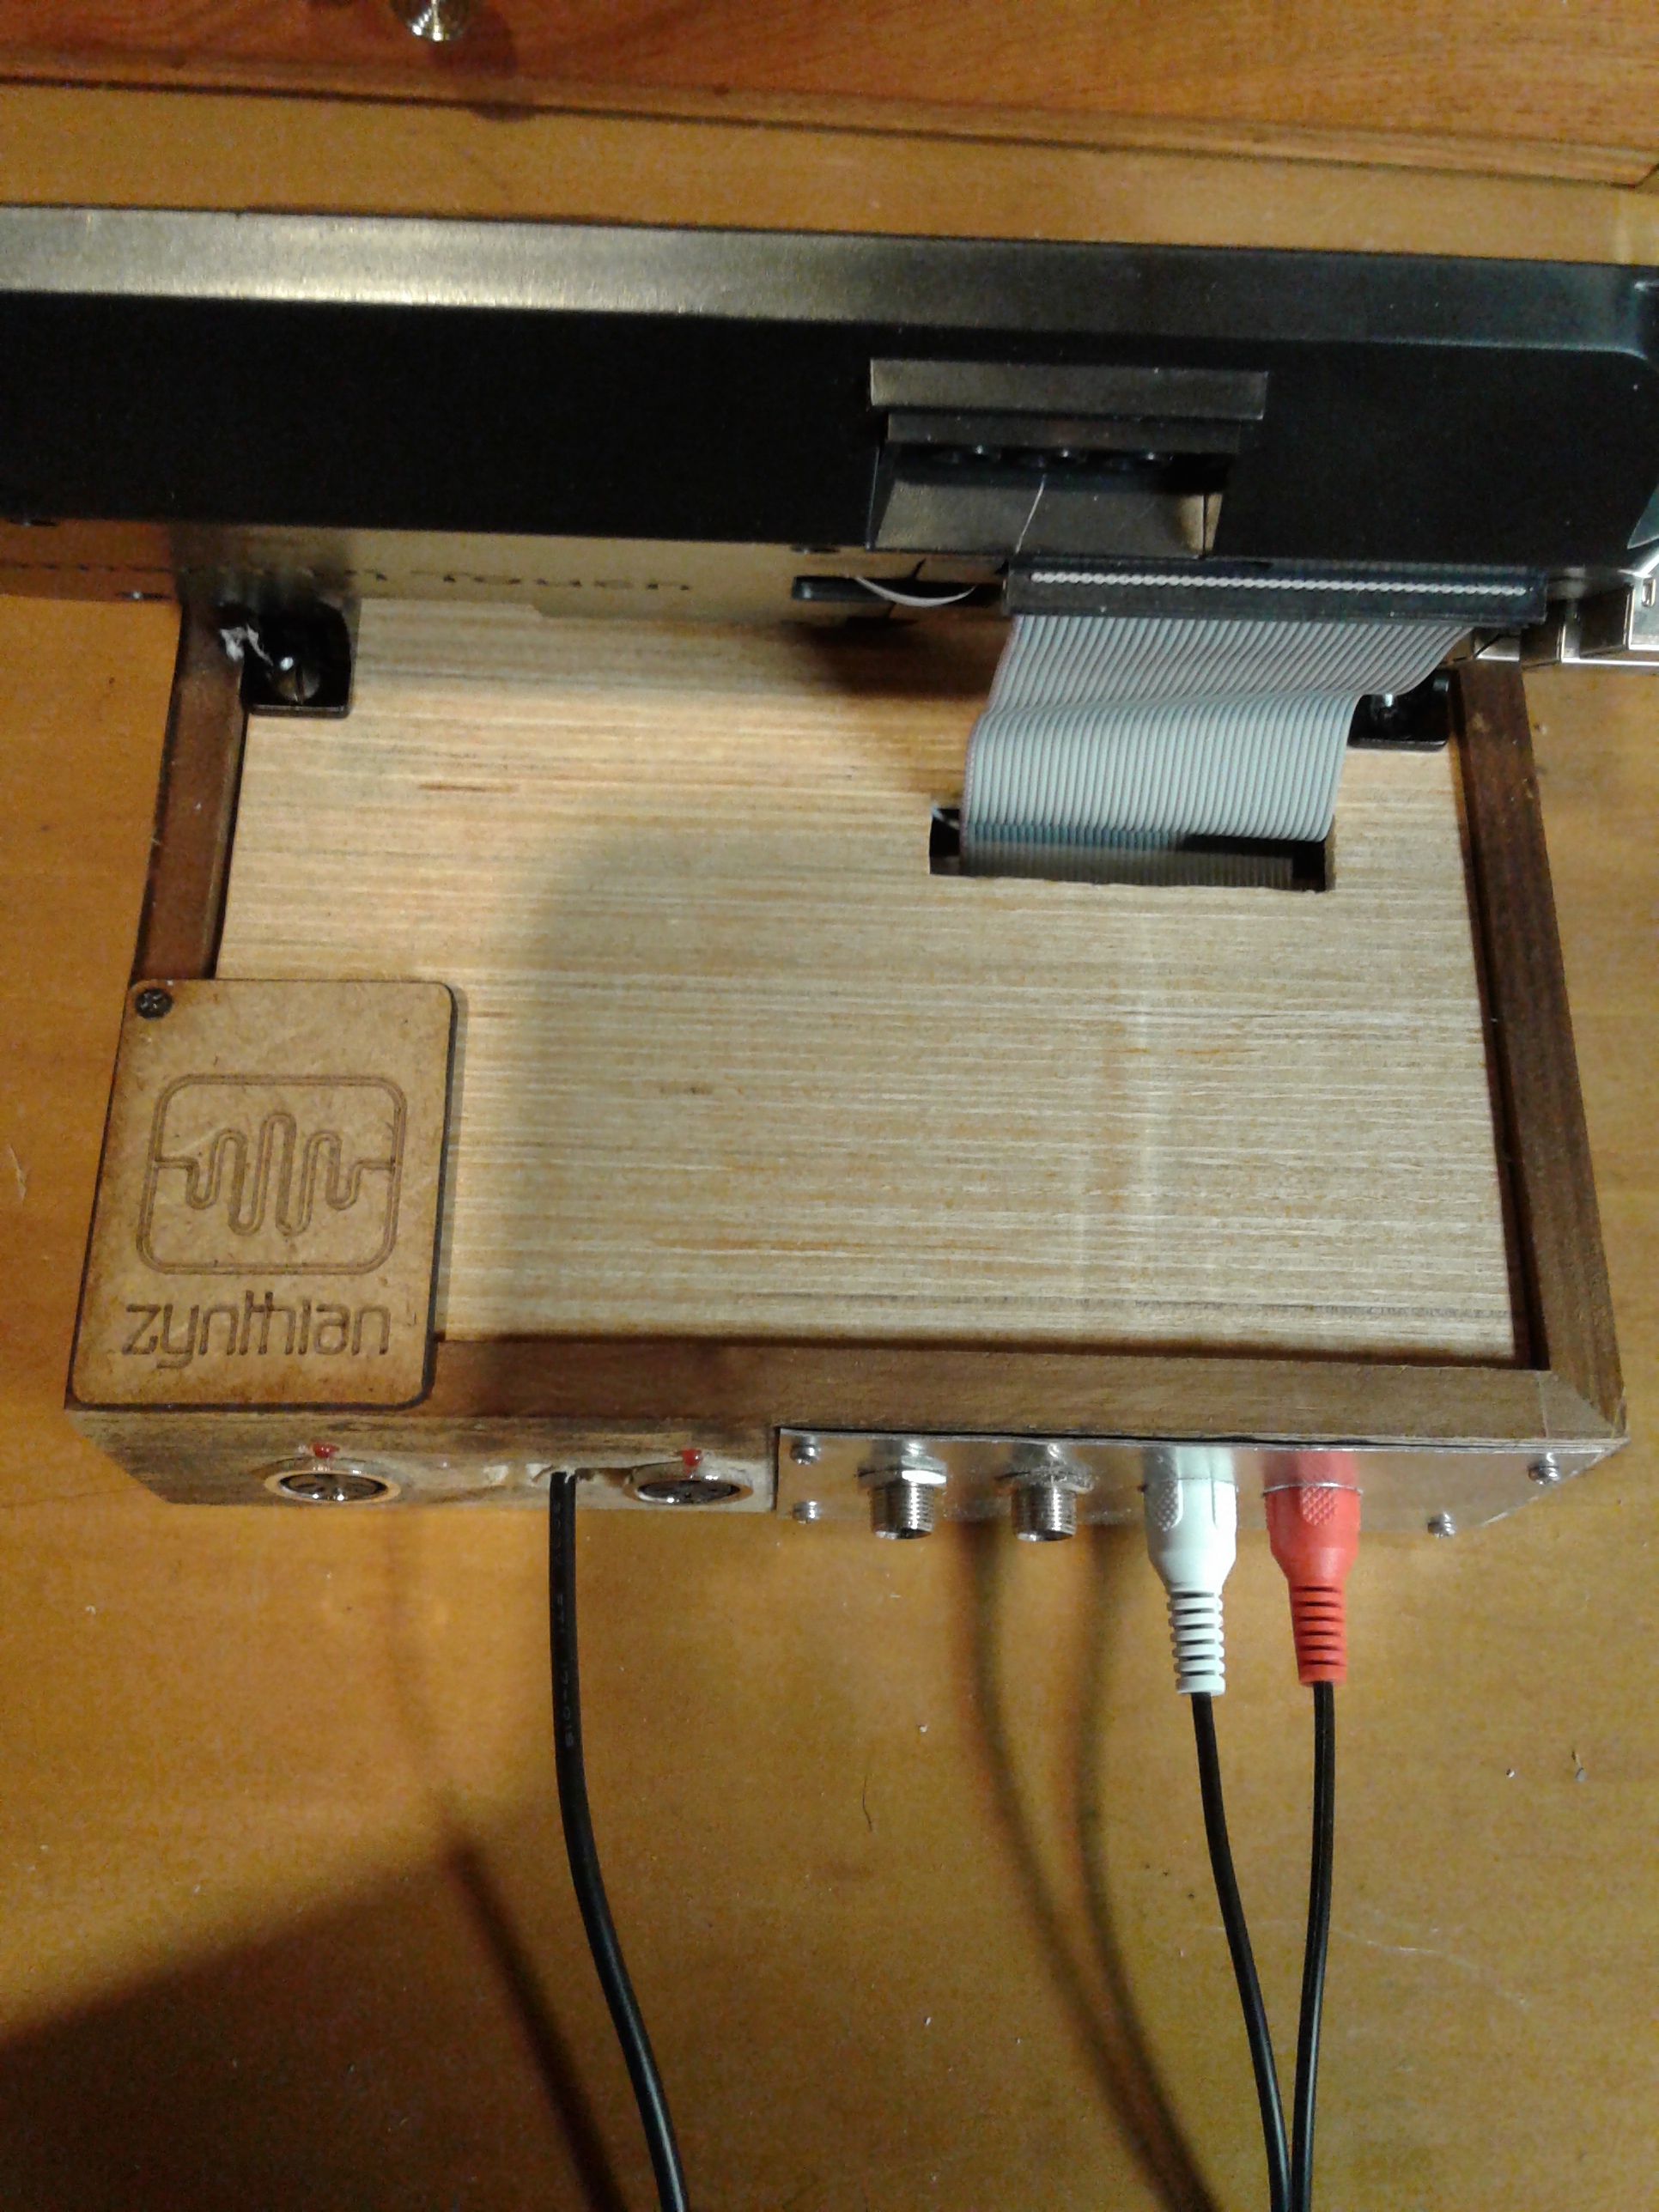
For the MIDI board (see image below) – I just have gone with MIDI in for now.
I’ve tried to keep everything as modular as I can, just so I can replace/upgrade anything or house in a new case.
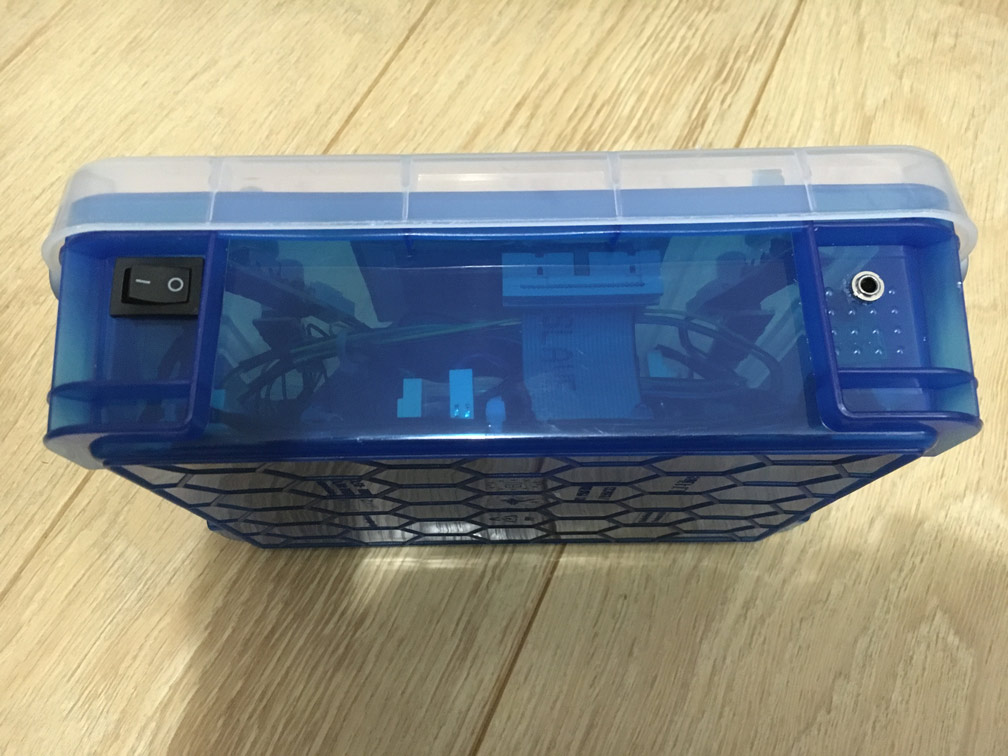
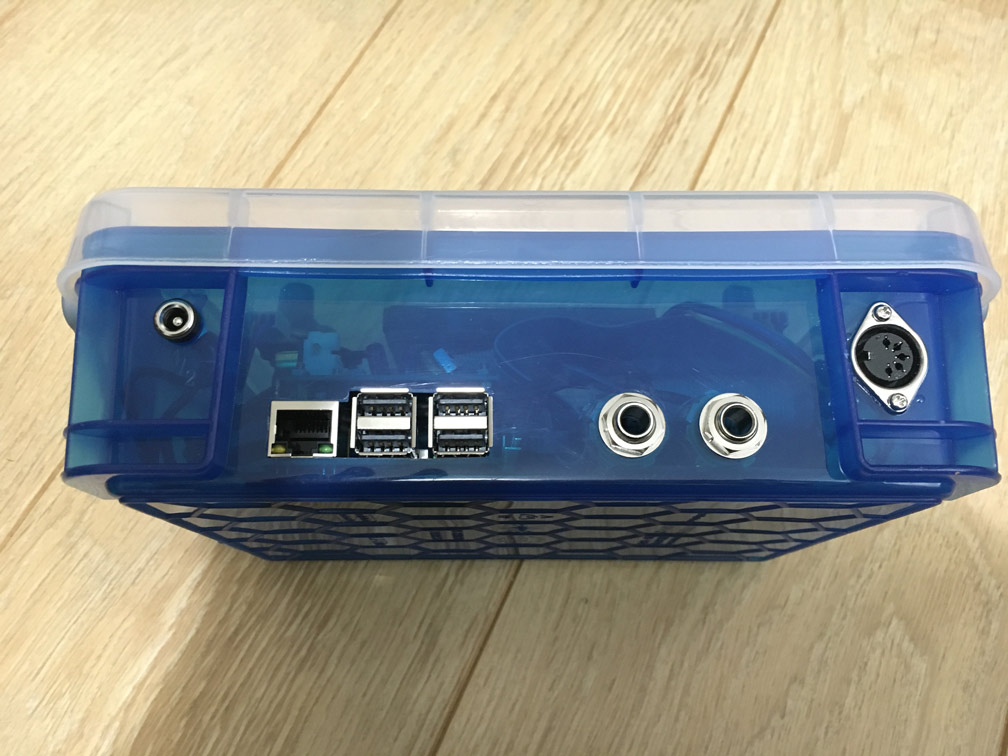
So for my case I have used a ‘Really Useful Box’ - it’s not the most elegant of enclosures, and it’s a little big but it works and is easily opened for modifications and prototyping.
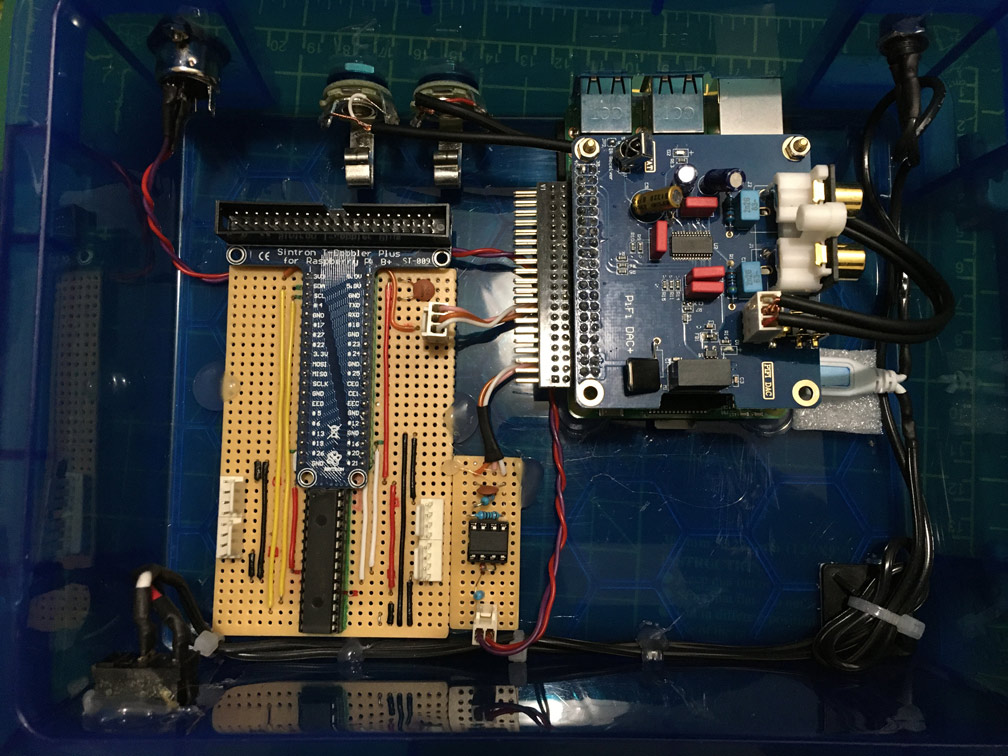
I have run the USB power via power switch at the front, socket in at the back.
As well as jack outputs I’ve routed the DACs headphone output to the front too.
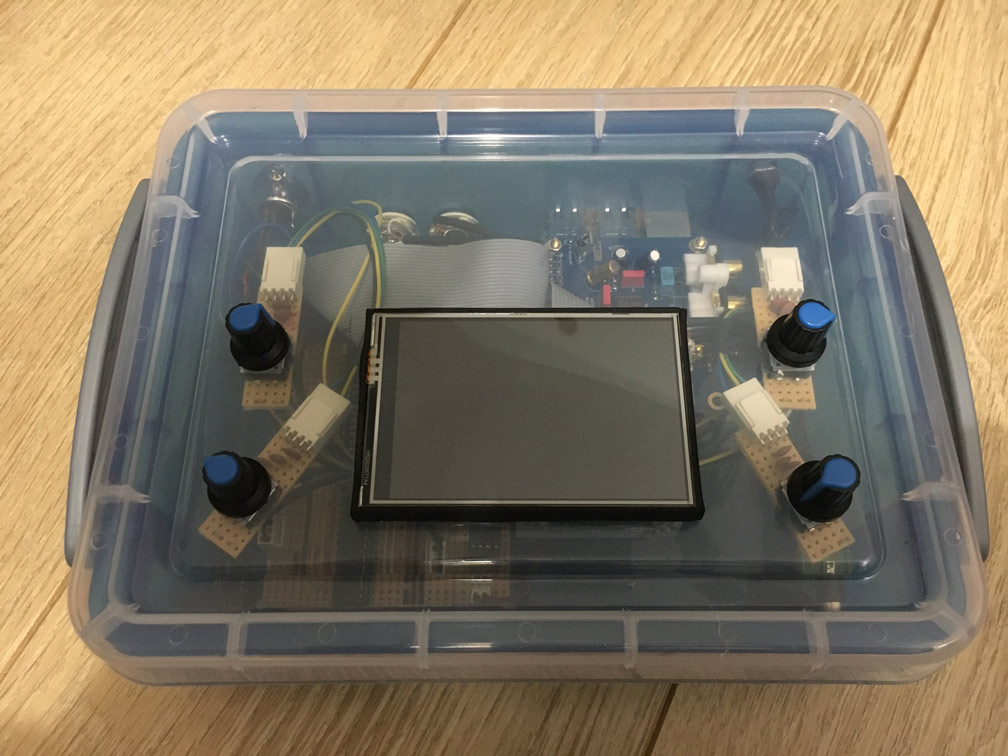
This is at it stands now:
6 Likes
One screw up is I think I’ve managed to blow the touch interface, I connected the cable backwards and unless it was a coincidence, the touch has not worked since. Oh well, and I can always replace the screen at a later date.
I’m pretty pleased with what I have made and I’d like to thank all those involved with making this a possibility and inspiring me to make one of these fantastic machines.
If you have any questions on my build, please ask.
Likewise any suggestions for improvements.
Simon
10 Likes
@Simon Well done! I applaud you! 
I notice that you don’t have the Raspberry Pi’s power plug showing, and you also have a power switch on the side. I’ve only seen that on a few Zynthians, and I might want to try it someday. How did you get that to work?
Thanks so much for sharing!
1 Like
Congratulations, @Simon … and welcome on board!
You made a good (and hard!) work.
I hope to ear your zynthian very soon … 

1 Like