I just wanted to document my minimal build including Pi5 (4Gb) and Pi Touch Display 2.
Kit:
Pi5 4Gb
Pi5 active cooler
SD card
Touch Display 2
Touch Display 2 case for hats: KKSB Display Stand for Raspberry Pi 5 Touch Display V2 with Case for H — KKSB Cases
GPIO edge extension: GPIO Edge Extension for Raspberry Pi | The Pi Hut
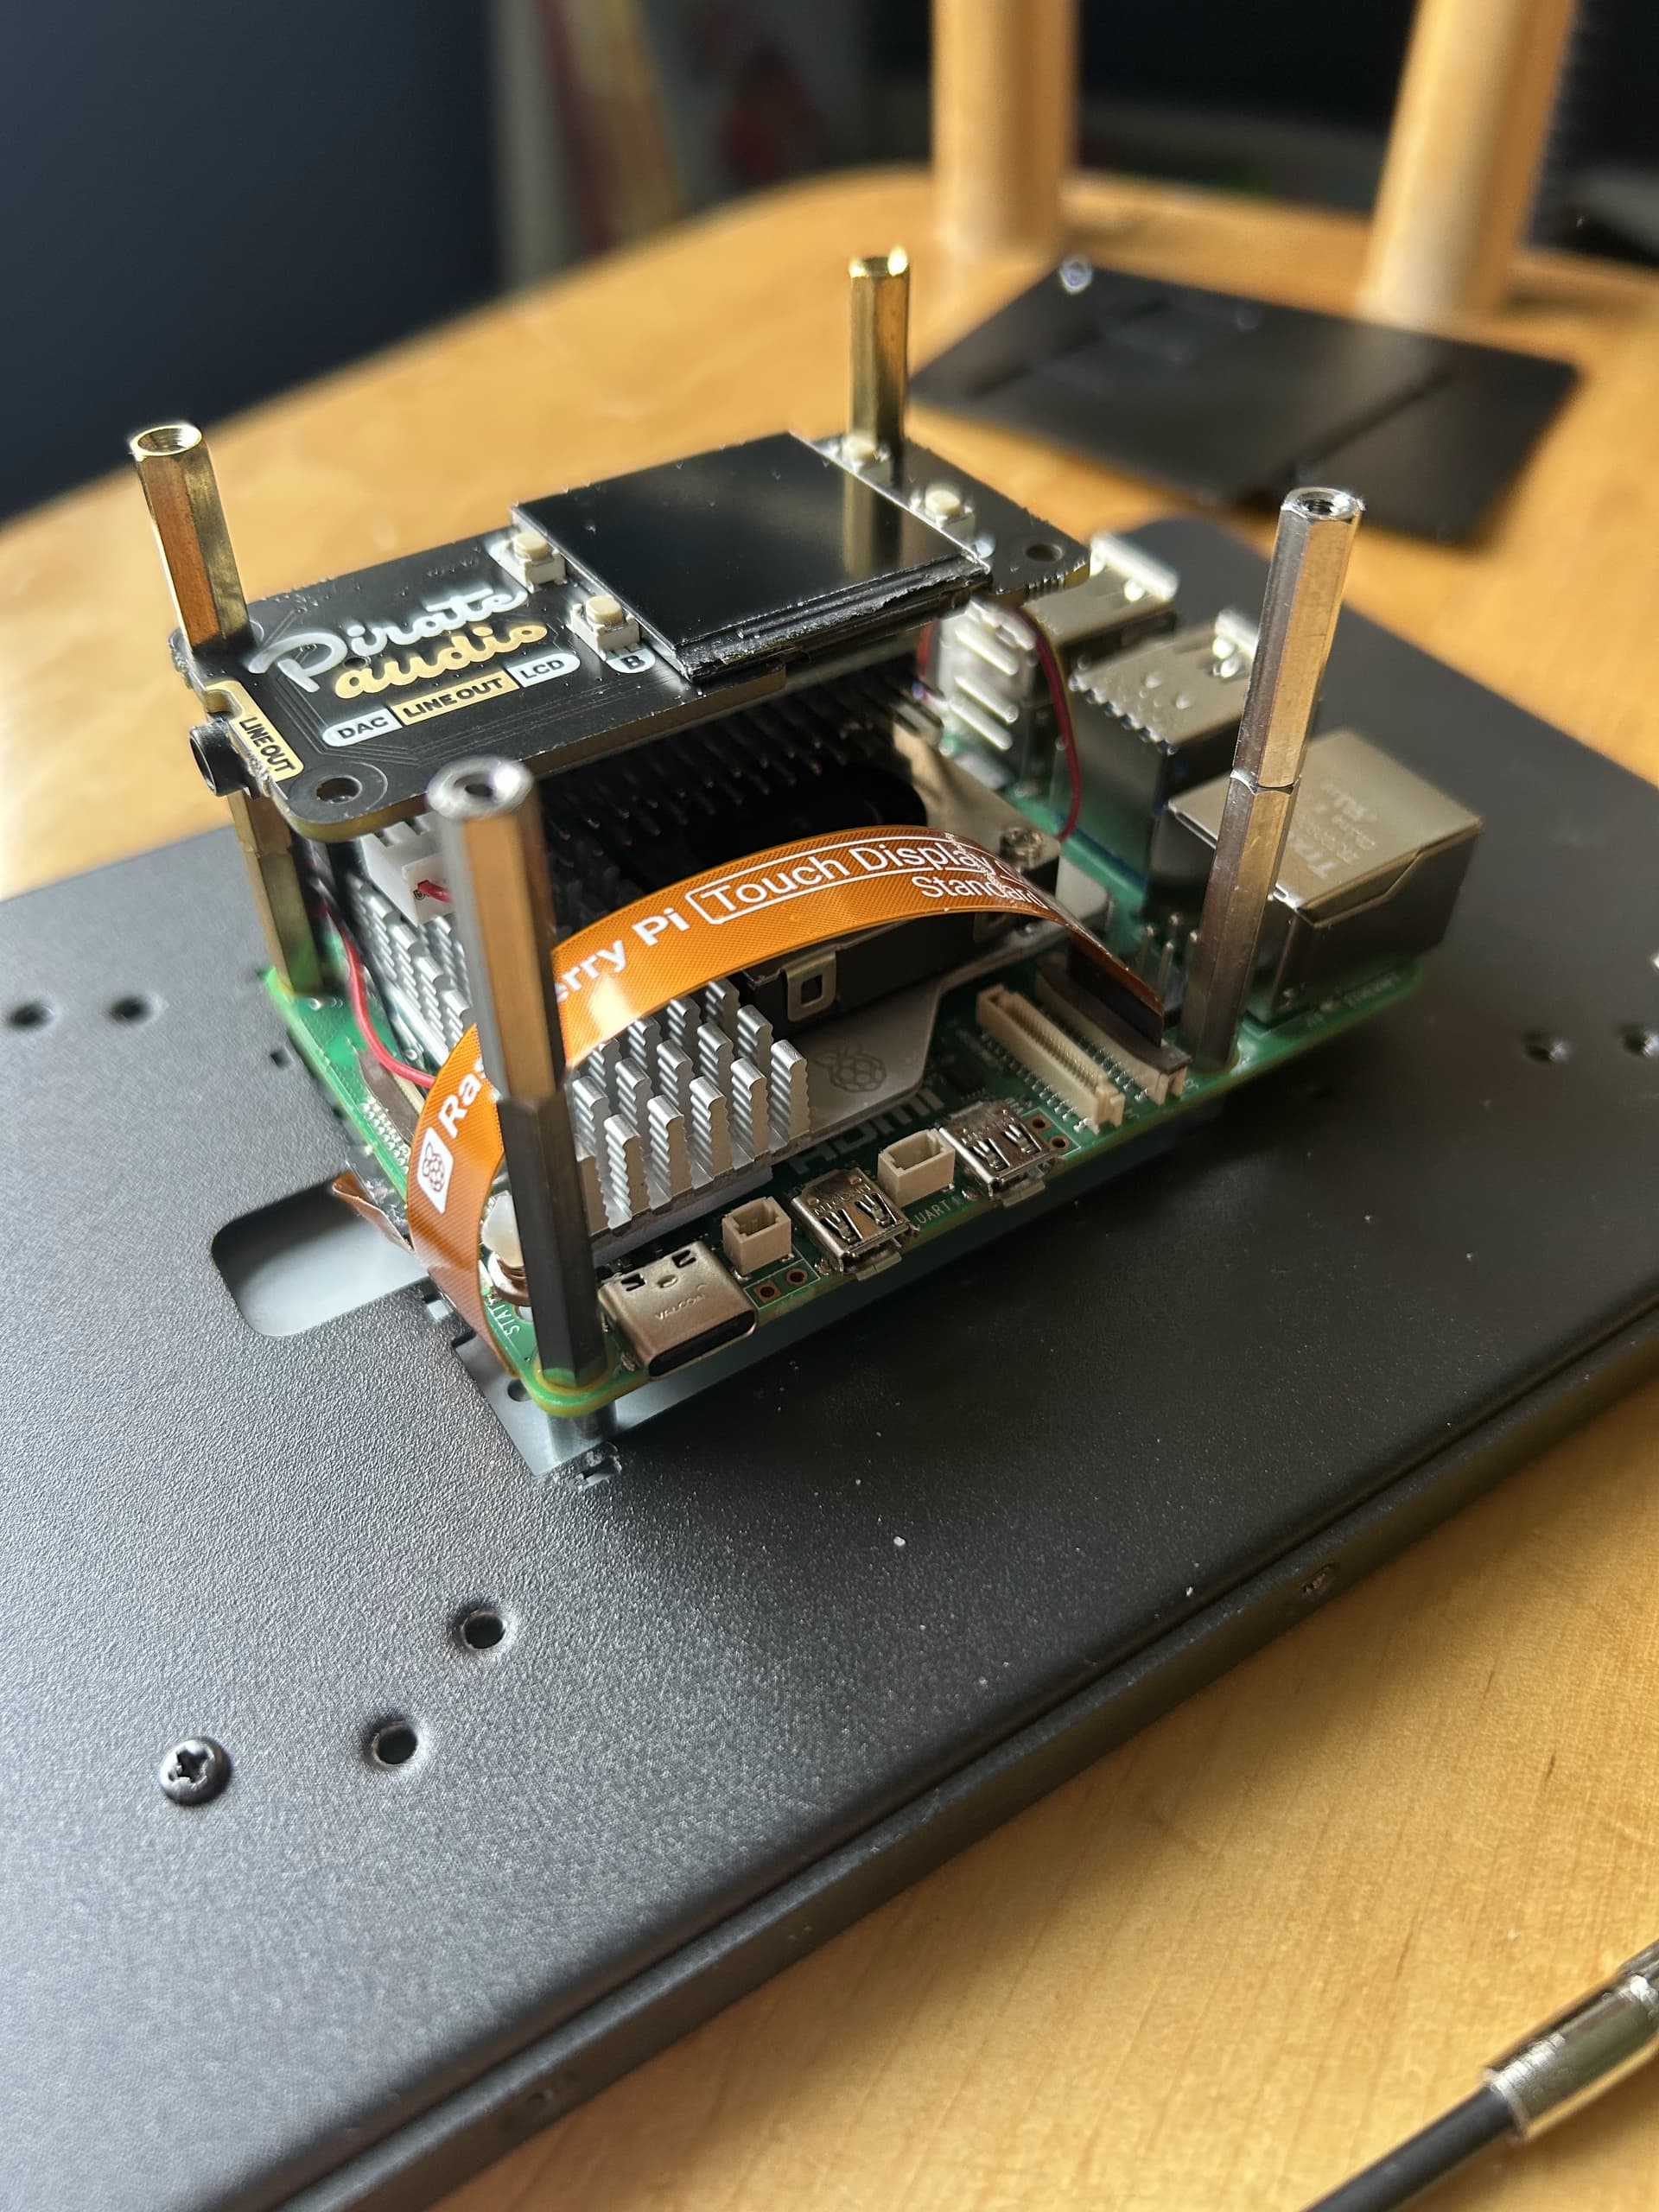
Sound board - I used Pirate Audio: Audio DAC SHIM (Line-Out)
but if you want line-in as well I would recommend the HifiBerry DAC ADC
also need:
USB mouse.
Some additional different length standoffs.
another computer on wifi network.
So first things: Flash the zythian image on the SD card using Pi Imager.
You will have to edit the config.txt in the root of the SD card - this can be done from windows by mounting the card in the card reader.
You need to add in the line:
dtoverlay = hifiberry-dac
(if that’s the card you are using - or change as required).
Or on first boot there will be an error because the sound card can’t be found.
Then:
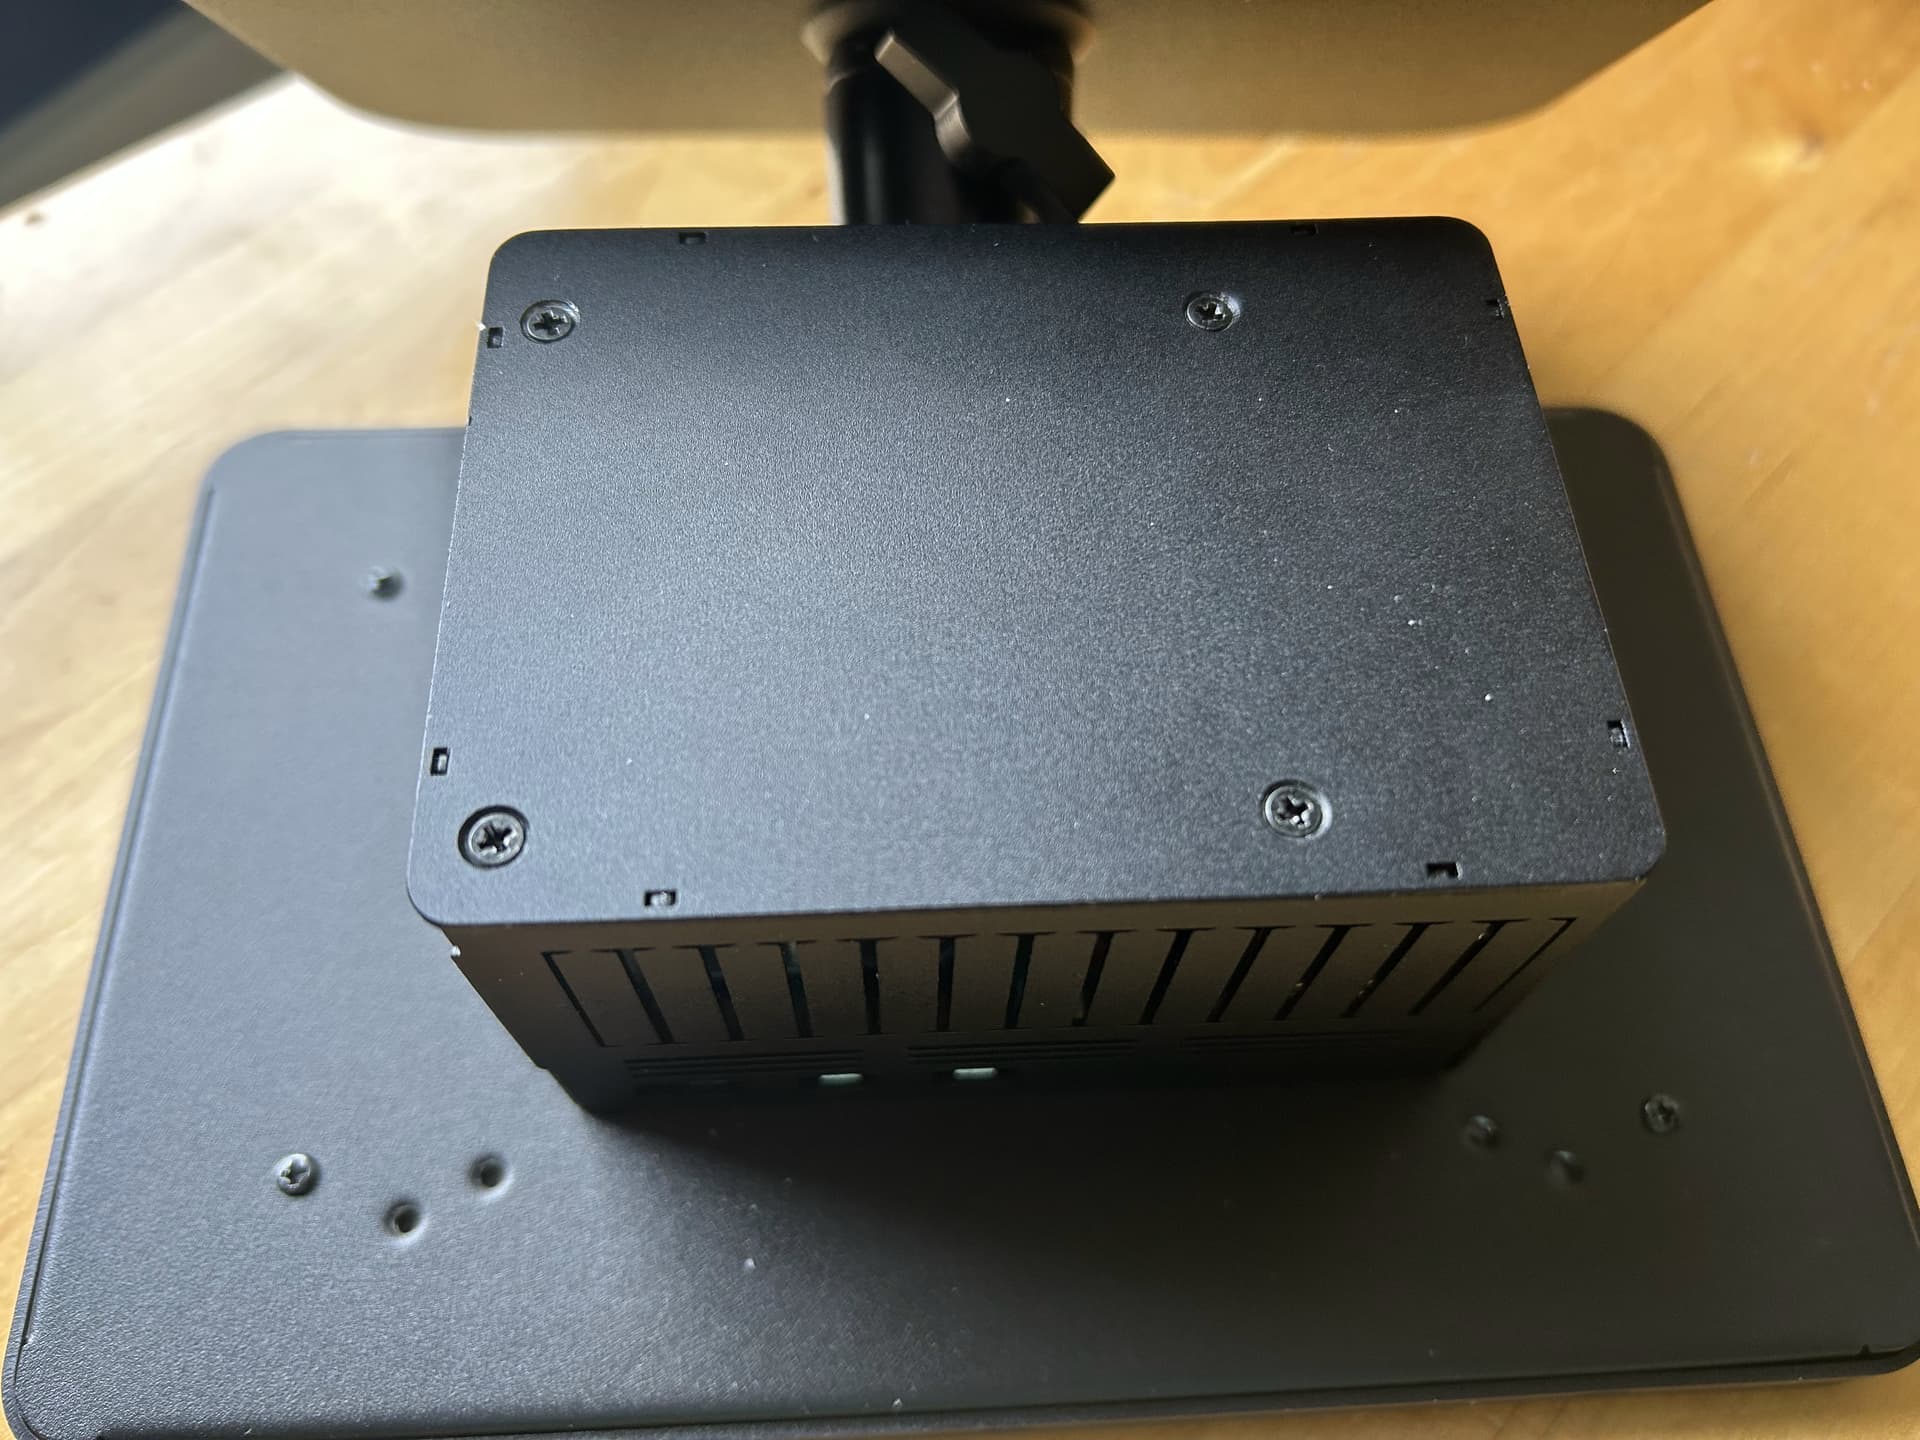
Put everything together (note there is a GPIO booster in the kit that comes with the case which is needed to bring everything above the level of the cooler):
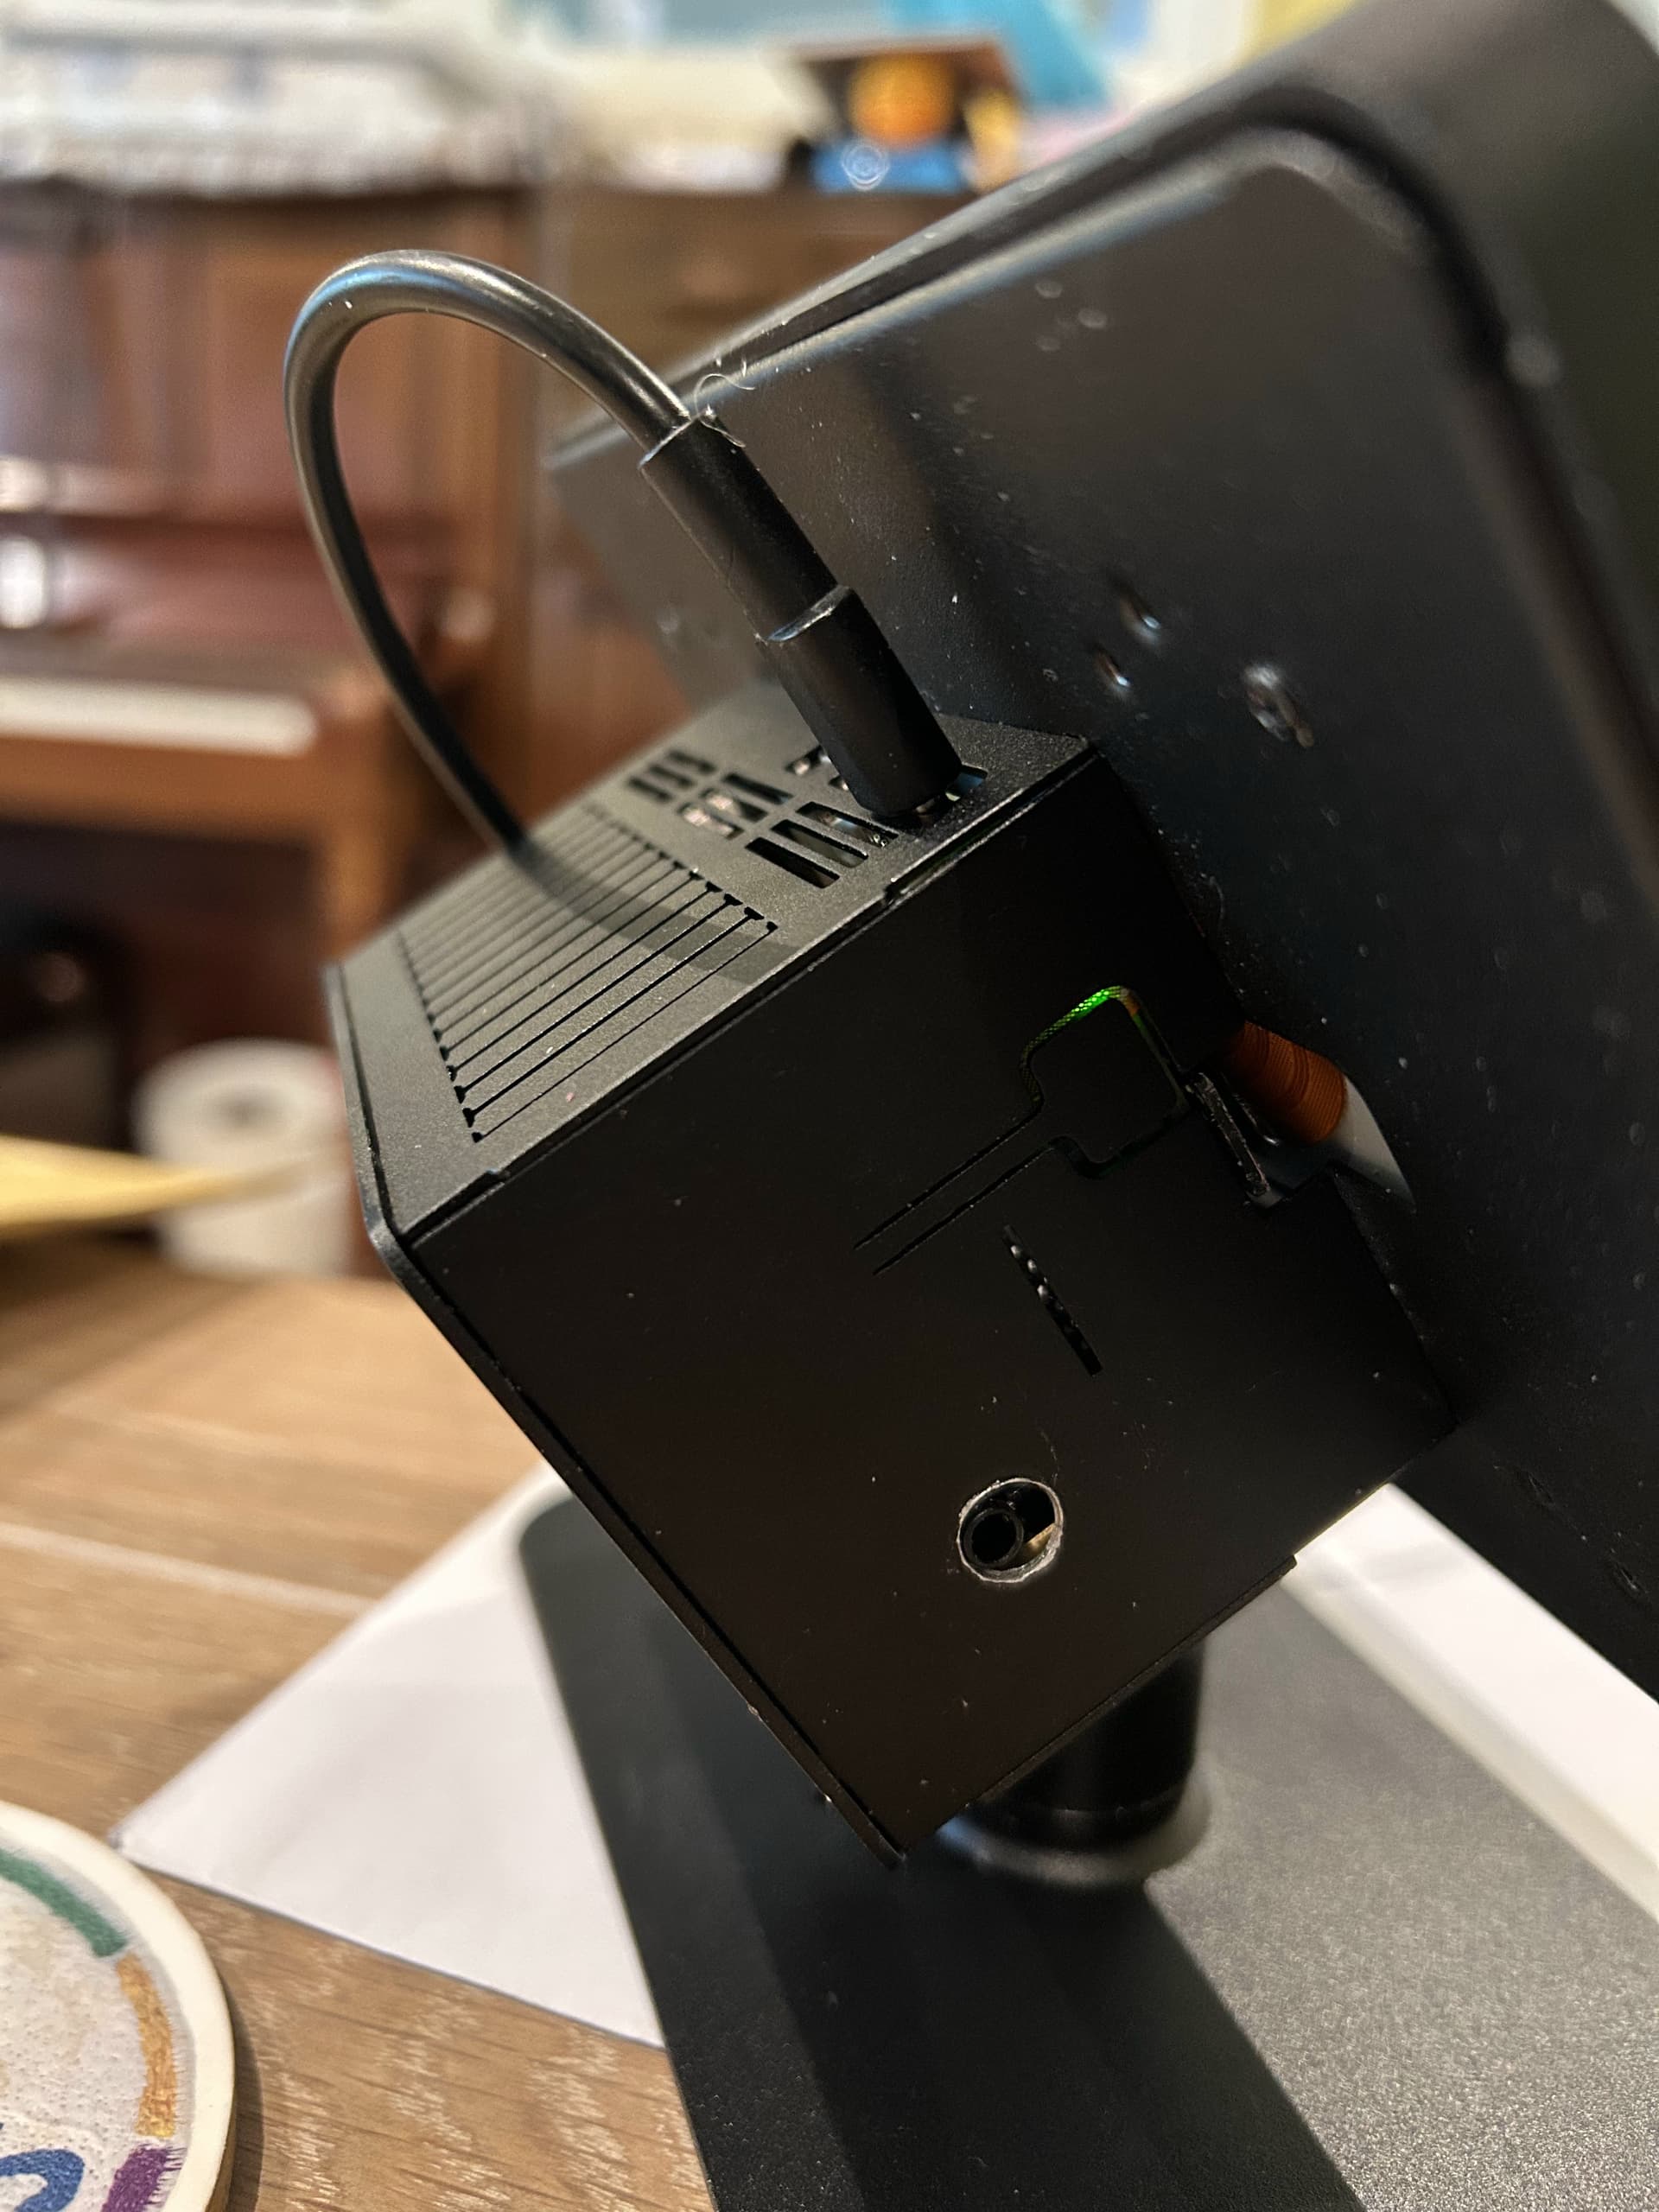
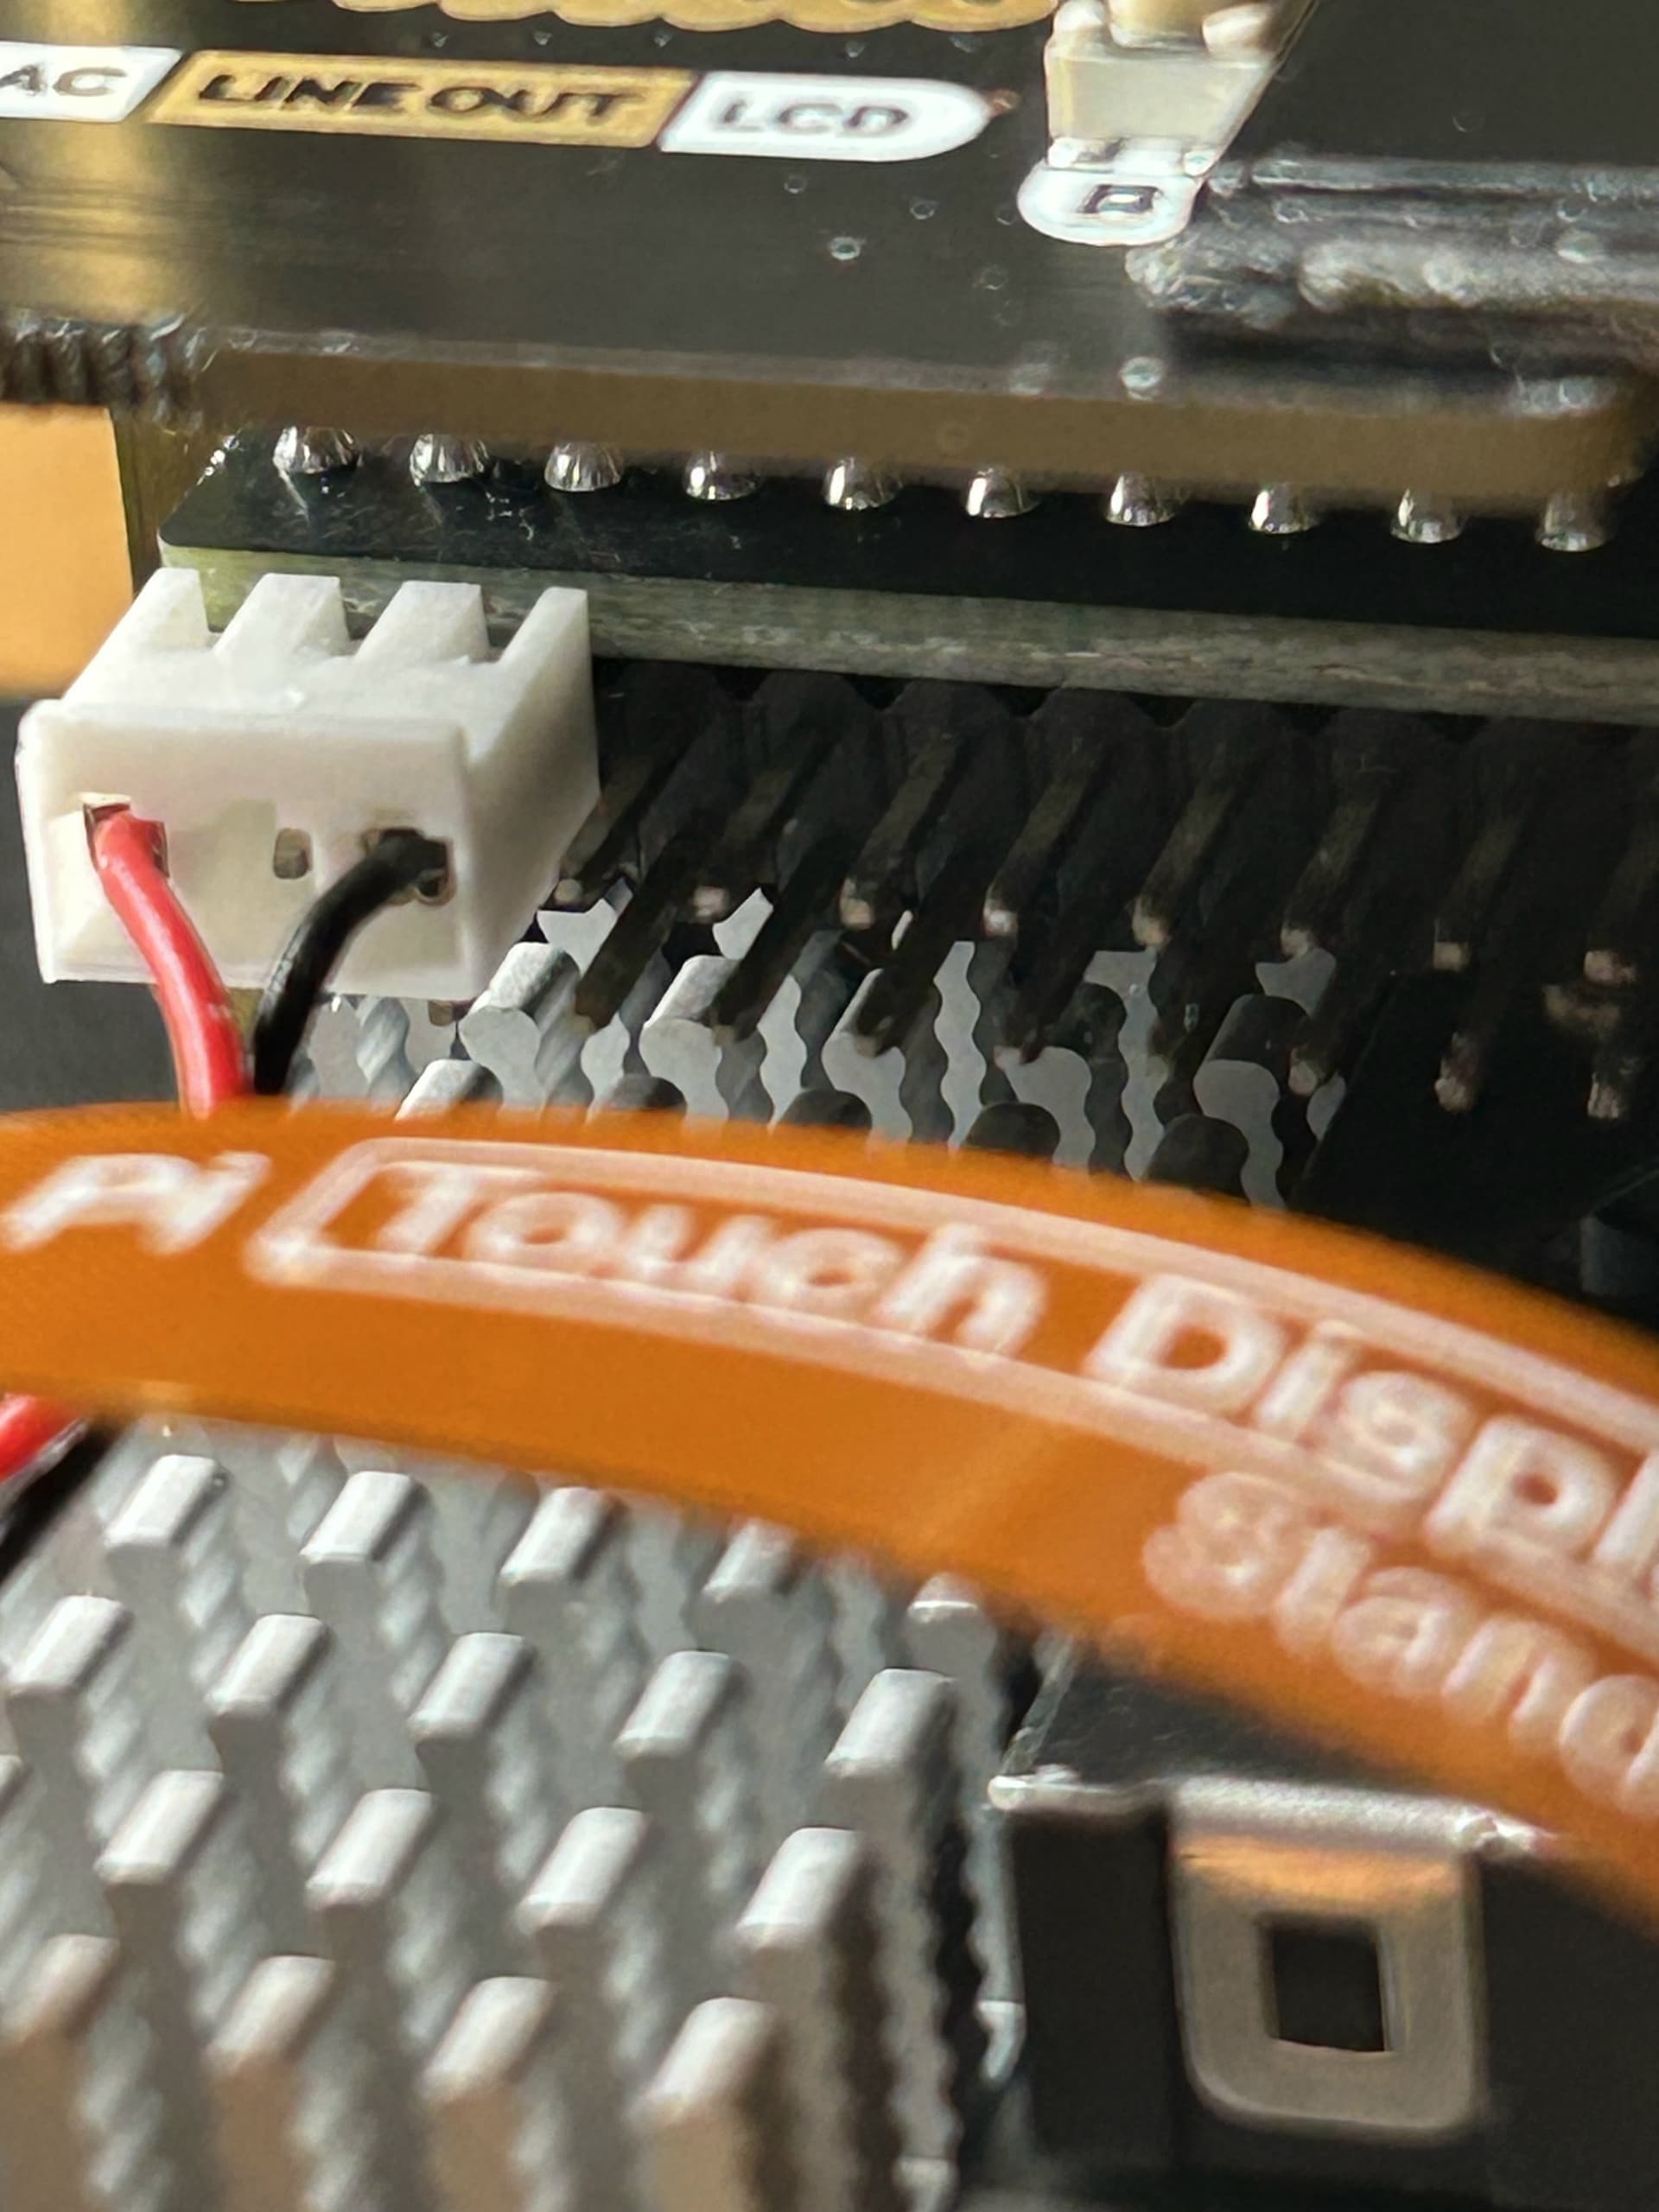
Note I had to drill a hole in the case for the audio out jack plug.
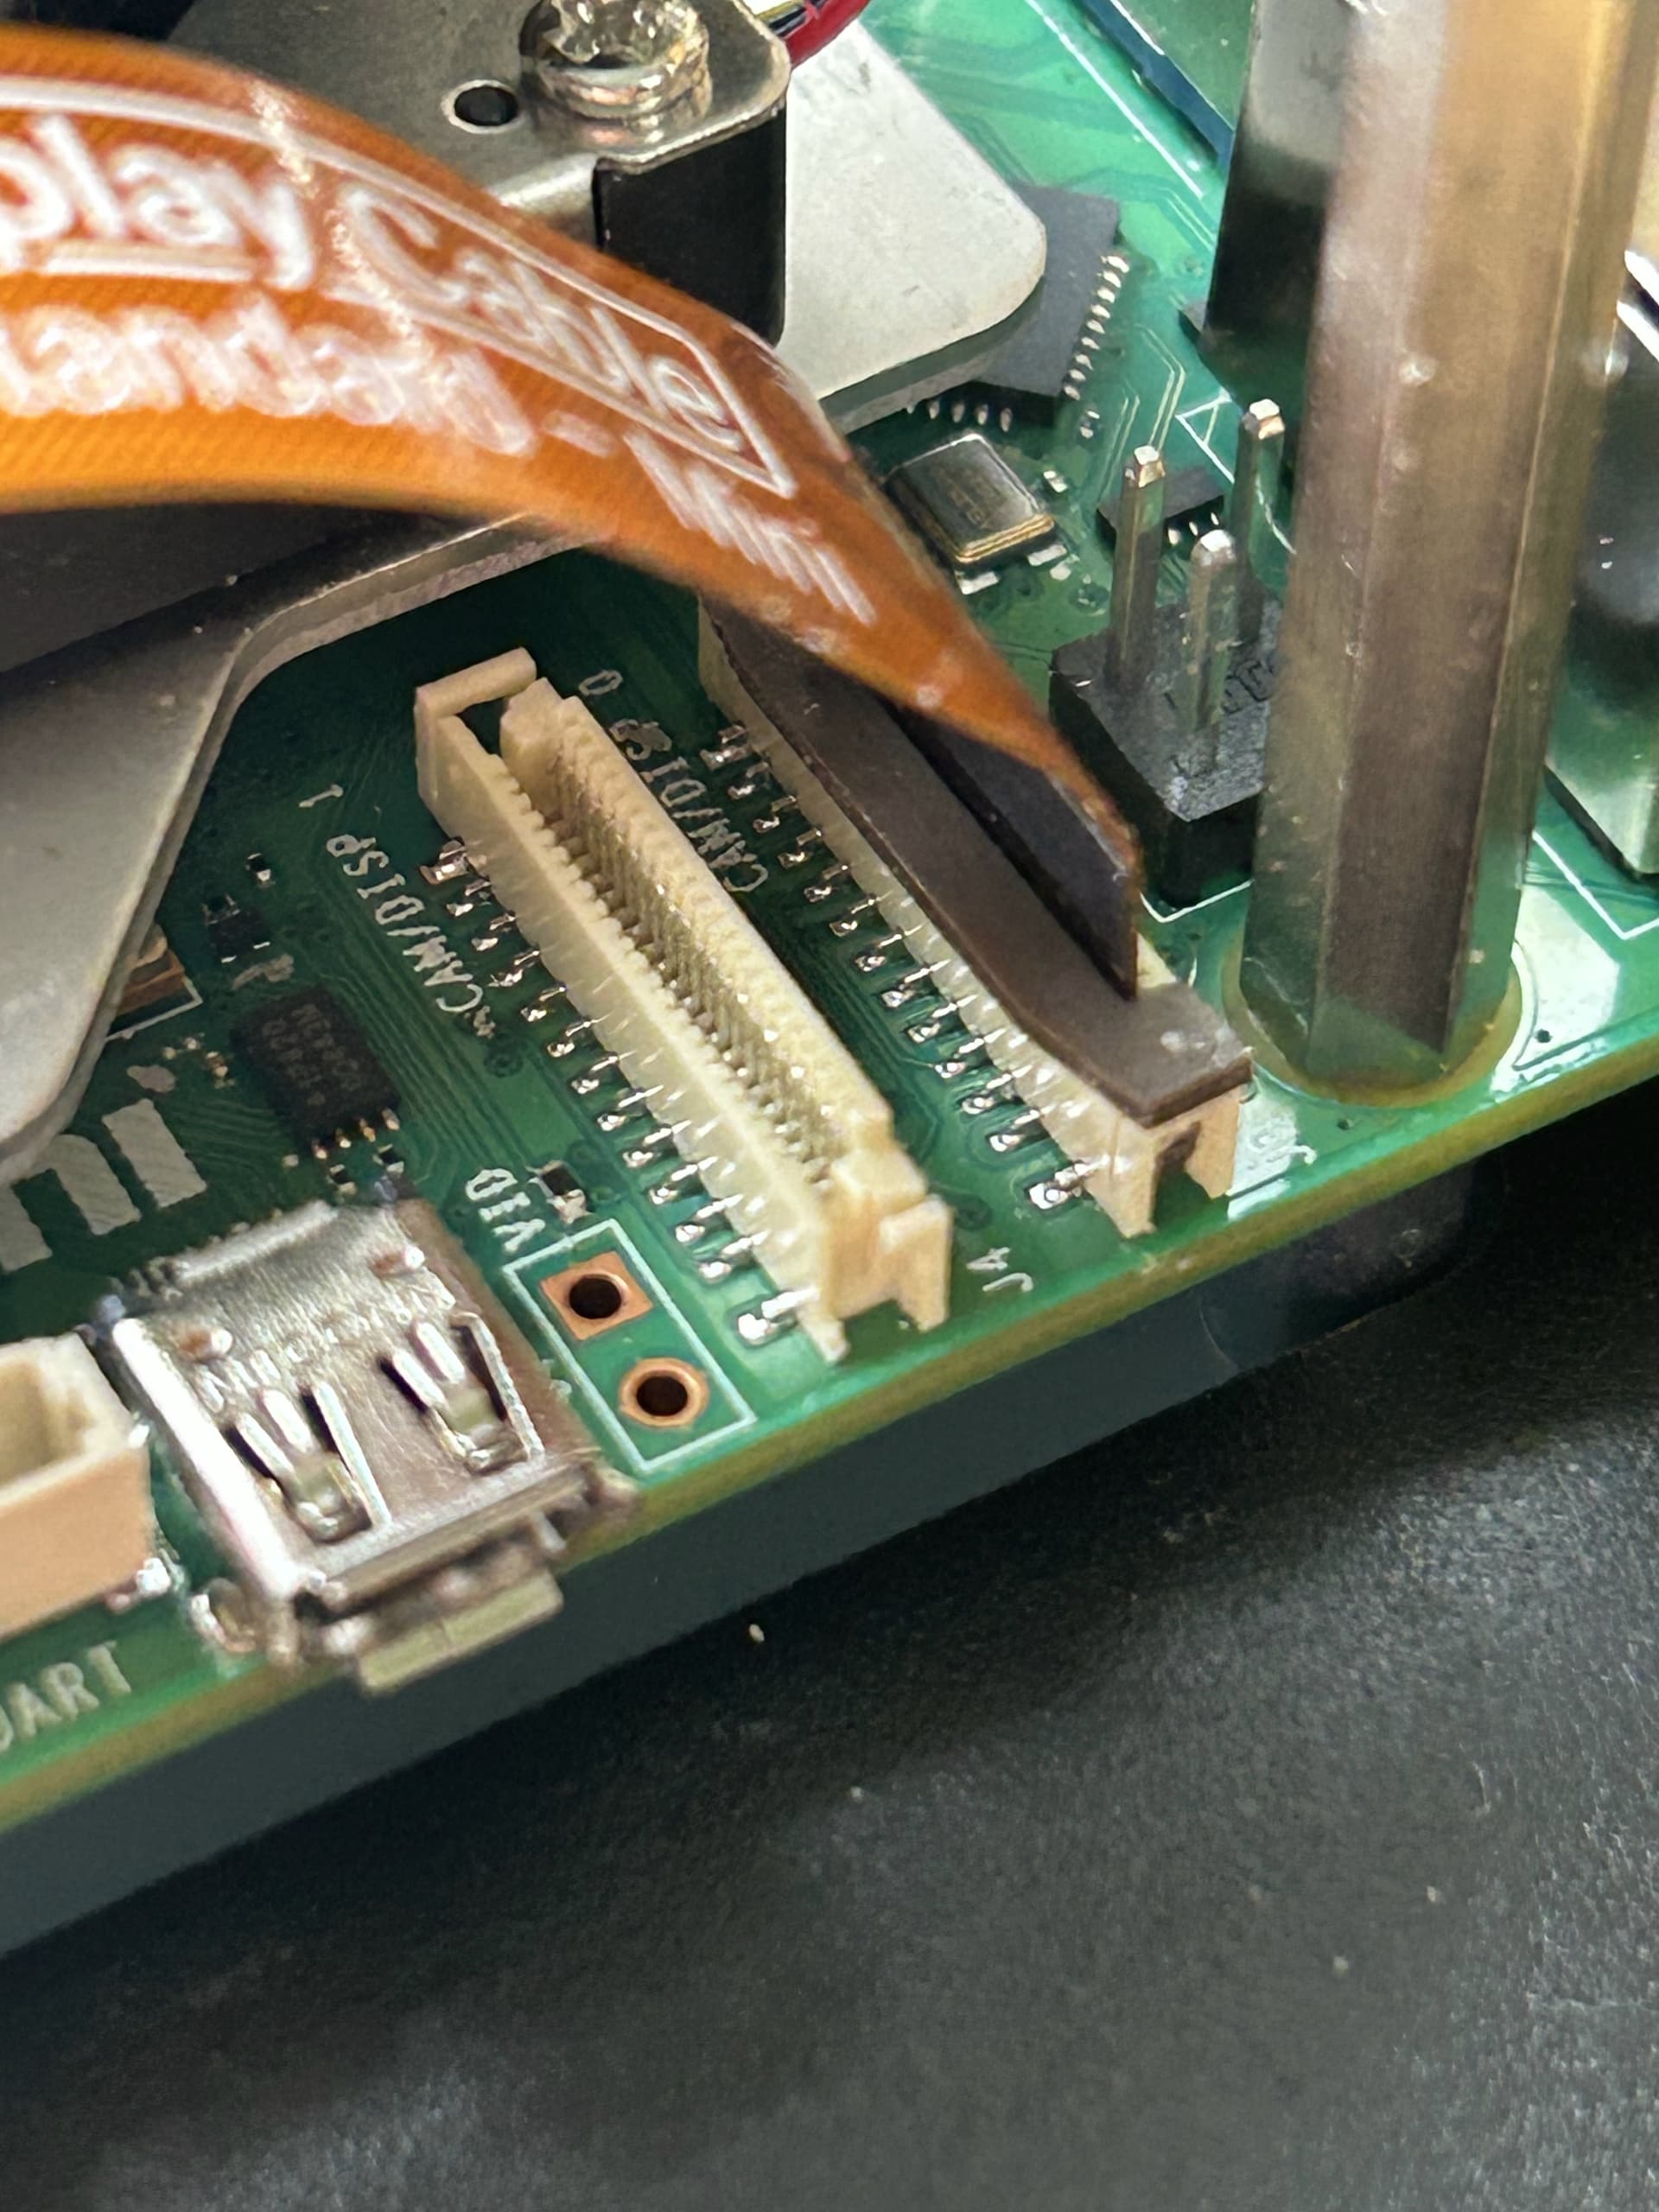
Also, great care is needed with the ribbon cable connectors - lift them very gently away from the board until there is around 1mm space to put the ribbon cable in and then reseat - you will see I managed to snap one off!
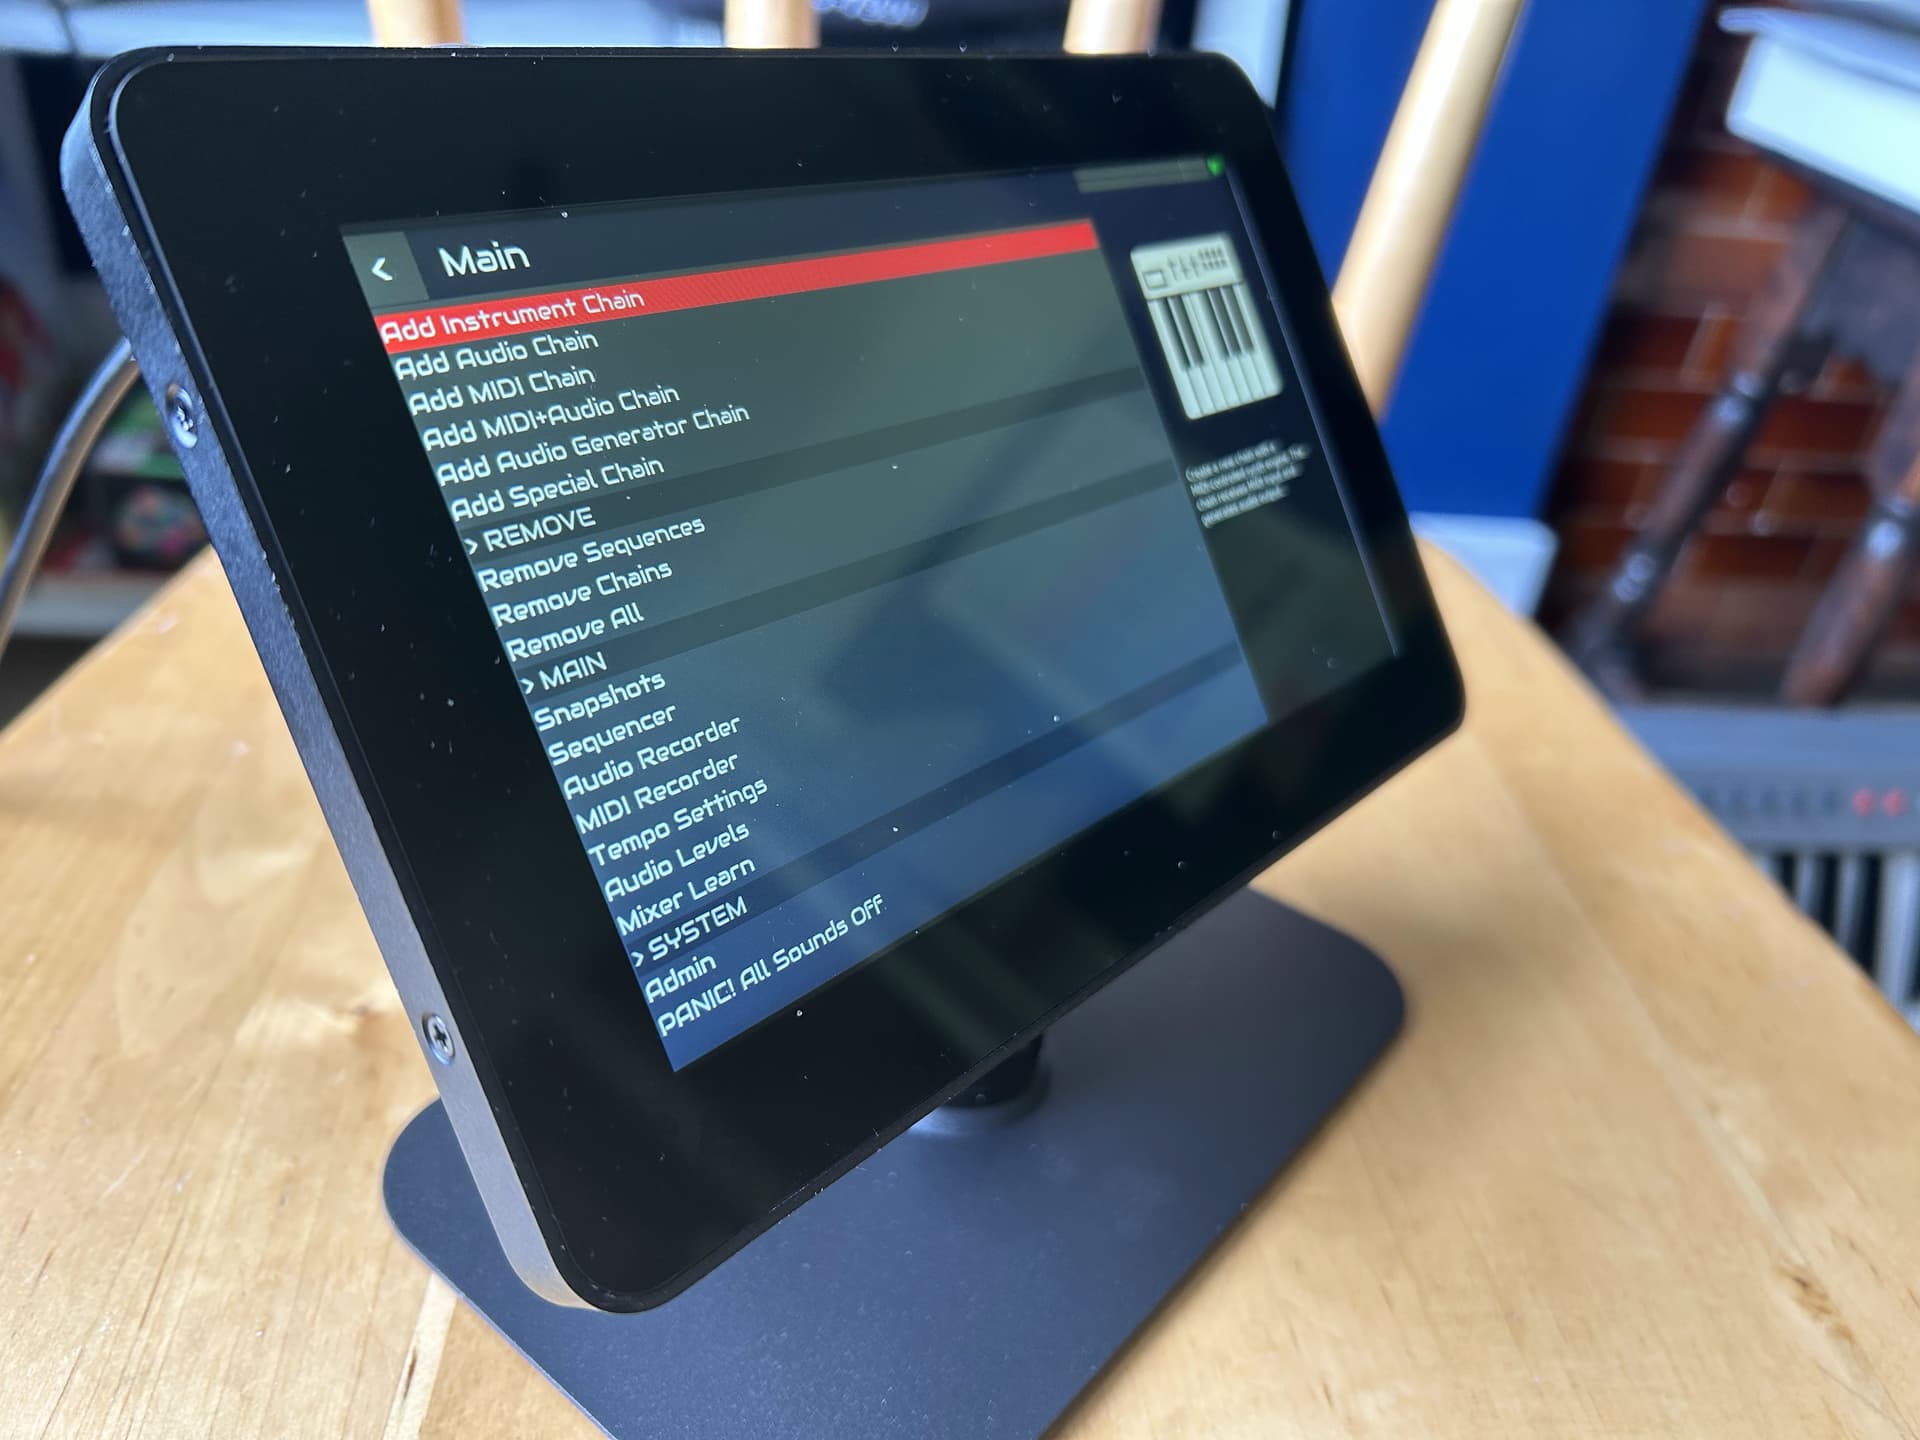
After it boots to the menu (if everything has gone OK), first step is to use the mouse to add in wifi config - (admin:wi-fi config) as you won’t be able to use touch initially. Look up the IP for the box under admin:network information.
From another computer connect via webconnect to the IP and type the password (opensynth).
Under Hardware:Display,
paste the following into Config:
lcd_rotate=2 dtoverlay=vc4-kms-dsi-ili9881-7inch,dsi0,swapxy,invx
(Note dsi0 in the above refers to the DSI-1 port which is the one pictured above. If you use DSI2 then you might be able to omit this part, or change it to dsi1.
Also note - the screen is upside down compared to previously reported uses of the Pi Touch Display 2 on this forum - so I had to modify some of the parameters)
Then, under kernel options paste:
video=DSI-1:720x1280@60,rotate=270
(Change DSI-1 to DSI-2 if that’s the port you are using).
Save changes but don’t reboot yet.
Next, go to Hardware:options and add in the following:
dtoverlay=hifiberry-dac
(or whichever sound card you are using!)
save but don’t reboot.
Lastly, go to system:terminal
and type
‘nano /usr/share/X11/xorg.conf.d/90-monitor.conf’
type in the following:
Section “Monitor”
Identifier “DSI-1”
Option “Rotate” “right”
EndSection
(note capitalization of Rotate vs. right. Also, change DSI-1 to DSI-2 if that’s the port you are using).
Save by typing ctrl-s then ctrl-x to exit
Lastly, on the command line type halt and the system will shut down.
You may then cycle power and if everything has worked, it should boot up with working touch screen and audio!
I use a USB midi keyboard, and I’m absolutely blown away by how amazing this project is!