Hi @Aethermind and everyone!
Here is a short tutorial on using Clone and Midi Filter Rules to create layers and splits.
The workflow is better using the Mixer, Clone, Key Range and Transpose.
MIDI rules are good if we frequently re-use them in splits or controller templates. MIDI rules have limitations with program changes, note mapping and controller learning.
The MIDI rules can be found here:
https://wiki.zynthian.org/index.php/MIDI_Filter_Rule_Language
The Zynthian is a 16 midi channel multi-timbral synth. Each mixer slot uses a unique MIDI channel. There are 16 MIDI channels available.
In multi channel mode we can only play the MIDI channel(s) that our controller is sending. In stage mode we can only play the active Zynthian channel (1, 2, 3 or 4). We can CLONE the channel data to another channel, or we can Rule IGNORE and MAP the data to another channel.
CLONE, TRANSPOSE AND KEY RANGE METHOD
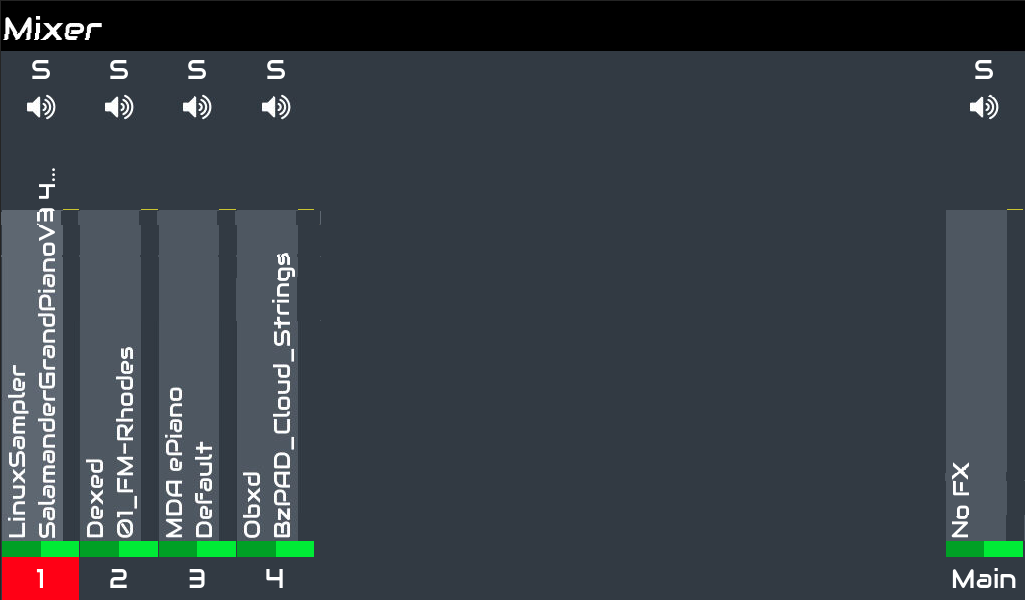
Set our controller to transmit on MIDI channel 1. Use Multi mode on the Zynthian. Create four mixer chains:
Linuxsampler Salamander Piano to MIDI 1
Dexed FM EP to MIDI 2
MDA Rhodes to MIDI 3
OBXd Cloud Pad to MIDI 4
In order to layer the Piano, DX and Pad, in Multi mode:
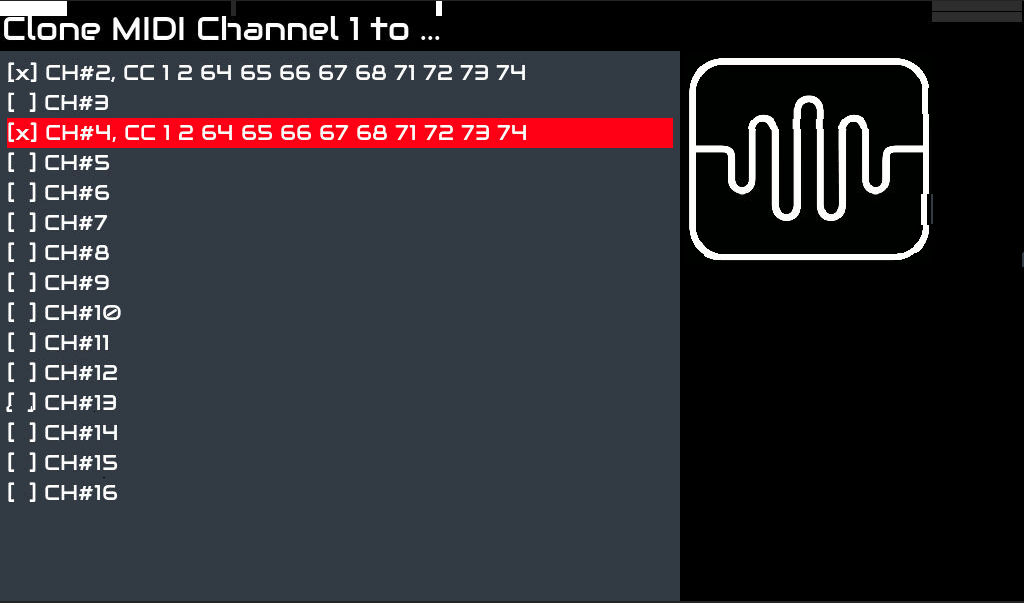
Clone the Piano Layer (MIDI channel 1) to
MIDI Channel 2 and include controllers  1 and 64
MIDI Channel 4 and include controllers 1, 64, 71 and 74
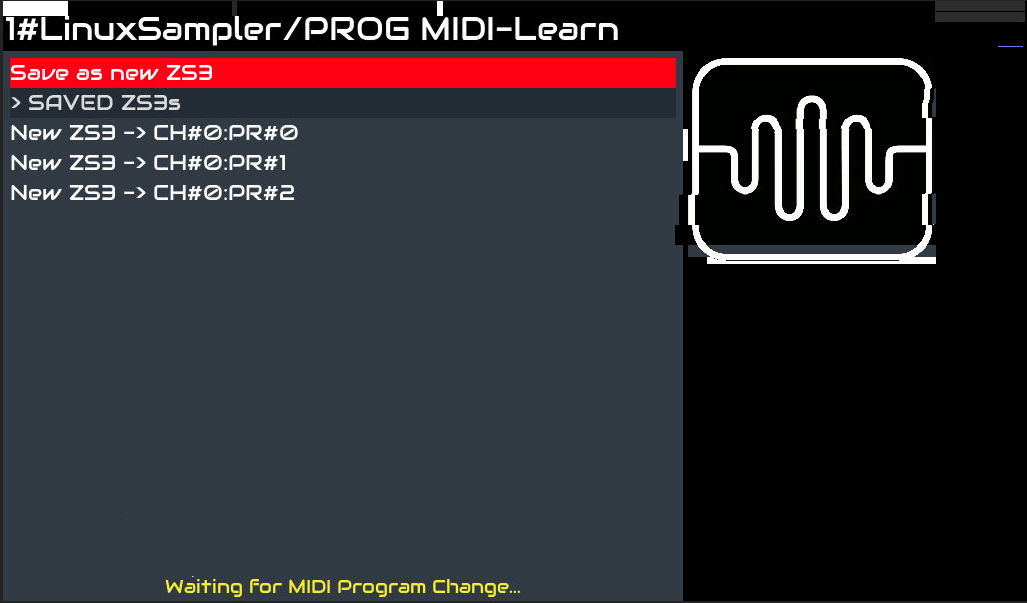
We can capture a program change (PC0) and save the snapshot as “Layer Split Tutorial."
To play the MDA Rhodes instead:
Zero the piano mixer volume
Clone Piano (MIDI channel 1) to
MIDI channel 3 and include controller 1 and 64
MIDI channel 4 and include controllers 1, 64, 71 and 74
and Uncheck the Clone to MIDI channel 2
Save this as a program change (PC1) and re-save the snapshot.
Now to split the keyboard at Eb3-E3:
Select program change 0 (The piano volume should be restored)
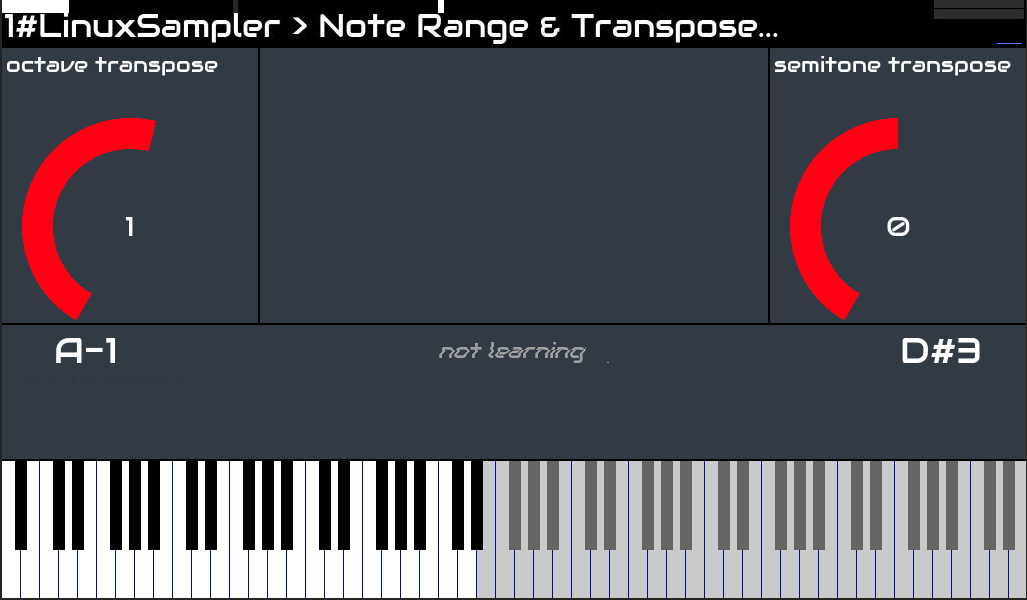
Transpose the Piano and Dexed up one Octave
Set Key range from full A-1 to Eb3
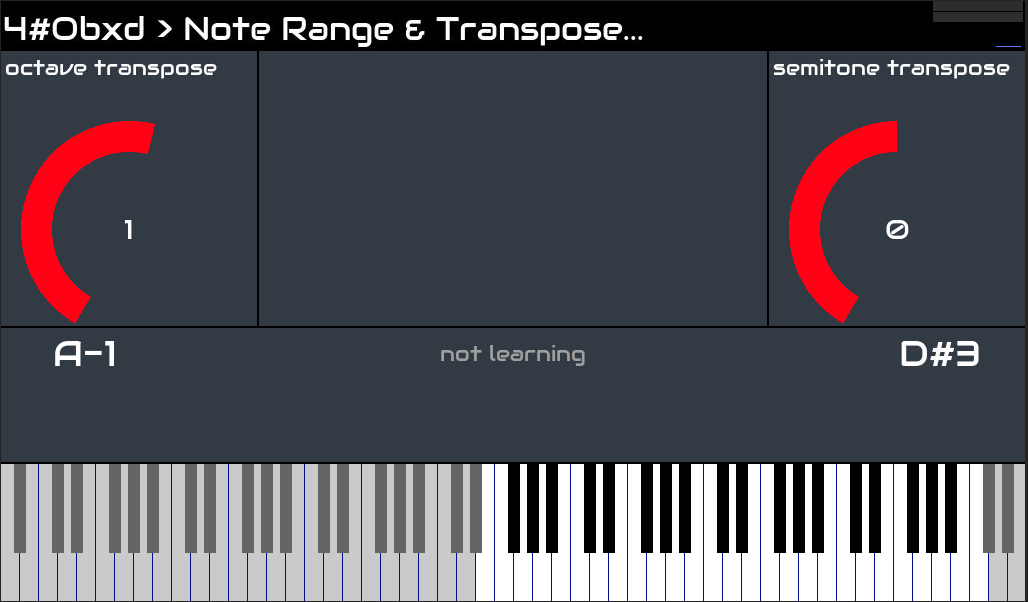
Transpose OBXd down one octave
Set Key range from from E3 to C7
Save this as a program change (PC2) and re-save the snapshot. We now have three programs and a split that we can access using program changes.
MIDI FILTER RULES METHOD
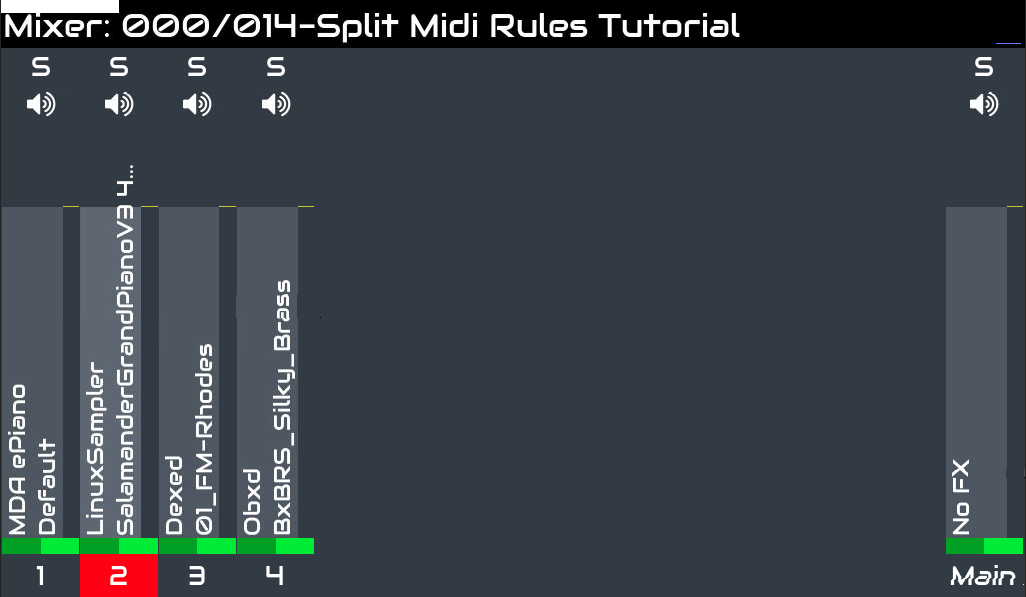
On the Zynthian, CLEAN ALL and create new mixer chains
MDA EP on MIDI01
Linuxsampler Piano on MIDI02
Dexed FM Piano on MIDI03
OBXd Silky Brass on MIDI04
On the zynthian, using zynthian.local, Interface, Midi Options, Midi filter rules, Delete the contents of the MIDI filter rules box. Save a MIDI profile as “Clear Rules” or “Default”.
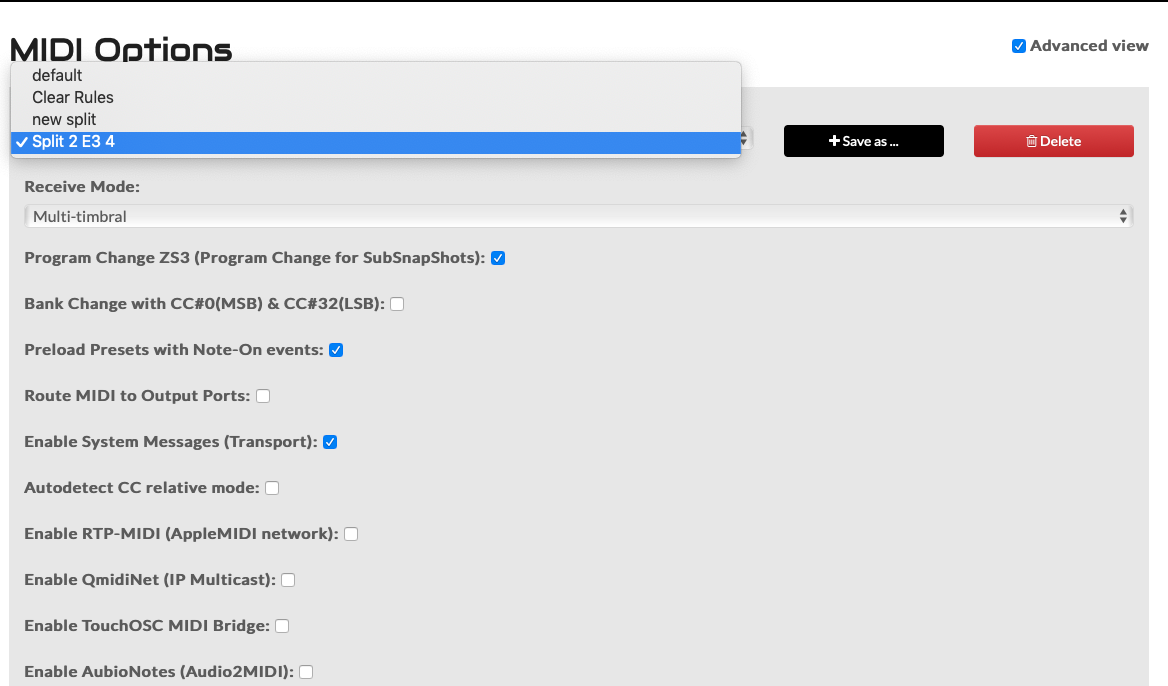
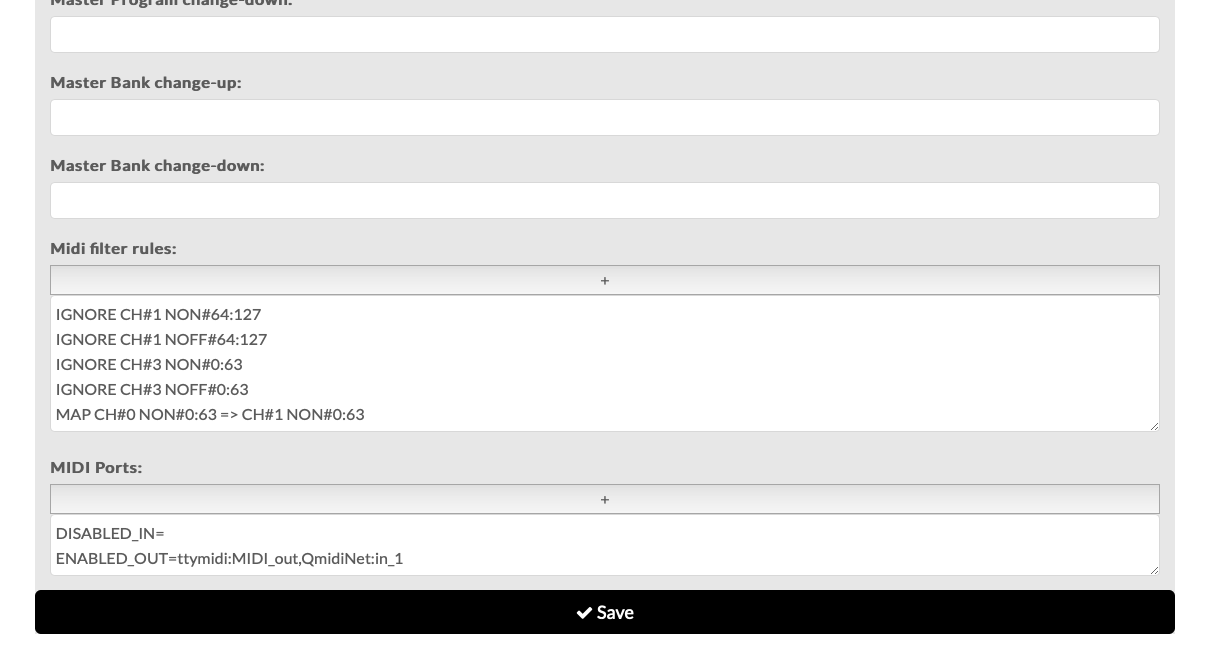
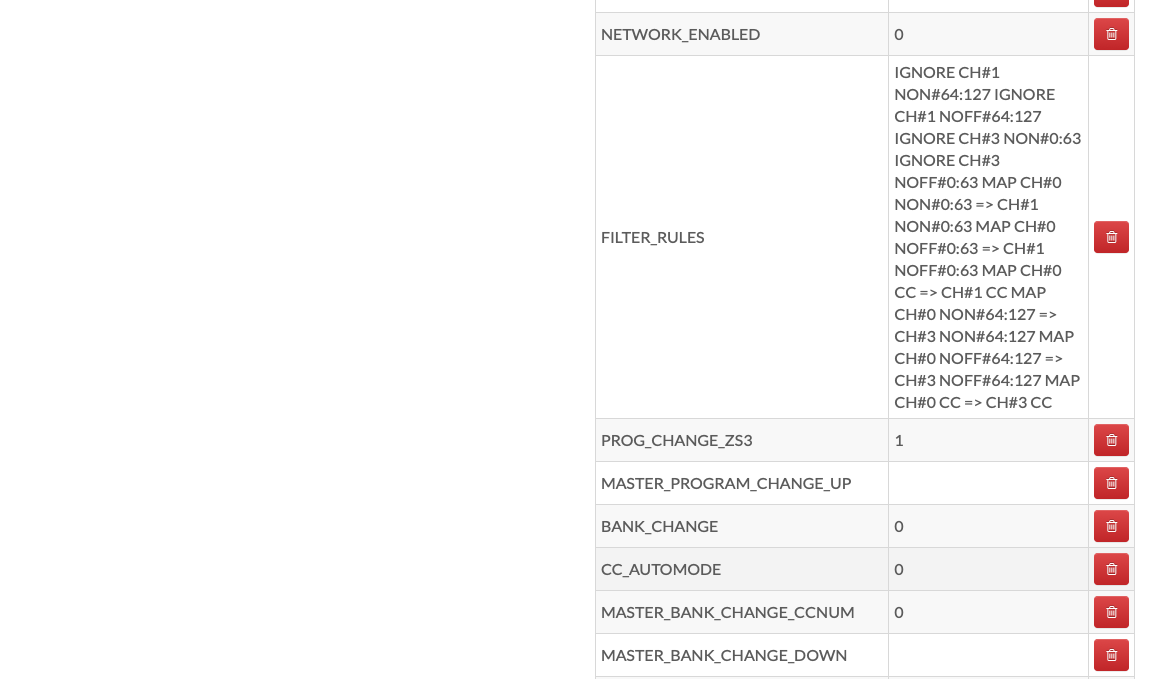
Paste this script into the Midi filter rules box. Save the MIDI profile as “Split 2, E4, 4.”
IGNORE CH#1 NON#64:127
IGNORE CH#1 NOFF#64:127
IGNORE CH#3 NON#0:63
IGNORE CH#3 NOFF#0:63
MAP CH#0 NON#0:63 => CH#1 NON#0:63
MAP CH#0 NOFF#0:63 => CH#1 NOFF#0:63
MAP CH#0 CC => CH#1 CC
MAP CH#0 NON#64:127 => CH#3 NON#64:127
MAP CH#0 NOFF#64:127 => CH#3 NOFF#64:127
MAP CH#0 CC => CH#3 CC
What the lines mean:
Do not play MIDI 02 (piano) note-on or note-off above Eb3
Do not play MIDI 04 (OBXd) note-on or note off Below E3
Map MIDI 01 note-on, note-off and controllers to MIDI 02 notes 0-63
Map MIDI 01 note-on, note-off and controllers to MIDI 04 notes 64-127
The limitations are:
The source channel (MIDI 01 MDA EP) is muted when using MIDI rules
Only one source note range maps to one target (Piano range 0:63)
MAP-ped controllers cannot be directly learned
Snapshots can change MIDI rules,
Program changes in a snapshot cannot change MIDI rules
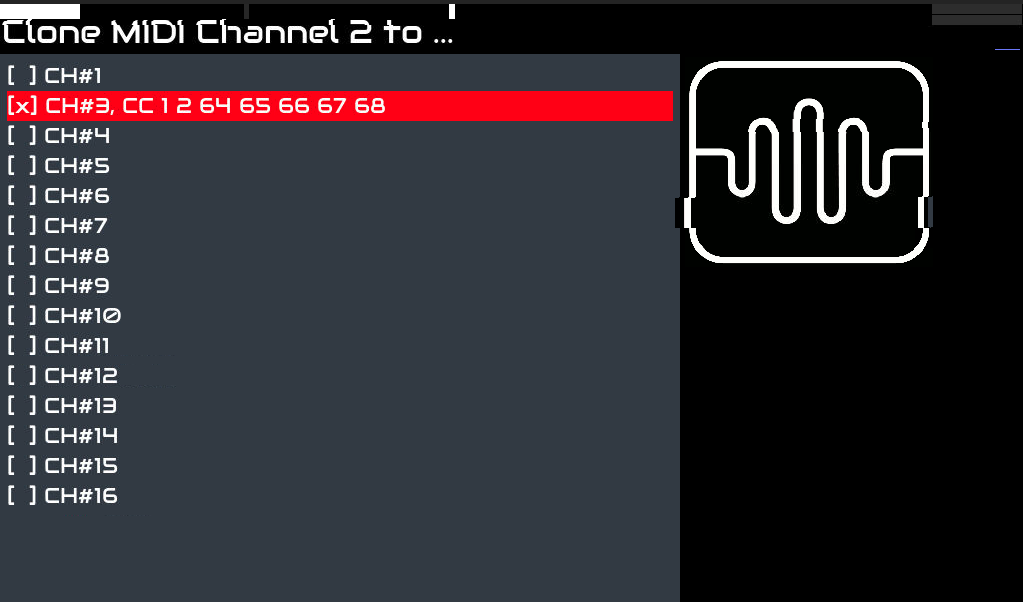
To play the DX layer, we have to Clone MIDI Channel 2 to MIDI Channel 3:
Apply the MIDI profile using the Zynthian’s Admin menu:
Select the Admin Page:
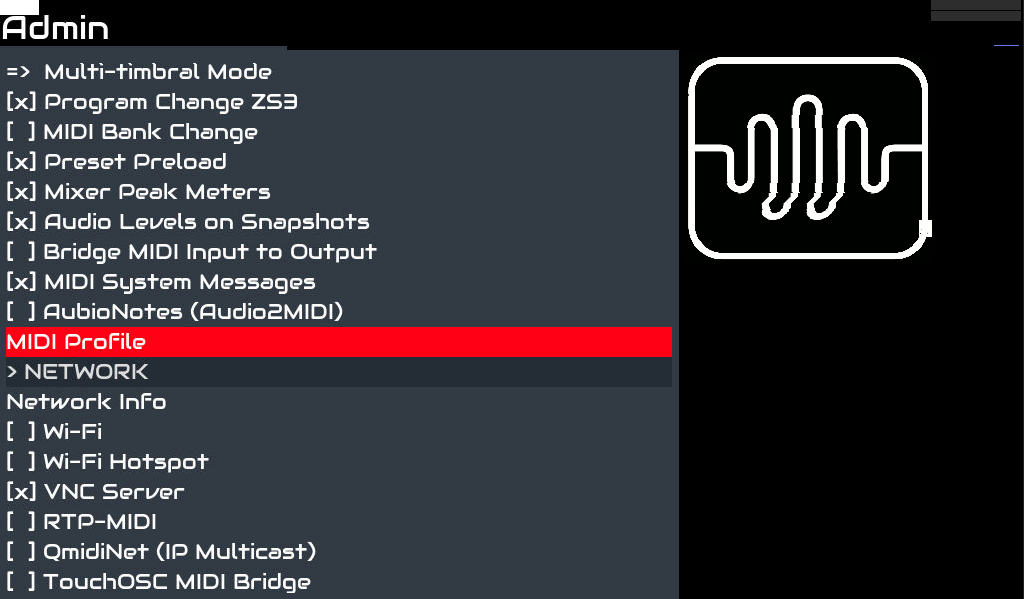
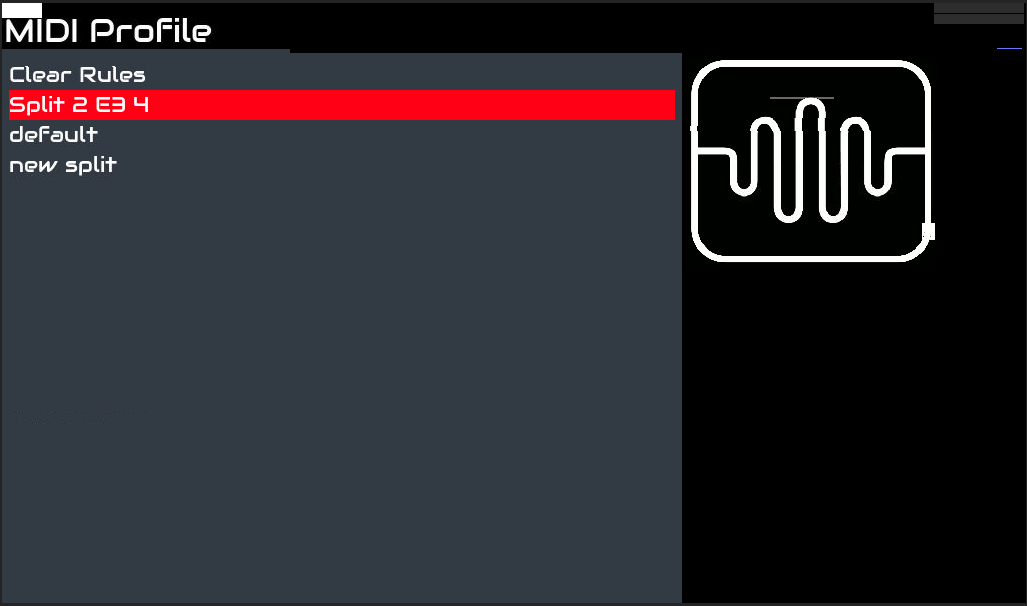
Select the MIDI profile menu and pick the profile:
Save the snapshot as “MIDI Split Rules Tutorial.”
If we want to play the EP, just apply the Clear or Default Profile.
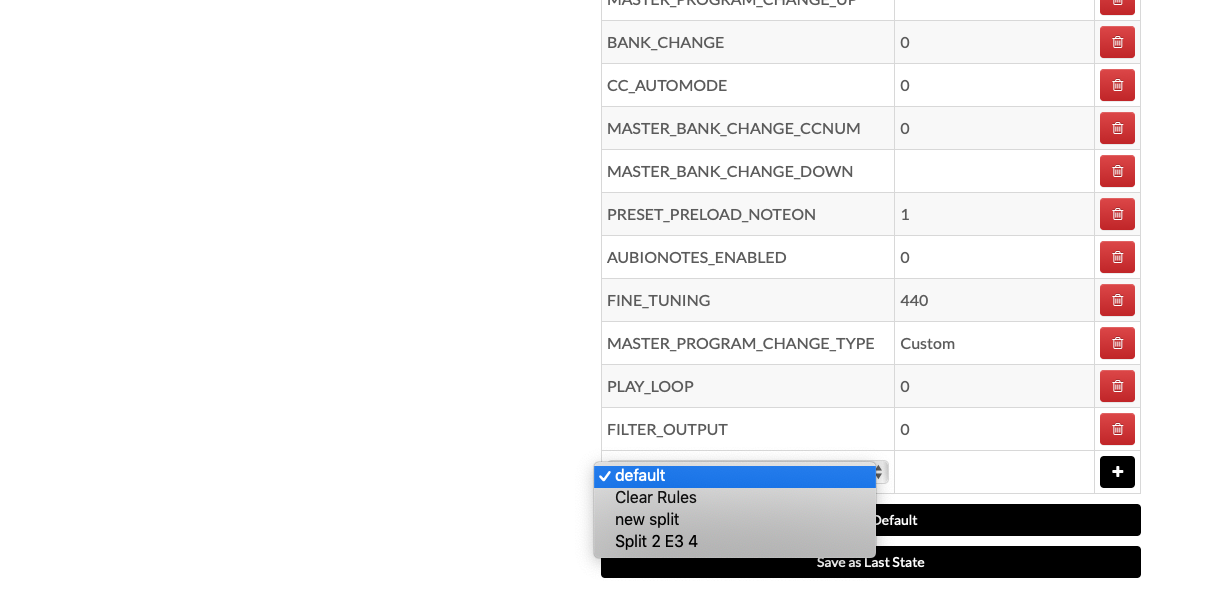
We can also add the MIDI profile using the zynthian.local Snapshot page.
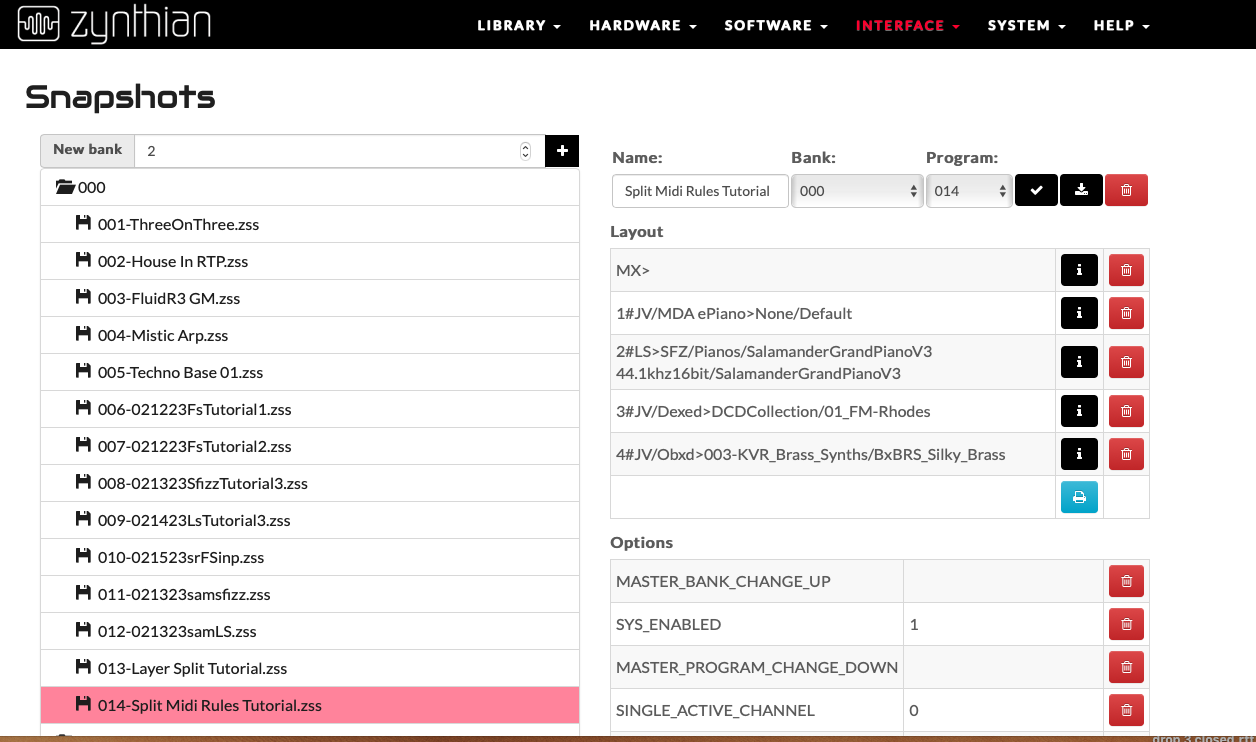
Select the saved snapshot. The MIDI rules are displayed in the middle of the page:
At the bottom of the page, Select the script “Split 2, E3, 4”, and click the + to add the script to the snapshot.
Re-save the snapshot. Enjoy the layered split!
I attached the snapshots to make learning easier.
013-Layer Split Tutorial.zss (123.3 KB)
014-Split Midi Rules Tutorial.zss (32.5 KB)
Hope this helps! Happy New Year!
Sam in NJ USA