The 5.1 is a really nice piece of kit. Not only does it look good on the desk, but it also feels thoughtfully put together once everything is assembled. The design has a clean, compact presence, and the fit and finish are solid overall. Even after shipping overseas (mine came from Spain), it held up well-though my frame was slightly squished on arrival, a little gentle coaxing got it back into shape without issue.
Spec-wise, it’s got plenty to admire, and the unit comes together with a satisfying sense of completeness. But what really makes it shine is that it isn’t just a box of parts — it’s a proper instrument, with its own personality. Once everything is running, the sound has a warmth and character that instantly pulls you in. It’s not sterile or clinical; it feels alive, like something crafted with both engineering skill and a bit of love for the music.
Cables & Orientation
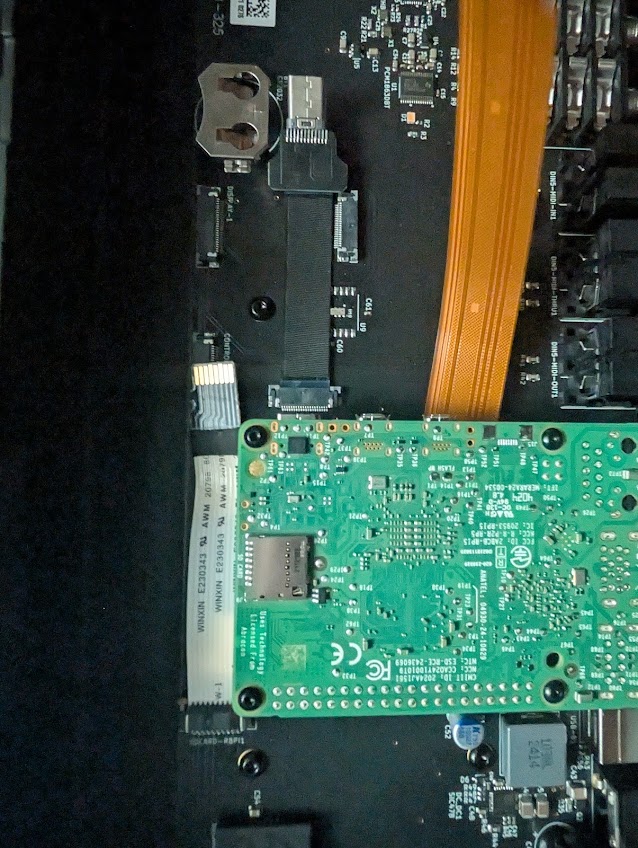
One of the trickier parts of assembly was getting the ribbon cables in correctly, particularly the video cable. It’s not immediately obvious which way they should be oriented, and if you happen to insert them backwards or not fully, you’re in for a frustrating round of troubleshooting. In my case, I initially thought the microSD cable was defective until I realized it was simply upside down. The video cable was even more stressful-it required removing the Pi from the heatsink and mainboard (which are tightly sandwiched together with 8 screws plus 2 in the rear) just to get it out again.
Suggestion: A simple silkscreen label or printed markers on the board near each connector would be a huge quality-of-life improvement. Even subtle “this side up” indicators would save users from second-guessing orientations. Floyd Steinberg’s videos show white ribbon cables, but my unit came with black and copper ones, which makes it harder to visually match references. Labels could close that gap.
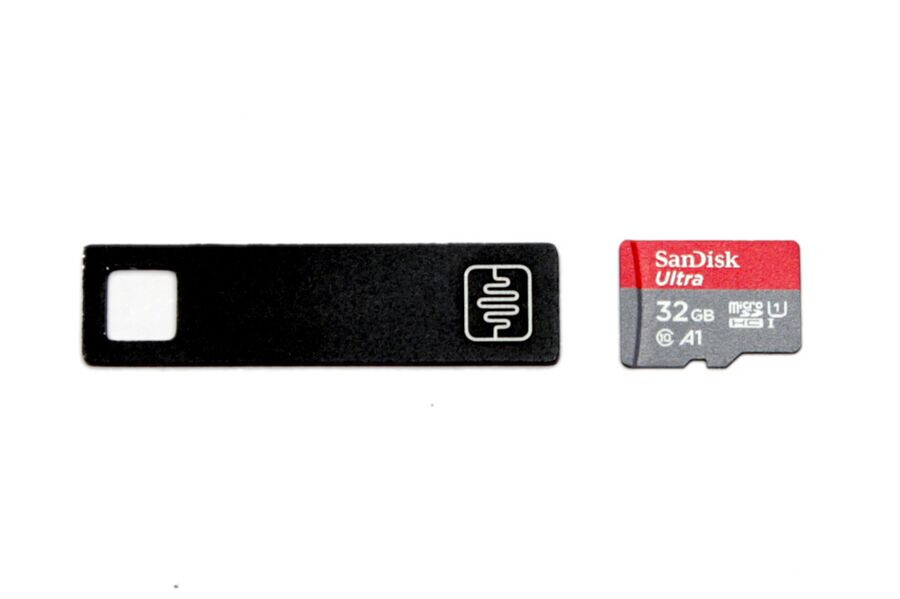
SD Card Access
Another area worth improving is the microSD slot. Currently, the slot’s full metal casing makes it difficult to eject the card with just a fingernail. Cutting the side tabs down to half height or adding a small hex-pattern cutout would help a ton.
Overall Fit & Finish
Aside from these small usability points, the overall build quality is impressive. The frame is sturdy, the components fit together with precision, and once assembled, the whole system looks and feels like a proper piece of hardware, not just a DIY kit. More importantly, when you start playing with it, you realize it’s more than just well-built — it’s fun. There’s a tactile joy in using it, from the little clicks and cable connections to the moment you hear those first tones. It has that rare mix of precision engineering and playful soul that makes you want to keep experimenting, keep listening, and keep coming back.
Thank you for this piece and its excellent software. It’s not just a machine, it’s an experience — and I hope many more amazing pieces like this continue to be made for people to enjoy.