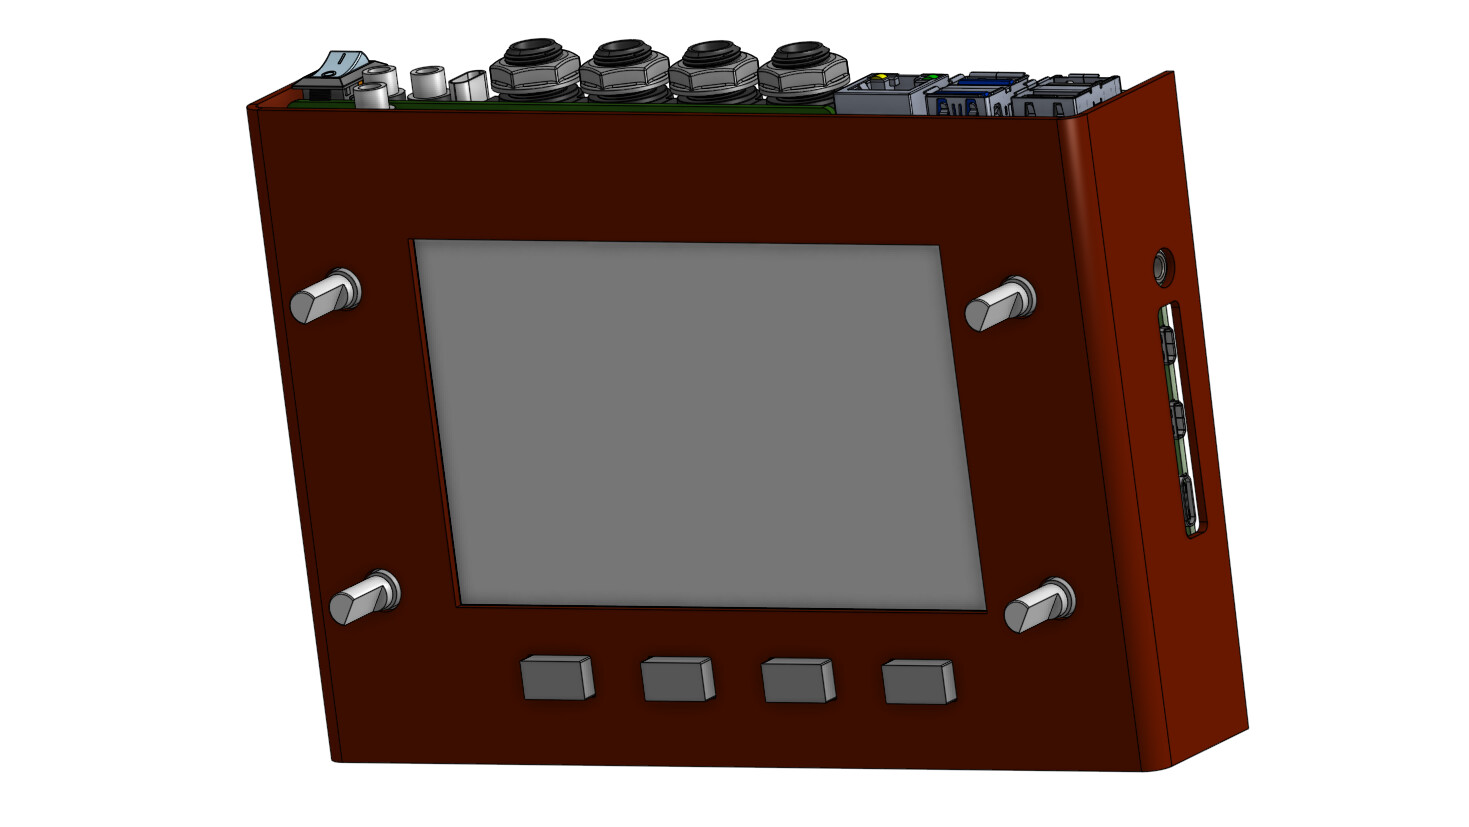
Well then, it’s nowhere near ready but I just finished (almost finished rather) the cad design part of things and just wanted to share it, so here it is!
Getting all of the cables out the back of the unit.
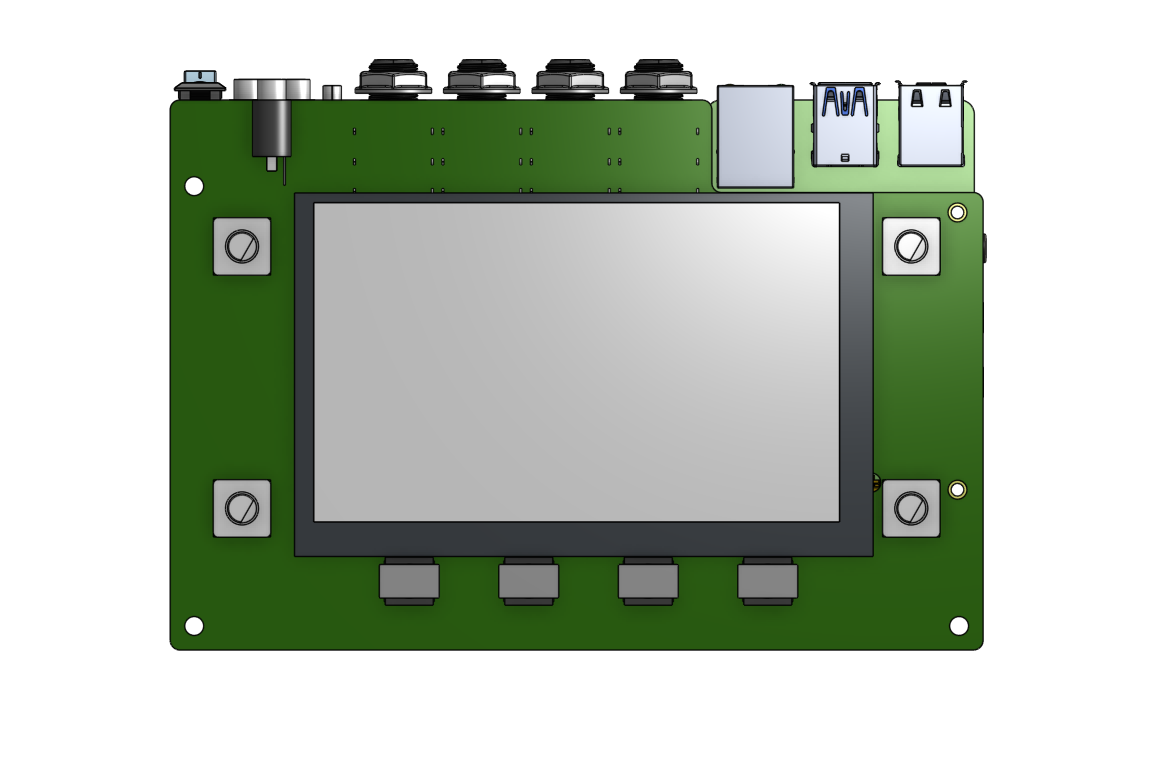
Maximize useable space via a 5 inch capacitive dsi touchscreen.
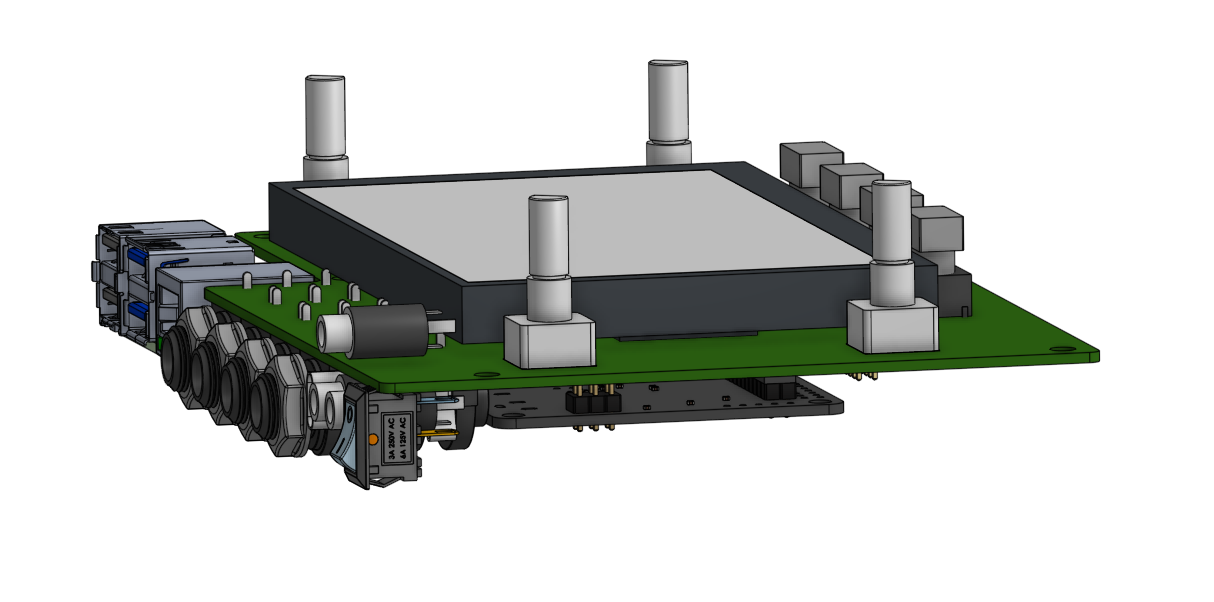
Make it thinner and easier to build (dsi helps a lot, but i decided on a board).
Integrate a power switch.
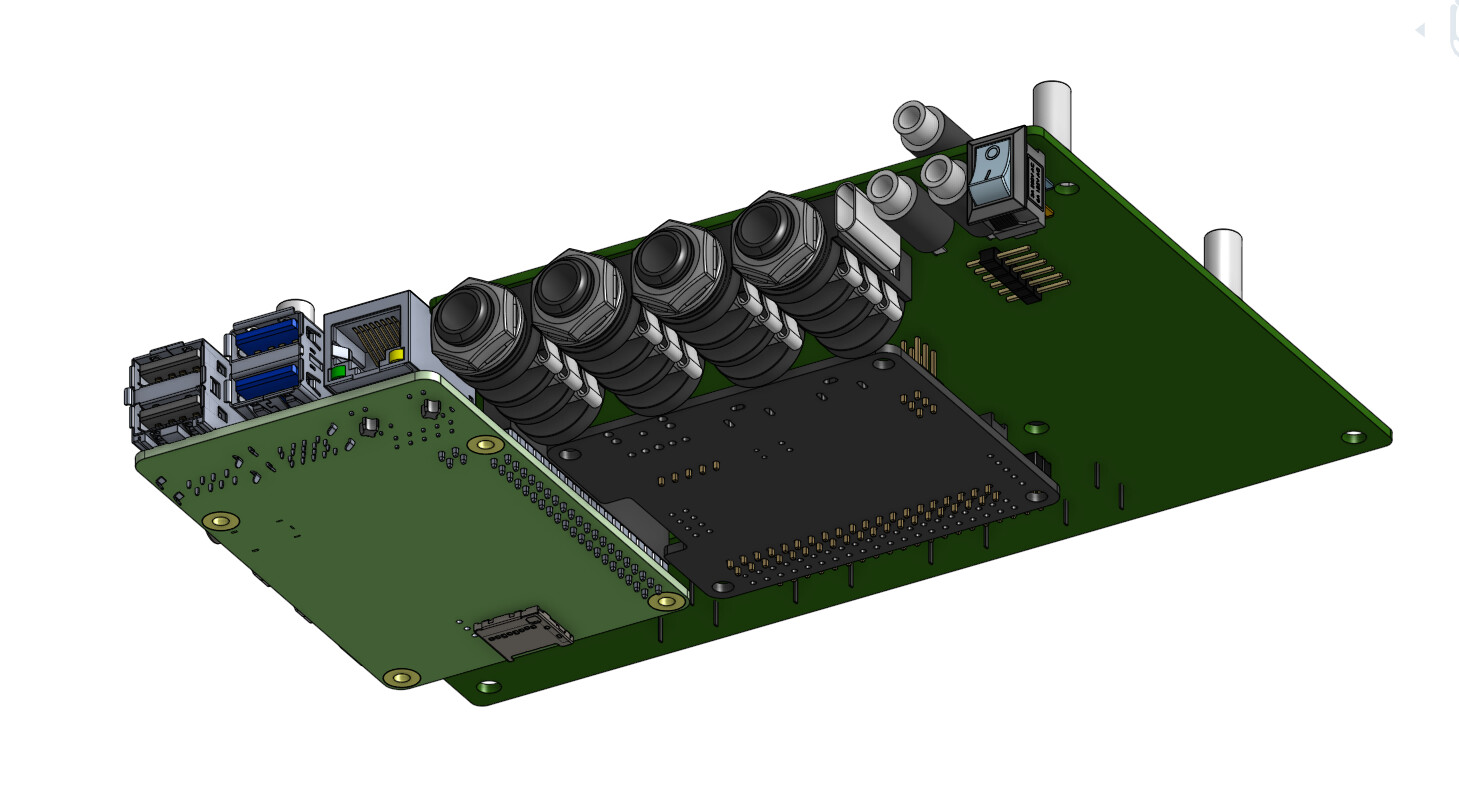
Use mostly off the shelf components (the usb c port is a bit tricky, but the rest of things can be bought from aliexpress/ebay)
Make the board fairly straightforward
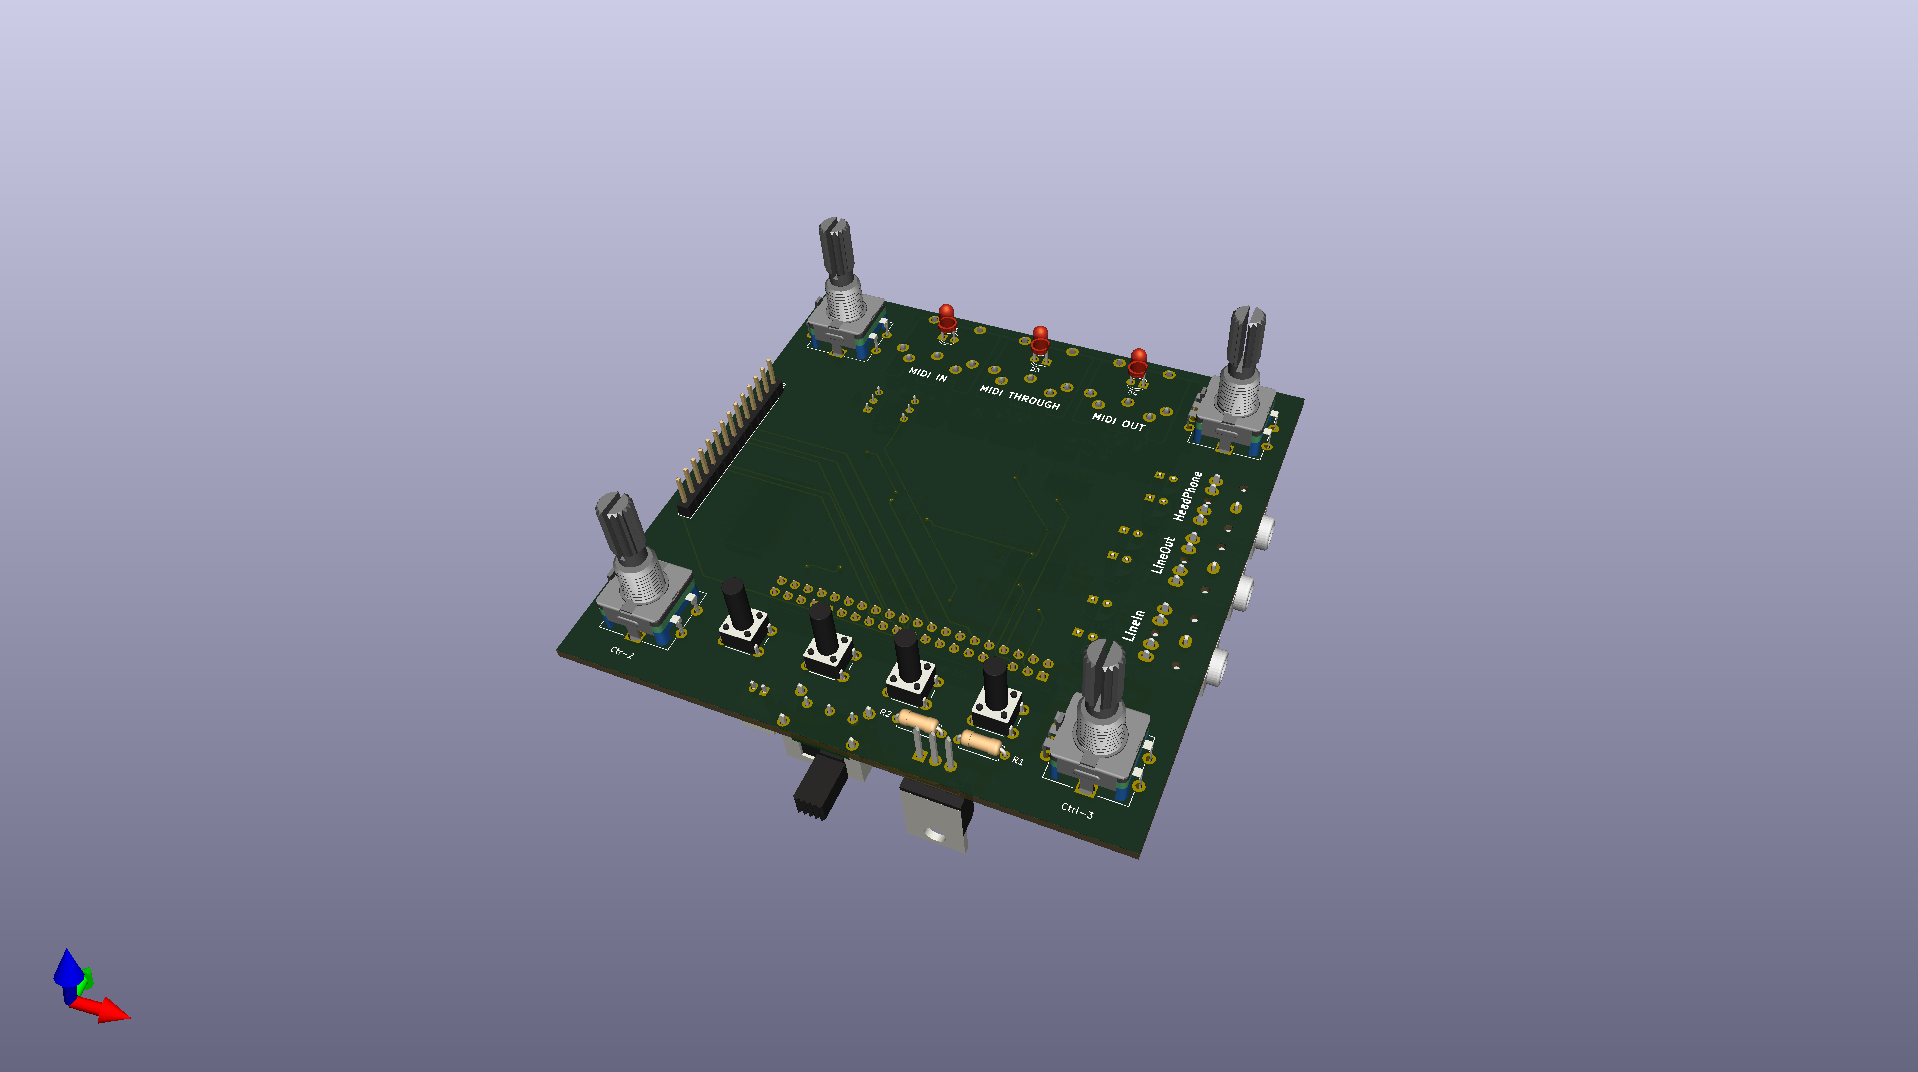
Add the Zynaptik-2 Module in the board itself
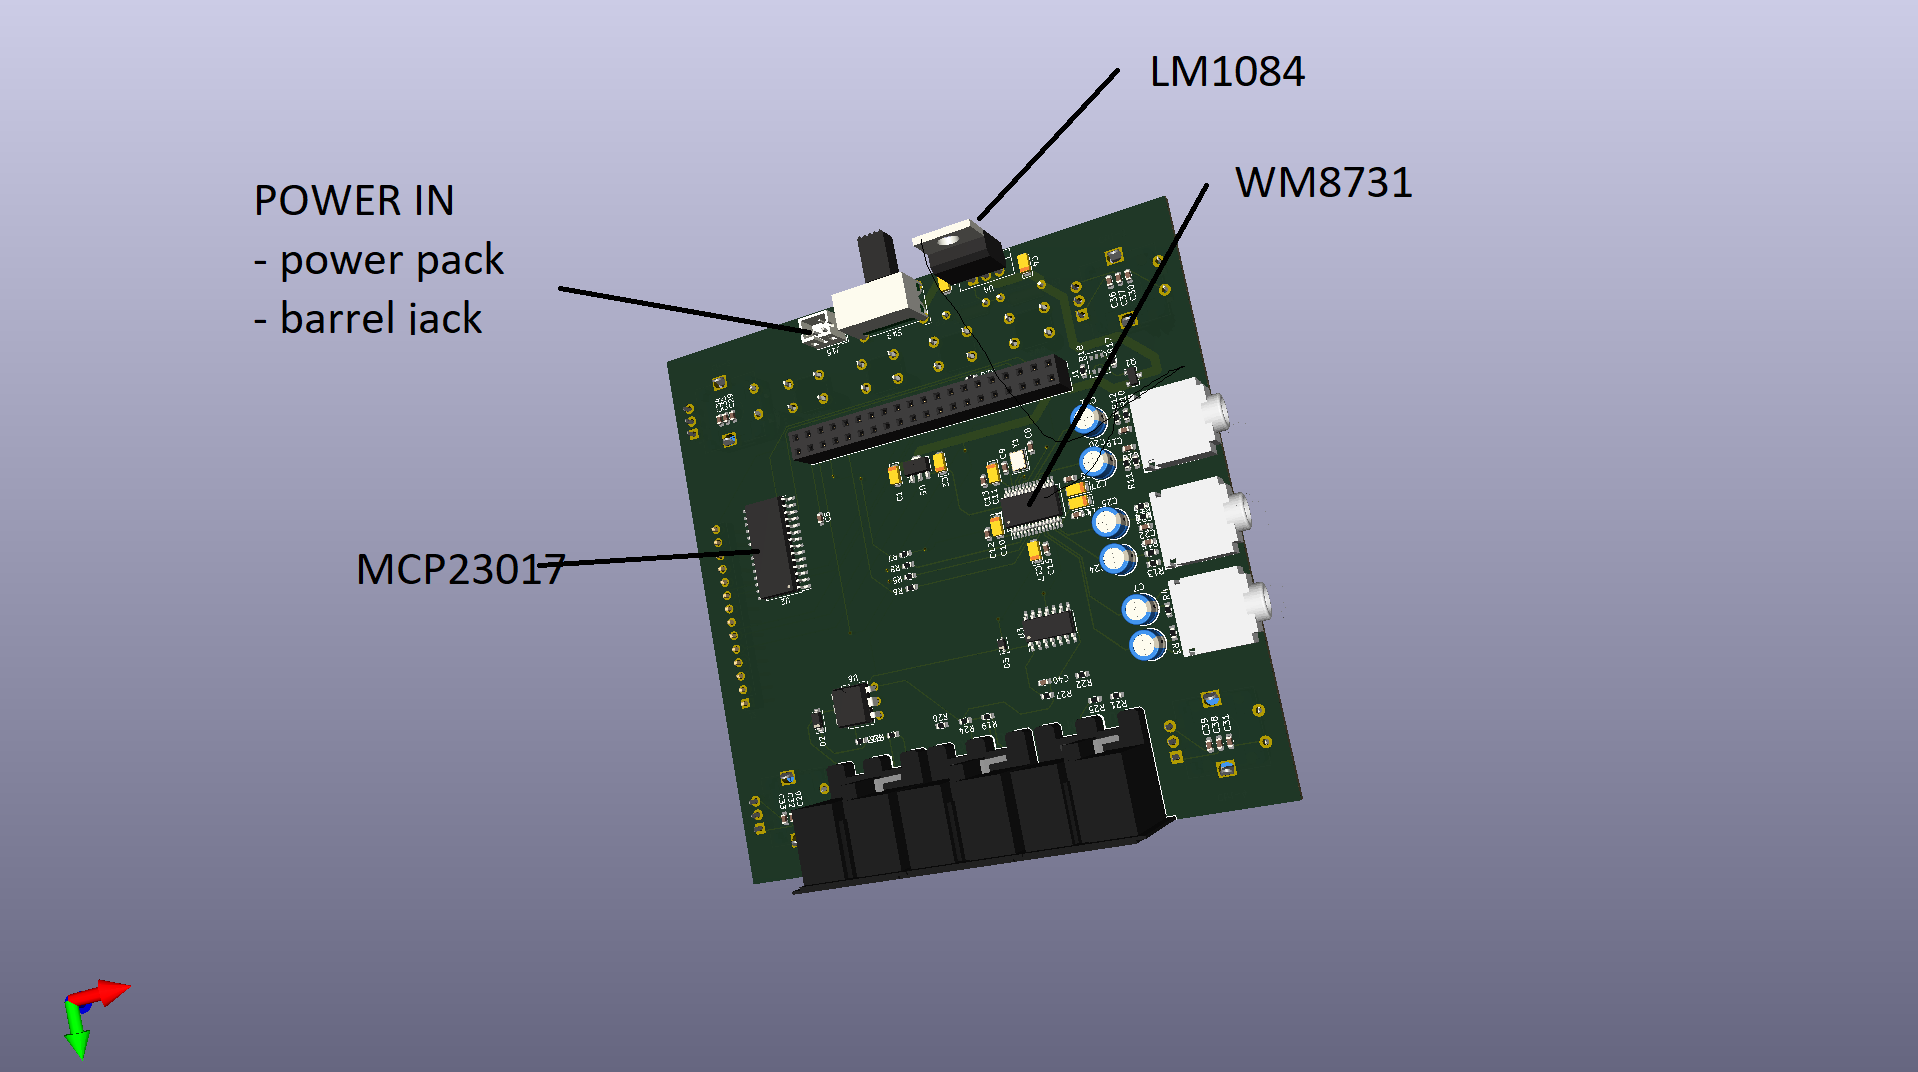
Re-use older zynthian kit components, mostly hifiberry and raspberry wich tend to be the most expensive. (Also like this i avoid the issue of having to deal with dac/adc design)
Use the metal case concept from the main project and the heatsink.
Avoid anxiety by doing something with my spare time while avoiding also human contact.
The 5 Inch screen has other uses other than zynthian, one of them being a mini dj station (+midi dj controller and MIXX) and maybe also an ORCA dedicated box
I’ll keep updating this thread as I did with the old one, for now this only exists on cad and I’m fighting my way with kicad to be able to actually get something useful out of this venture.
Hi Pastitas
It looks very good. How hot does the Raspberry get in this case. It looks very flat.
I have installed an quiet 5V fan that is connected at 3.3V and turns on at 55 °C.
The idea is to use the same system the original case uses, Zynductor.
This is pretty ingenious as the whole front plate of this case is metal, and you basically make it into the heatsink (kudos to @jofemodo )
The total thickness is 33.6mm at it’s thickest (the case is slightly slanted) This is achieved by the cutout in wich the raspberry pi sits in, socketed in a female pin header under it.
Keep in mind that physical limitations may apply when laying out the pcb and might make this design change in the future. This is heavily inspired by the fates project, wich is a DIY version of Monome norns, which i built already and designed a case for (this is not yet finished and i’m working out some kinks, but it’ll be published soon)
I am afraid the 5 inch screens that are compatible with this would be DSI only, unless this design is changed heavily. The design files however are gonna be public so you will be free to take them and adapt them for your needs.
This is the one I’m using and testing with (works great so far with zynthian)
This will have a frame to make it sit against the case, but this would be inside of the case, so if what you’re asking is for covering the screen, there isn’t such a thing, although I could design it.
Hi @Pastitas ,
I love the overall design. The 4 custom switches are very nice. Are these standarts components, or did you design your own caps ?
Anyway, I do not own some good machinery to “drill” rectangular holes, so I will stick on circular push buttons and caps.
Yes, reusing hifiberry board is an excellent idea !
But I’ve got some doubts about heat dissipation. RBPi is very close from the pcb and using the zynductor will be tricky imho.
Also USB type C connector has a bunch of horribly small pads that will be for sure hard to solder. Or will increase the pcb cost if you plan to make them soldered by the PCB producer (JLCPCB doesn’t do that for example). I’m more in implementing an on board PSU that will power the RPI through its GPIO.
Oh, yeah, this will encased for sure, similar to my last one. In terms of the fan, i’ve found it extremely loud, but I have not tried modding it for 3v, do you have any documentation on that?
I looked into it, but I didn’t find many advantages as the connections on the current pi are used (dsi, usb, ethernet, usb c/micro and hdmi) and this board is made with hand soldering in mind (maybe some smd components could be pre-populated), having to solder hdmi/ethernet connectors is a huge pain point and the thickness is already pretty much as thin as it gets with 6.3mm audio jacks and an independent, off the shelf dsi screen module.
I think that if a “complete solution one board design” (dac/adc and screen included) was to be made then definitely a compute module would make way more sense then anything else
Yeah, this is something that still needs testing, i might have to machine a copper piece to make my own zynductor (a nice job for my new cnc machine)
this particular connector uses tht tiny little holes, it’s the trickiest thing to solder in the whole design but it’s waaay better than i expected, and this is also optional, the idea being to have 6 pins that allow you to have an inline swich, bypass it or have a battery circuit or bypass it aswell. this way the psu/battery management circuit becomes a possible add on. I know it seems a bit weird integrating and unifying and then modularizing, but I do believe that some of the added features (even the power switch) are optional and don’t serve everyone’s purpose, while the base (zynthian official kits) is a very solid hardware/software platform as is.
I looked through Amazon for wrench powered knock out punches, had no appropriate sizes, most cost $100++.
It takes a passionate commitment to a design to tackle square holes.
I have seen Online CNC Machining Services
(like CAD driven PCB makers), but the cost is wayyy more than a mass produced part.