Success Cases

Thank you for sharing!

I’m amazed and what you have built is a big inspiration for me.

Zintian is controlled by pots through Arduino, since these pots directly interacted with T-Synth. Therefore, I had to make a midi controller on Arduino.

This is my dream for a DeepZynthian case.

But I don’t dare to destroy my DeepMind 6 :wink:

Greetings Rolf

3 Likes


Hello fellow zynthusiasts, i am introducing myself with this little zynthian build i was able to finish during my quarantine last week. Many thanks to everyone involved in the making of zynthian! I had plenty of fun in the process of building this minimal implementation, although I am a bit ashamed of the unnecessarily heavy printed case that took my printer more than an eternity to finish, I am more than happy with the outcome. Zynthian found its place in a suitcase full of sound I recently put together

It is connected to an old esi maya44 usb interface and each of the instruments in the case is connected to one of the inputs. This way I have a very small and effective multi effects mixer and another source of sounds at my fingertips. I am very happy and i cannot wait to make some noise with this setup and satisfy any :face_with_monocle:

Yet I havent quite reached my goal yet, as the input channels 3 and 4 of the esi don’t show up in the audio levels menu and they seem to be autorouted to the outputs 1 and 2 bypassing the whole zynthian. They do show up as capture sources in the layer menu anyways but the dry chain always persists. I have read some interesting informations about autorouting problems here and there but have not fond a solution yet. I am about to open a thread but maybe someone will point me towards an existing discussion :slight_smile:

6 Likes

Excellent! as long as you accept the quest!

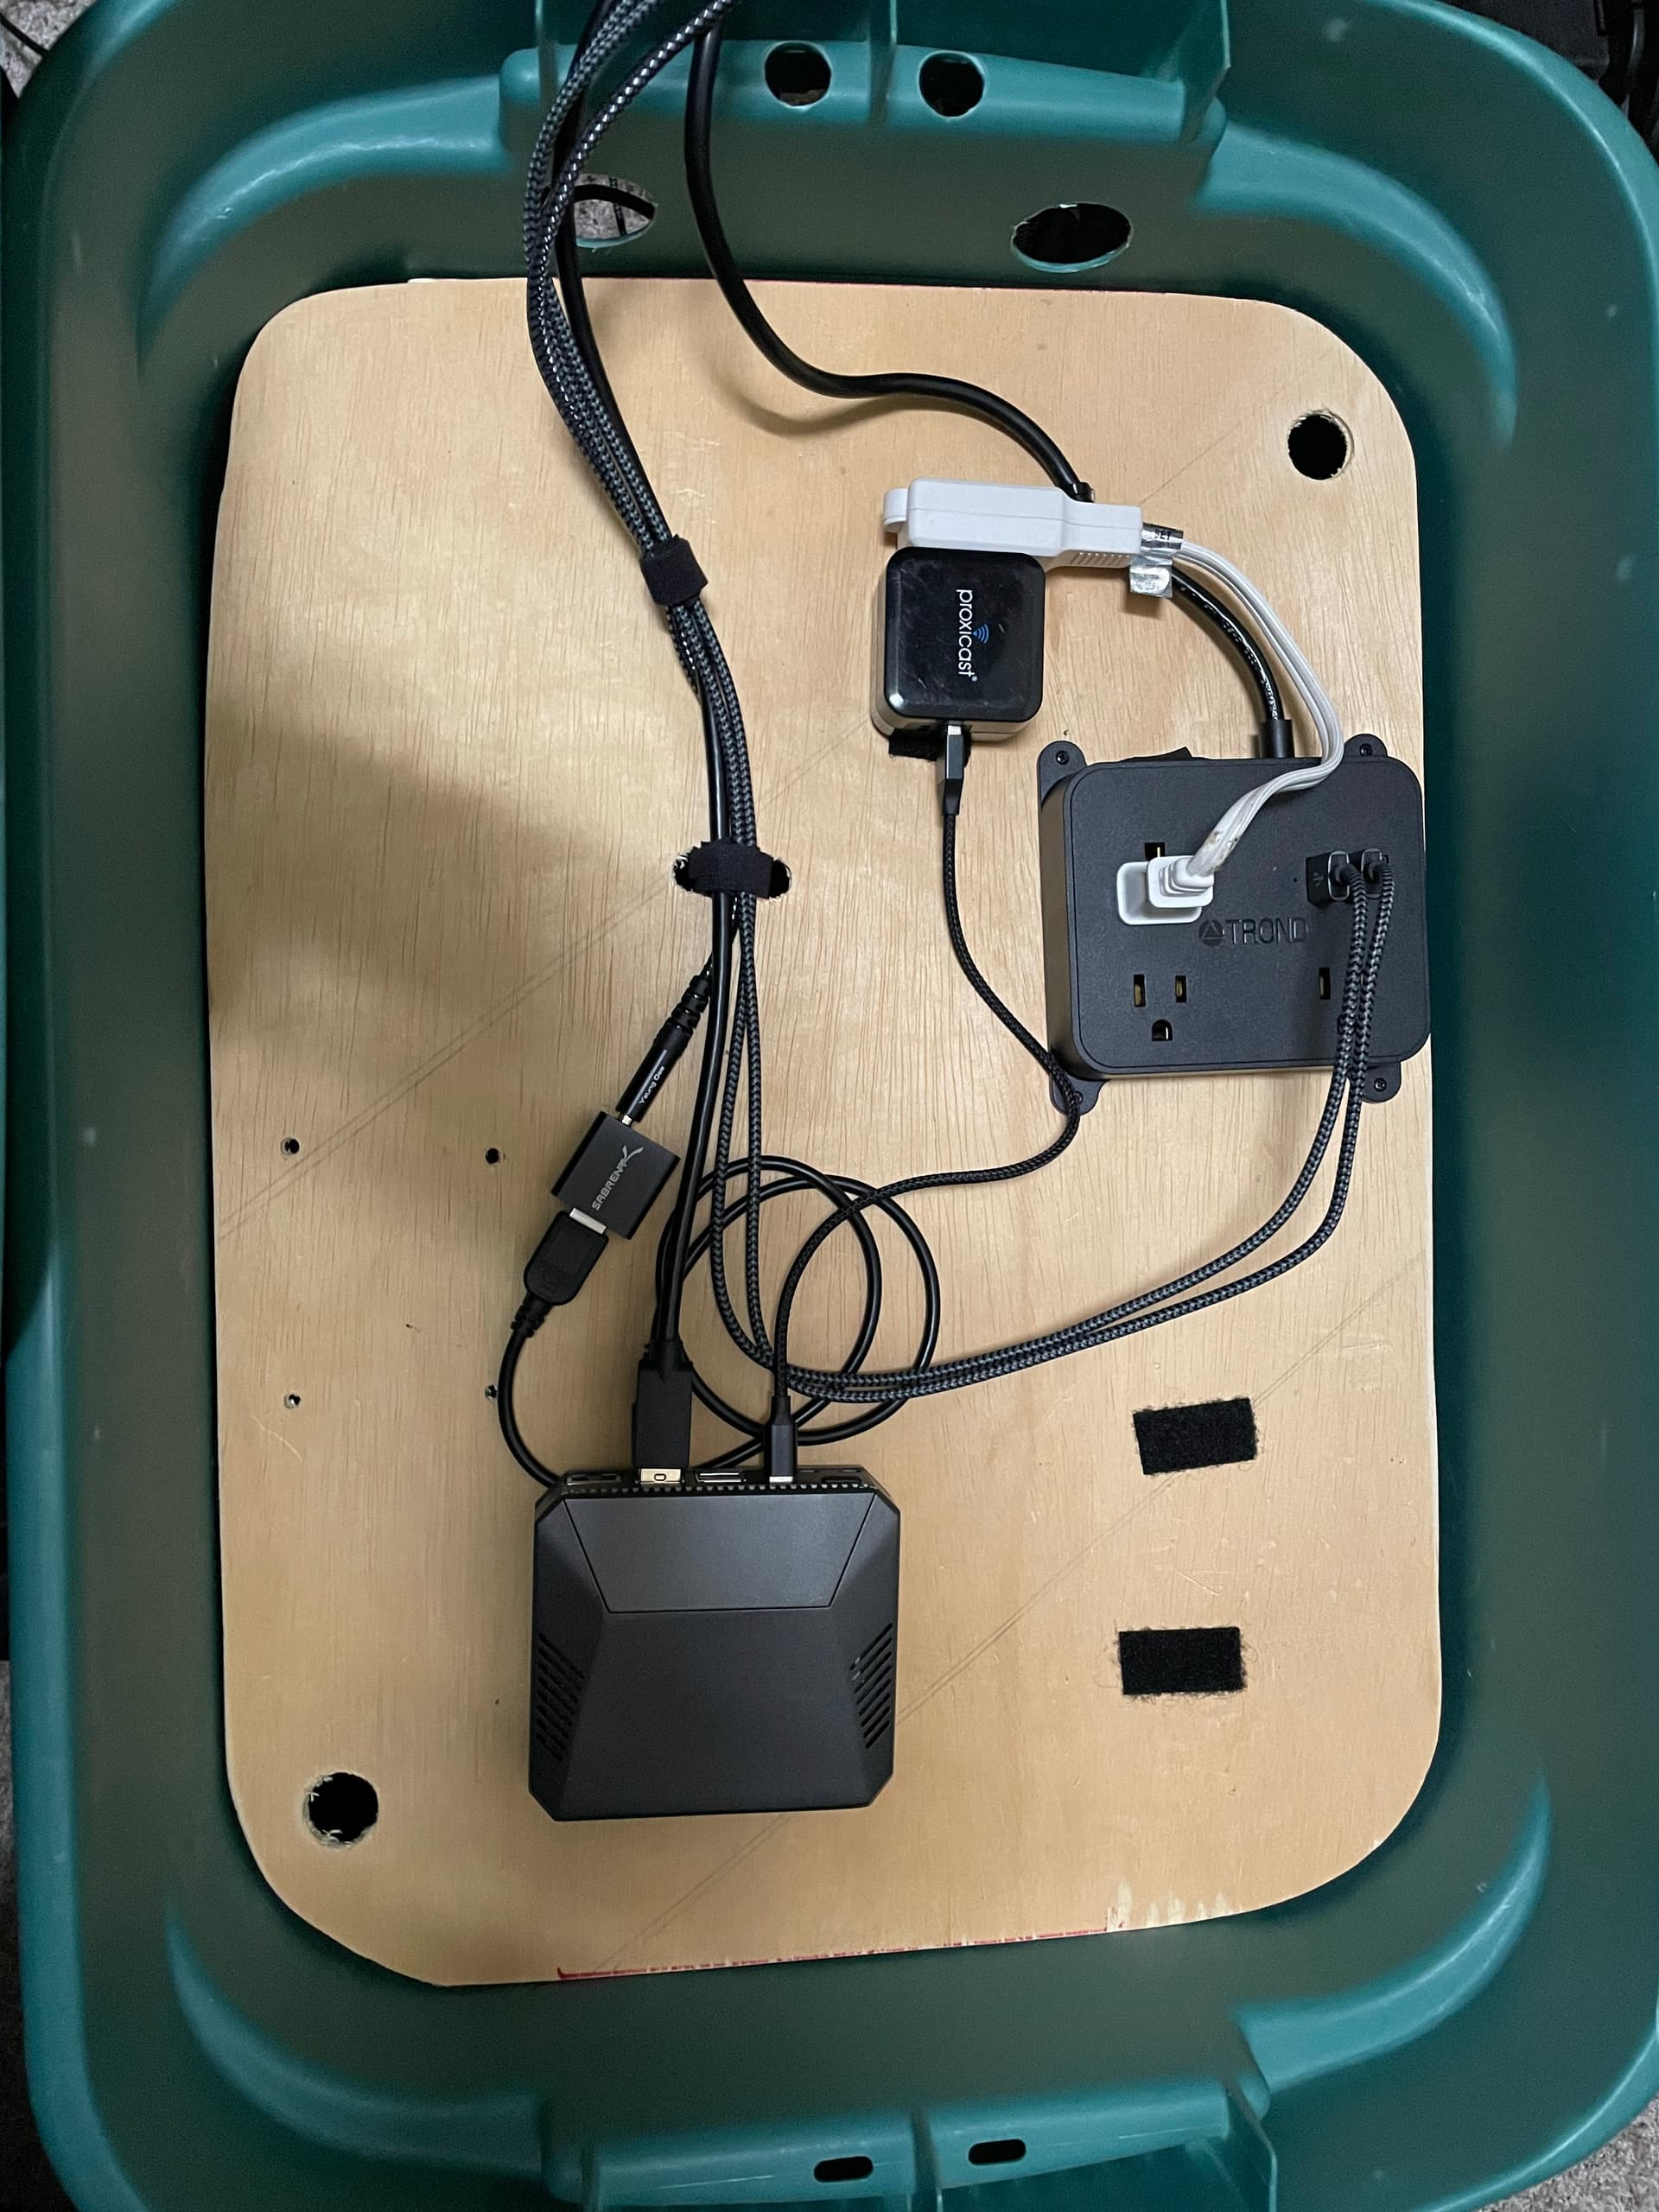
Headless Road Zynth:
No knobs, external USB sound, Argon One Case. Contained in a rolling case with storage under for cables, duplicate Zynth and SD card for catastrophic failures.
$8 Sound Dongle, $25 Case, RPi4 ($Zomg!$)

Here’s my baby :blush:

Thanks to everyone that has contributed to Zynthian and with their effort make it available for all to enjoy!

This one is based on the all-in-one module V2 (from a Zynthian Basic Kit V2), a Raspberry Pi 4, a IQAudio DAC Pro, and a 5" IPS dsi screen.

I wanted a compact case with a larger screen so I designed and printed this one in PLA. Thank you @LAN for yours, that served as inspiration :+1:

Had I not wanted a bigger 5" screen I would have been better for me to go for the official metallic case as I’ve had to go through a lot of design and print iterations to achieve the results I liked. Although I learned a lot and I’m already thinking of designing another one :sweat_smile:

I still need to find a neat way to add labels, and find time to fix some of the flaws that I left in the design but that I could hack after printing :innocent:

BTW: The knob in the front is for the rotary encoder that allows to control the volume of the IQAudio, intended to be used with headphones plugged to its amplified 3.5 output.


12 Likes

Hi there!

I’m newby in “Zynthian” but…

My zynthian project is almost done…
I used the “prototype-1” scheme with a PI4 (source: A Build with Variations), a screen, four encoders and an USB Audio… It’s my “speciality” becouse, I just I sacrificed my old ALESIS io2 Express USB sound card, and my EDIROL PCR-800 MIDI master keyboard…

I dissasambled the io2, and built in into the PRC-800 with the zynthian…

The result a bit ugly yet now :stuck_out_tongue: but it’s will be nicer of course.

The most important thing is my zynthian setup is alive! :slight_smile:

Raspberry PI4B / 4G RAM
Waveshare 4.3 inch DSI LCD
PROTOTYPE-1 wiring
ALESIS io2 sound card with

  • USB MIDI IN/OUT
  • DIN MIDI IN/OUT
  • 2x balanced AUDIO IN MIC/LINE/GUITAR with +48V phantom
  • 2x AUDIO insert IN (for external FX)
  • 2x AUDIO OUT (44100 Hz/24bit with 5ms latency)
  • 1x Phones OUT
    EDIROL PCR-800 MIDI keyboard/house :slight_smile:


7 Likes

I really like the builds that incorporate a Zynthian into keyboards :grinning:

Did you need to cut some extra holes in the back for extra ventilation?

Yes, of course becouse “he” is usually heat himself to 55-60 degree of celsius…

Great build, looks awesome!

Are the files available anywhere?

Thanks! I really put a lot of time and design iterations into it :slight_smile:

I’ll post the .stl and a BOM after I solve a couple of bugs in the design.

Amazing design, and thanks for the mentioning, glad my design could act as inspiration. Now I want to rebuild mine with your case :slight_smile:

1 Like

Hello everyone!
Here’s my attempt at making a portable synthesizer:


Specs:

  • SBC: Orange Pi PC+
  • Keyboard: M-Audio KeyRig 49(Scored for a few bucks :smiley: )
  • Power: Asus 10050mAh(Lasts quite a bit, did not measure it but in the range of 4-6 hours)
  • Screen: ili9341+XPT2046(No touch unfortunately, the allwinner H3 on the orange pi supports a single slave/spi bus)
  • Encoders: generic breakout boards from china interfaced through a stm32 sending commands over UART
  • Soundcard: Aliexpress speciality $1
  • Single 3.5mm jack output
  • Built-in wifi with external SMA antenna

Paint job is not great, I know, I’m not a painter myself :smiley:

Upcoming: Embedded stereo speakers with cabinets

8 Likes

Hi @xanderz congrats:

  • For the integration, it’s pretty nice even if you’re not a professional painter
  • For building Zynthian on an another chip.

But this bring me a lot of questions :

  • How is the experience with the H3 chip, isn’t it to weak for some synth engine ?
  • Did you interface to Zynthian the keyboard’s mod and pitch wheels ?
  • Since a couple of month they are no mcp23017 available in the JLCPCB assembly stock. While STM32 are available (in a bunch of variations)

It could be nice if you share hw design and software code.

Edit: don’t forget the :face_with_monocle:

This has been done a few times before. Did you use that previous work?

  • Yeah, the H3 can be a bit overwhelmed with some synths, for sure, but I am mainly using it as a sampler + effects, and it does a pretty nice job. That is, unless something updates on the screen in which case it starts getting into xruns. Pretty low latency, and is for sure enjoyable to play.
  • The mod and pitch wheels are connected internally to the m-audio so you would get a midi event for that. It worked out of the box, actually.
  • Beware of the stm32 that you can get from AliExpress nowadays because most of them are actually fakes, with peripherals that are full of bugs.
    I used a stm32 because that was what I had on hand at the moment. But you can use anything else. I wrote the code in CPP in Arduino so it should be pretty portable.

As for the hardware, I don’t really have a schematic for it, I just connected the pins on the go, but the code should be pretty explanatory.
I’ll yet have to check if the repo visibility is set to public.
Edit: Past silly me thought that I added the Arduino code to a github repo when I cleaned up the PC. Apparently not.
These are the branches that I’ve worked on:

1 Like

I actually modified the encoder library in order to be able to use the uart port. I serialized the data in 2 bytes + 2 bytes used for framing. I have my work done on a fork, somewhere :slight_smile:

Hey Zynthheads, here is my custom Zynthian in a Hammond 1590DD case.

Rear panel:

Gut shot:

Custom I/O boards (before installing encoders):

  • Raspberry Pi 4 4GB
  • Geekworm aluminum armor case (for heatsink)
  • Osoyoo 5" DSI 800x400 touchscreen
  • Audio Injector zero, mounted on I/O board
  • 2 x MCP23017 for encoders and buttons

I started this project about two years ago, primarily as an inexpensive, easy to use replacement for the setup of the keyboardist/singer in my band (his current Windows computer setup is very unreliable). Our guitarist helped fund it, and also wanted one of his own, so I’m building three. This is actually the second prototype. The first one was on PCBs I etched myself, and there were a few issues that caused me to redesign the PCBs and send them off for manufacturing this time, so I didn’t have to drill hundreds of holes again.

Anyway, thanks to everyone who has contributed to this project. I’m having a lot of fun playing with this, and it was a big hit with our keyboardist at our last rehearsal when I brought it for him to try out. He’s super excited to get his own!

8 Likes

Yep, that’s something that seems to take for ever.

What do you use the switches for?