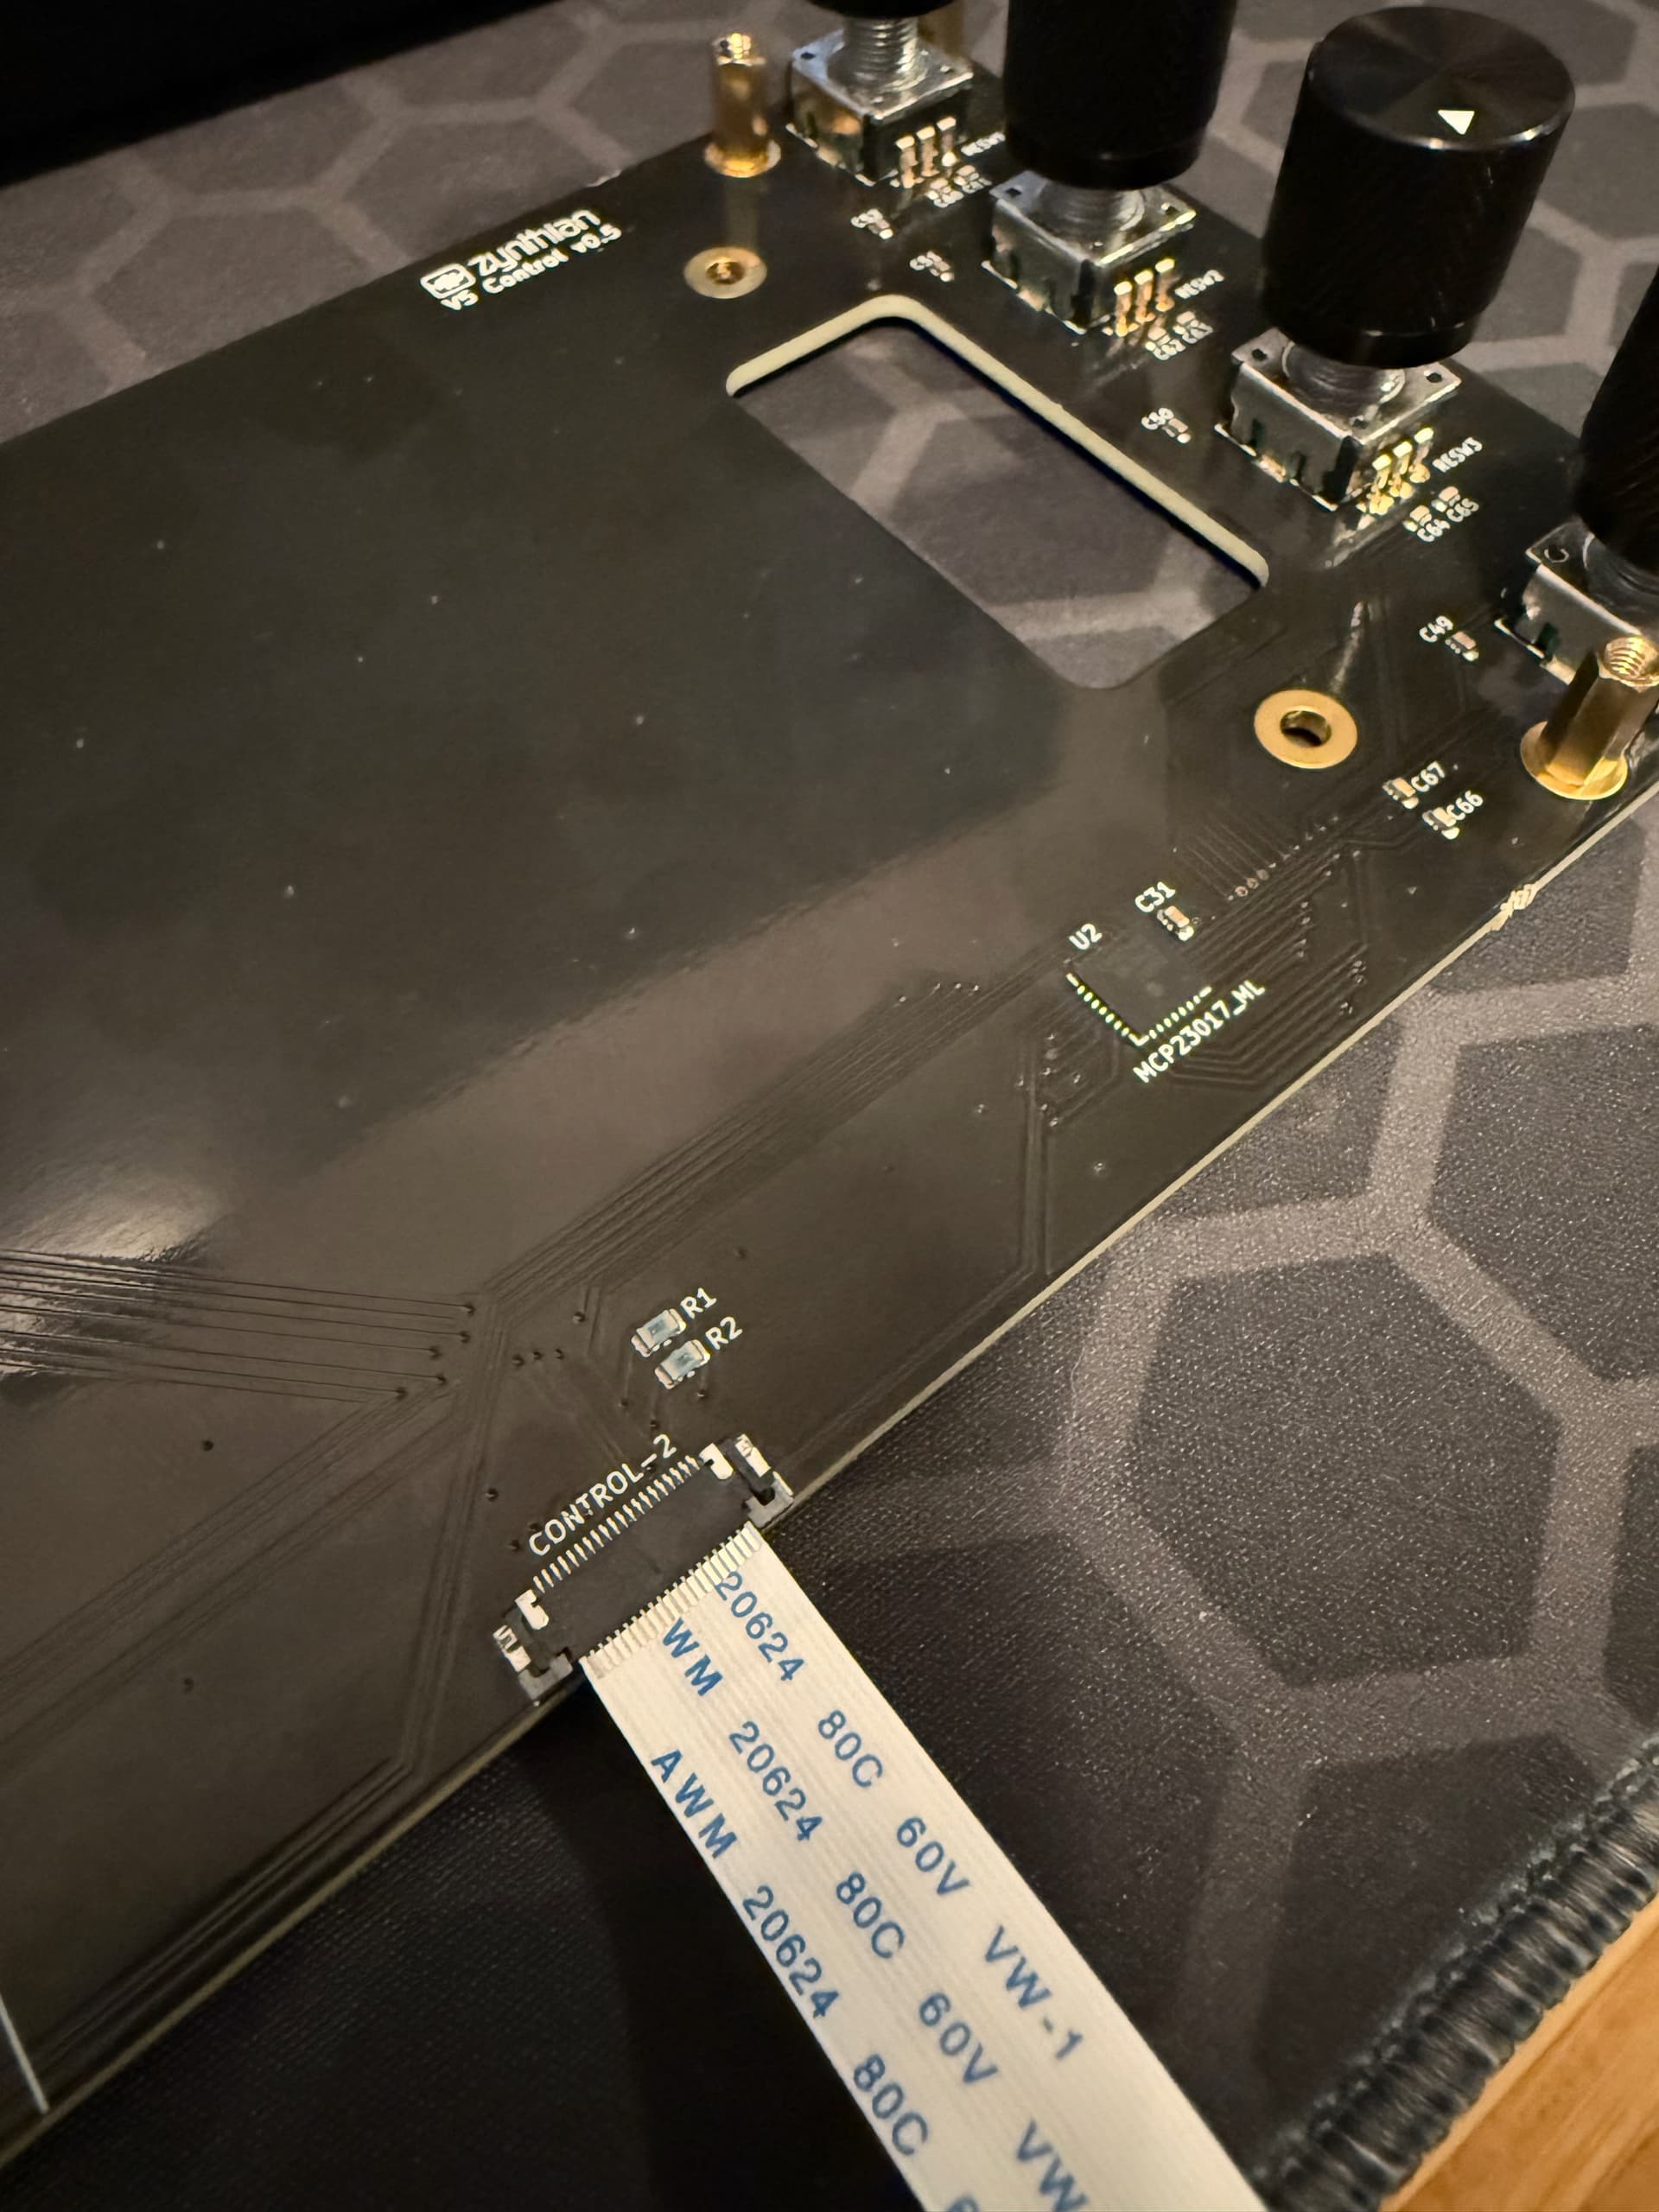
I just received my v5 kit (I went the custom route since no stock was available), and everything seems to work fine until I plug in the control board. Since I went the custom route, I had to order the cables, etc, separately. I couldn’t find the exact ribbon specs listed anywhere so I bought what I believe is a 20pin .5mm pitch to connect the main board with the control board link here.
When I boot without the control board connected, everything works just fine, touch screen, web interface, etc all work.
When I plug in the control board, the raspberry pi just has a solid red led light and nothing comes up. I should also note that I noticed the MCP23017 chip on the control board get VERY hot.
Here is what hardware I’m using:
Official v5 boards
Raspberry pi 4
Official zynthian power adapter
32 gb sandisk sd card
Waveshare 7" touchscreen
20pin .5mm pitch connector to/from main to control board
Is the chip socketed? If so remove it.
IF it’s getting hot, and it really shouldn’t be,It’s passing a lot of current it’s simply a digital device and it’s not switching anything like it could do, so it’s either getting too much voltage. Either way it’s probably a goner. IS it plugged in the board the right way round? I’ve never plugged a 23017 in the wrong way round but I’ve done it with a CA3130 CMOS chip and I burnt the letters on the label on the metal can into my finger ( aged 15), and that chip survived. So check that.
Also a couple of pictures always help. IT’s surprising how much familiarity leaes out something obvious and a picture really helps.
For sure, I triple-checked that according to the manual, the pins face up, and the blue part faces down. I’m wondering if the unit is faulty at this point. It’s for sure receiving too much current
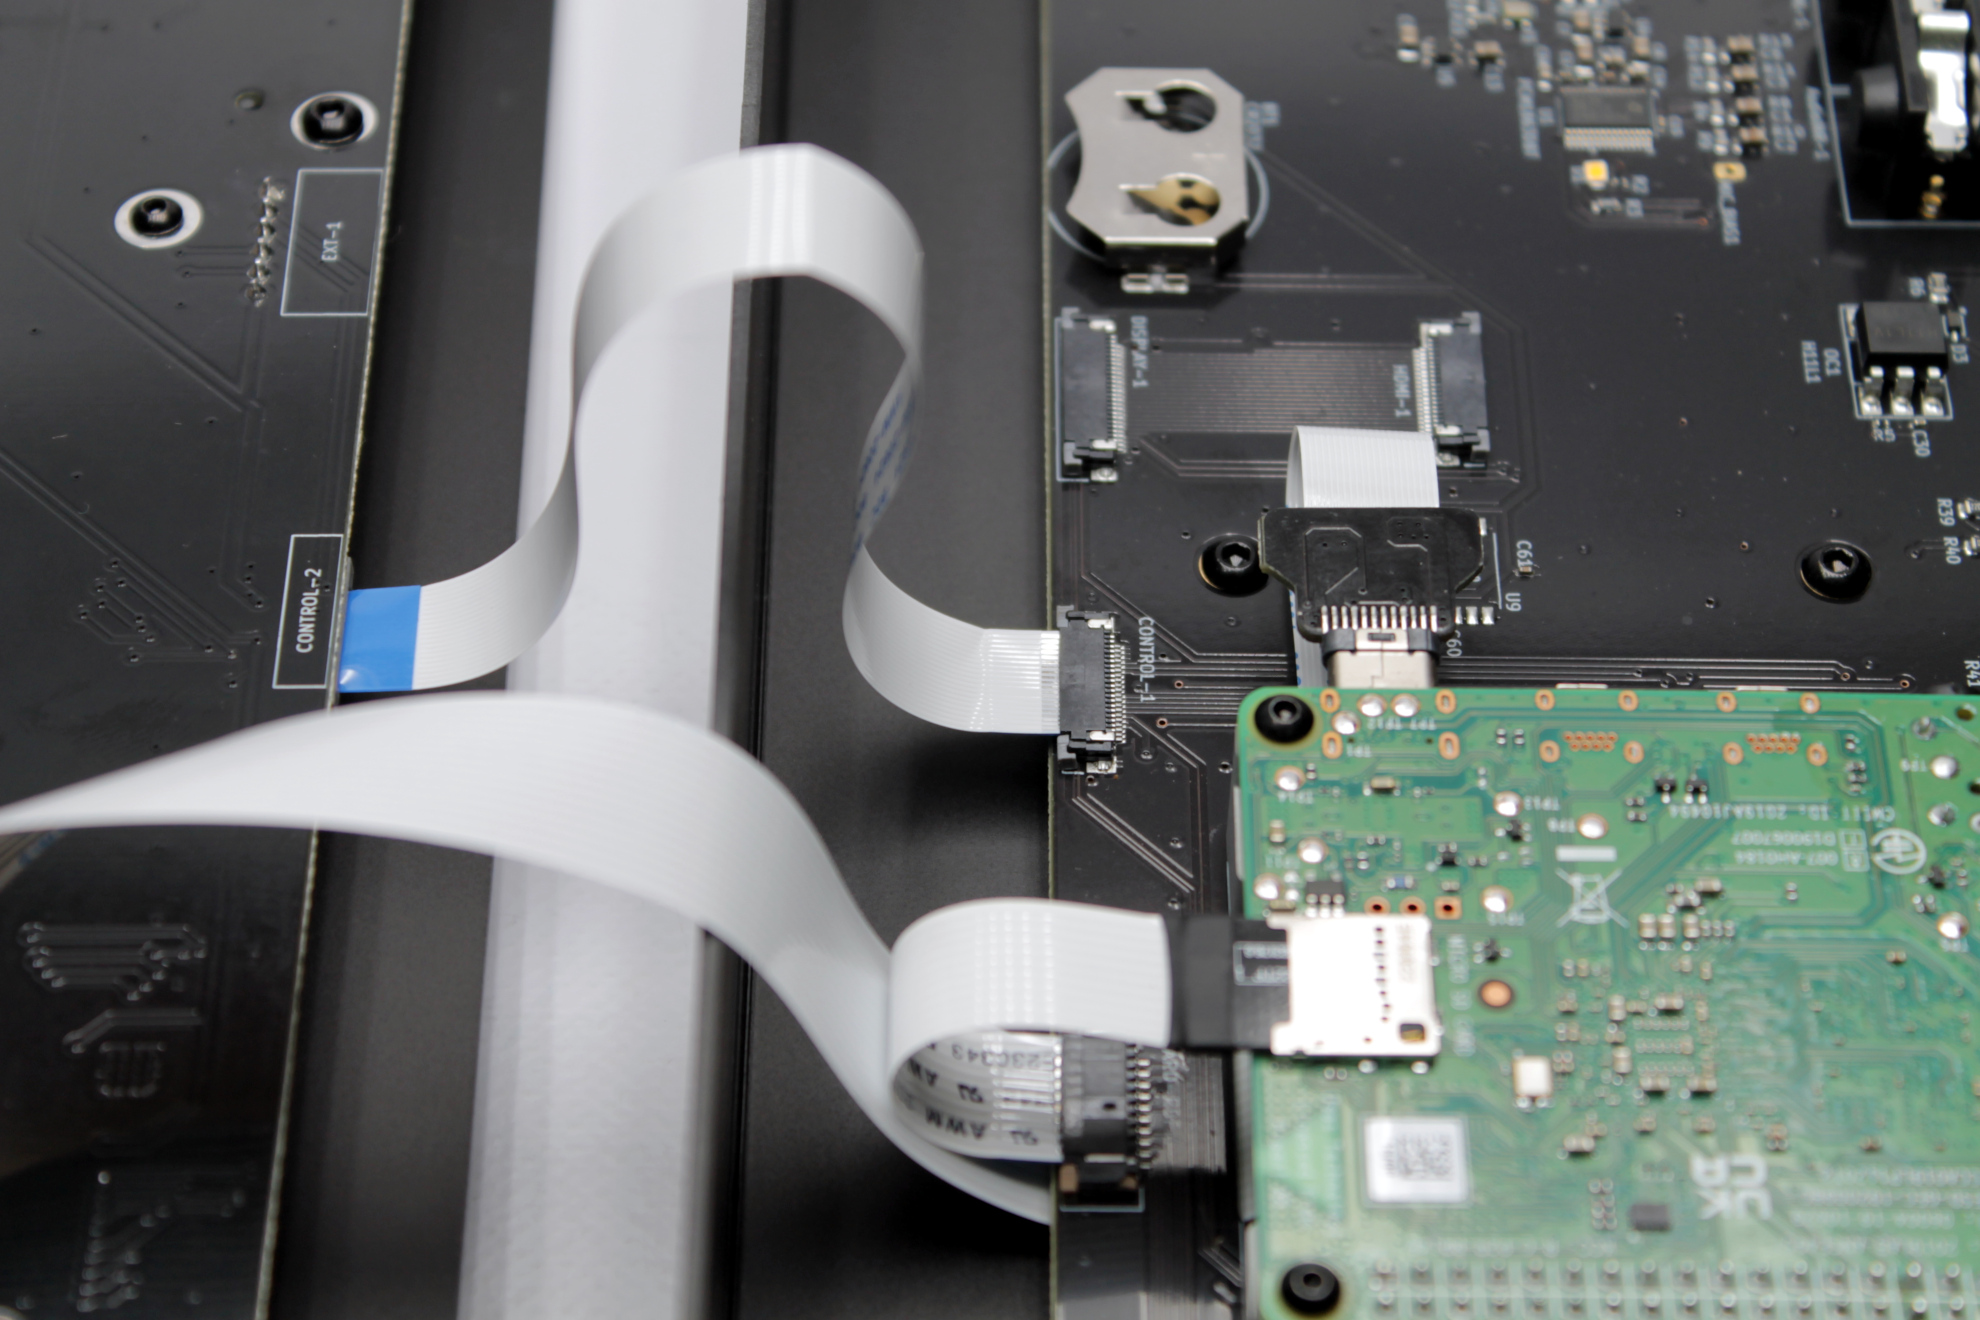
I am not at all sure about this, having only built V5 kits from stock parts, but looking at the picture from the V5 build instructions:
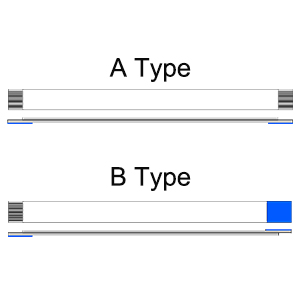
It looks like the Zynthian kit uses what MECCANIXITY calls a type B cable and you have gotten a type A. From your link:
Two Kind of Types - A and B
“A Type” flat cable means — the contacting side of the 2 top pin is on the same side(Both towards to up or down).
“B Type” flat cable means — the contacting side of the 2 top pin is on the opposite side(One towards to up, the other towards to down).
So the result is the pins are reversed left to right from what they should be,
I’ve built a V5.1 with a Waveshare 8’’ HDMI screen, the rest according schematics. I can not boot a fresh image without extra steps:
disconnect i2c from Pi5
boot a fresh image – a failed try will not work, so it has to be freshly flashed onto MicroSD
connect via Ethernet or the Zynthian Wi-Fi AP
in Webconf Hardware Kit choose “custom” setuo
do all the other Hardware config according to real hardware, like Audio V5, Wiring V5, save each setup, but without rebooting, even though Webconf screams so loud for a reboot
if it is a Pi5, shutdown with power button directly on the Pi5. The long-press Admin will not work yet. If you can not reach the power button, do the Pi4 procedure.
if it is a Pi4, go to Terminal (also in Webconf, or via SSH), execute the command sync twice, power down
reconnect i2c
reboot
be happy. The Zynthian then acts like a normal Zynthian, can be configured, rebooted, whatever
The failure to first-boot with i2c connected is due to a flawed autoconfig, messing things up.
With i2c disconnected, autoconfig just finds a normal Pi
PS: You may as well boot the Pi only with the screen connected to DSI or HDMI, do the config steps as listed above, then put the Pi back into boards connectors.
Be warned that connecting cables reversed as you have done, is not something we have considered while designing the V5 boards, so perhaps you broke something. Cross your fingers!
Just to update: I ordered the alternative connector (the B type), plugged it in and everything seems to be working now. Hope this helps anyone doing a DIY version in the future. No fried components, thankfully.