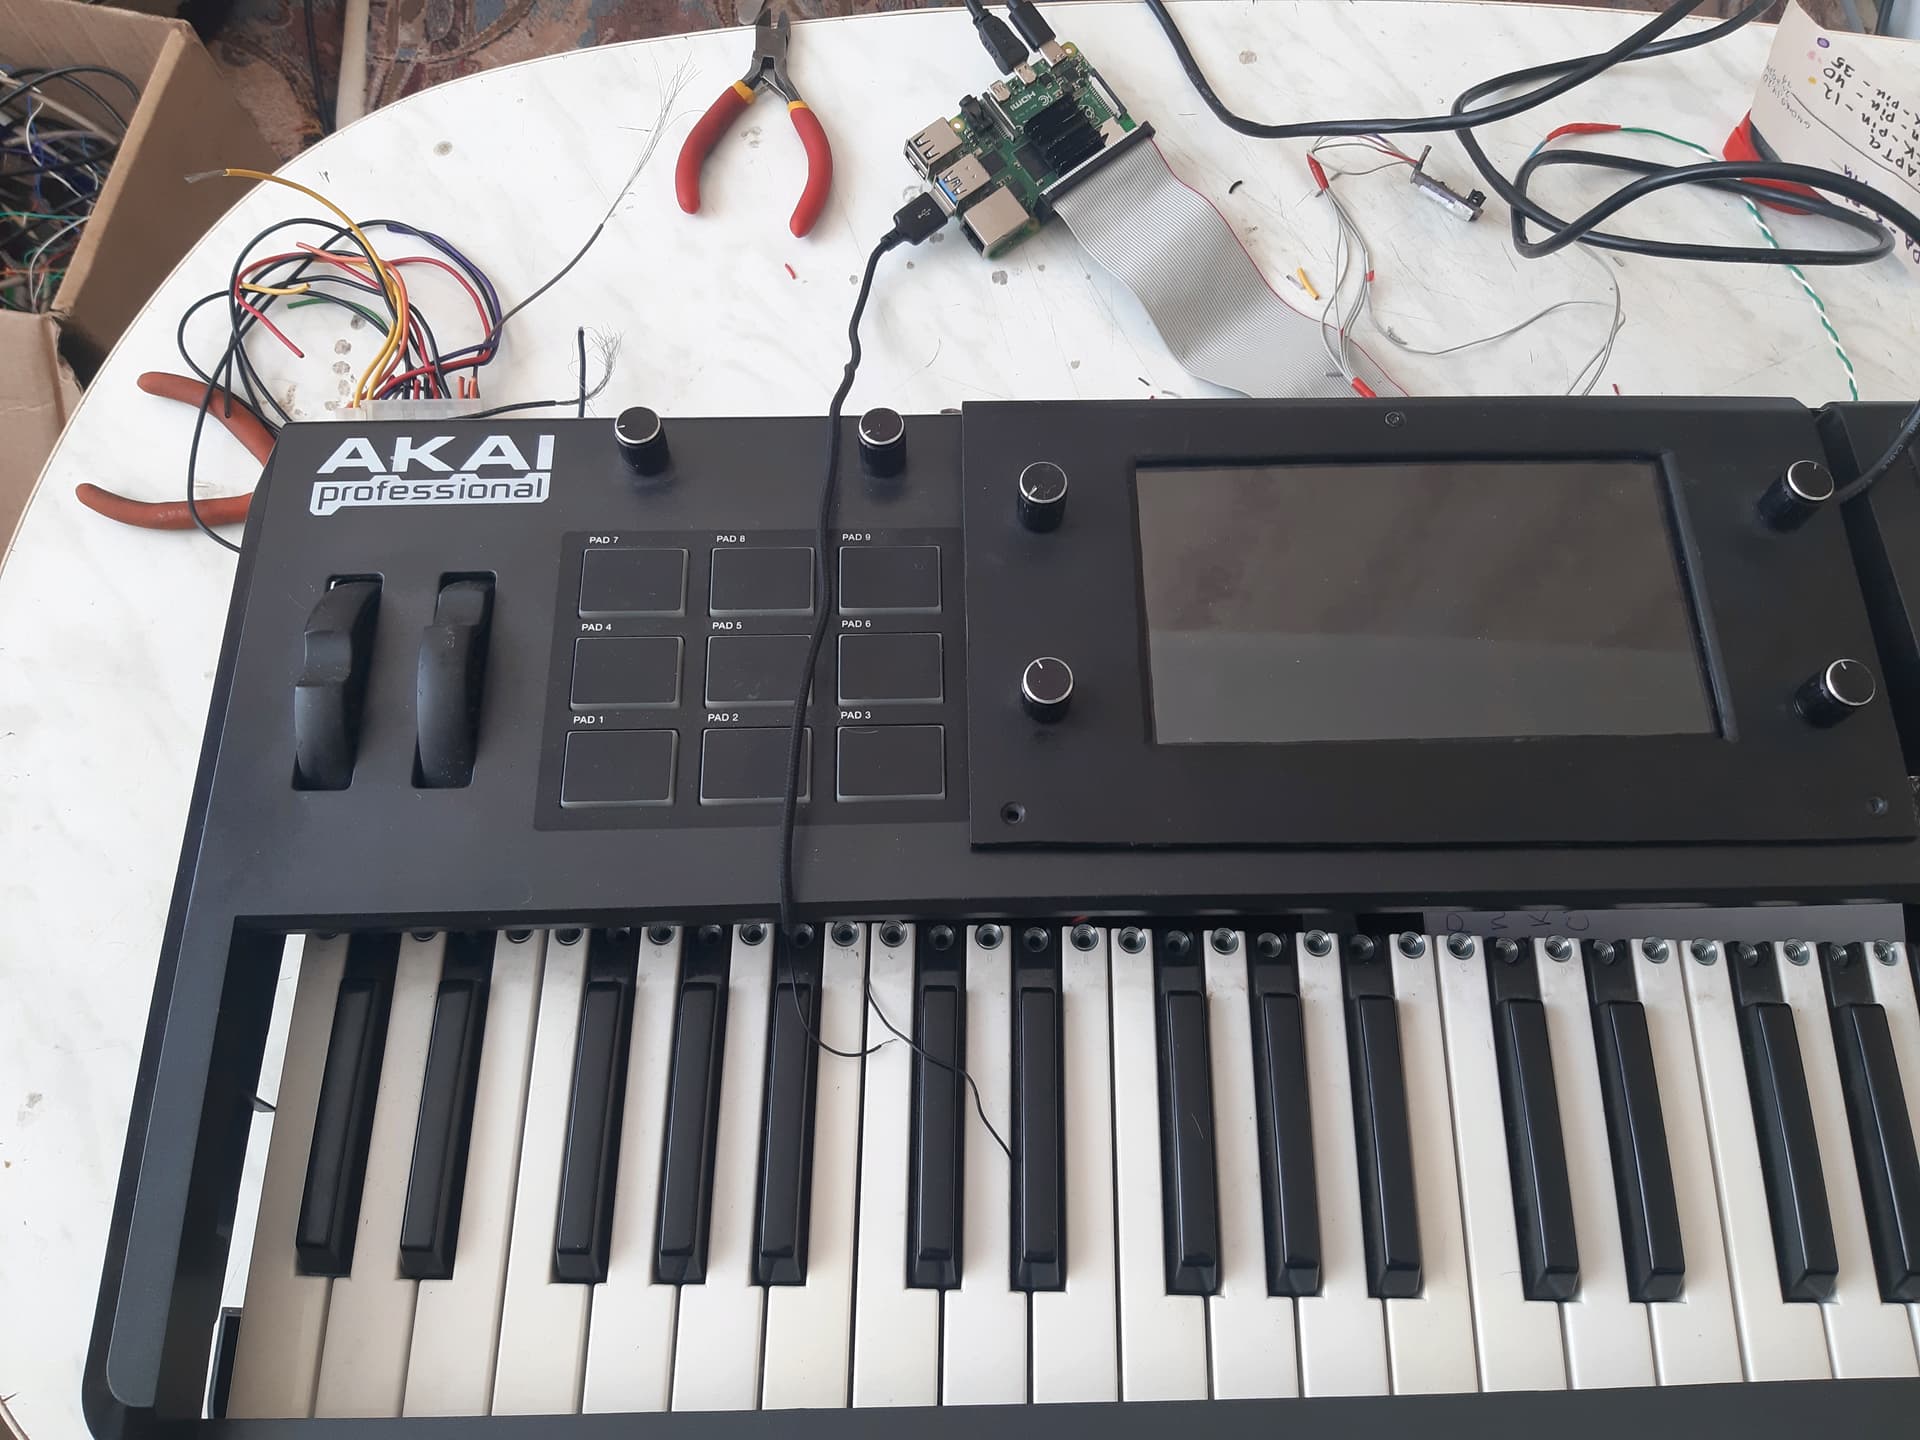
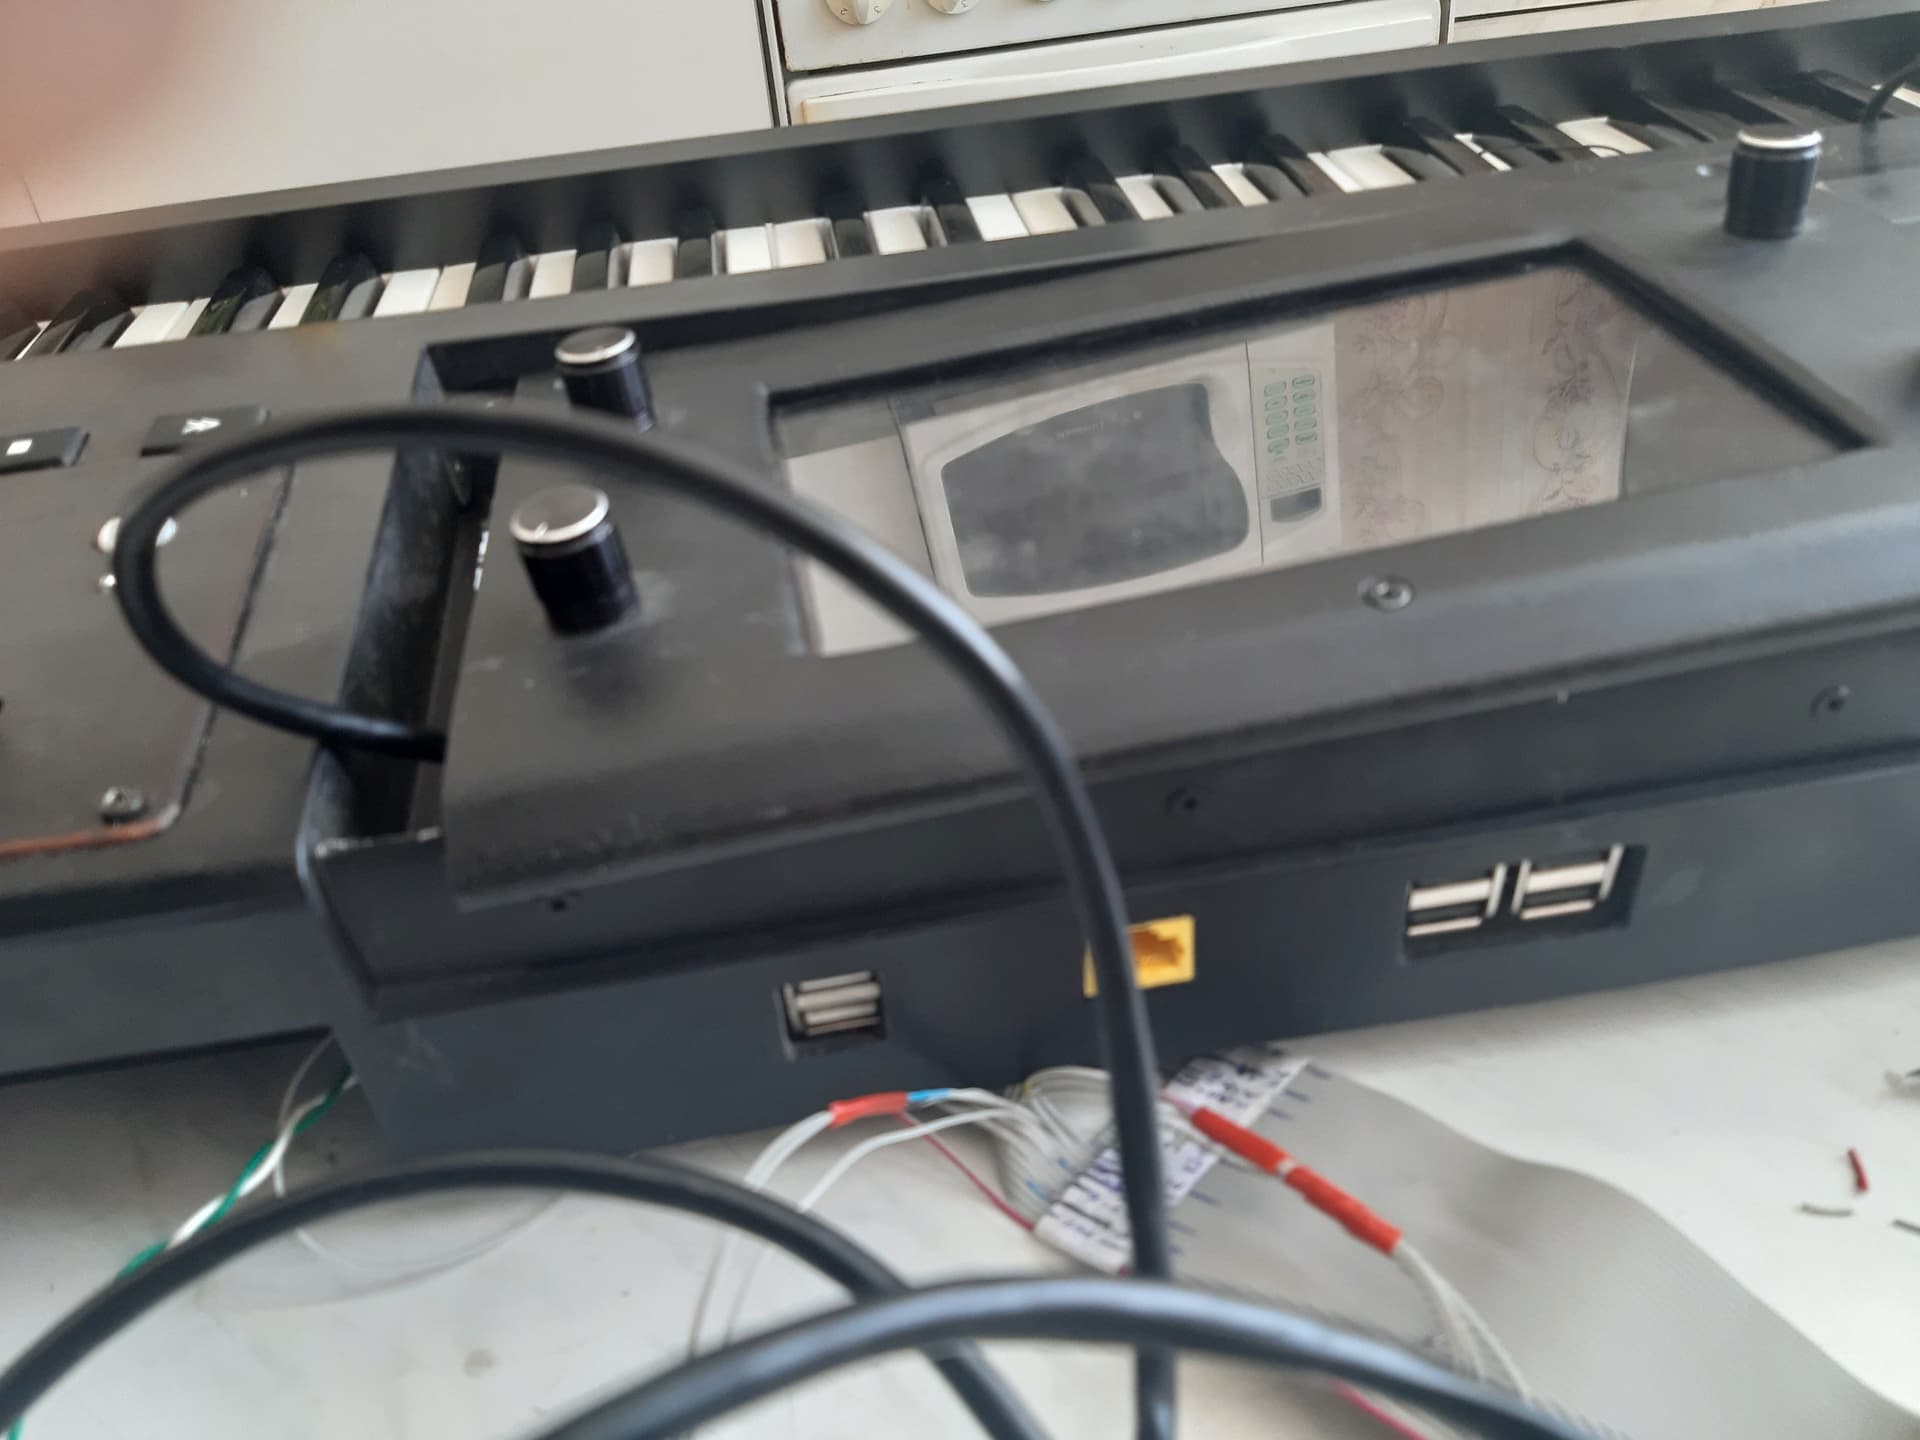
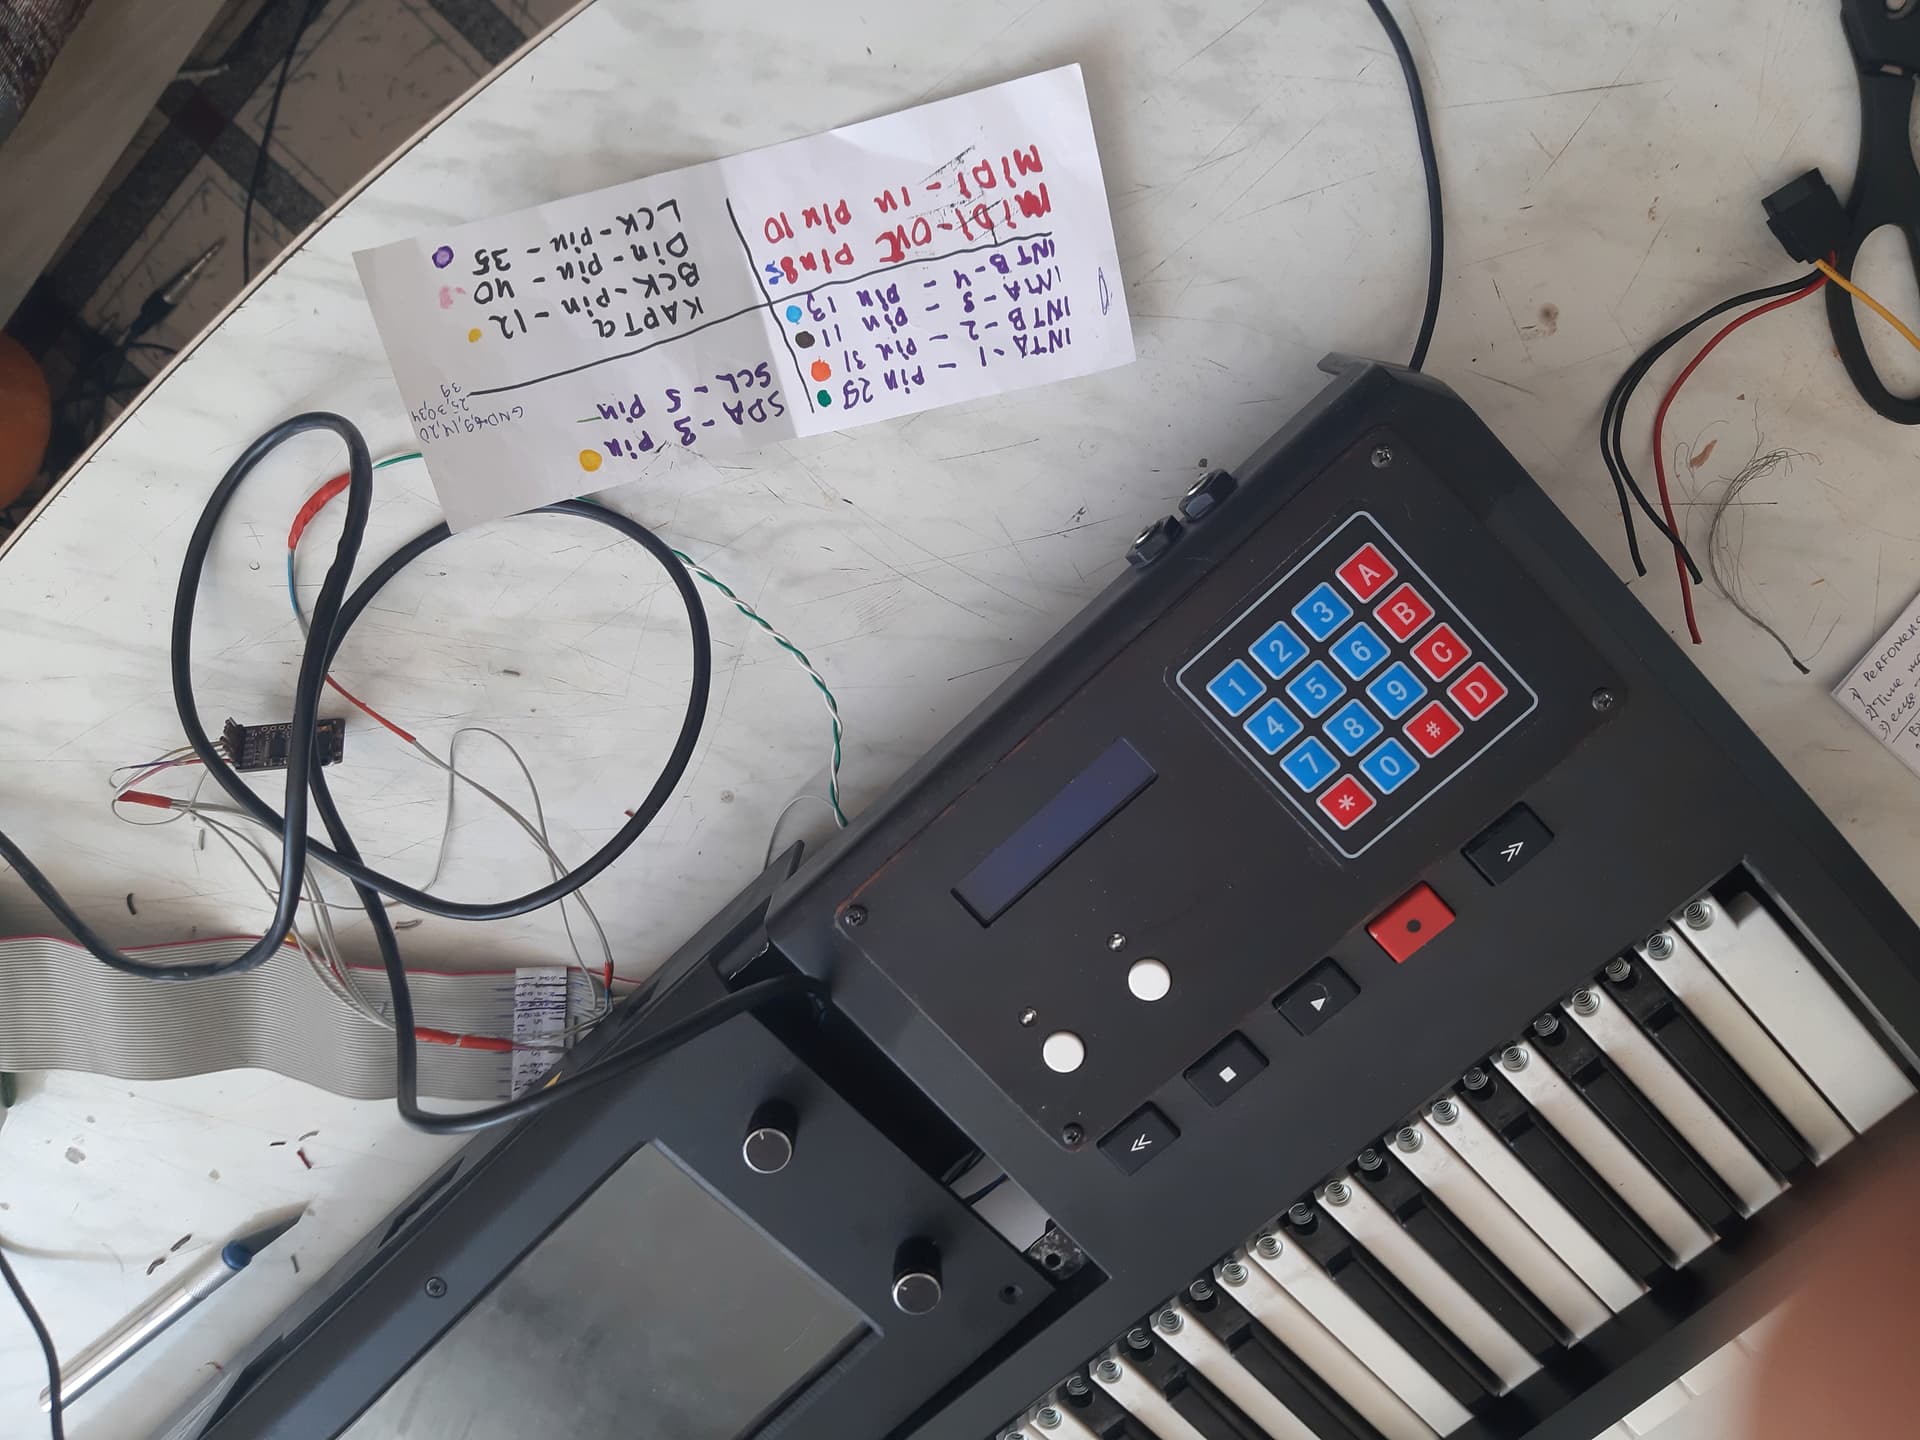
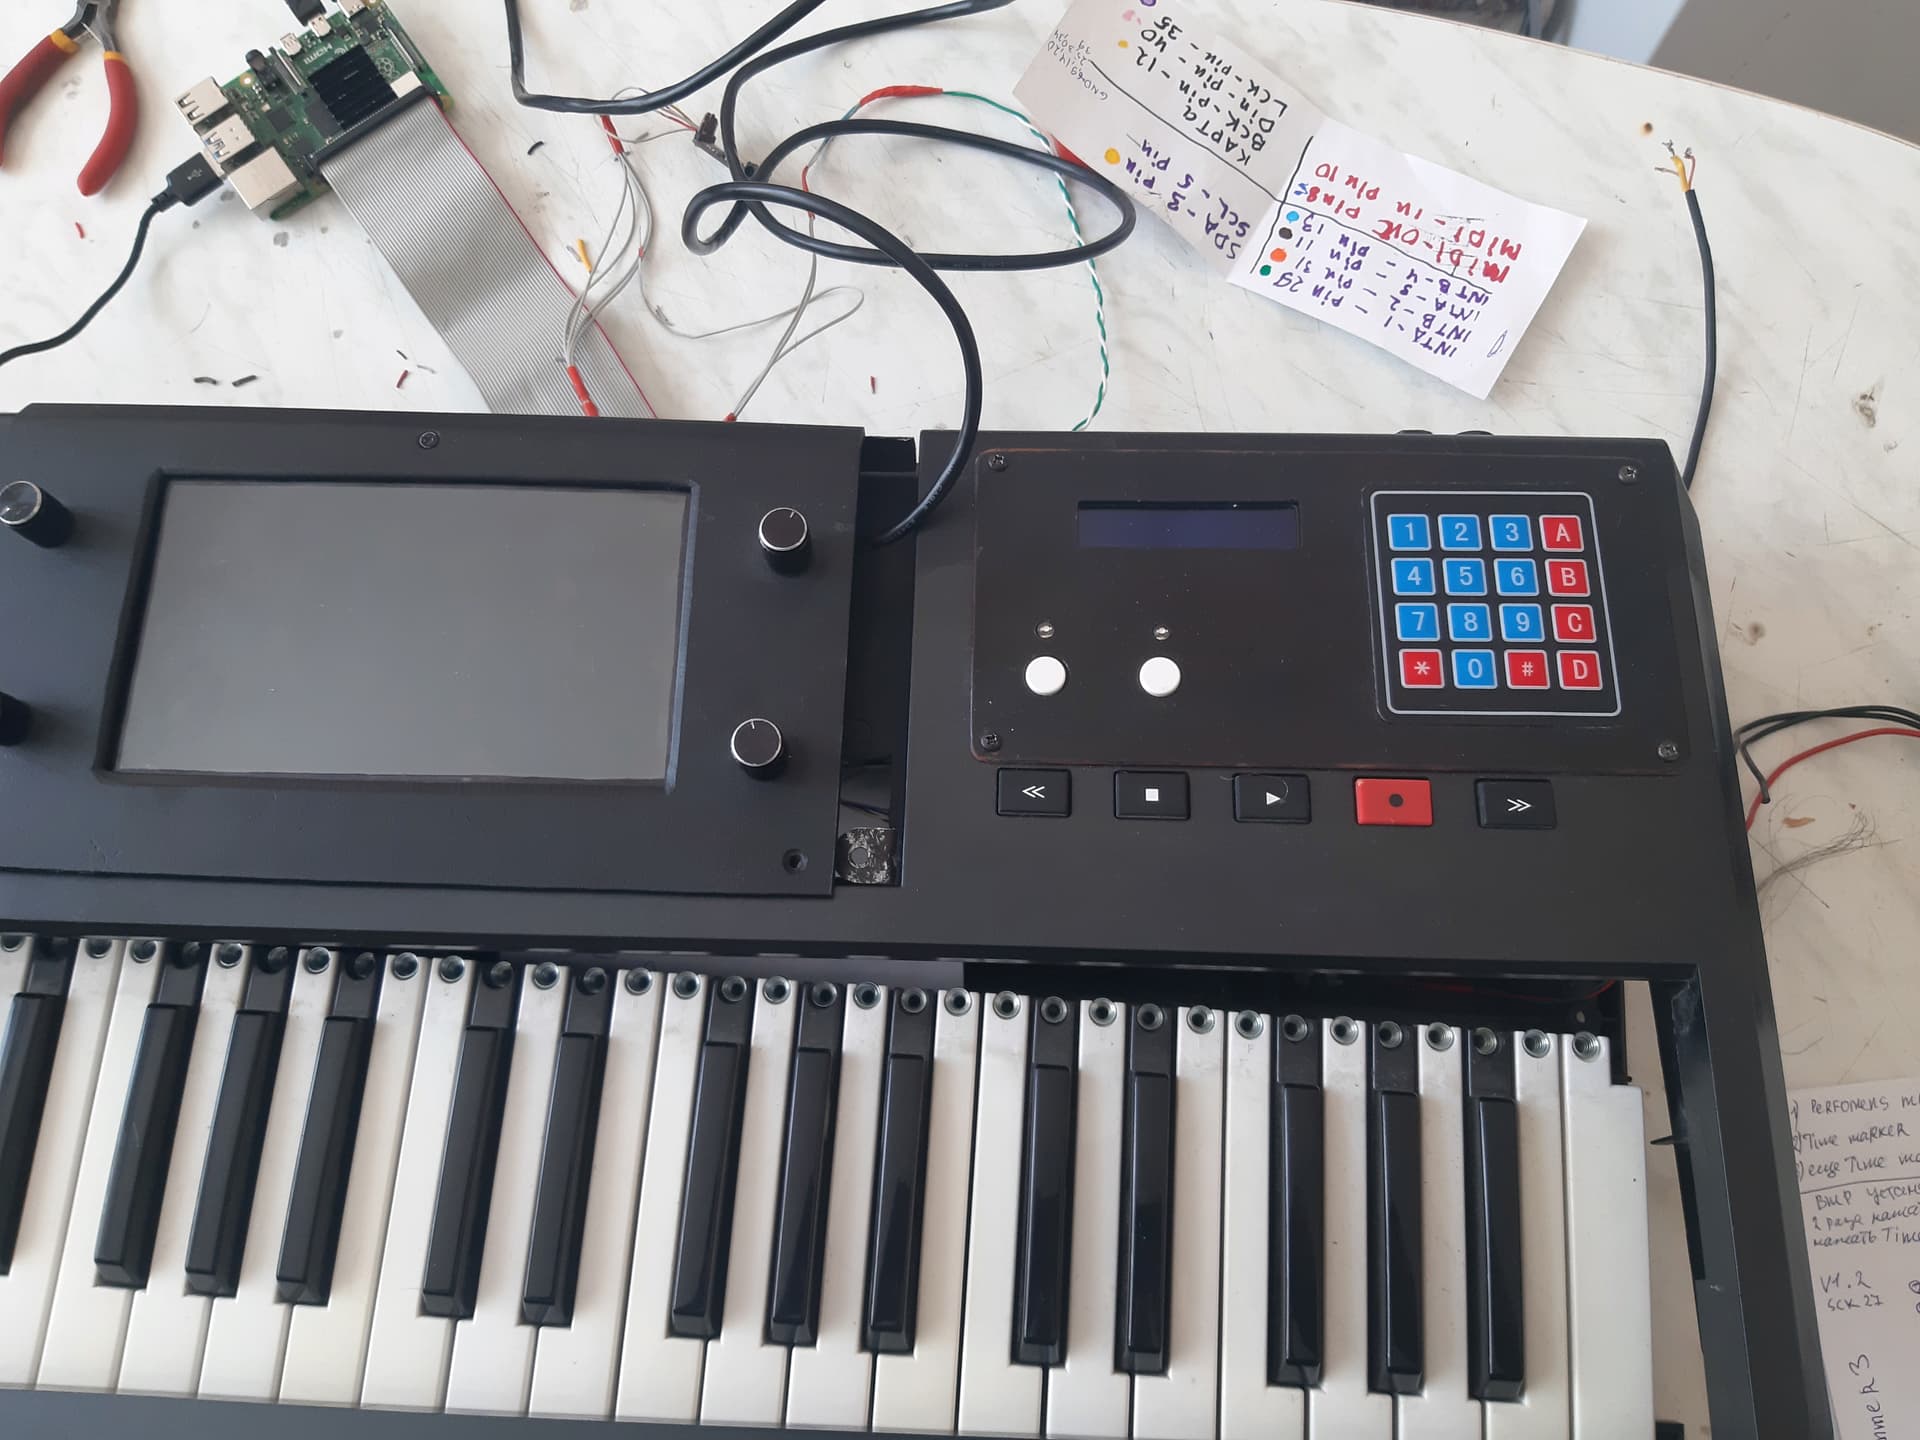
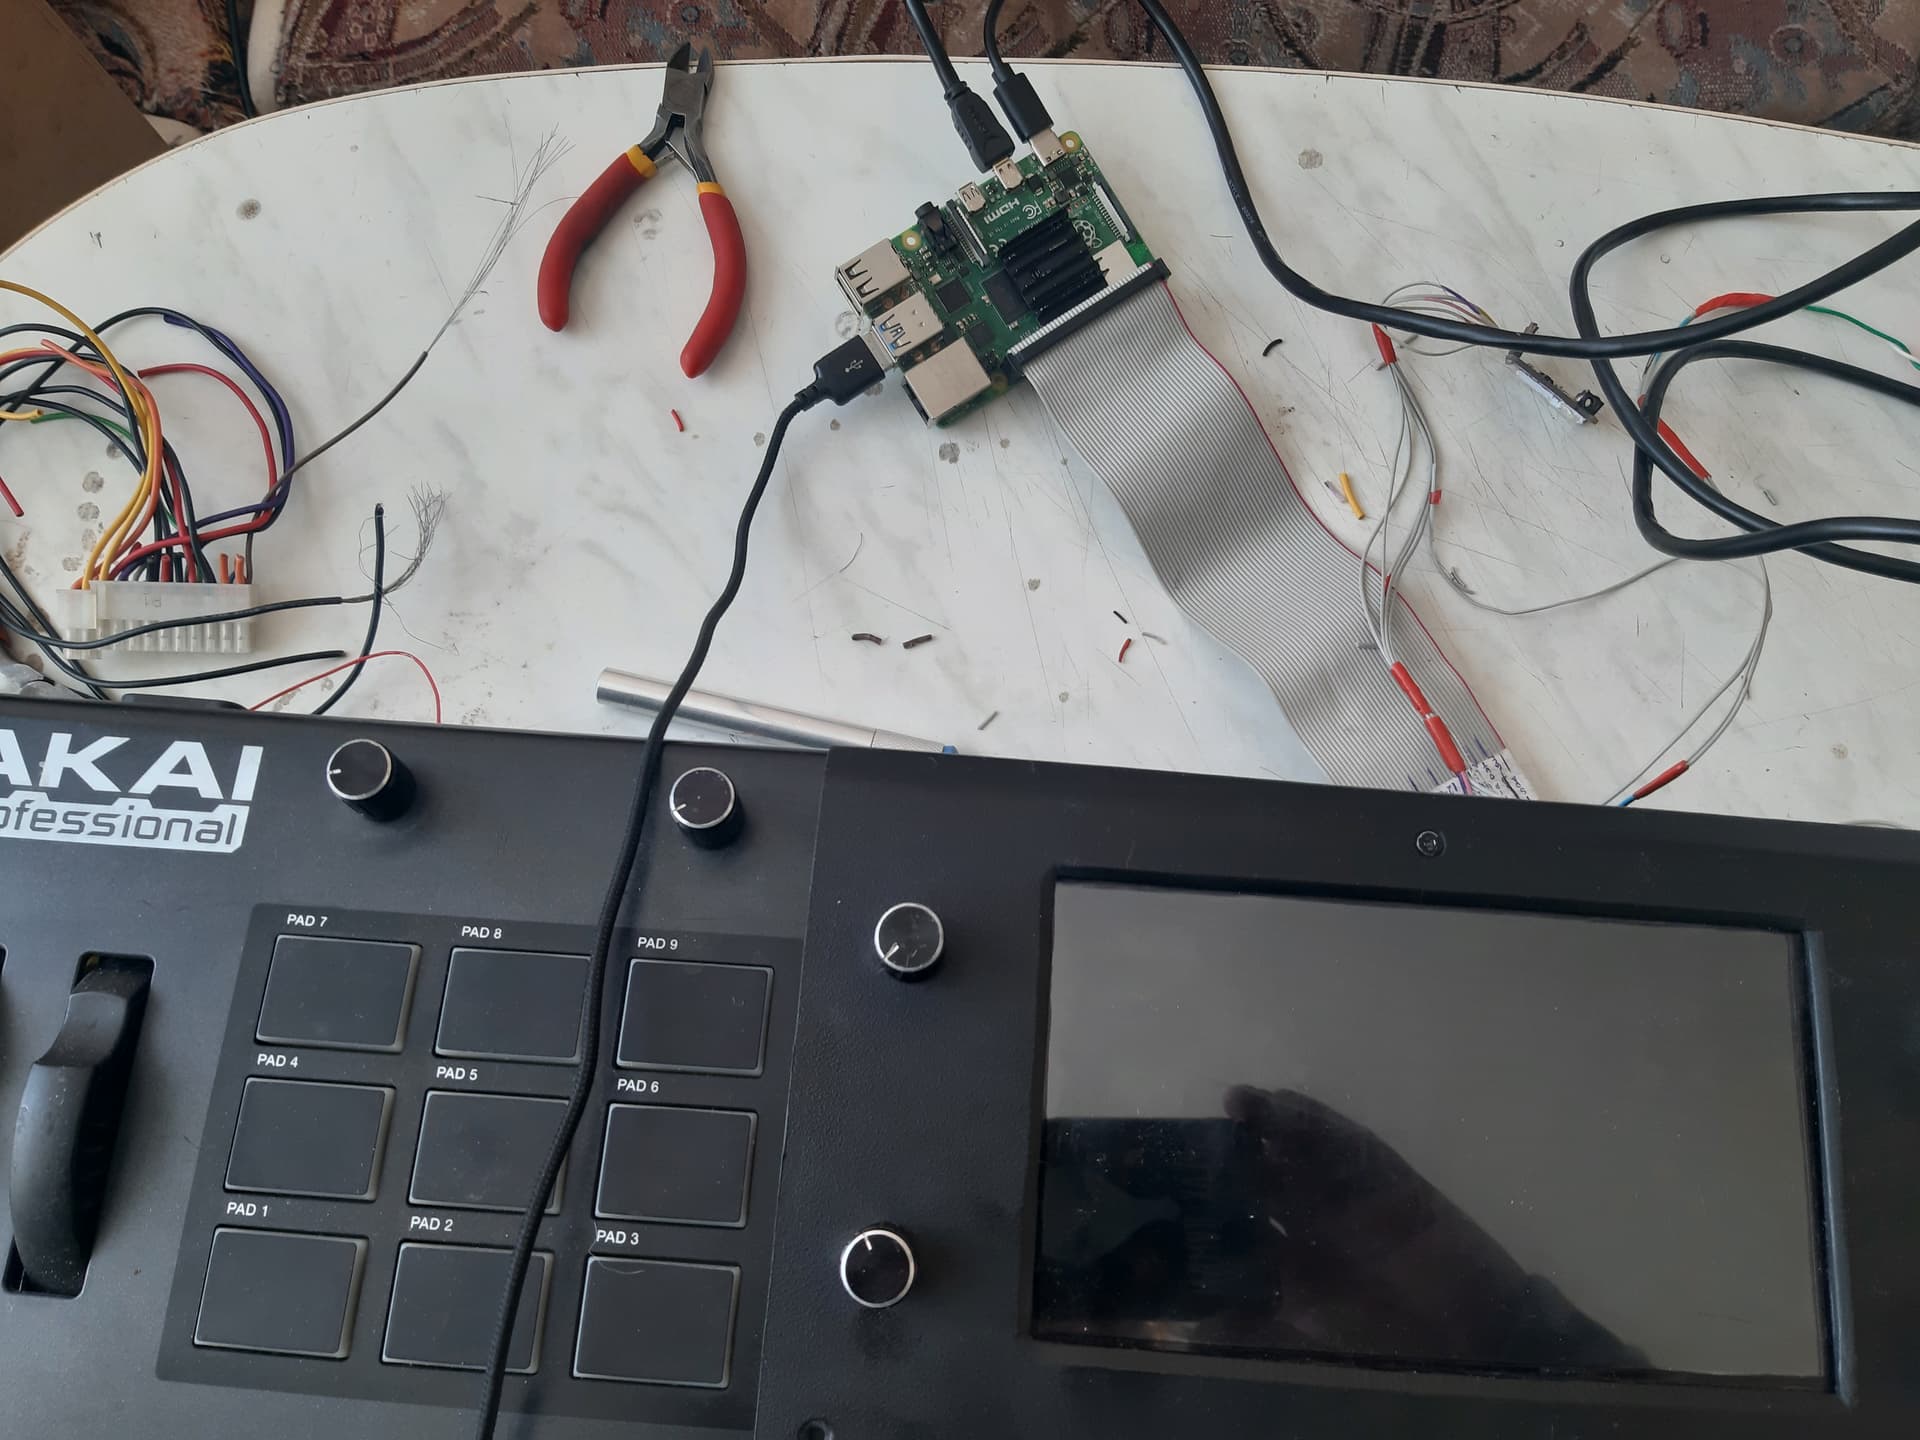
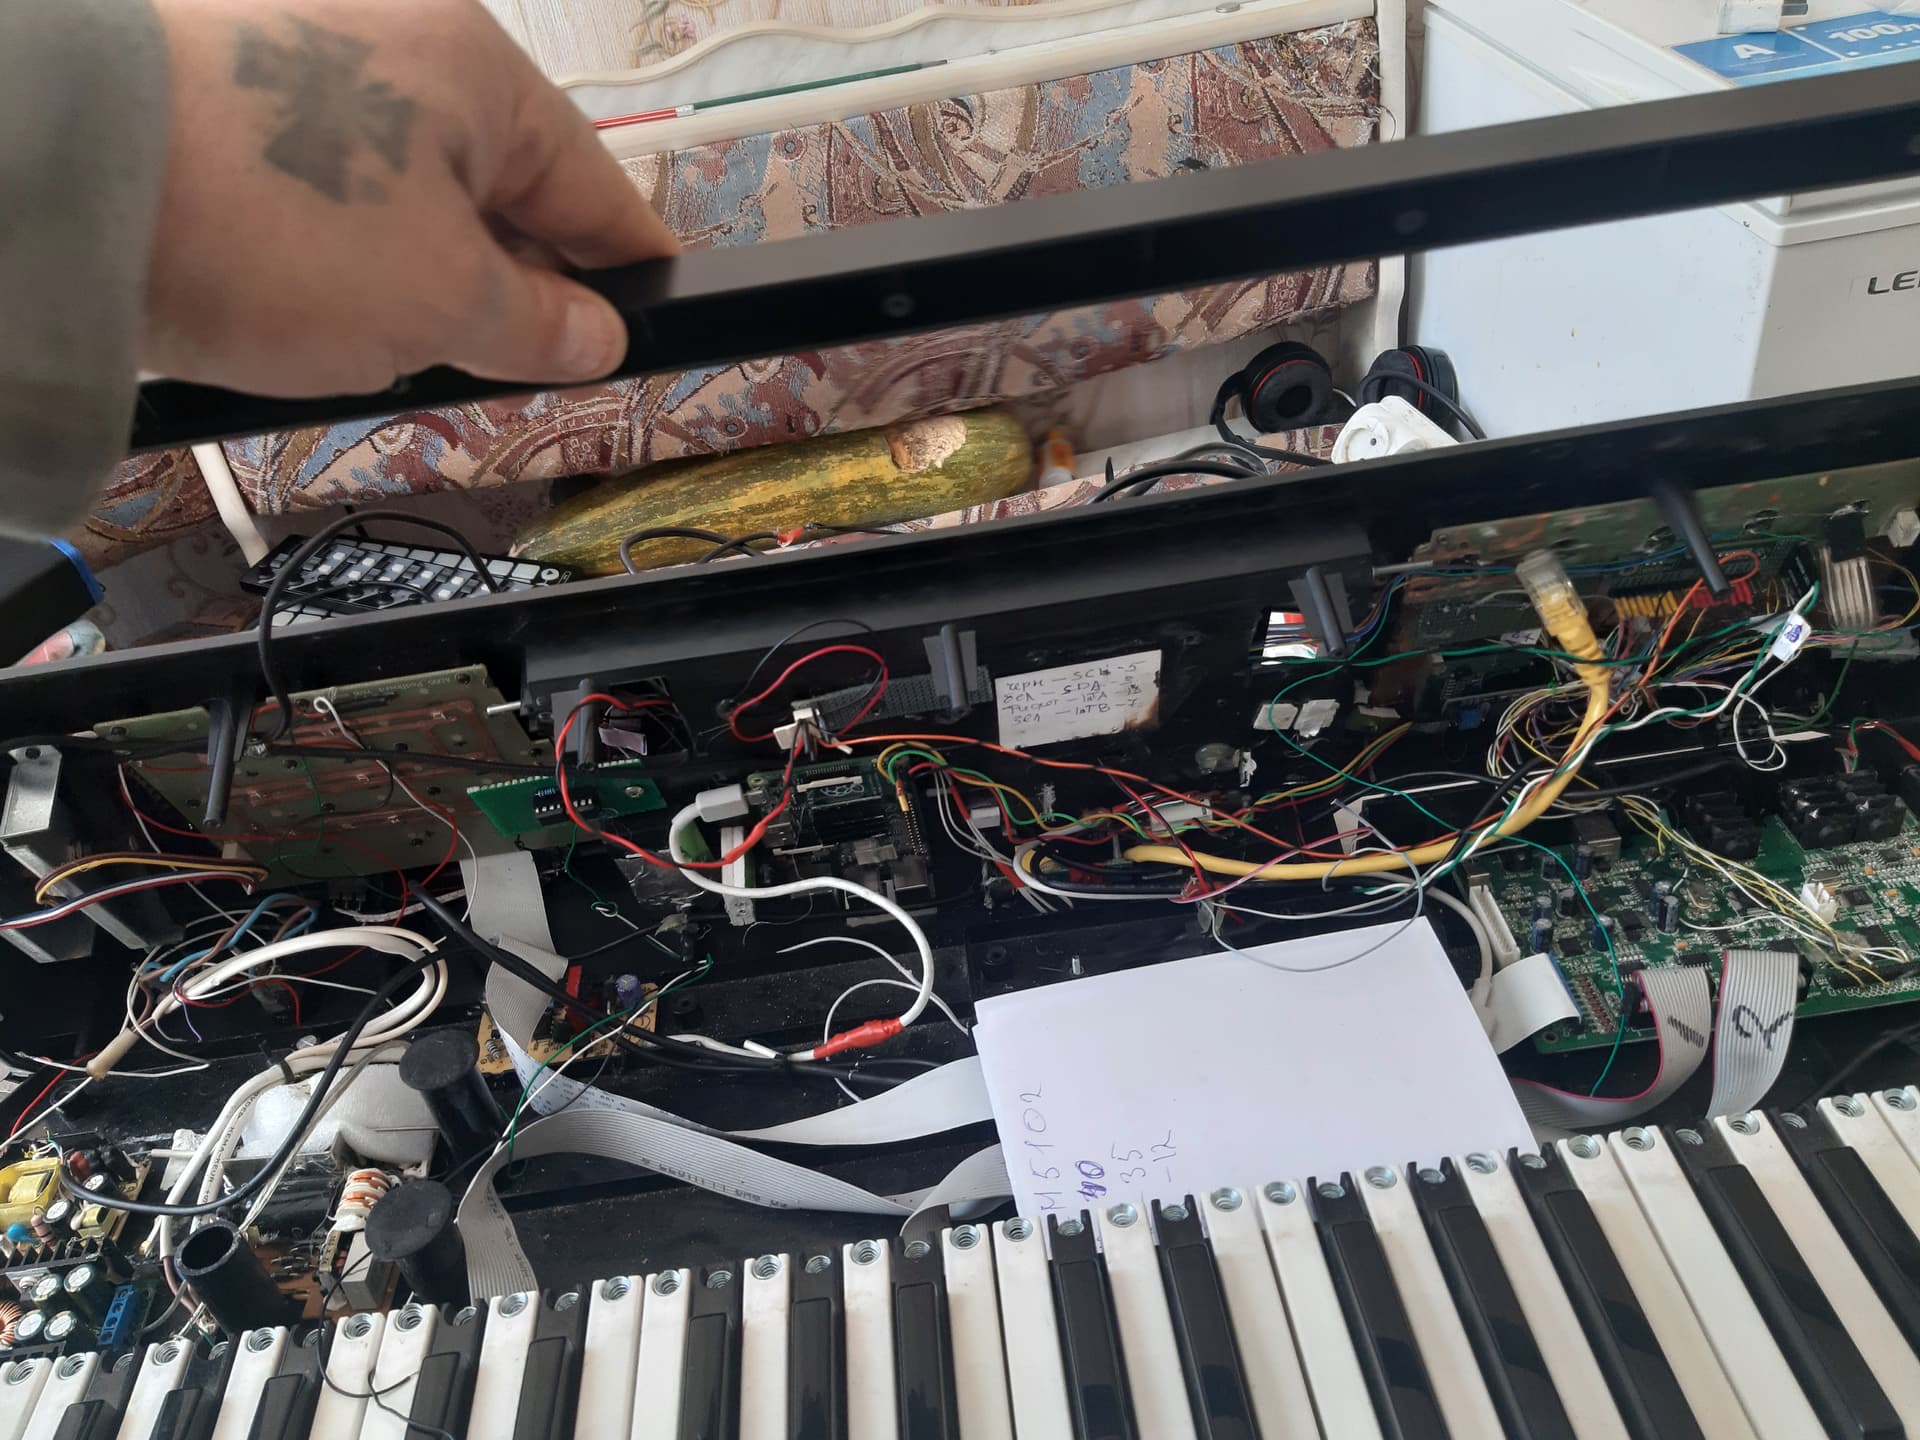
Hello, I decided to upgrade my Zynthian a little. Did I draw the connection diagram correctly? And which version should I follow when setting up buttons and encoders? Thank you in advance!
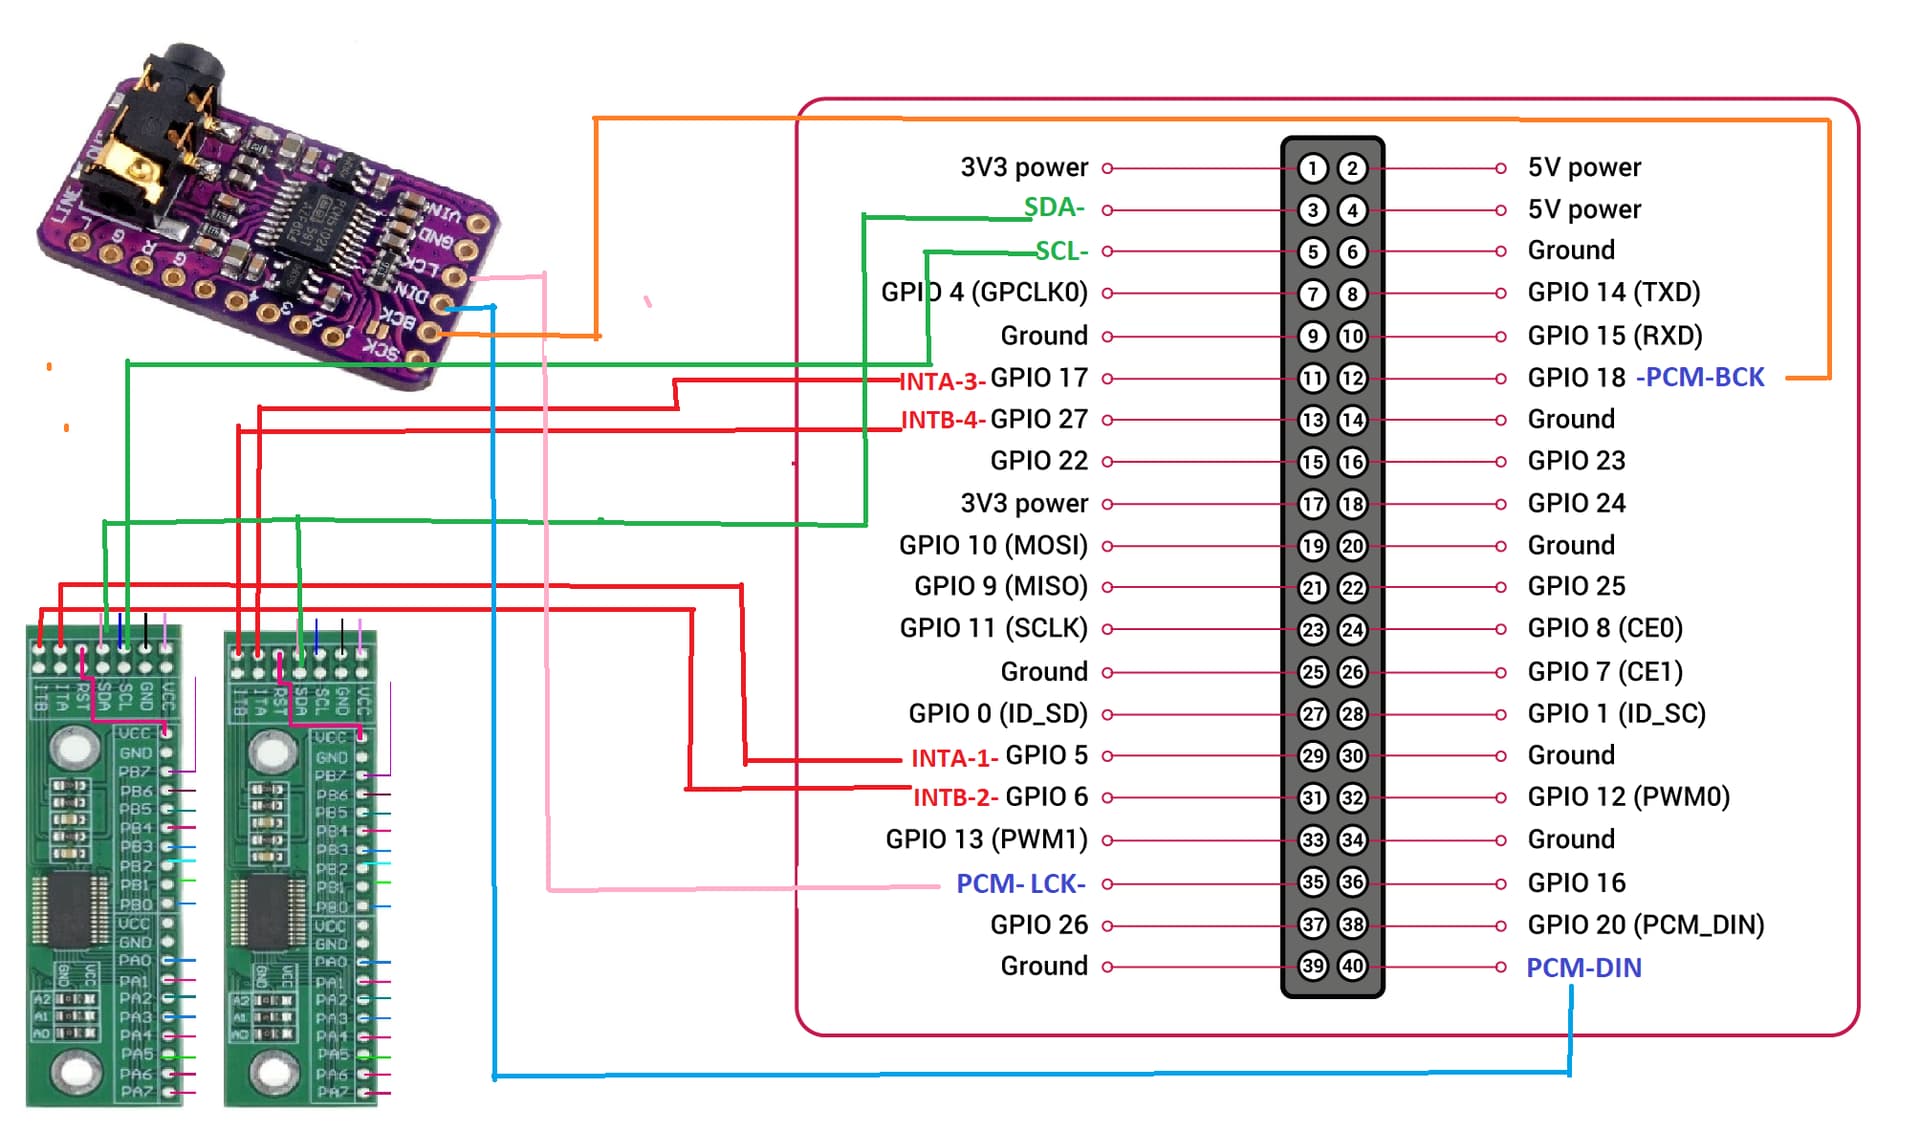
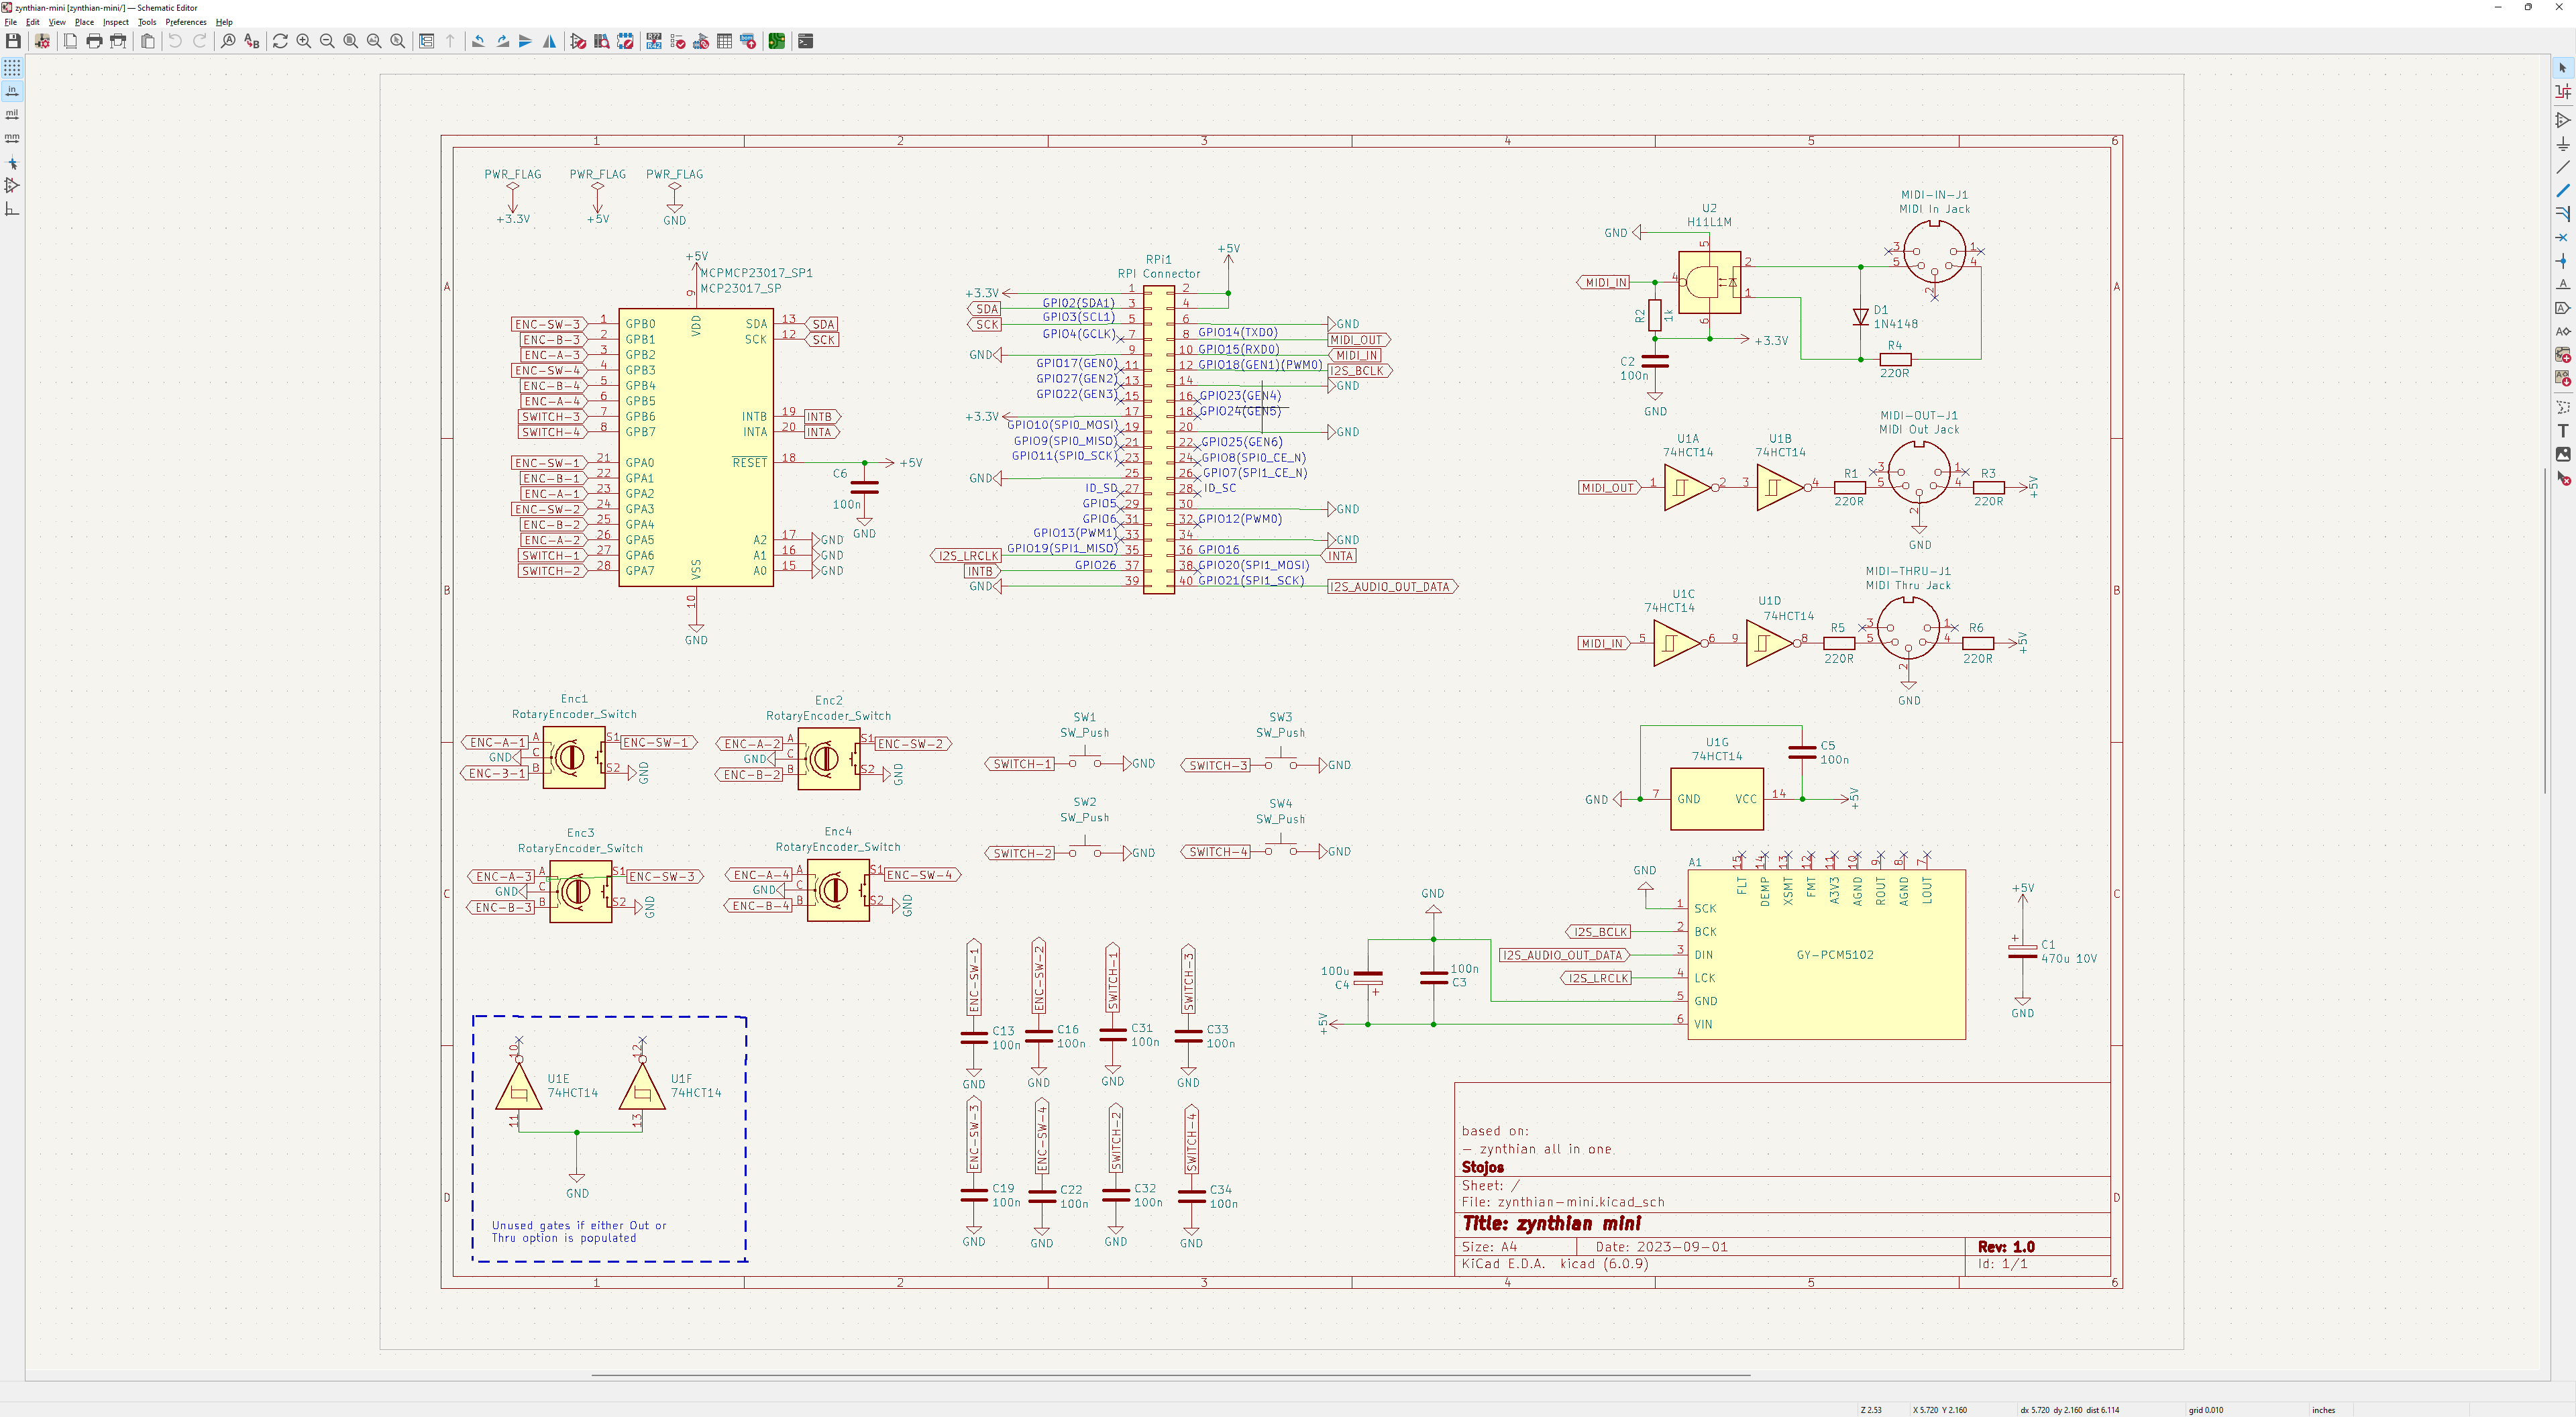
If you are using 2 x MCP23017 you should try to match the V5 layout, so you don’t need to write your own C code for setting up things. V5 uses 8 GPIO pins for rotary encoders and 24 GPIO pins for buttons. Take a look to the V5-control board schematics in the github repo “zynthian-hw” for getting the details.
If you want to follow your own path and innovate, take a look to the zyncoder library to learn how to write your own layout setup file in C. It’s not difficult and there are good examples, but you need some understanding of how things work inside.
Regards,
2 Likes
I see that you are trying to create a cost effective version of zynthian. I am working on this for last few months. I am almost there so maybe wait few more weeks for details. Here is some glimpse of what to expect.
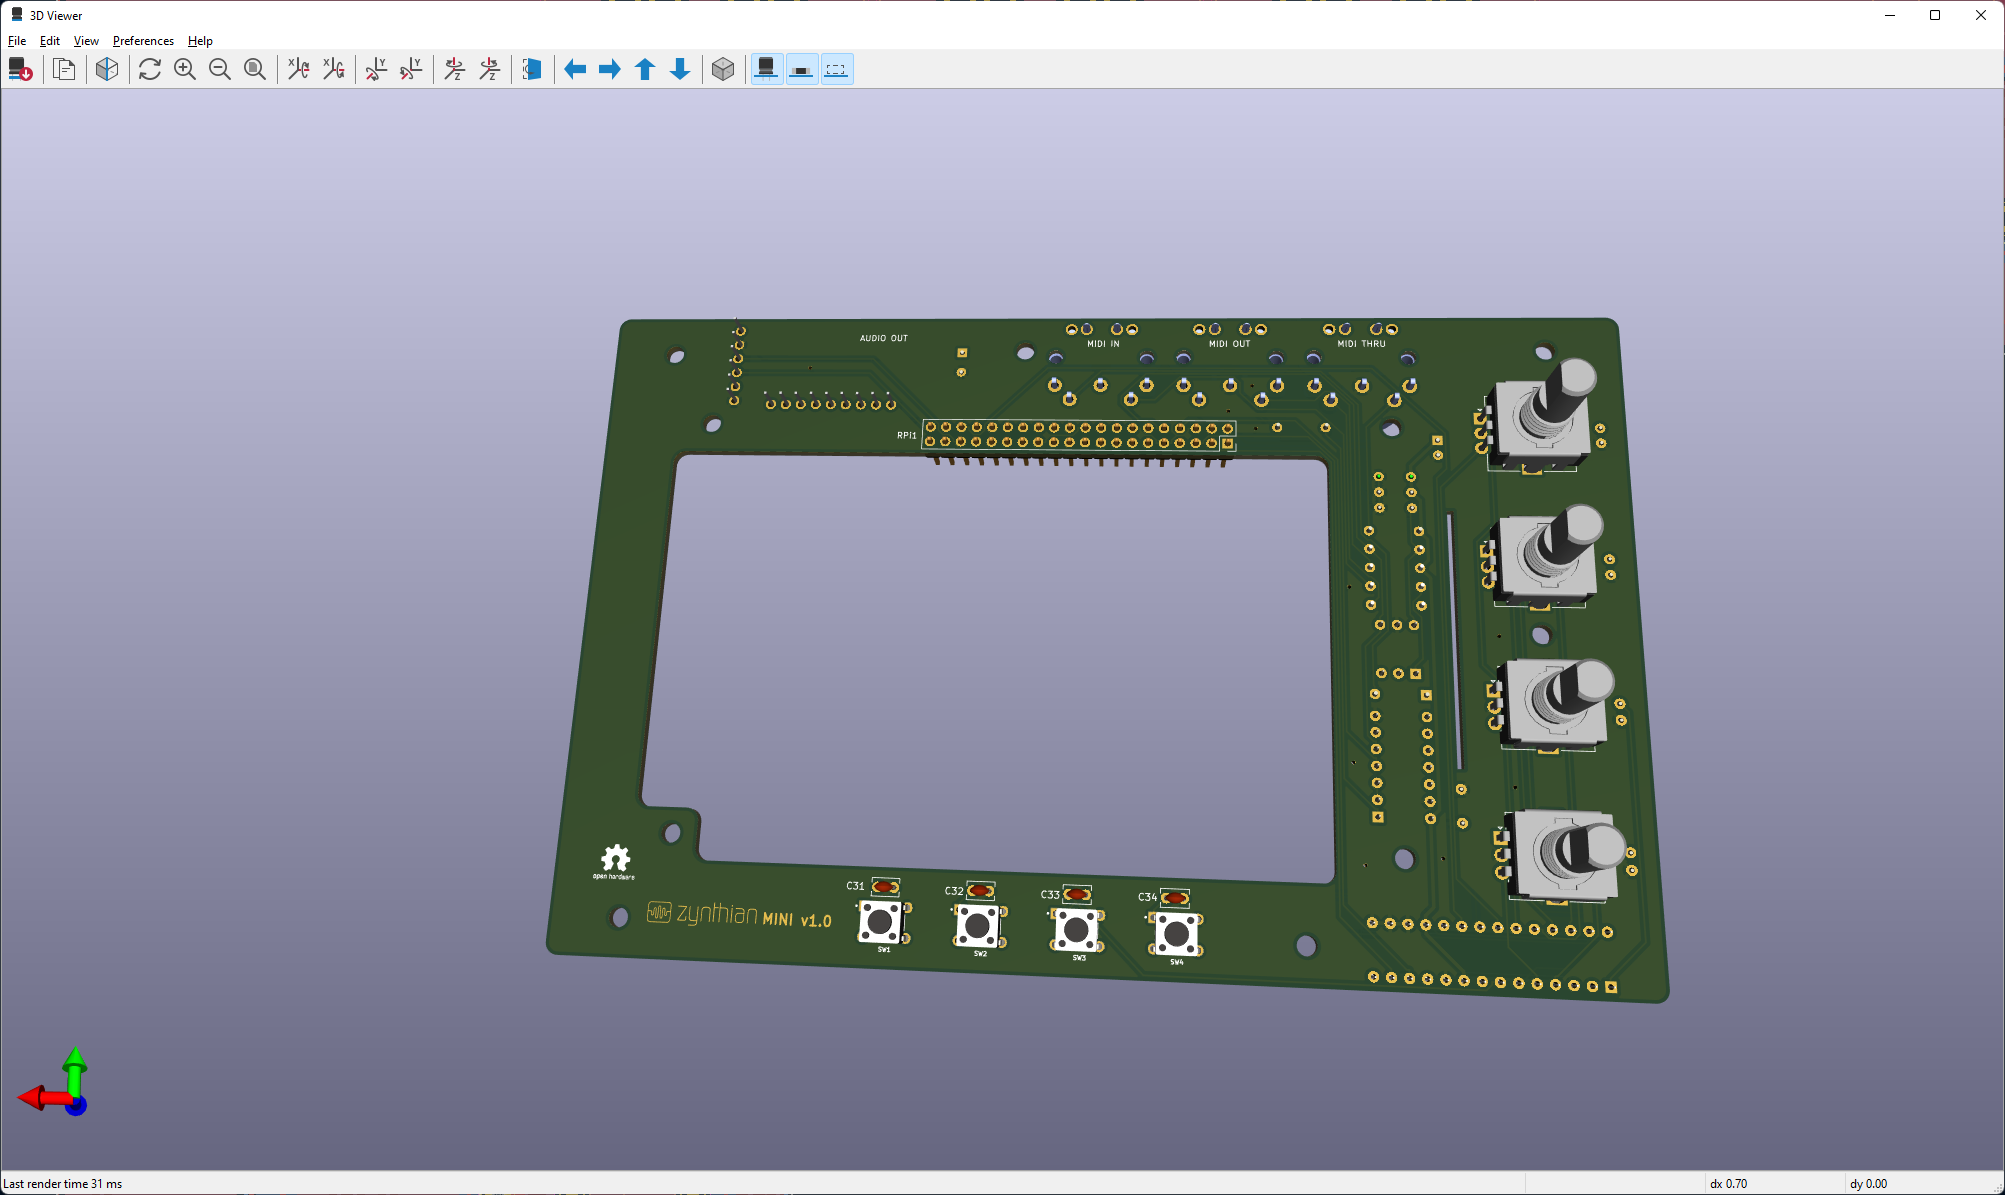

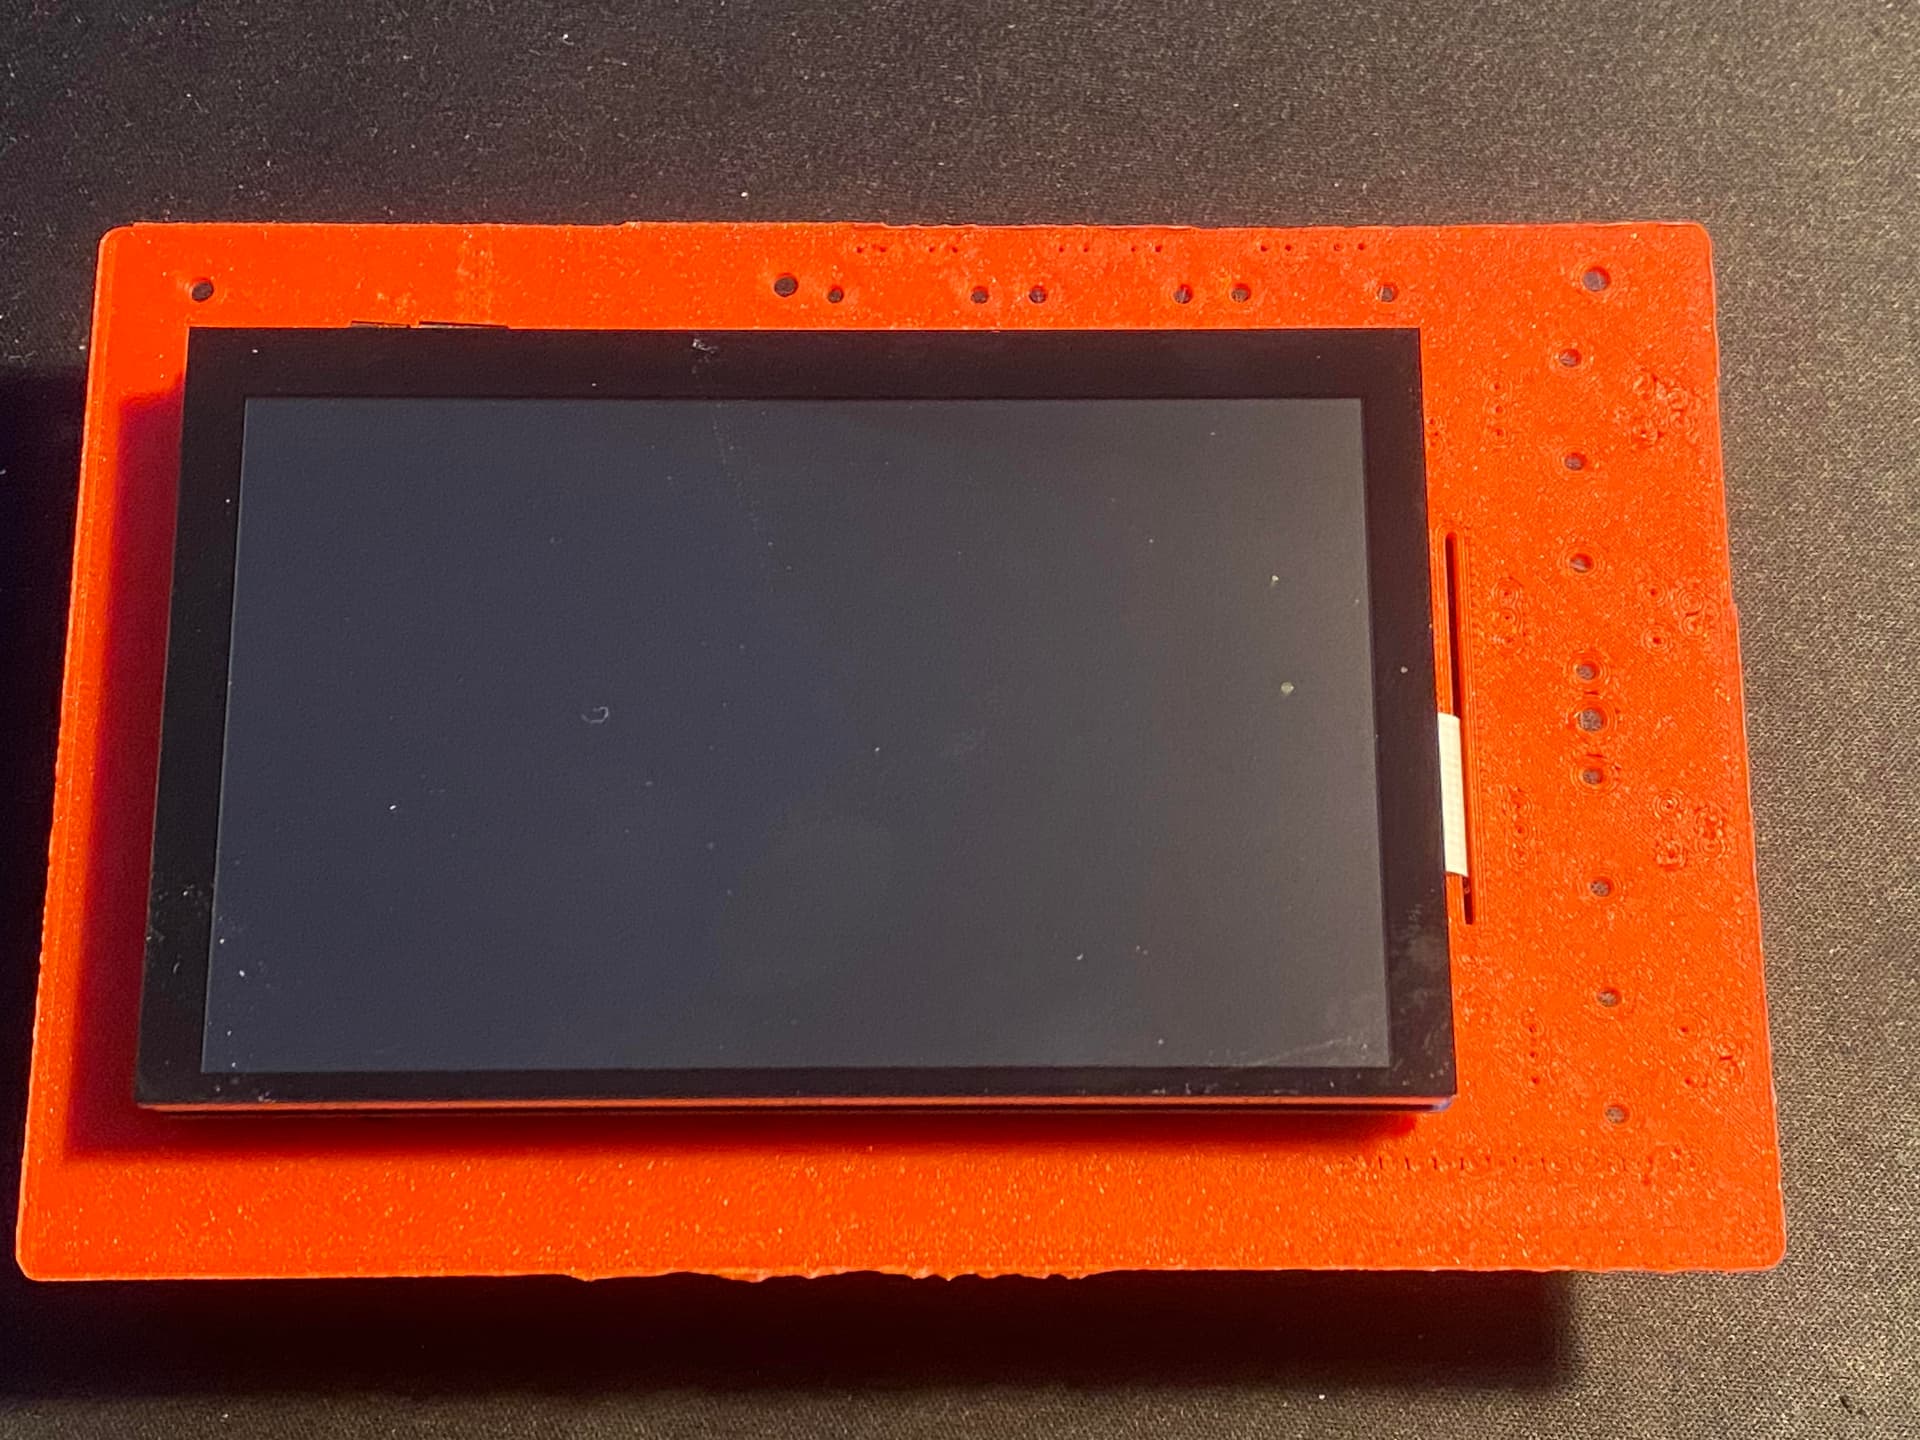
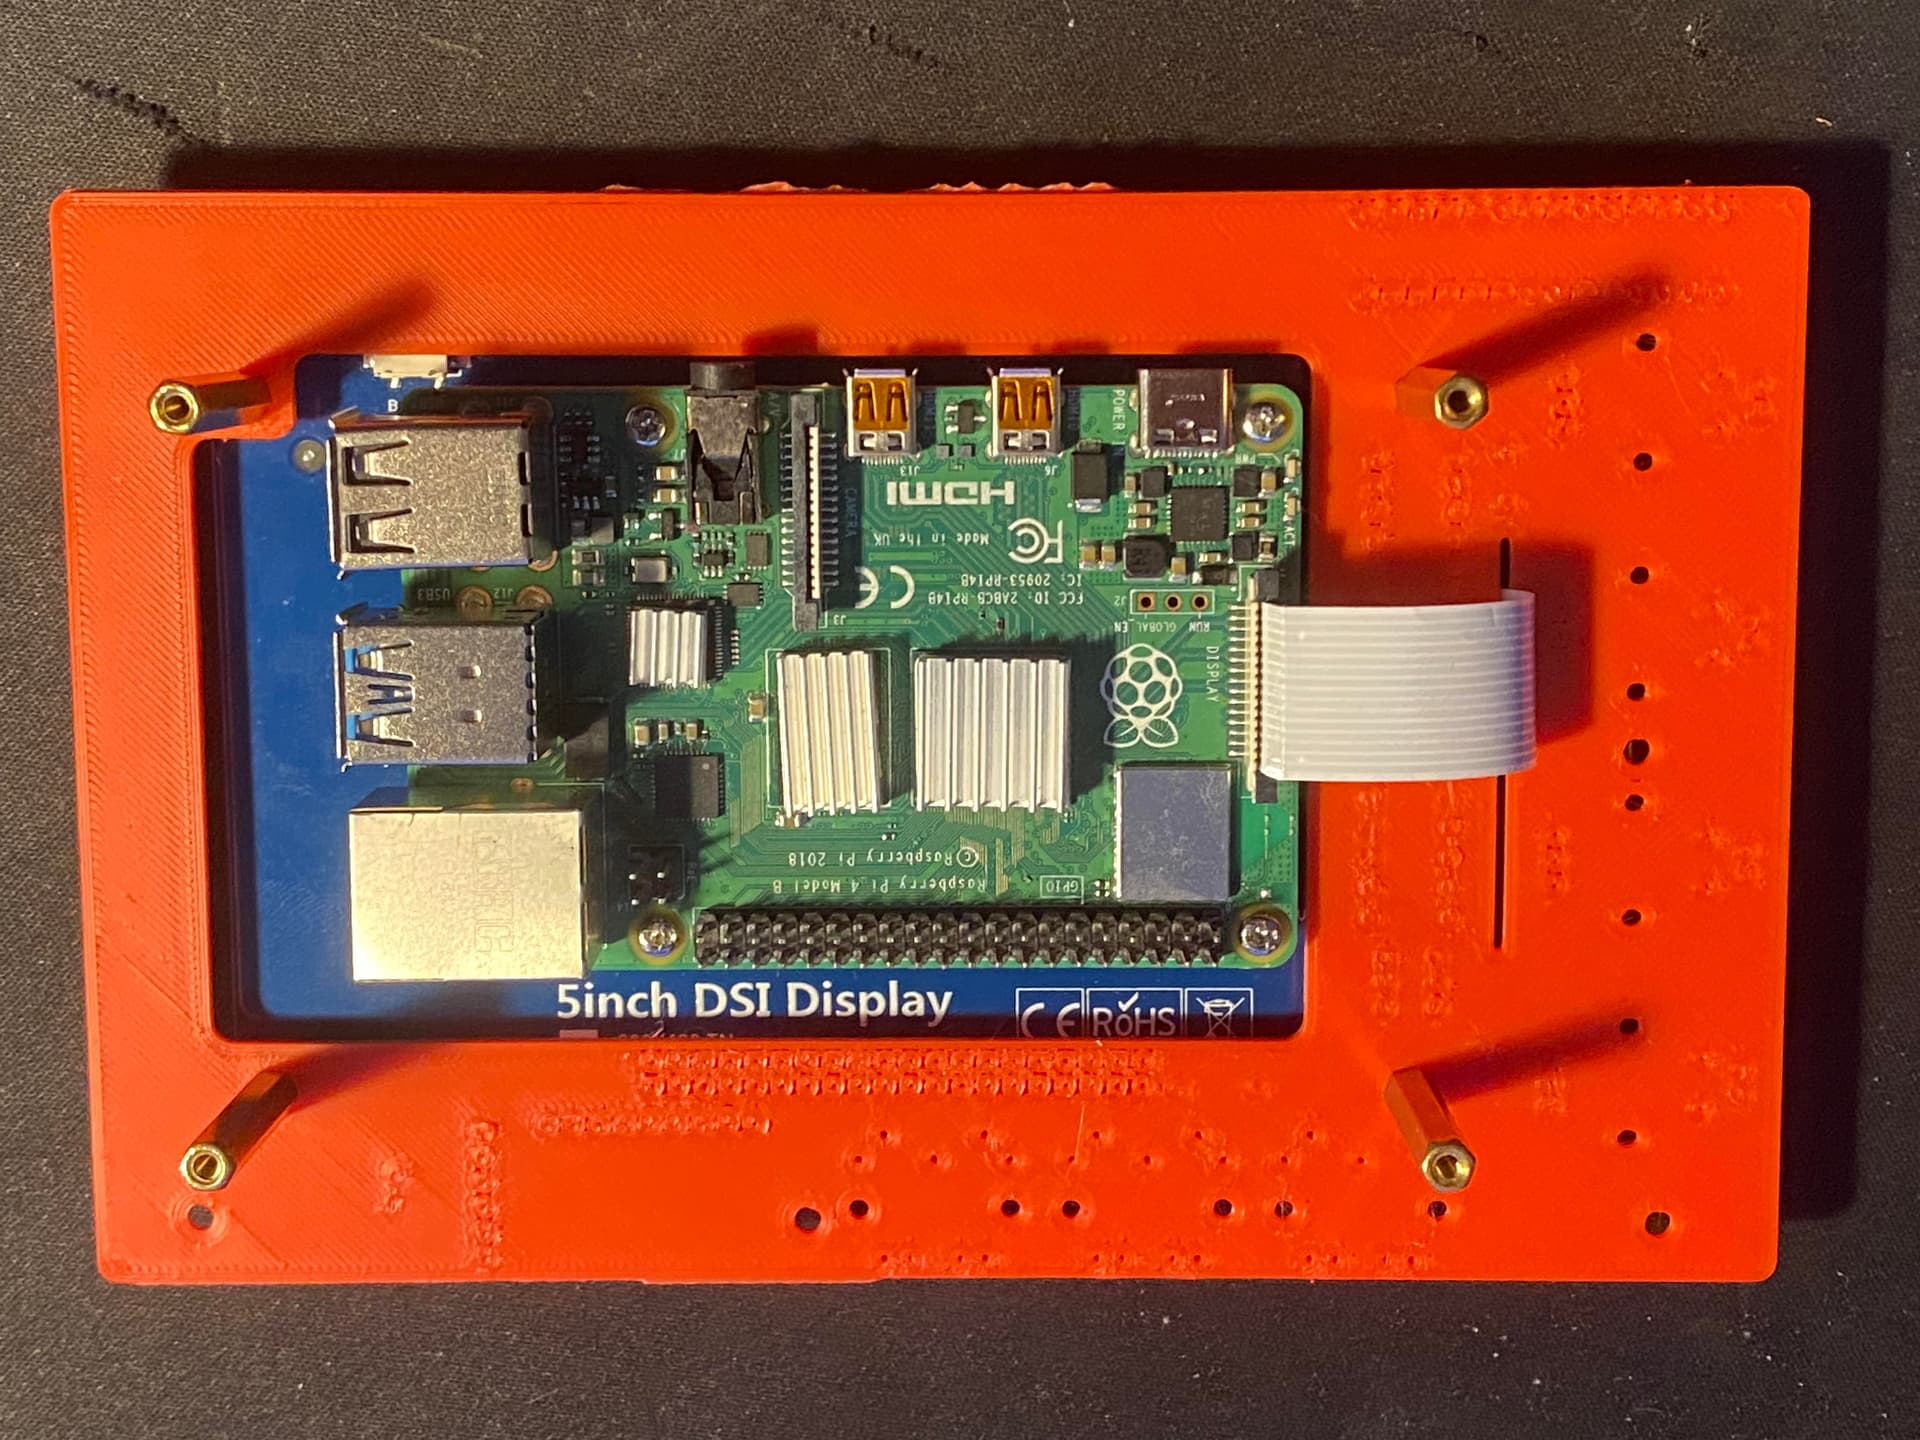
PCB would be just attached to back of readily available 5" RPI display (also used by v5 I believe). There are two versions of these 5" displays on china sites. One where RPI is mounted more towards bottom of display and another more in the middle. This PCB would support both mounts. Here is my test with 3d printed PCB and display with RPI mounted more towards bottom so to get idea how this will look like.
Audio DAC is based on cheap but good enough GY-PCM5102 card - the same that you are trying to use.
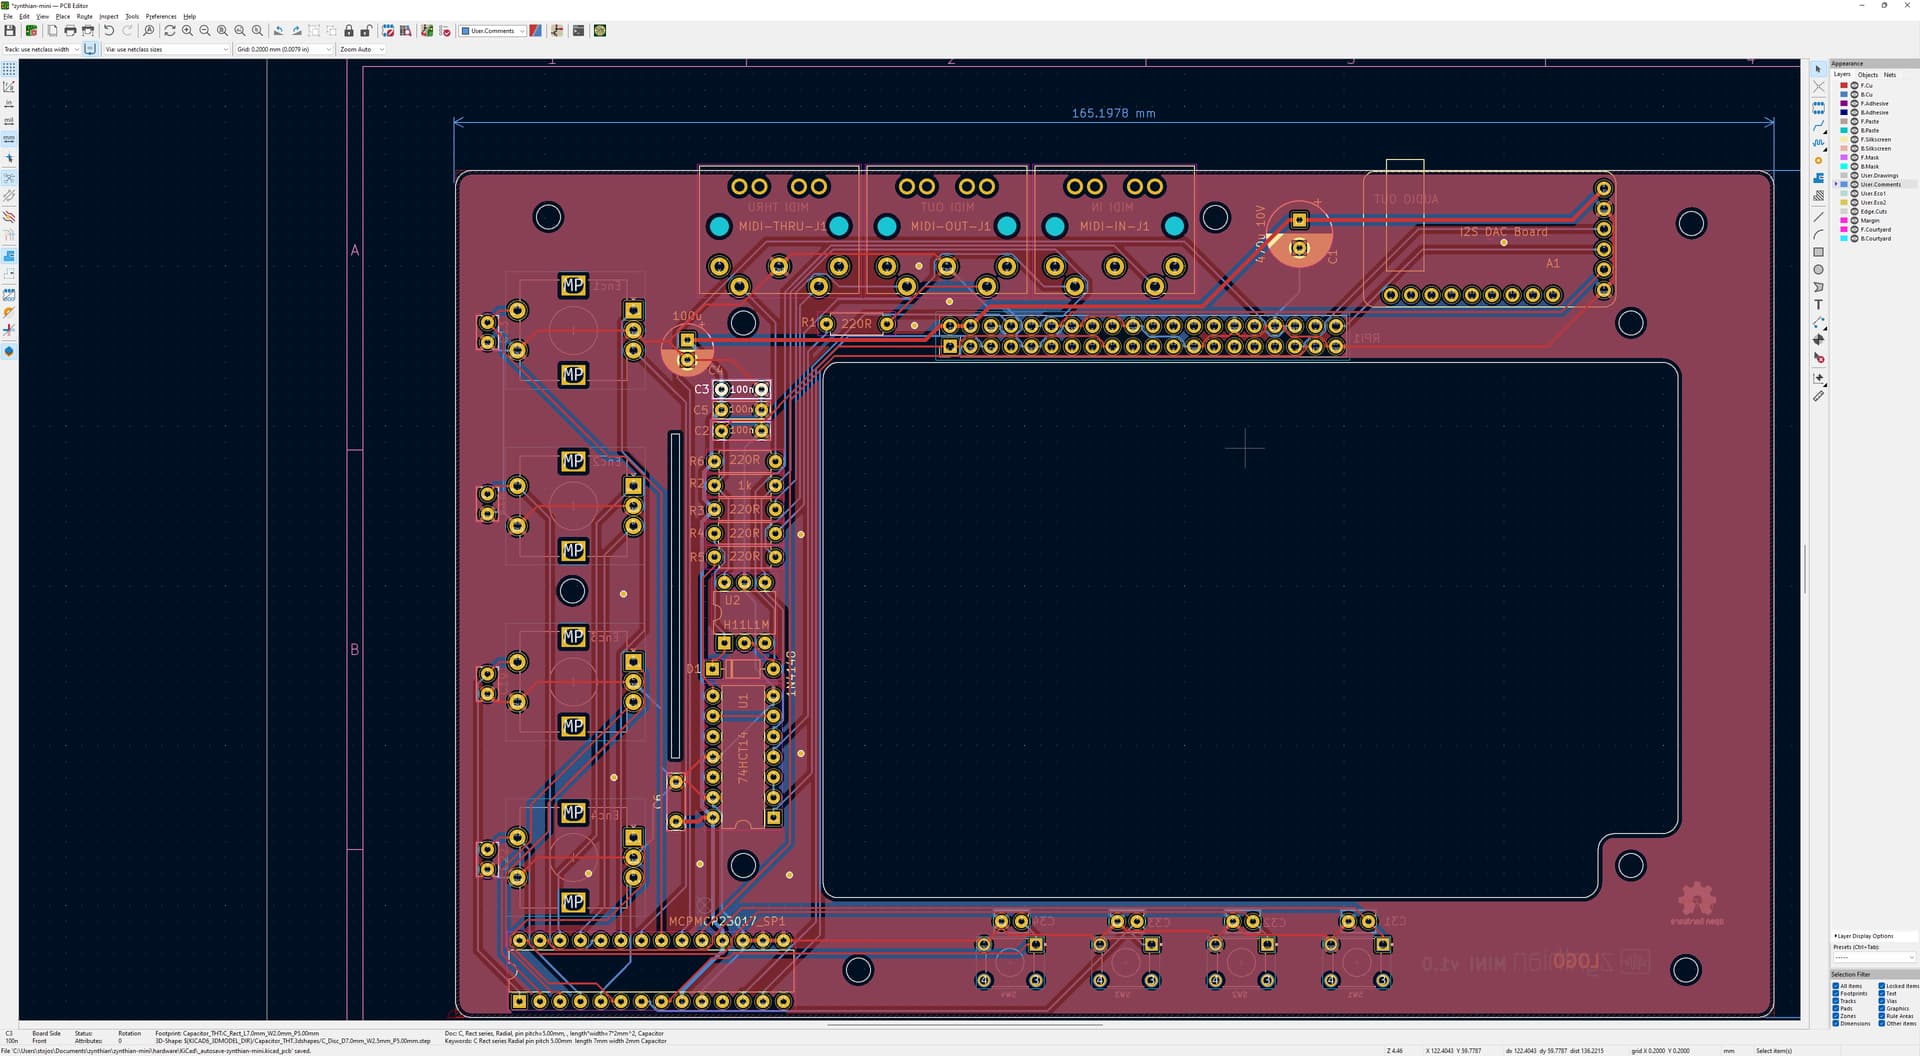
All components are through hole so it will not be hard to solder yourself. No cables - all connectors (all MIDIs, Encoders, switches and audio out ) are PCB soldered. The only cable is 40pin from rpi to PCB.
Can be easily used without case.
Case can be easily 3D printed. I will provide 3d design for it too.
As you can see Rpi is fully open for any type of cooler (specifically we will need that with rpi 5).
More information will be published as soon as I have this tested. First batch of PCB will arrive next week to me from pcbqway.
I have the same schematics tested before but PCB was mounted on top of RPI and needed cables for encoders and when in case for audio and MDI. I was not happy with too many cables - hence this approach. See my other post for midi pedal that I built where you can find how it was originally looked.
Cheers.
6 Likes
Regarding „cost effective“
You should give your time a price.
I don’t know, how much time I spent with different V2 versions , sound cards, displays.
Broke cards etc.
you should like to discover new paths and like pioneer work.
Saving money should not be the motivation. Most of the time it doesn’t. Unless you think an hour of your life is worth nothing.
2 Likes
Ups! This design take to my mind this cute device:
The main problem i see is access to USB & ethernet ports in the Pi, for the rest, good work, @stojos!
The best!
1 Like
@mheidt You are correct - I wrongly used phrase “cost effective”. What I meant was not to create something to compete with current zynthian v5 hardware. That hardware is professional grade hardware that for price we can’t get cheaper. What I meant with “cost effective” is a version that is significantly cheaper with expected sacrifices so that we can get more adoption - something that cost 20% of professional version and has enough functionalities for people to play on it, program on it and contribute to the project. I would call it “zynthian mini”.
@jofemodo - you are right that connection for USBs, network etc will not aligned to the edge of the PCB . However they are still accessible - there is nothing in their way - hence case can be printed to have idented openings for these connections.
Thanks all for comments !
Hello everybody! Yes, as they say, it’s a hard way, but it’s cheap. I decided to update and improve my Zynthian a little, but during all this I was unlucky and my Rpi4 burned down and the culprit is just a cat, a simple domestic cat. I was waiting for the new one to arrive, I connected everything today. But you will have to update the OS to a more recent one. Thank you so much for your support.

Such a look of innocence. “It wasn’t me!”
1 Like
Hi, which OS version should I download for my Zynthian V5 build?
You have a choice of the current stable image 2401 or the development image oram. The stable is unlikely to change unless there is a substantial issue discovered. Oram is in a constant state of flux, being under rapid development. Oram had ta lot of improvements so if you don’t need something stable you could go with that.
You said your V5 build. It looks like your are using custom parts so it may not be fully V5 compatible but I’m sure you can configure appropriately.
I assume you have replaced your broken RPi4 with another RPi4. (The RPi 5 is not yet supported due to substantial changes in the hardware the require extensive changes in Zynthian.)
count me in if your doing a run of pcbs. looks good
I am expecting PCBs early next week. As soon as test one I will post if they are ready for wider testing. Cheers.
2 Likes
I have posted more information on my build on dedicated topic Zynthian mini .
1 Like
cleaning current chains , it constantly exits, after several turns on and off it starts working normally.
