Great @norbim!! Really great build!! Congratulations!
I hope to hear some audio/video demo very soon!! 
Best Regards!
Great @norbim!! Really great build!! Congratulations!
I hope to hear some audio/video demo very soon!!
Best Regards!
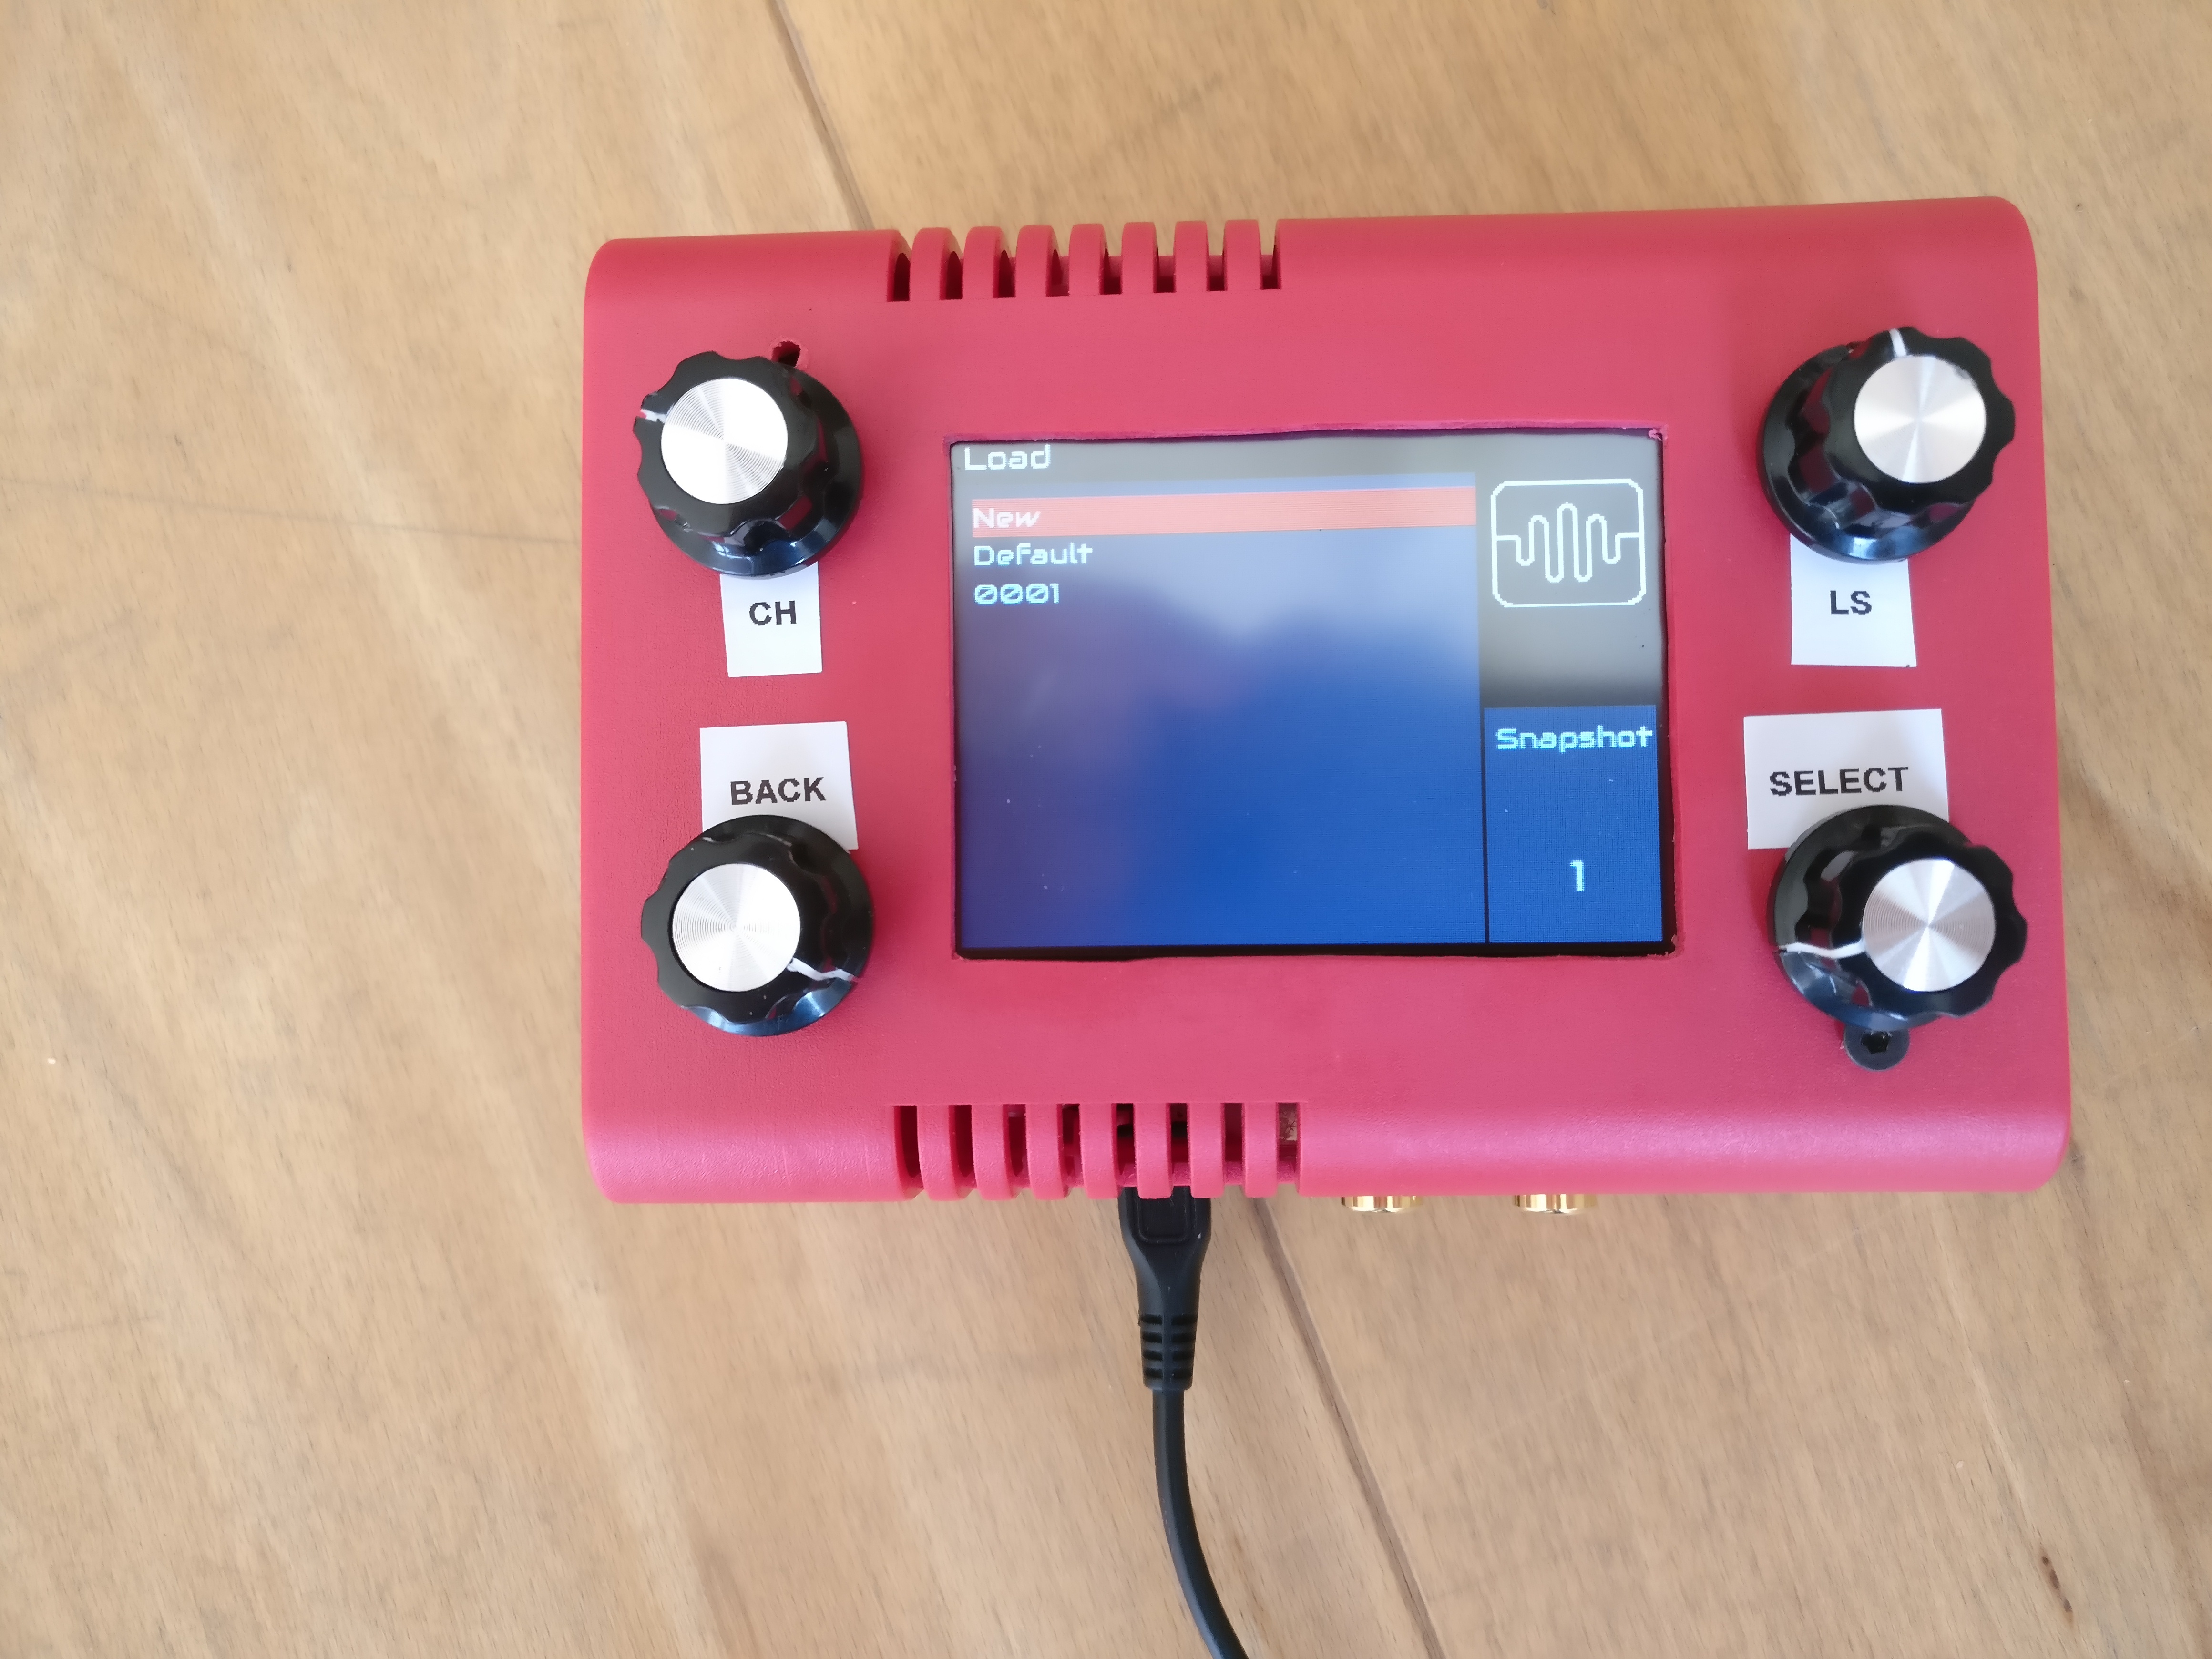
…and finally… the “Success” post 
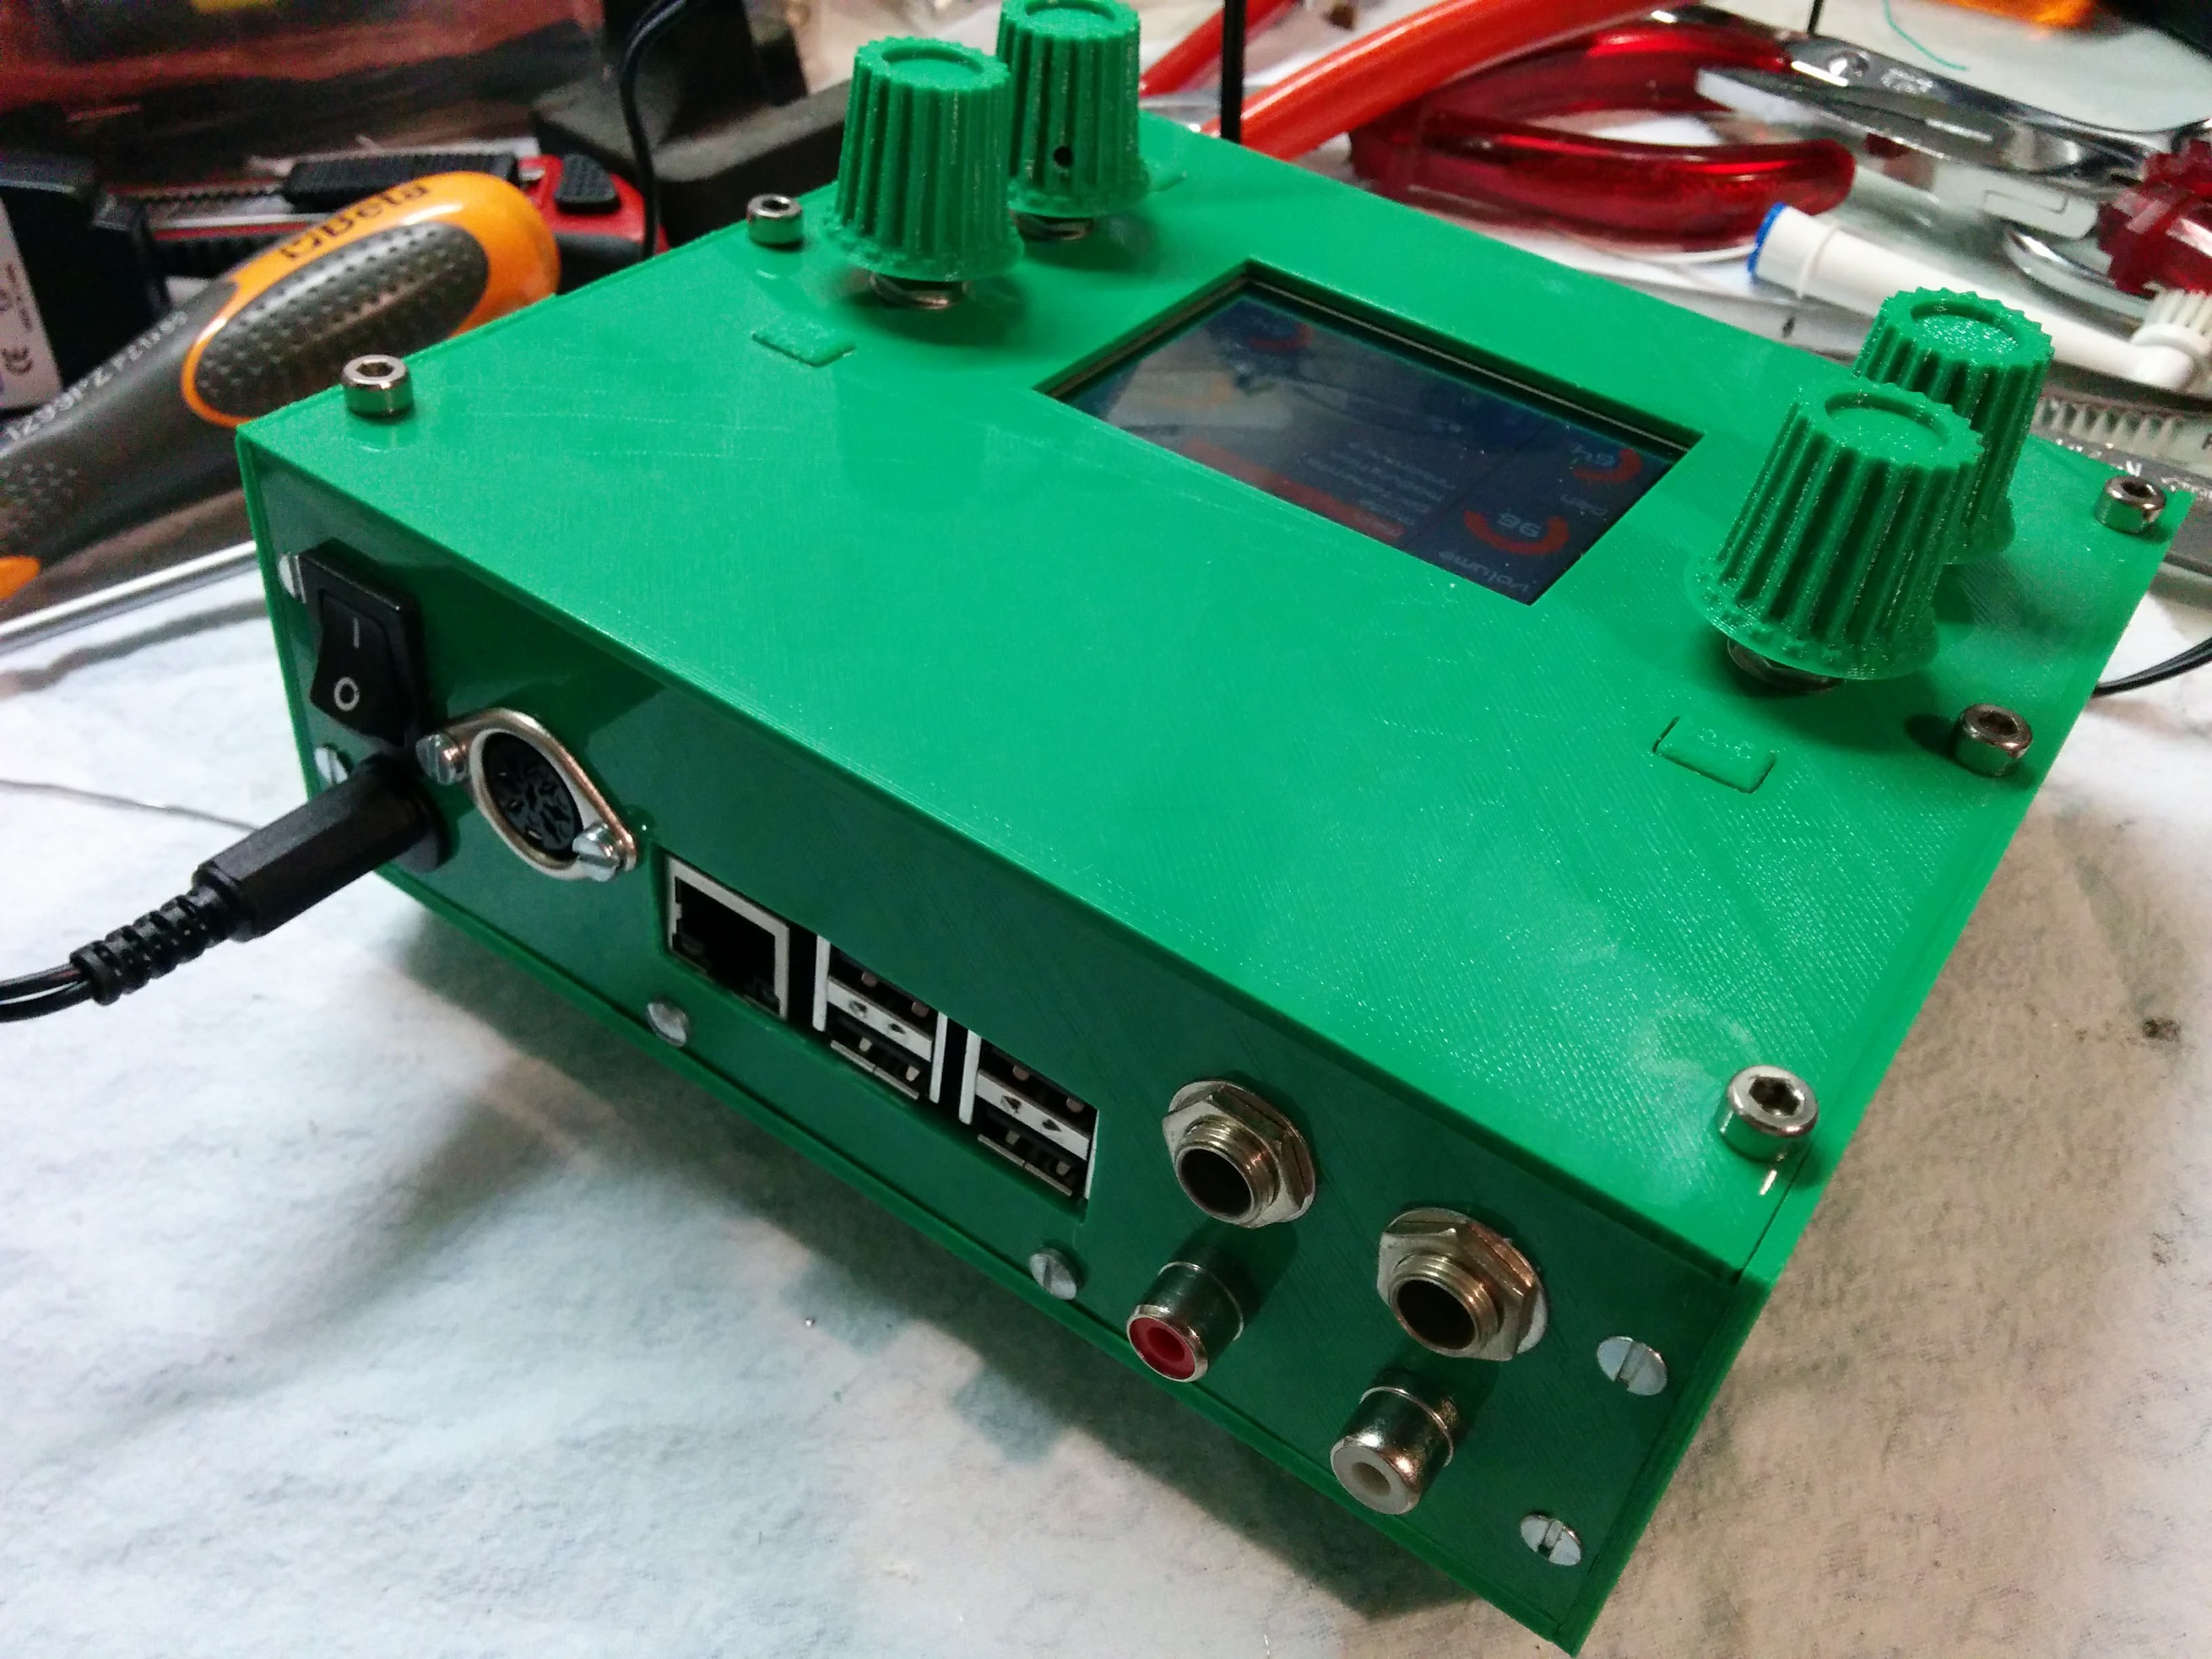
My first Zynthian is now fully assembled and tested (a good musician tested it, my “bang away” playing style is not a real test  ) and ready to be given to the friend that asked me to build it.
It has been almost completely hand wired (but I’m used to hand wire prototypes well bigger than this… Zynthian worked the very first time I powered it)
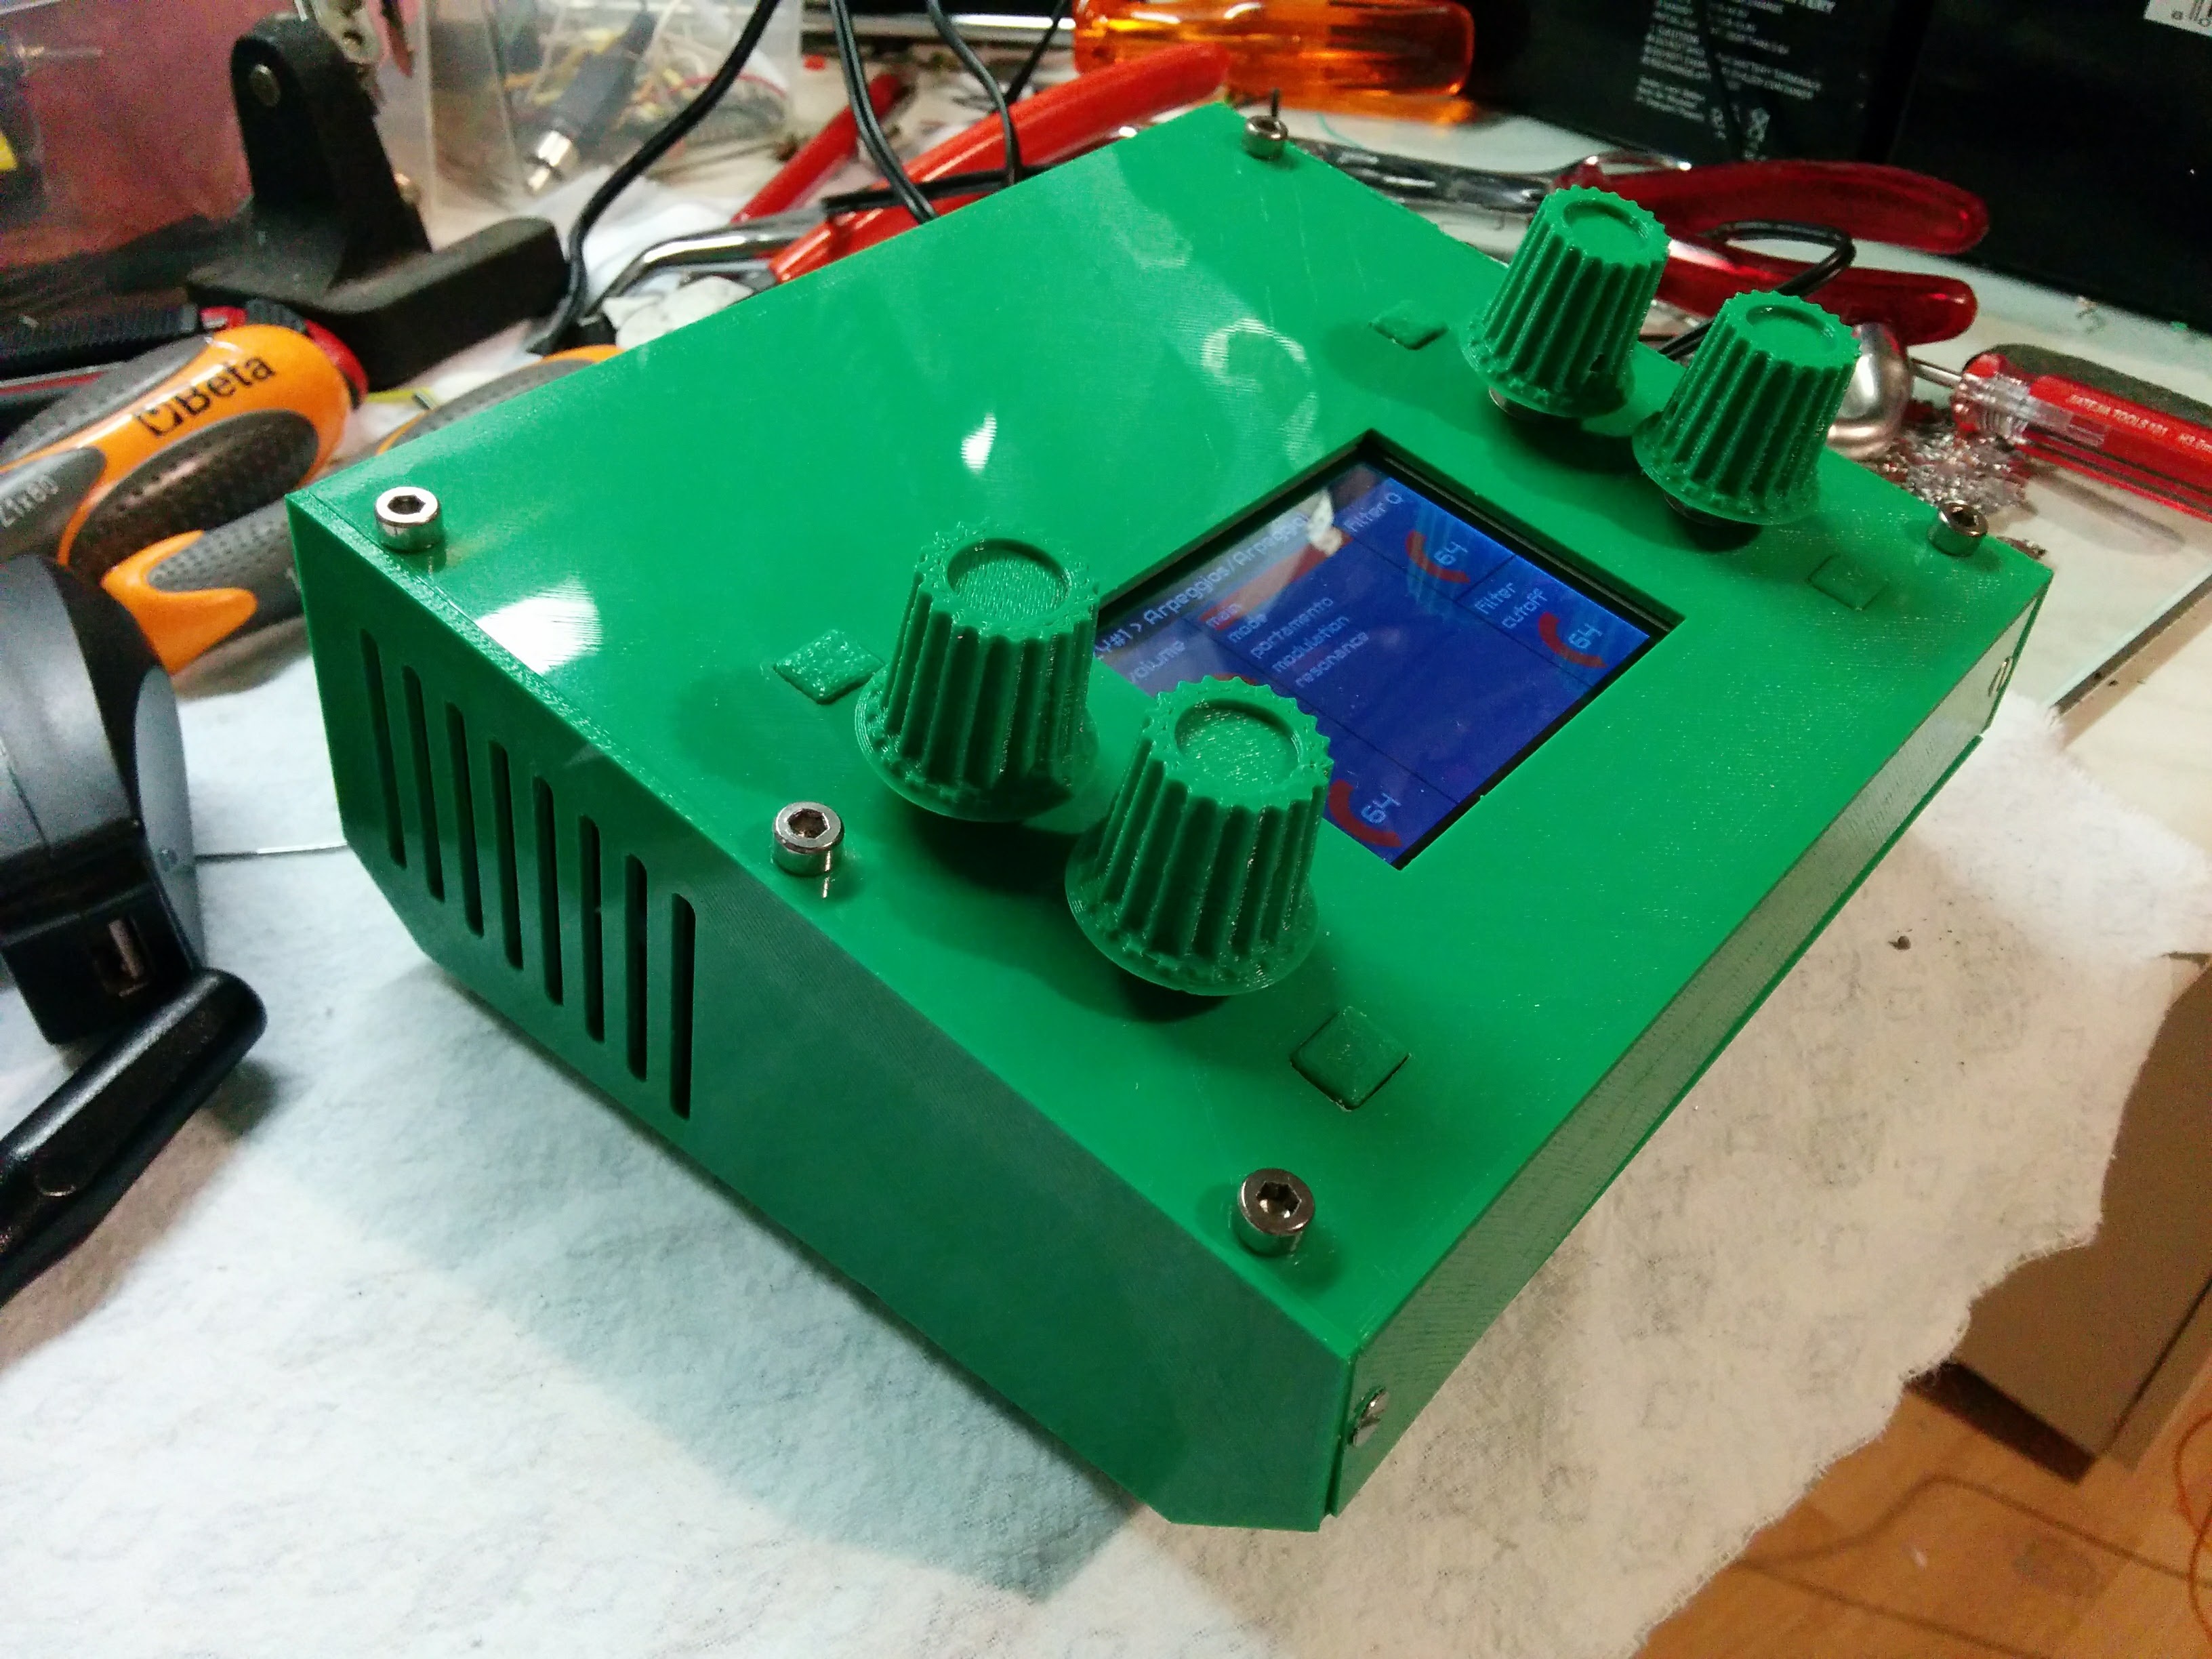
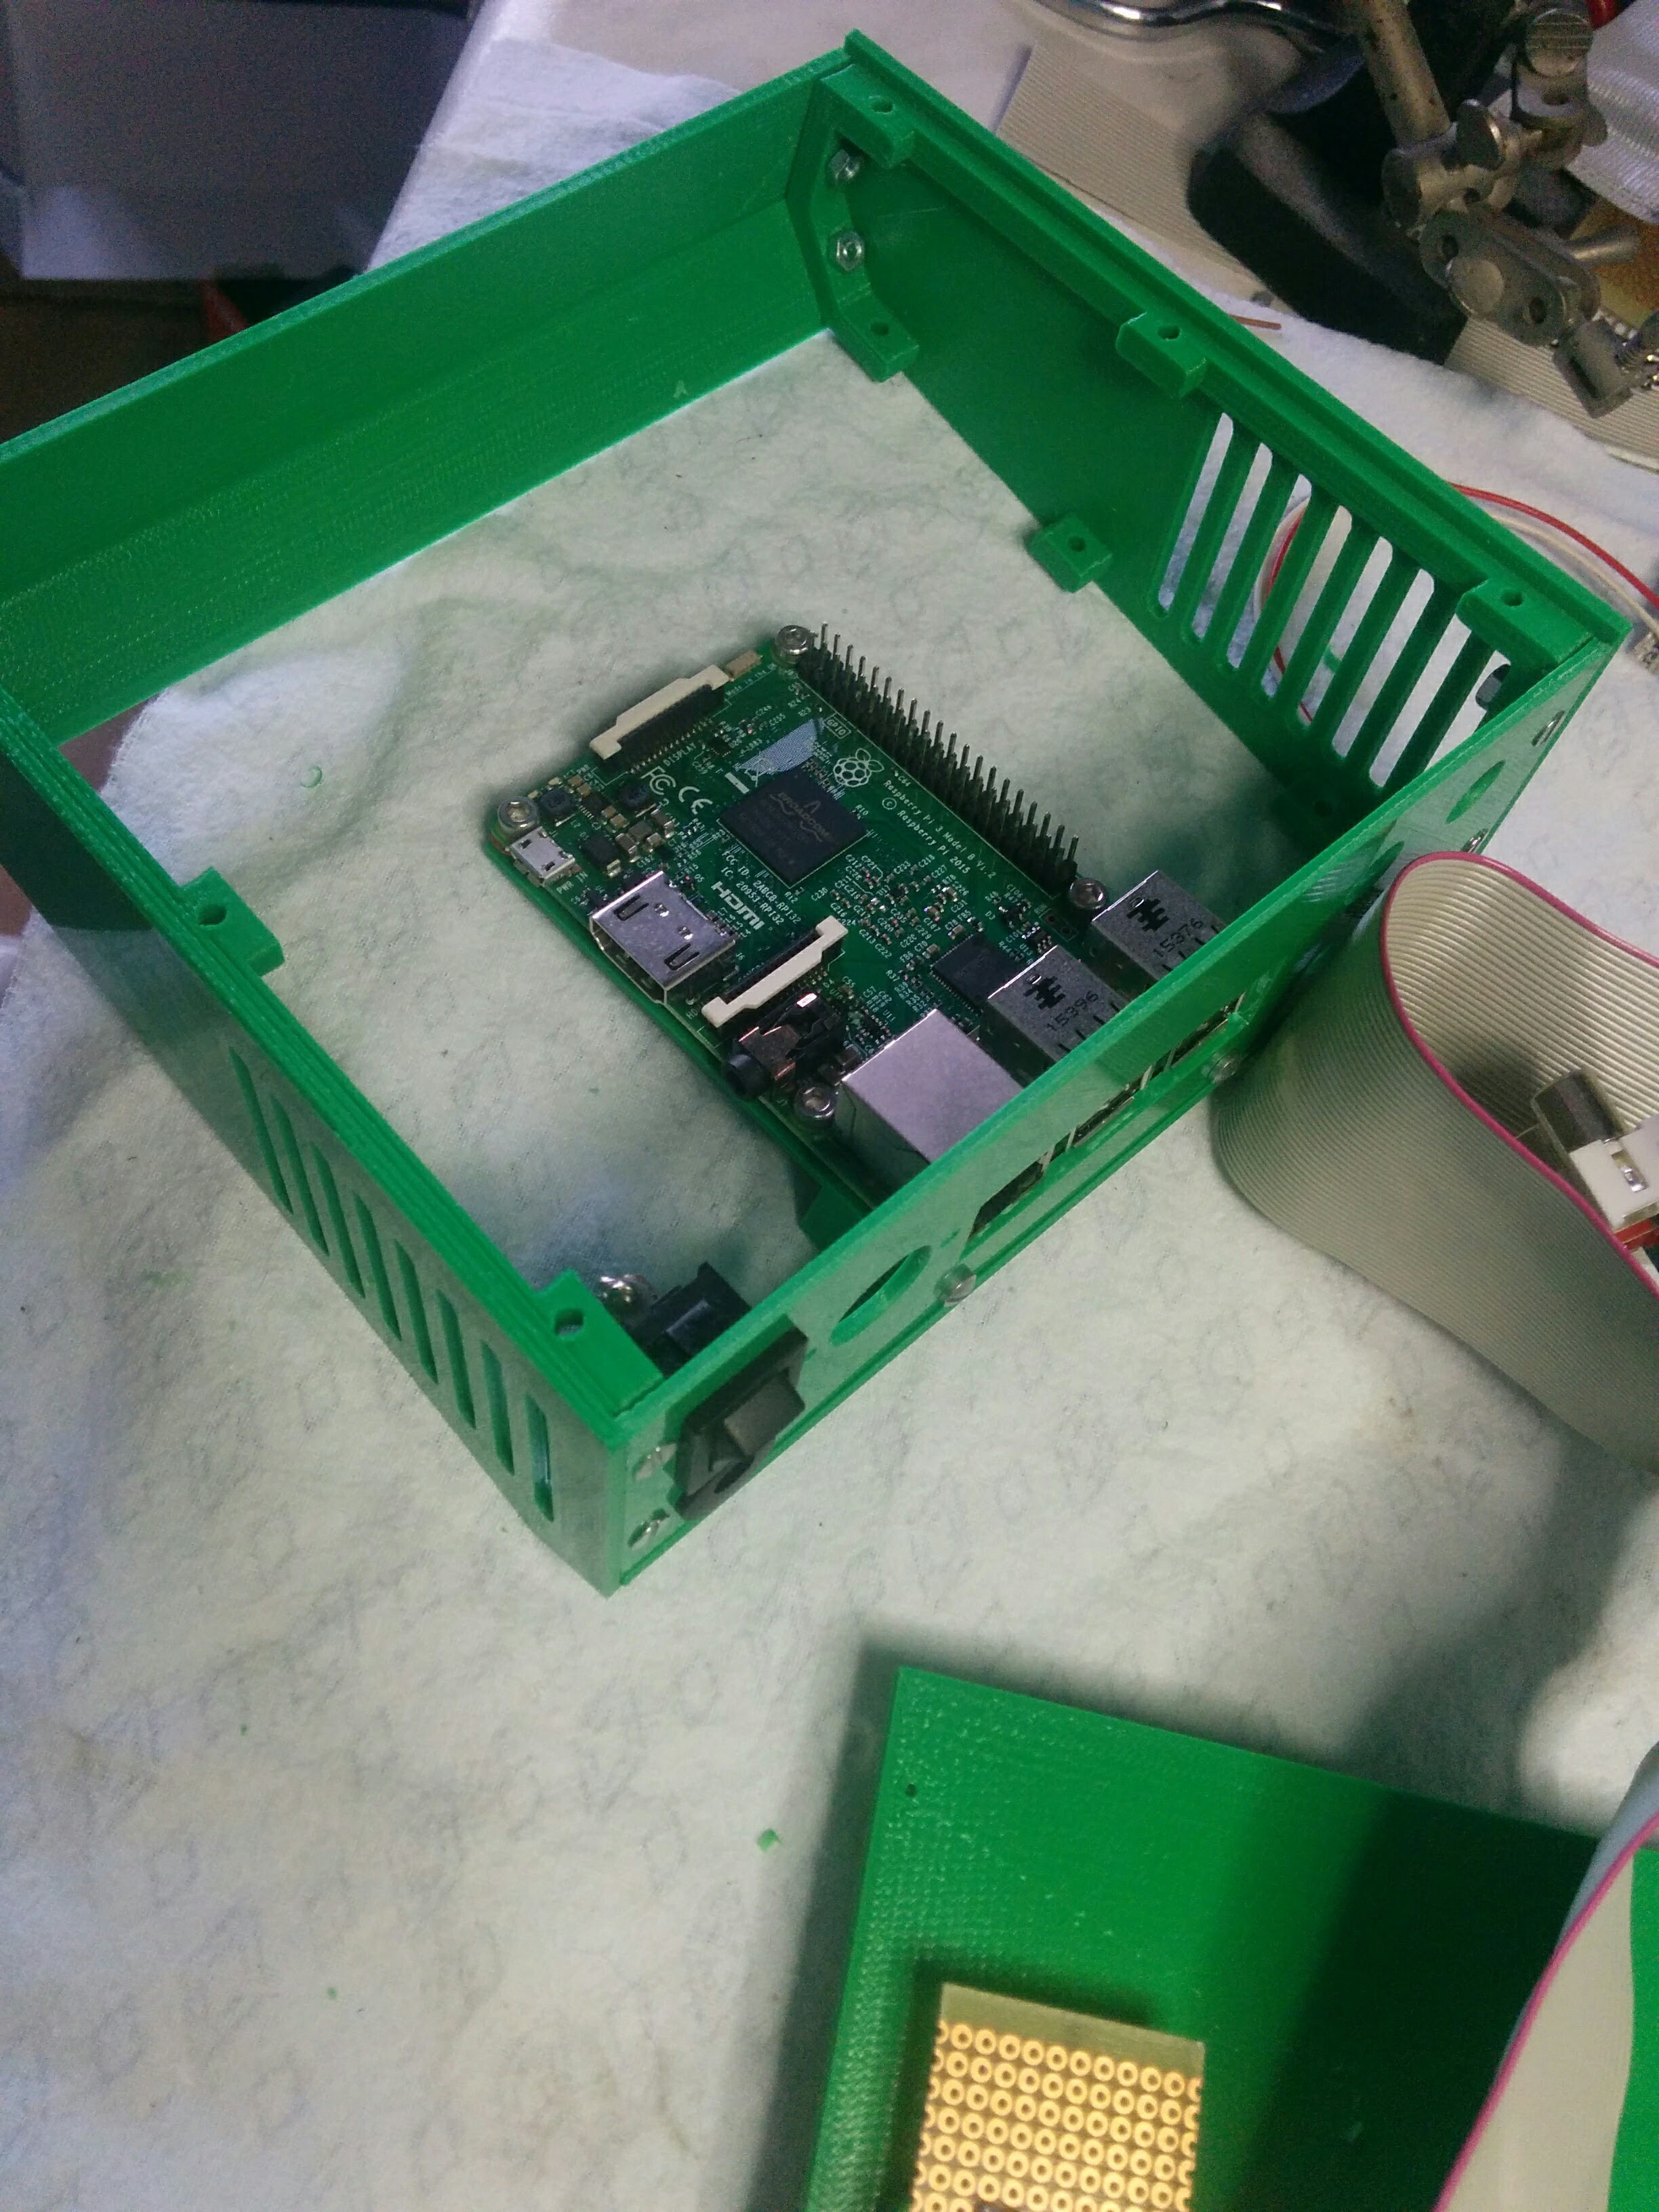
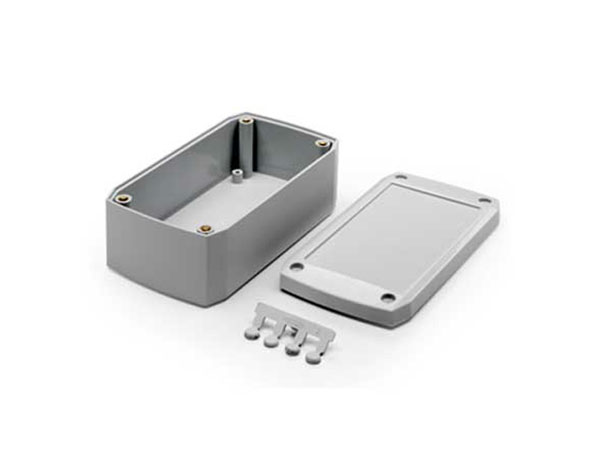
I designed a 3D printable case for rPI3+PiTFT+HiFiBerry, STL files are on the github repository and on thingiverse. The case is made by many pieces, and each piece can be printed with the outer side on the printing bed, to have a nice and glossy surface. Parts fits on a quite small bed (18x16cm)
I’m thinking about making a thin (2D) printed decal to put on front panel, with key and control descriptions, like the offical one.
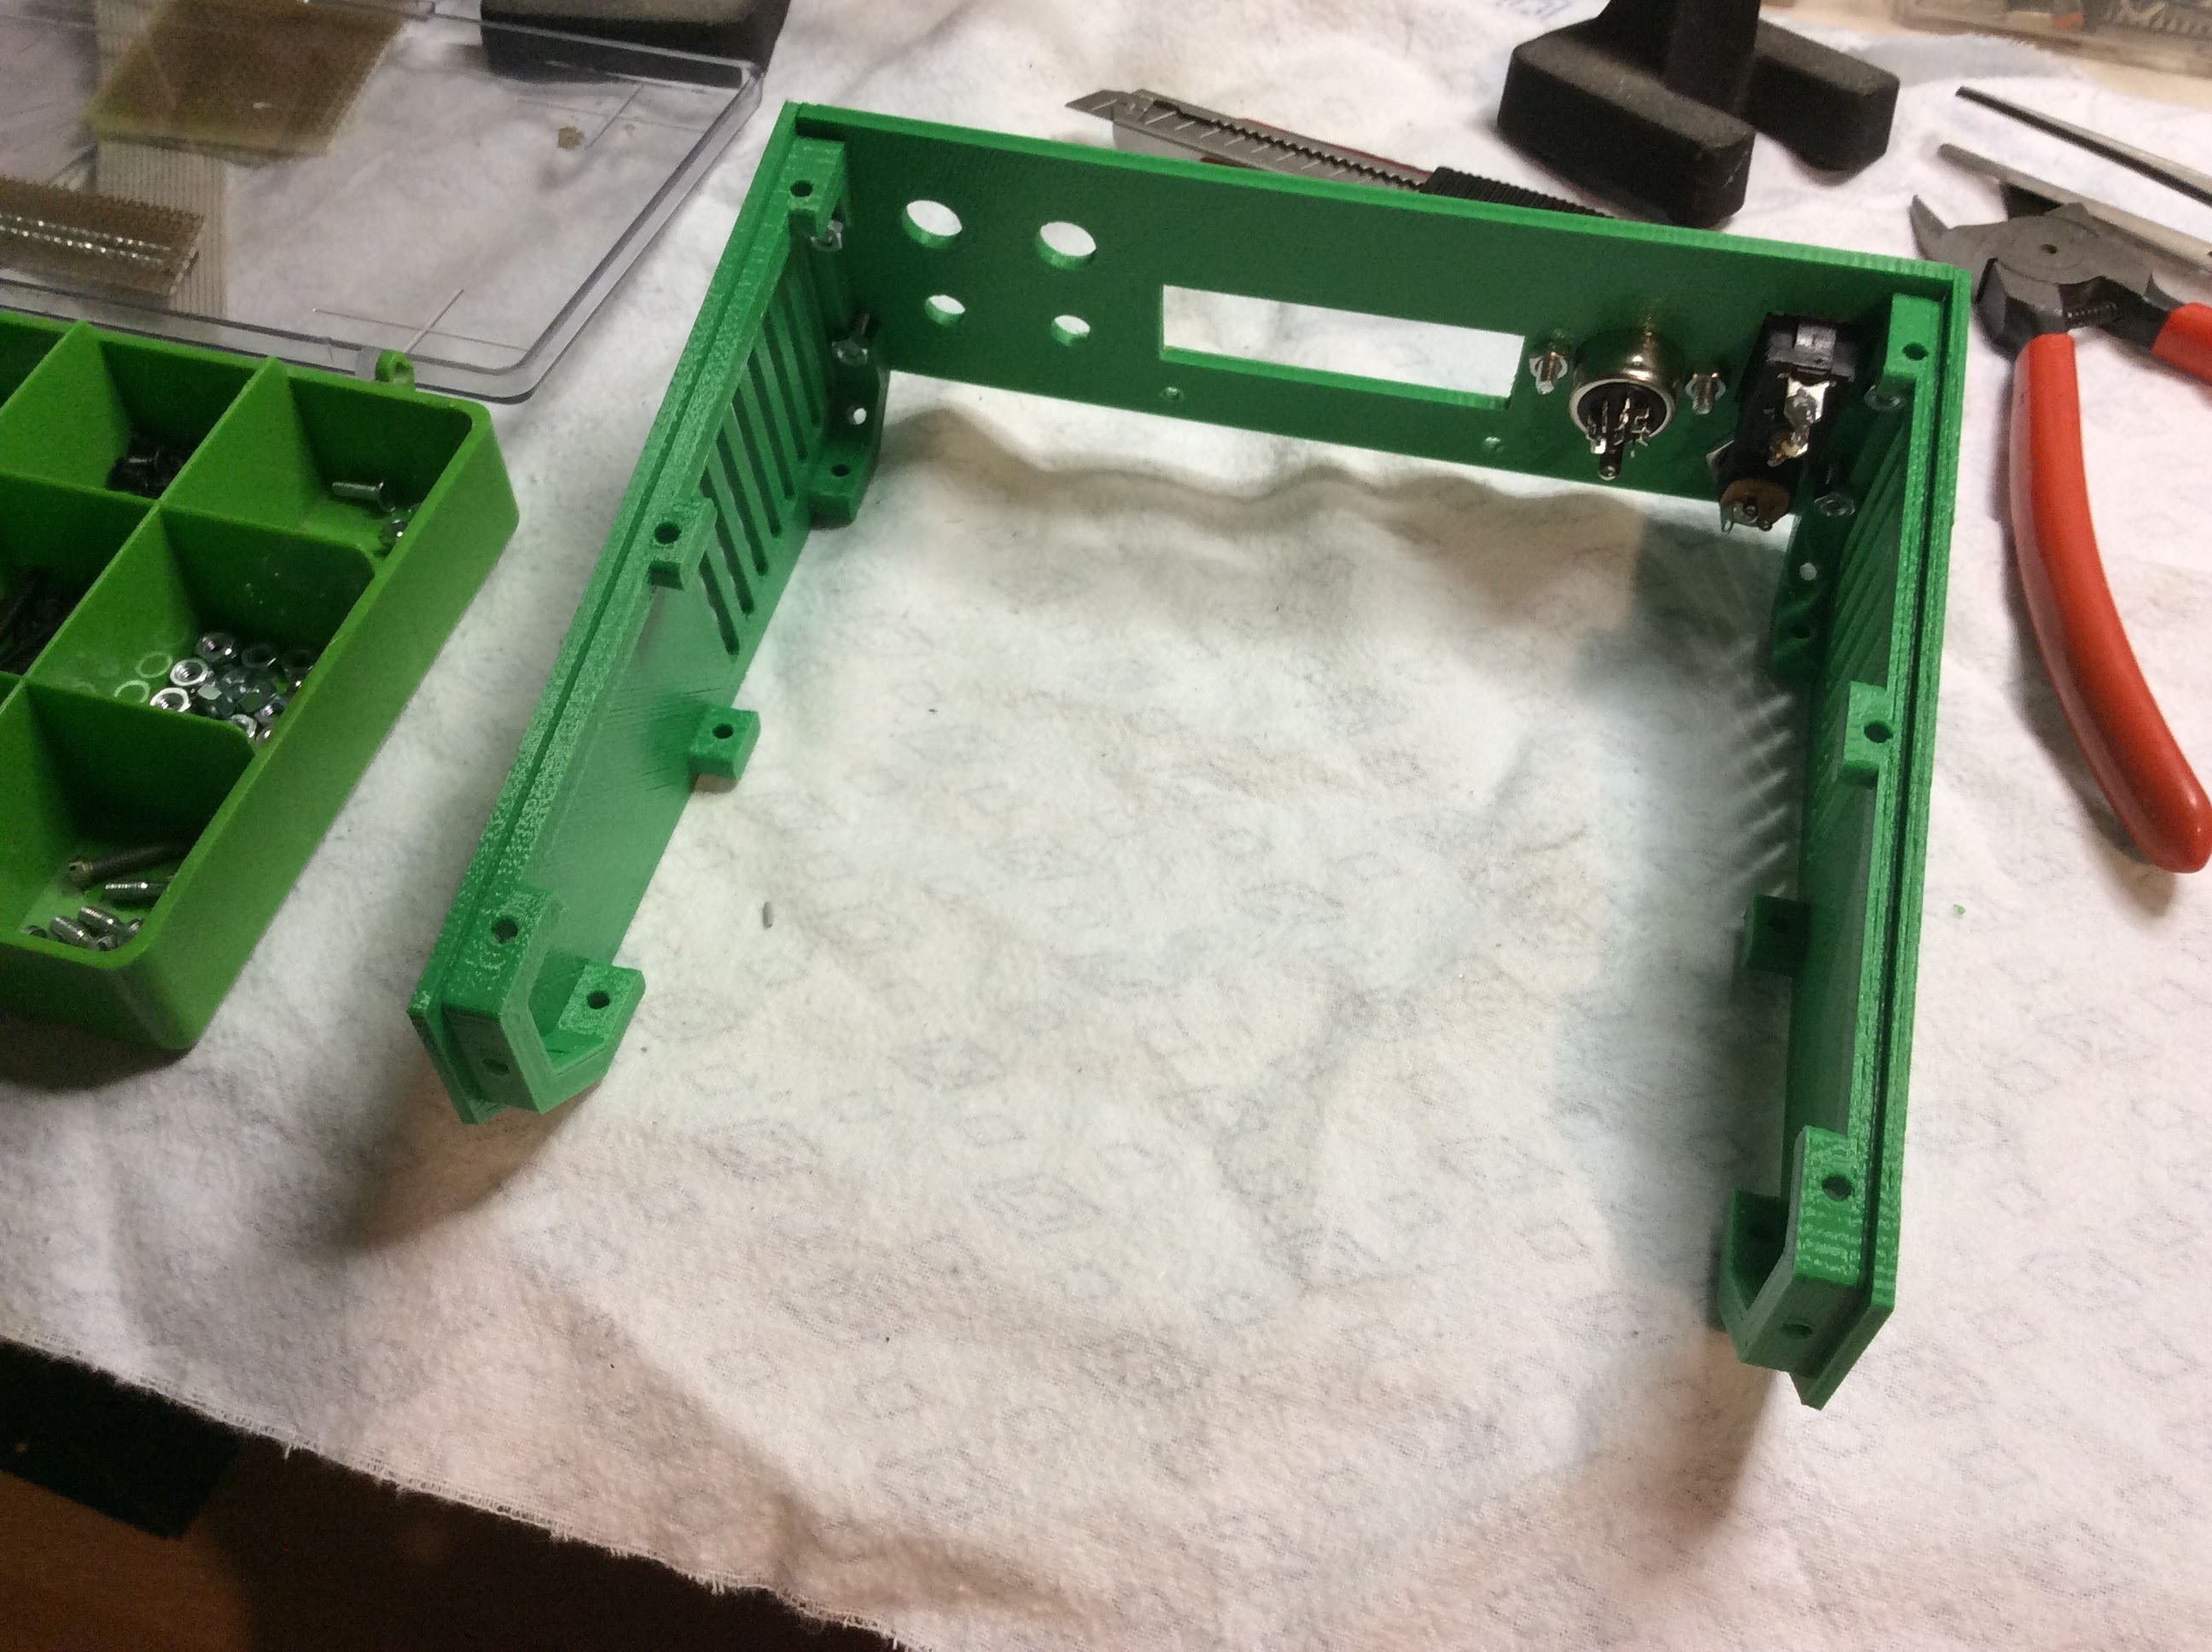
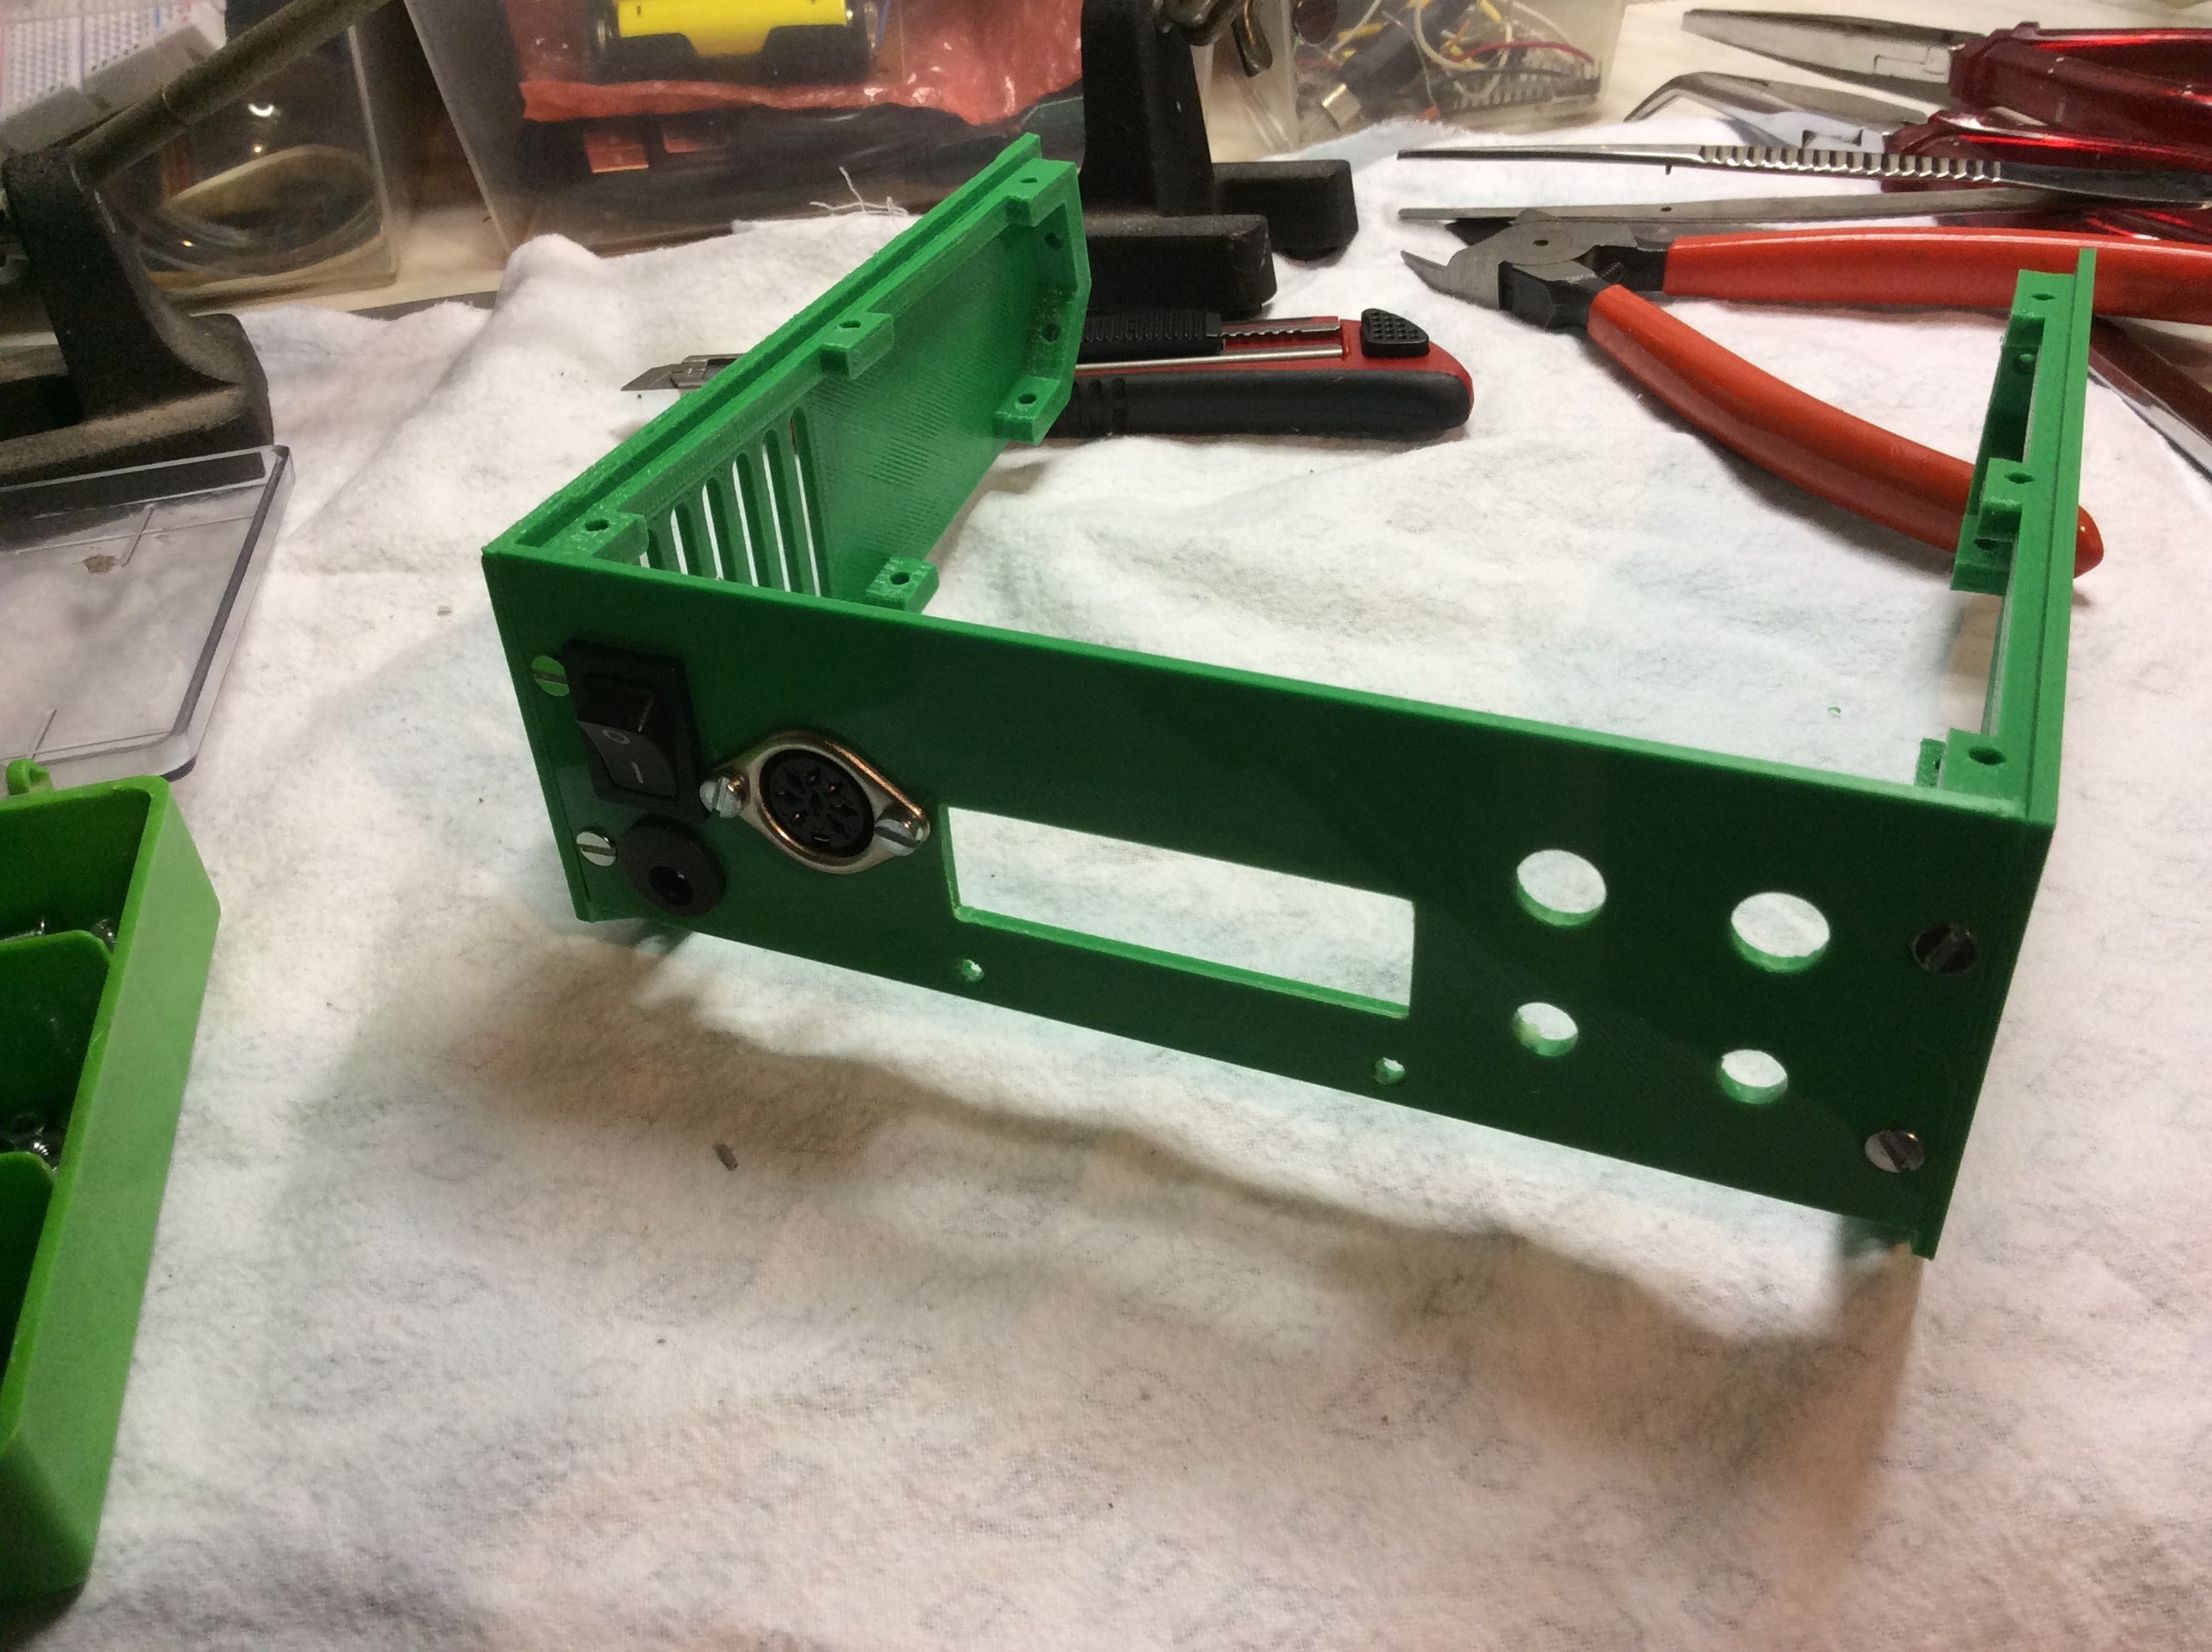
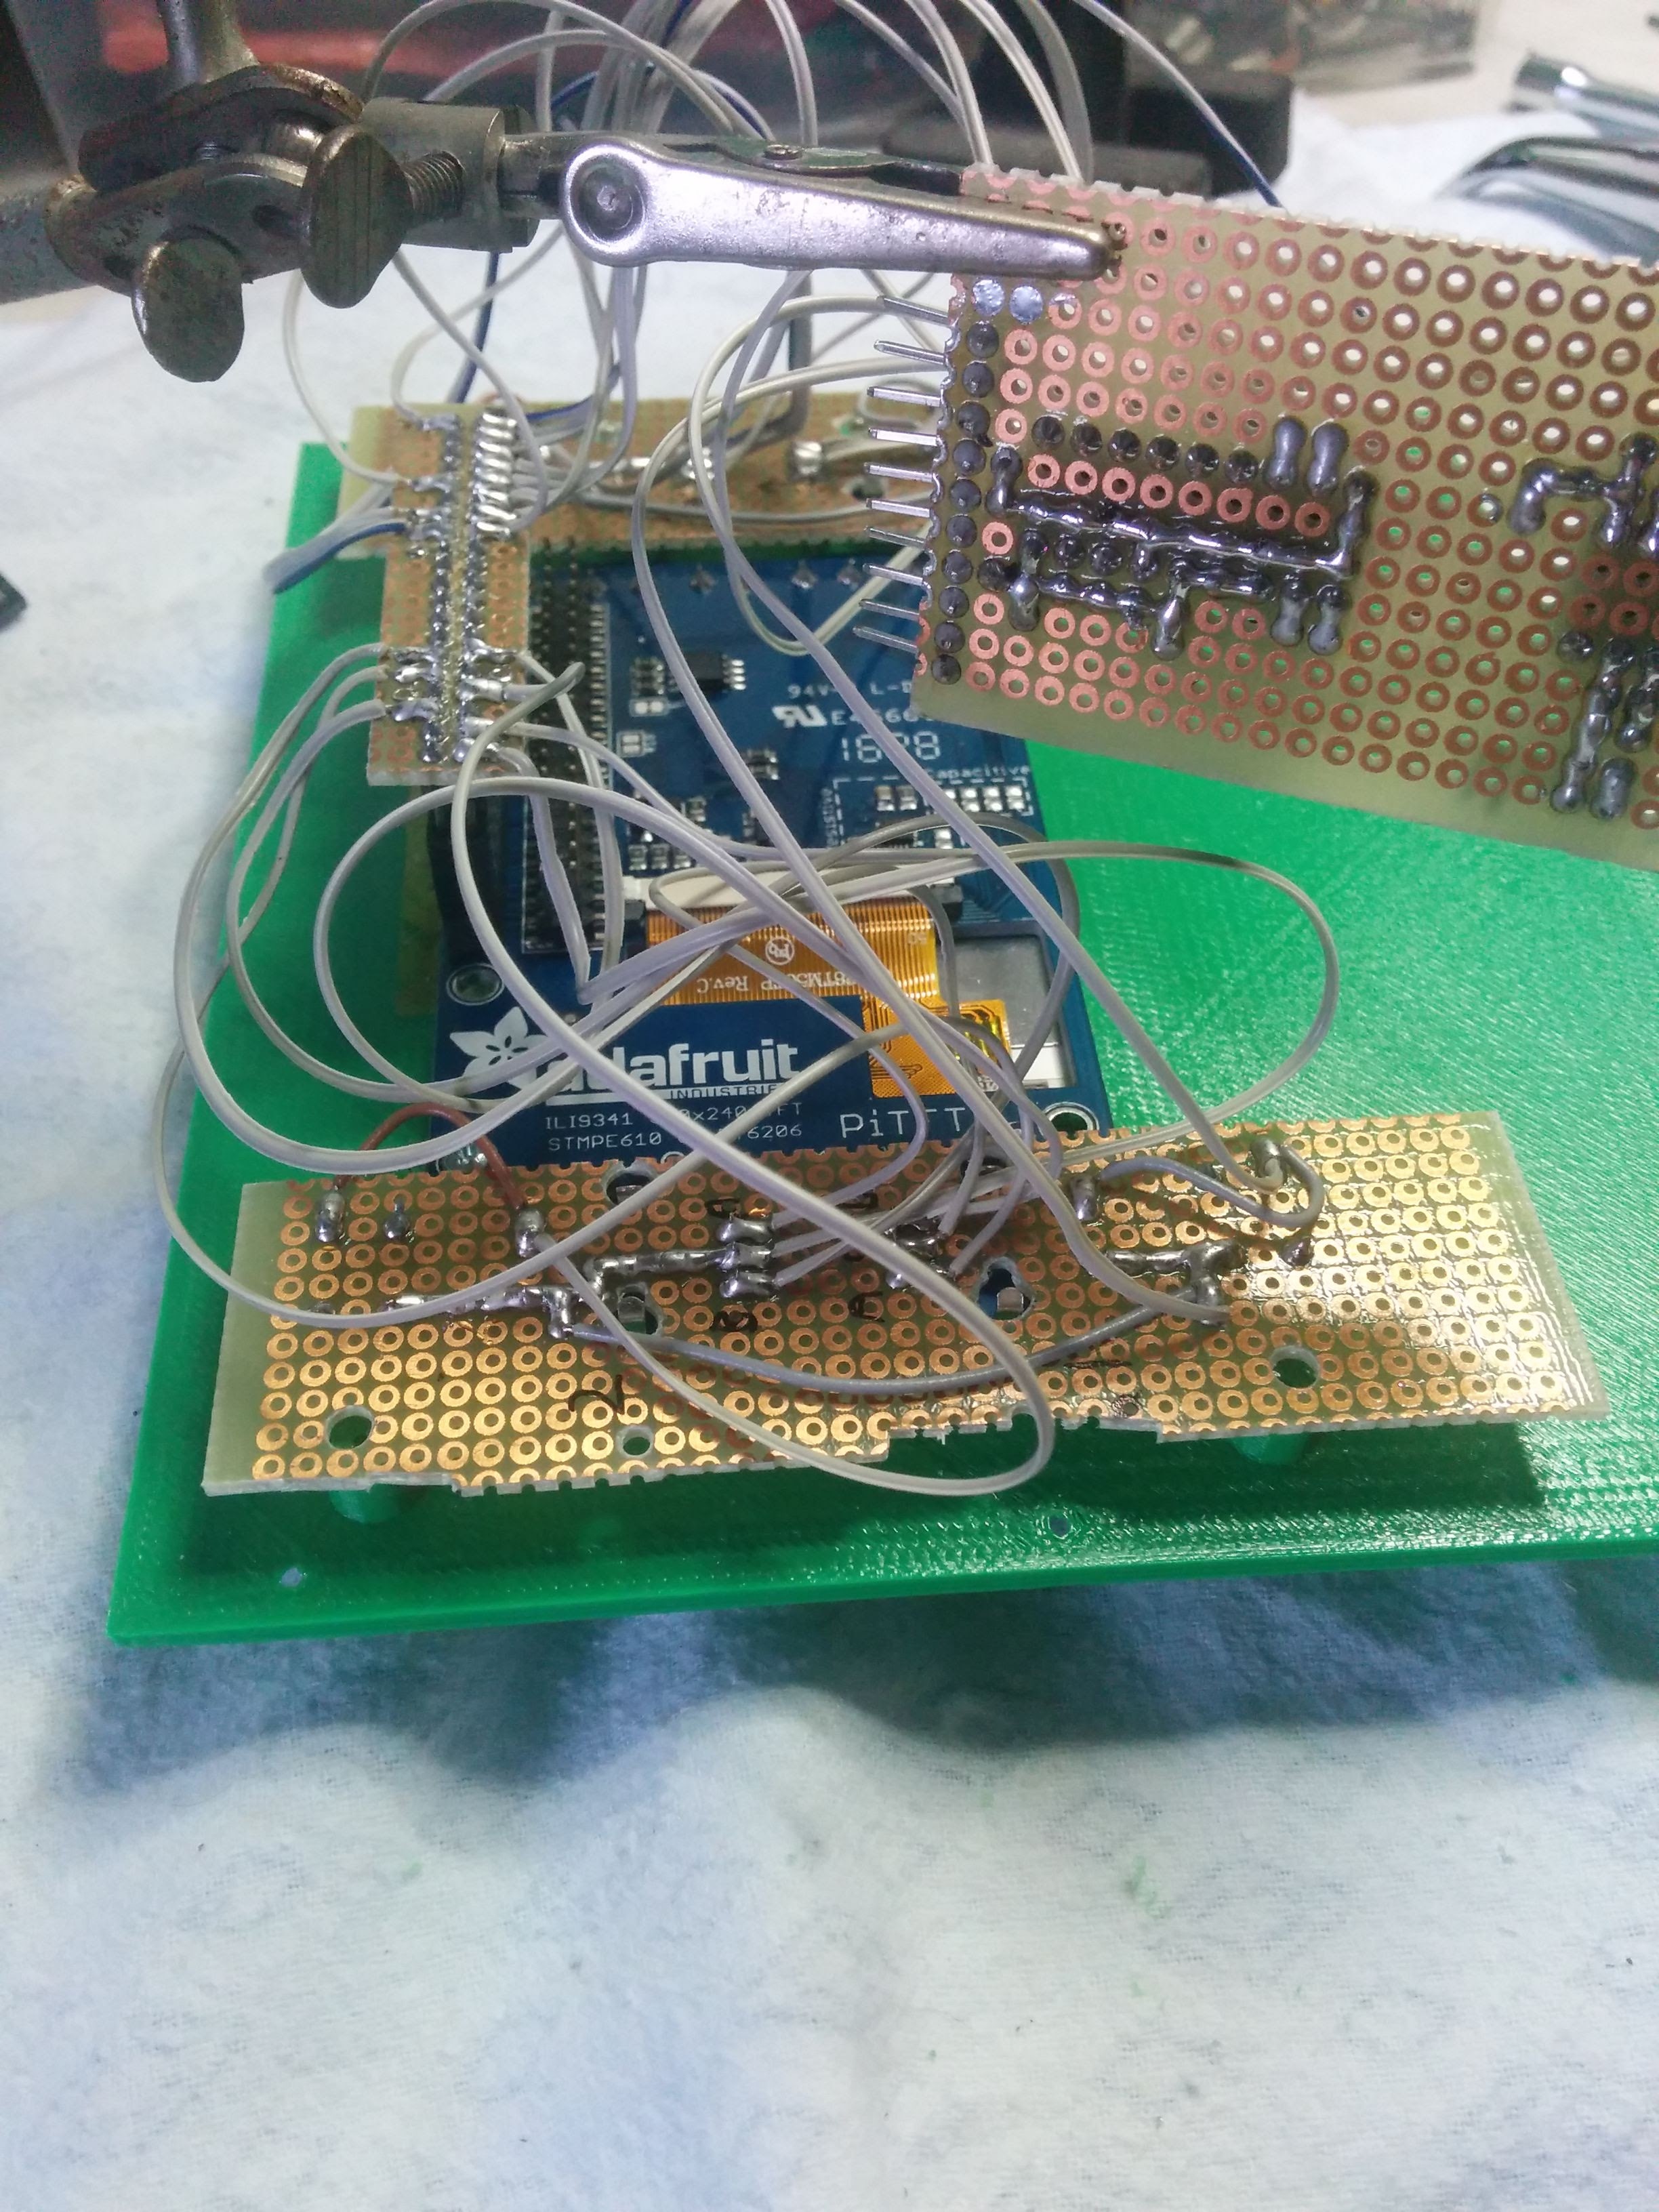
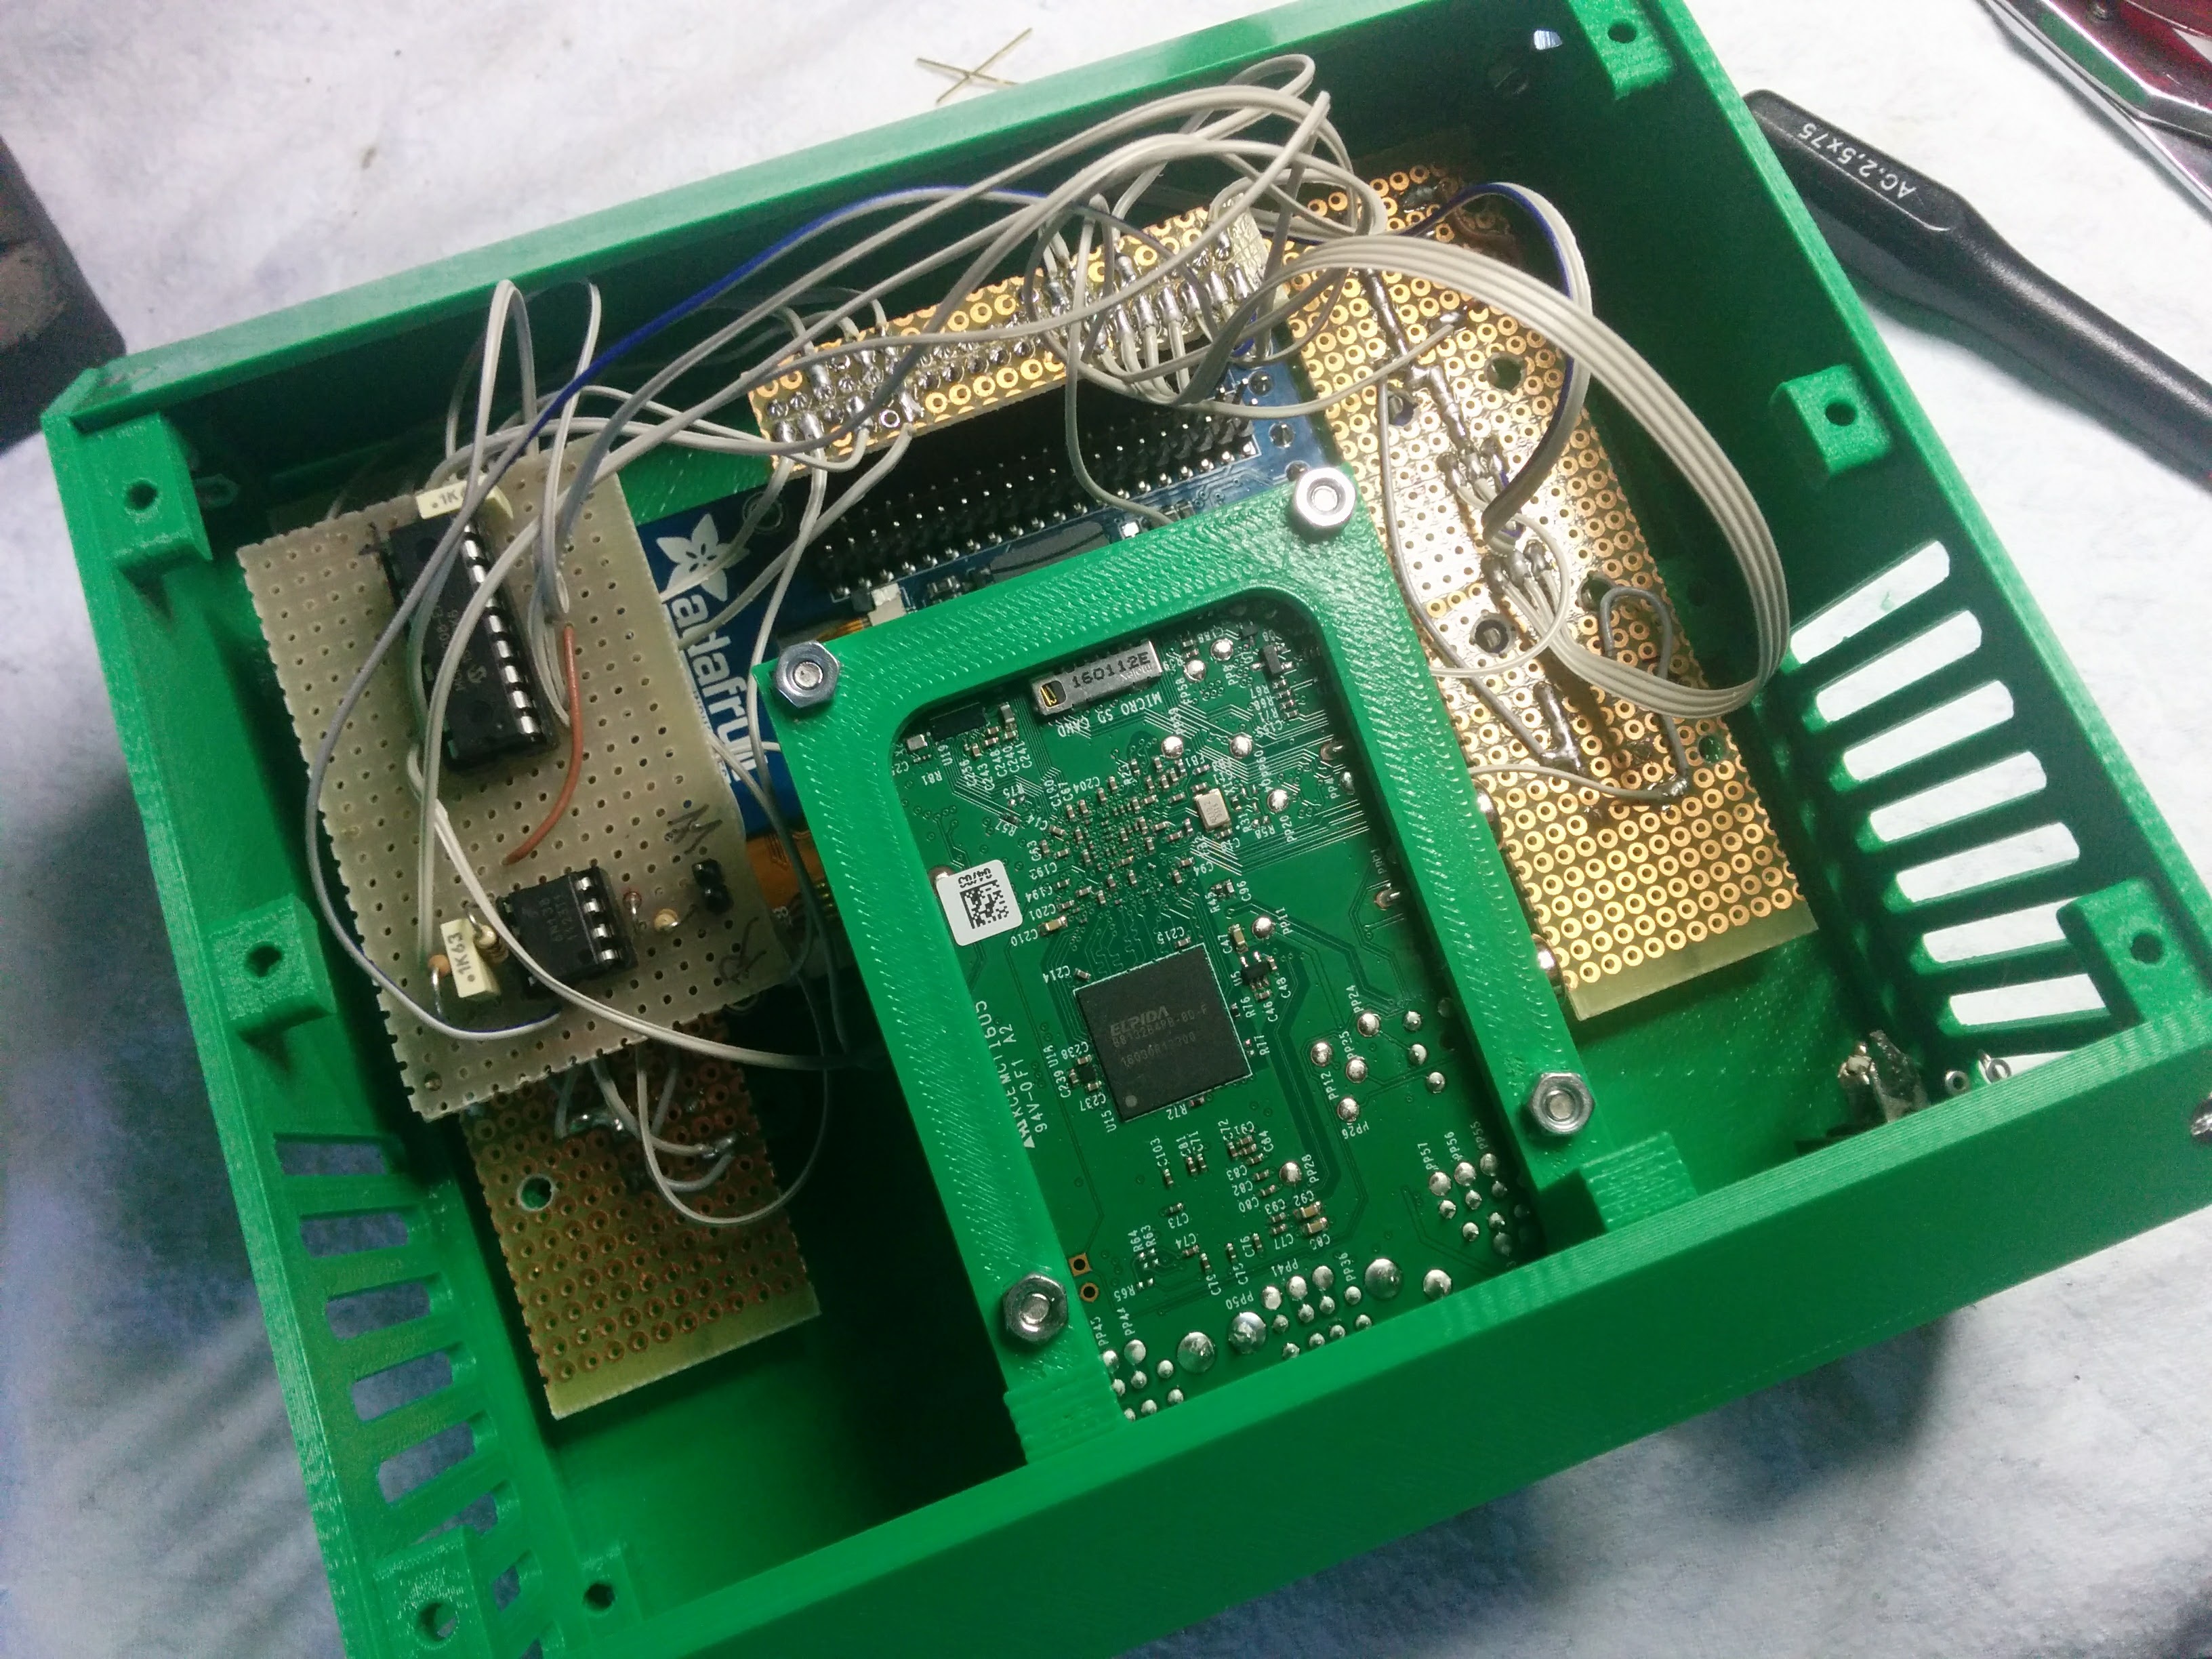
Here are some “work in progress” pictures.
Partial case:
Partial case:
RPI3 on its support:
My fantastic “spaghetti style” wiring
Almost done:
Everything in:
…and now? Already building my second one (for the musician that tested the first one and loved the idea of a “portable hammond”… probably I’ll build it directly inside one of his midi master keyboards
And the third one will be for me, with AudioInjector board. It’ll be a good addition to synths that I can’t play : the great Novation MiniNova, a Yamaha PSR3000, and the funny Pocket Operator PO-20 “Arcade”
Amazing @Axeman!
Congratulations for your great work!
It would be nice to have some video testing the case. The project really needs more video contents
Kind Regards!
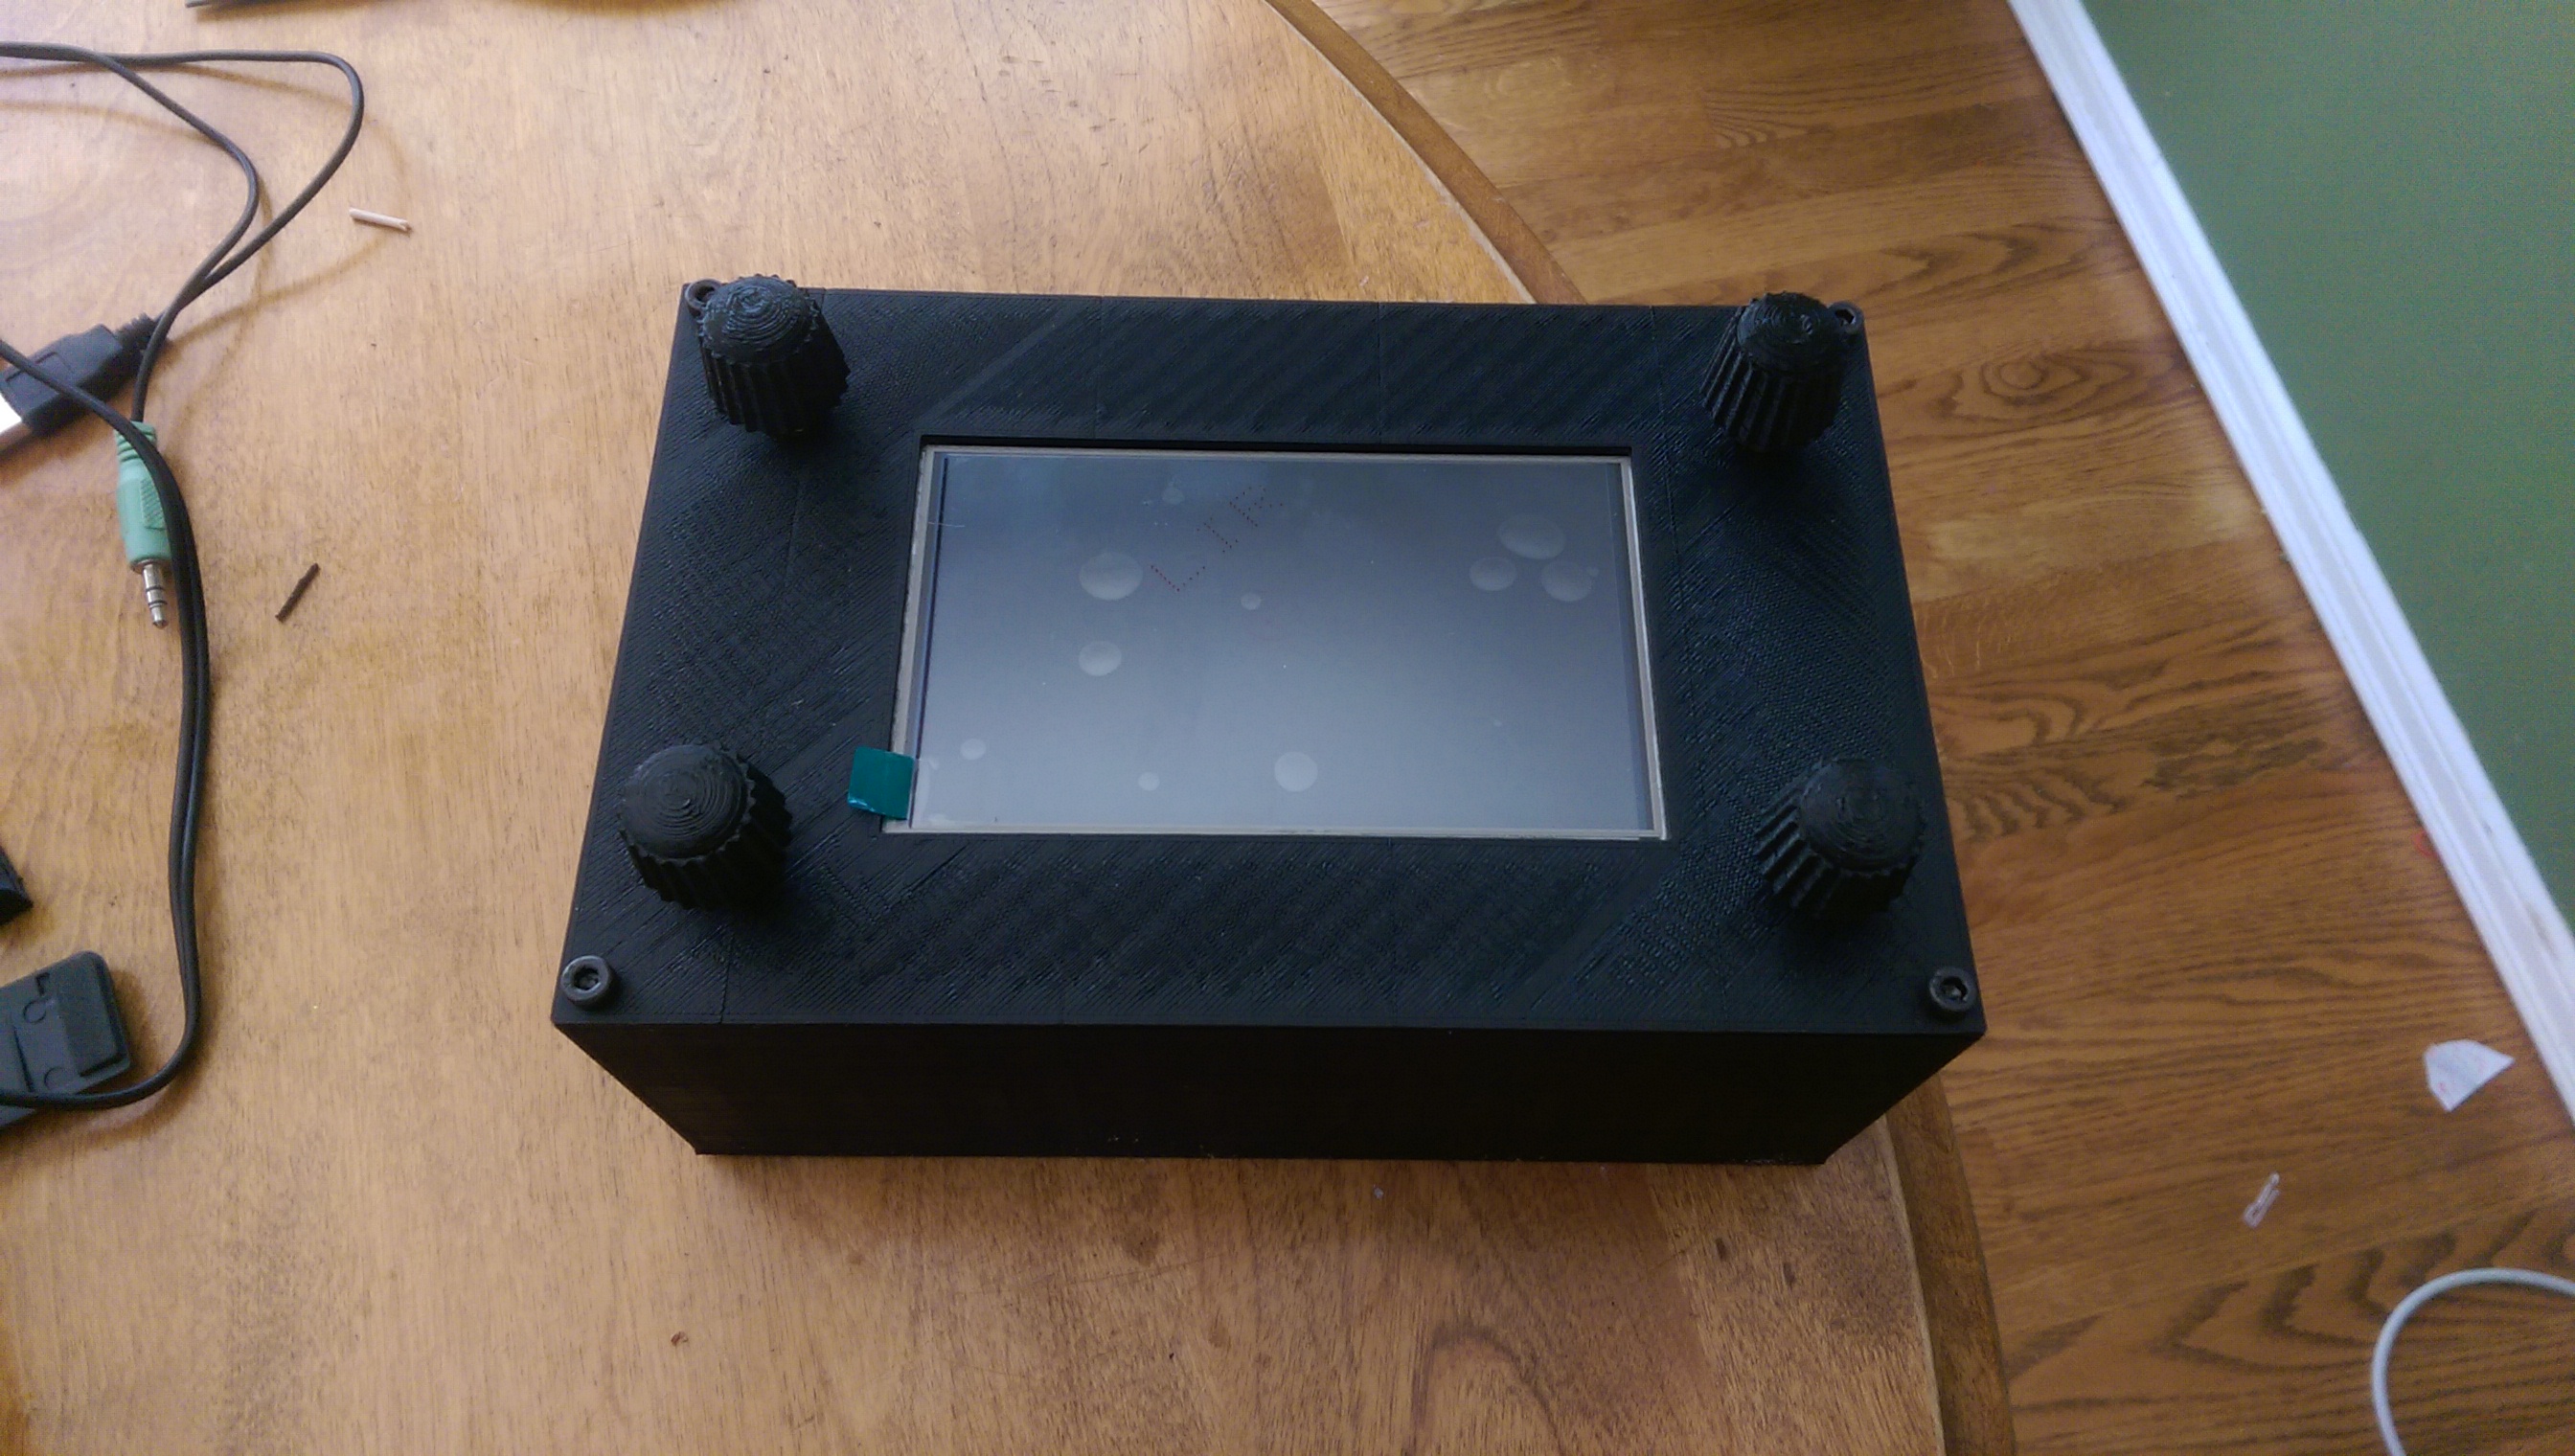
I finally managed to get the screen mounted - after I destroyed the first attempt.
In case anybody needs a defect waveshare32 for “case studies”
I chose the waveshare32, because it’s only about 20EUR.
The case was 6EUR and I should buy a new one now that I know, where all the holes should be.
Nice @mheidt! I love your box. And it seems quite small. Can you detail the dimensions? How did you make the holes? Did you use a “dremmel” or what?
Thanks!
Did i say 6€? 3…
https://www.voelkner.de/products/39353/Euro-Gehaeuse-Polystyrol-135x95x48mm-Rot.html
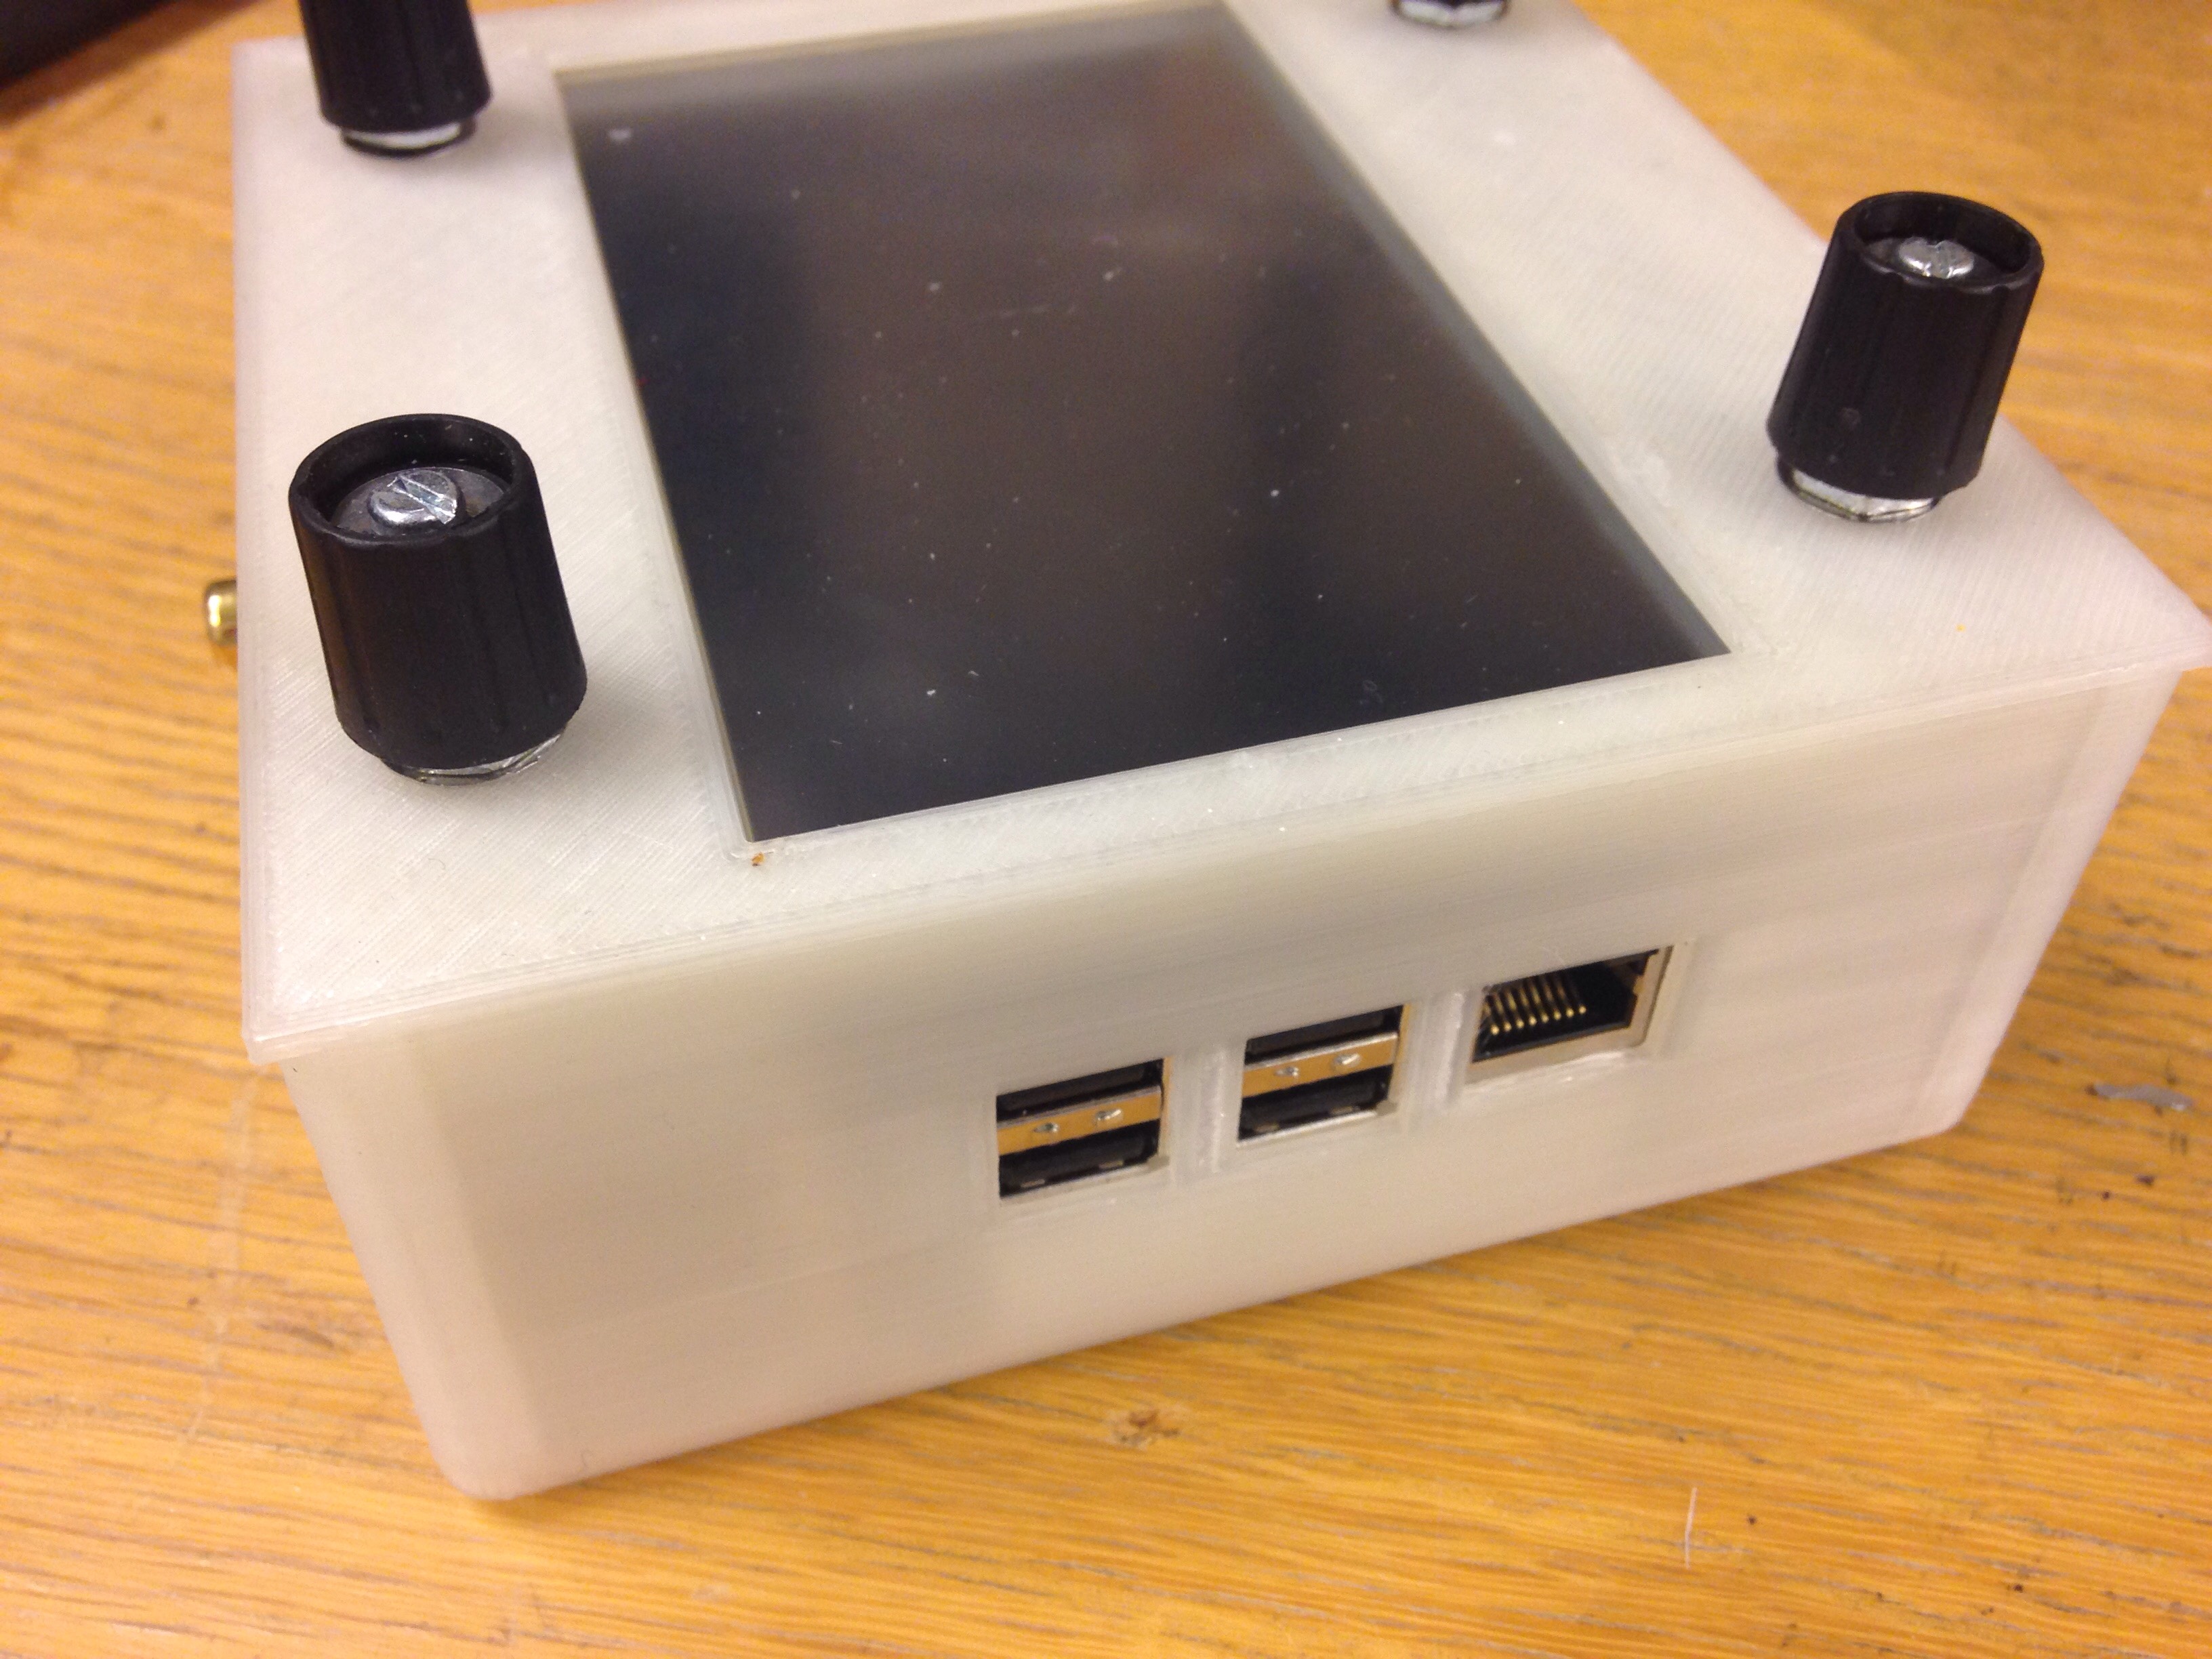
I started with a Dremel but had to adjust with a file. It could be far cleaner.
My primary concern was the mounting of the screen. It has only screw holes in one corner. The knobs are holding it now 
Nice nanet! I just added a flag on Valencia
Only 2 quick questions:
Regards!
It could be the PiTFT “+” version, Both the capacitive and resistive versions have 4 holes.
@Axeman you’re right!
My display is a PiTFT 2.8 Plus with capacitive touch panel. Bought from Amazon:
https://www.amazon.es/gp/product/B01LCN0WIS
The origin of the case? Simply a kind of electrical junction box I found at the electronics store.
(“RETEX” 101 series, model 33101004)
A bit of “decoration” using a dremel and a cutter, and Mr. Nanet enjoys his Zynthian! 
Mine for the moment 
My korg ea1 is sequencing with my midi to usb interface, and the ea1 is synced to my korg emx1
(I’m uploading a video to show my setup)
Congratulations, Steve!! It’s a galactic Zynthian. What about the sound?
Nice mounting, @beckdac! Congratulations!!
Is it working OK? What about the sound?
Probably you want to increase the font size in UI. You can do it from the webconf tool
Regards!
Works great! Full response in the build thread, but thanks for the font size tip! I had neglected that. 20 seems too big so maybe I’ll try 18.
Hi All,
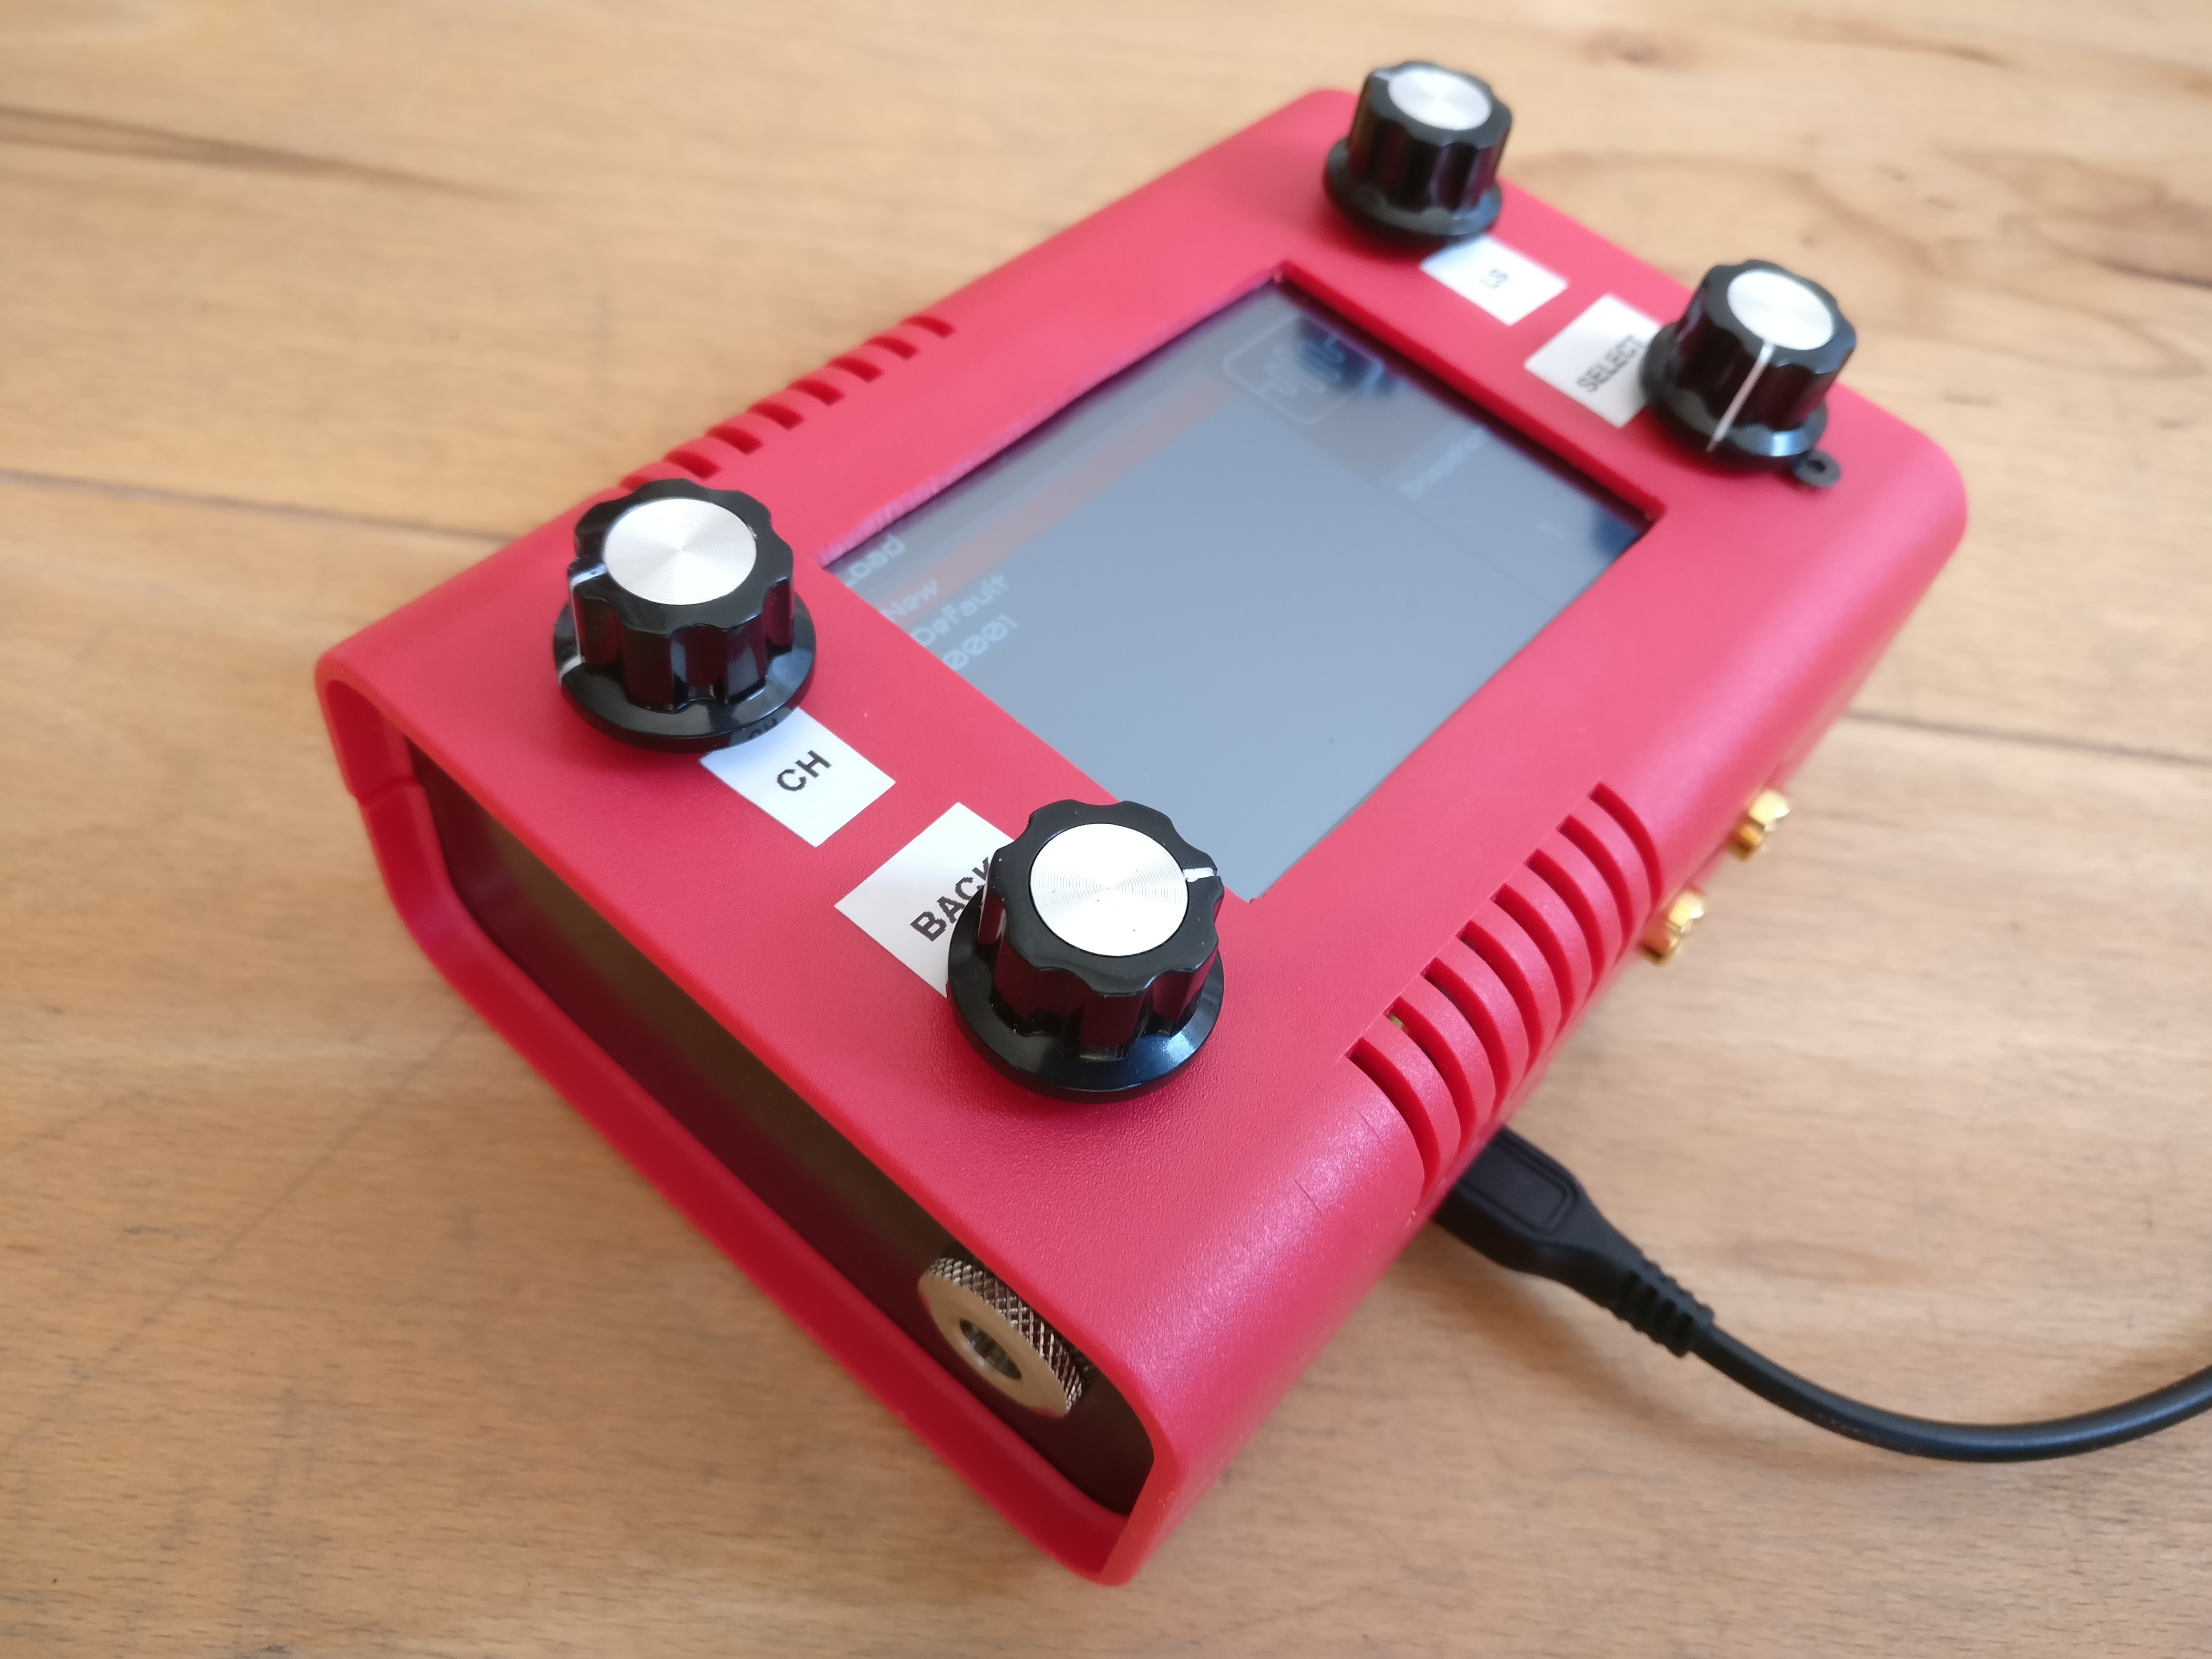
I’ve just assembled my Zynthian with 5 inch screen.
The touch interface is active, but it is a bit ‘erratic’ so I included the encoders. I designed the covers in Blender & printed them as part of a college project.
The screen connection is with HDMI which spared some GPIOs. So this design doesn’t need an IO Expander. I made a little breakout board to connect to the encoders. There are many 5 inch displays available on Ebay, but I took this one => http://www.ebay.co.uk/itm/5inch-LCD-Touch-Screen-Display-HDMI-800x480-FOR-Raspberry-Pi-B-B-Pi2-Board-/331707690771 If you look carefully at the pictures, they show that the RPi is mounted upside down, so the 40 pin GPIO port is still visible. This makes it easier to mount the DAC.
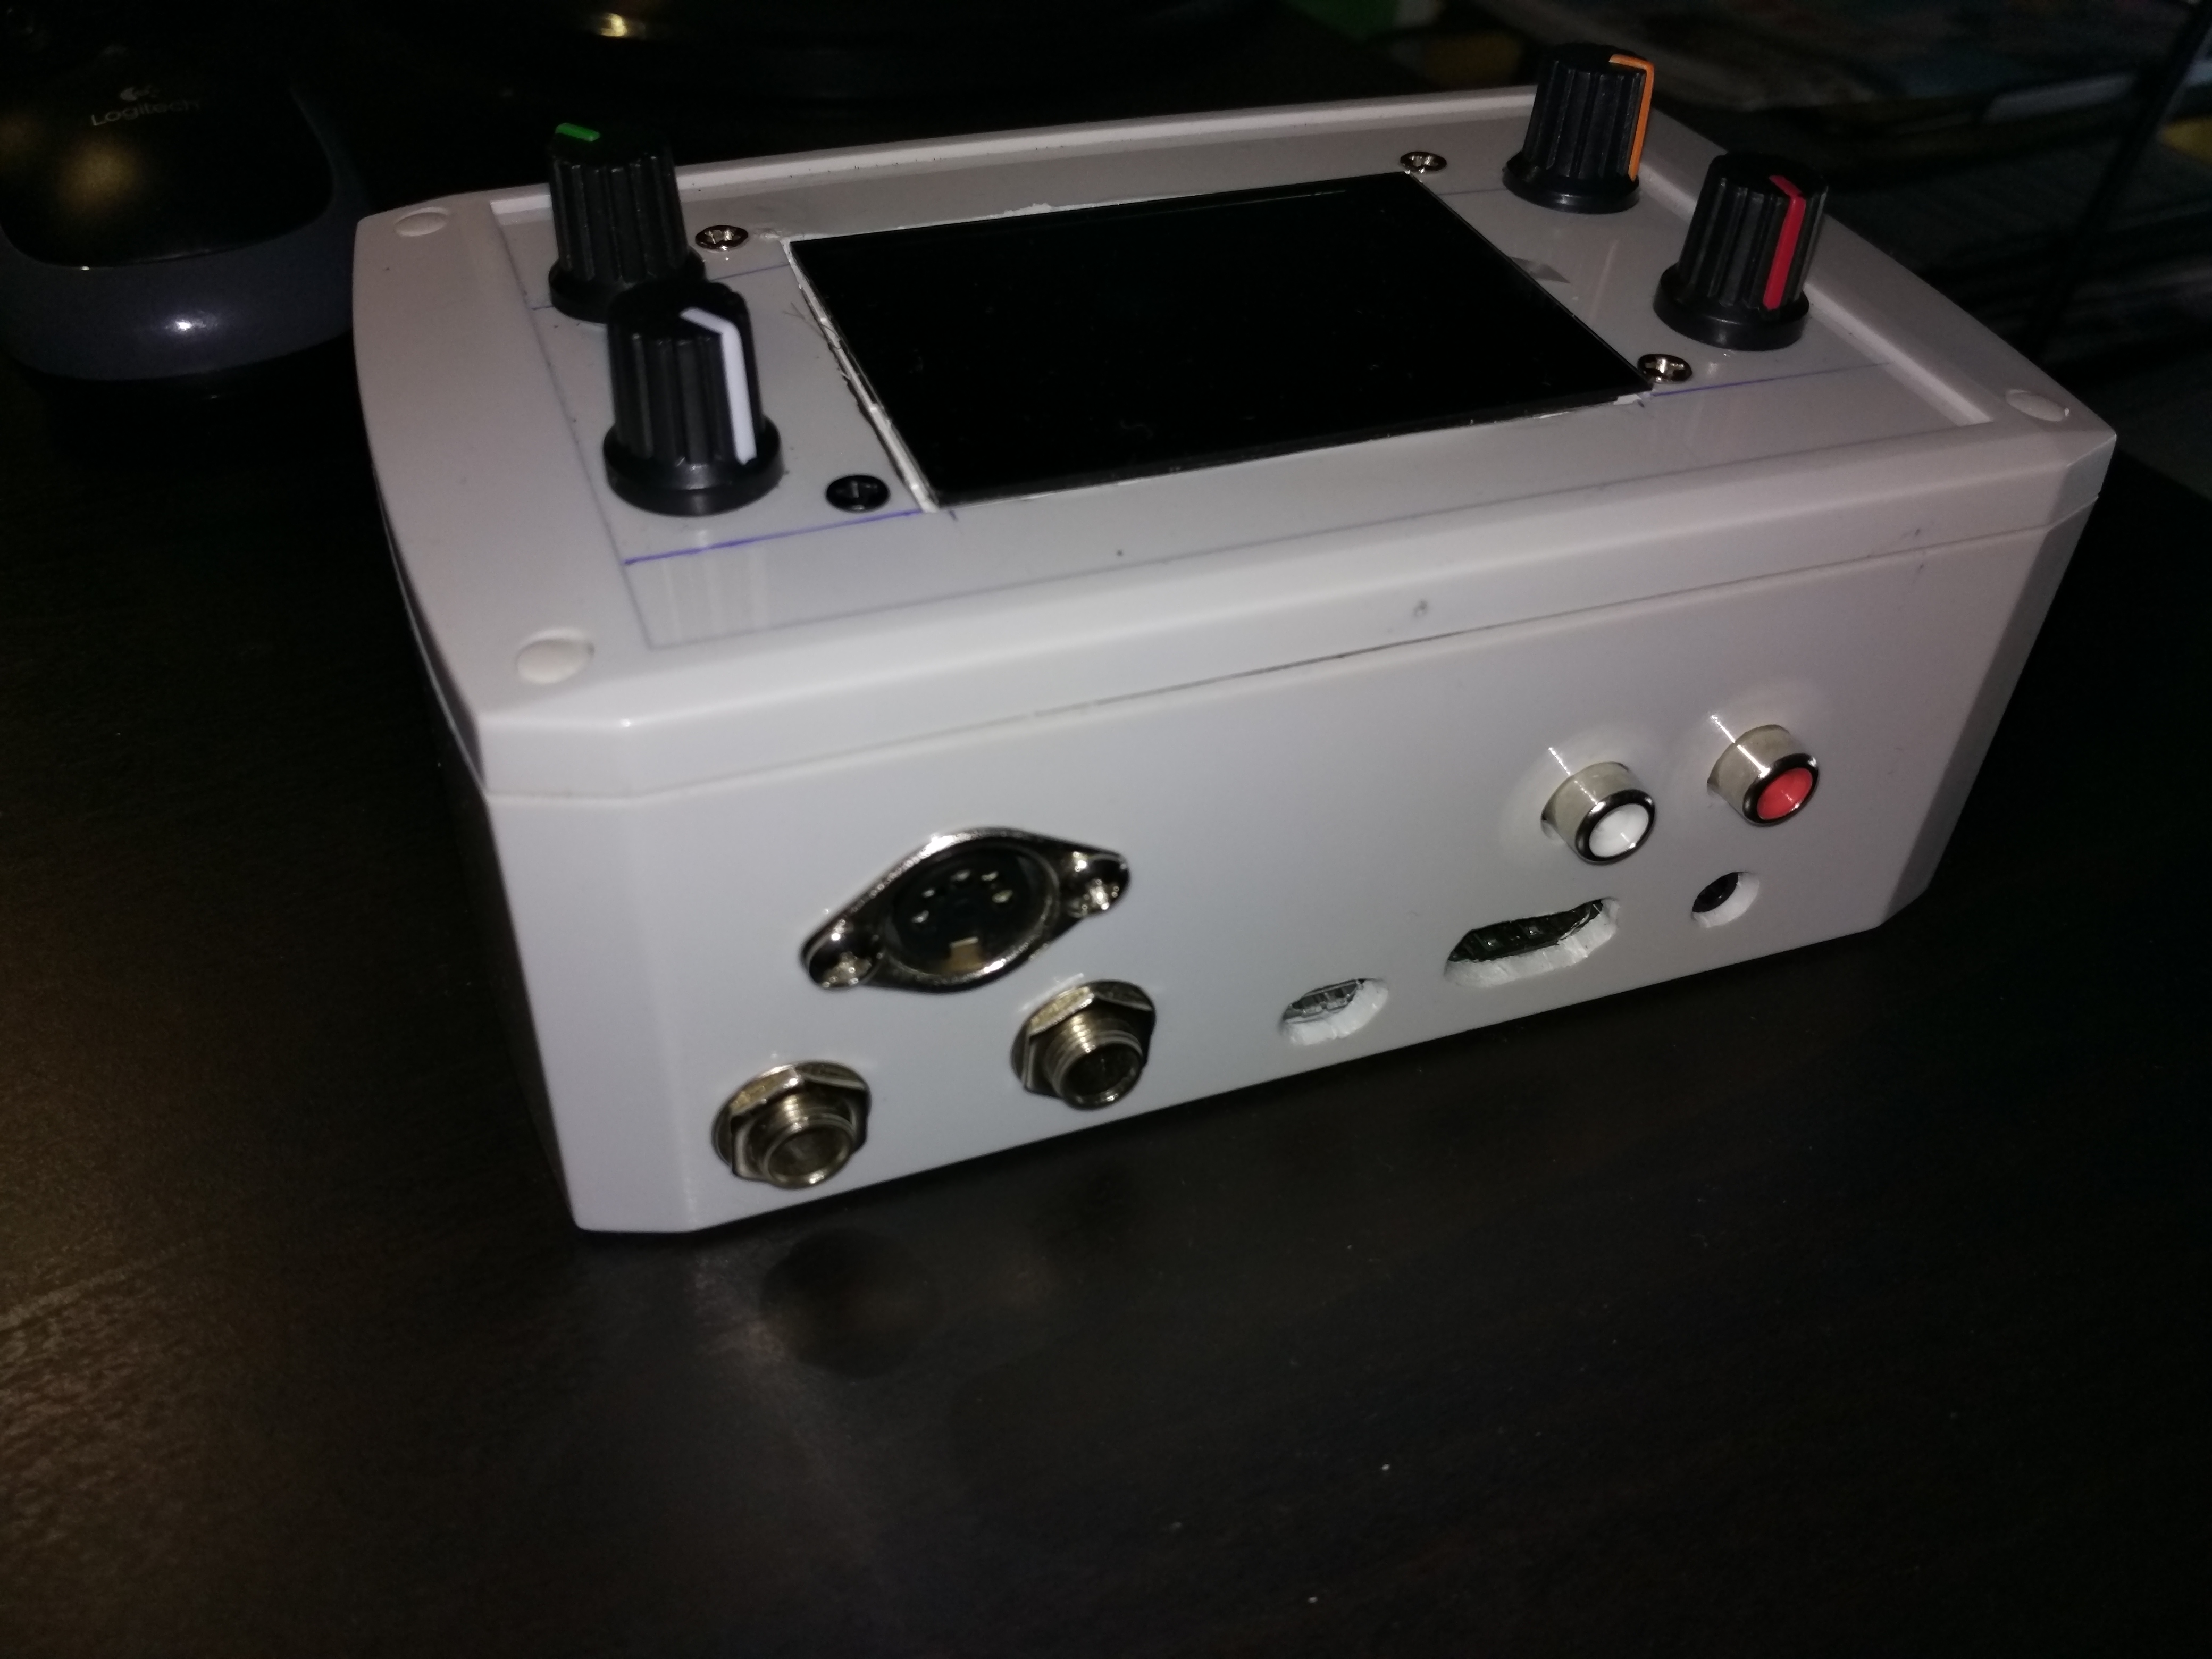
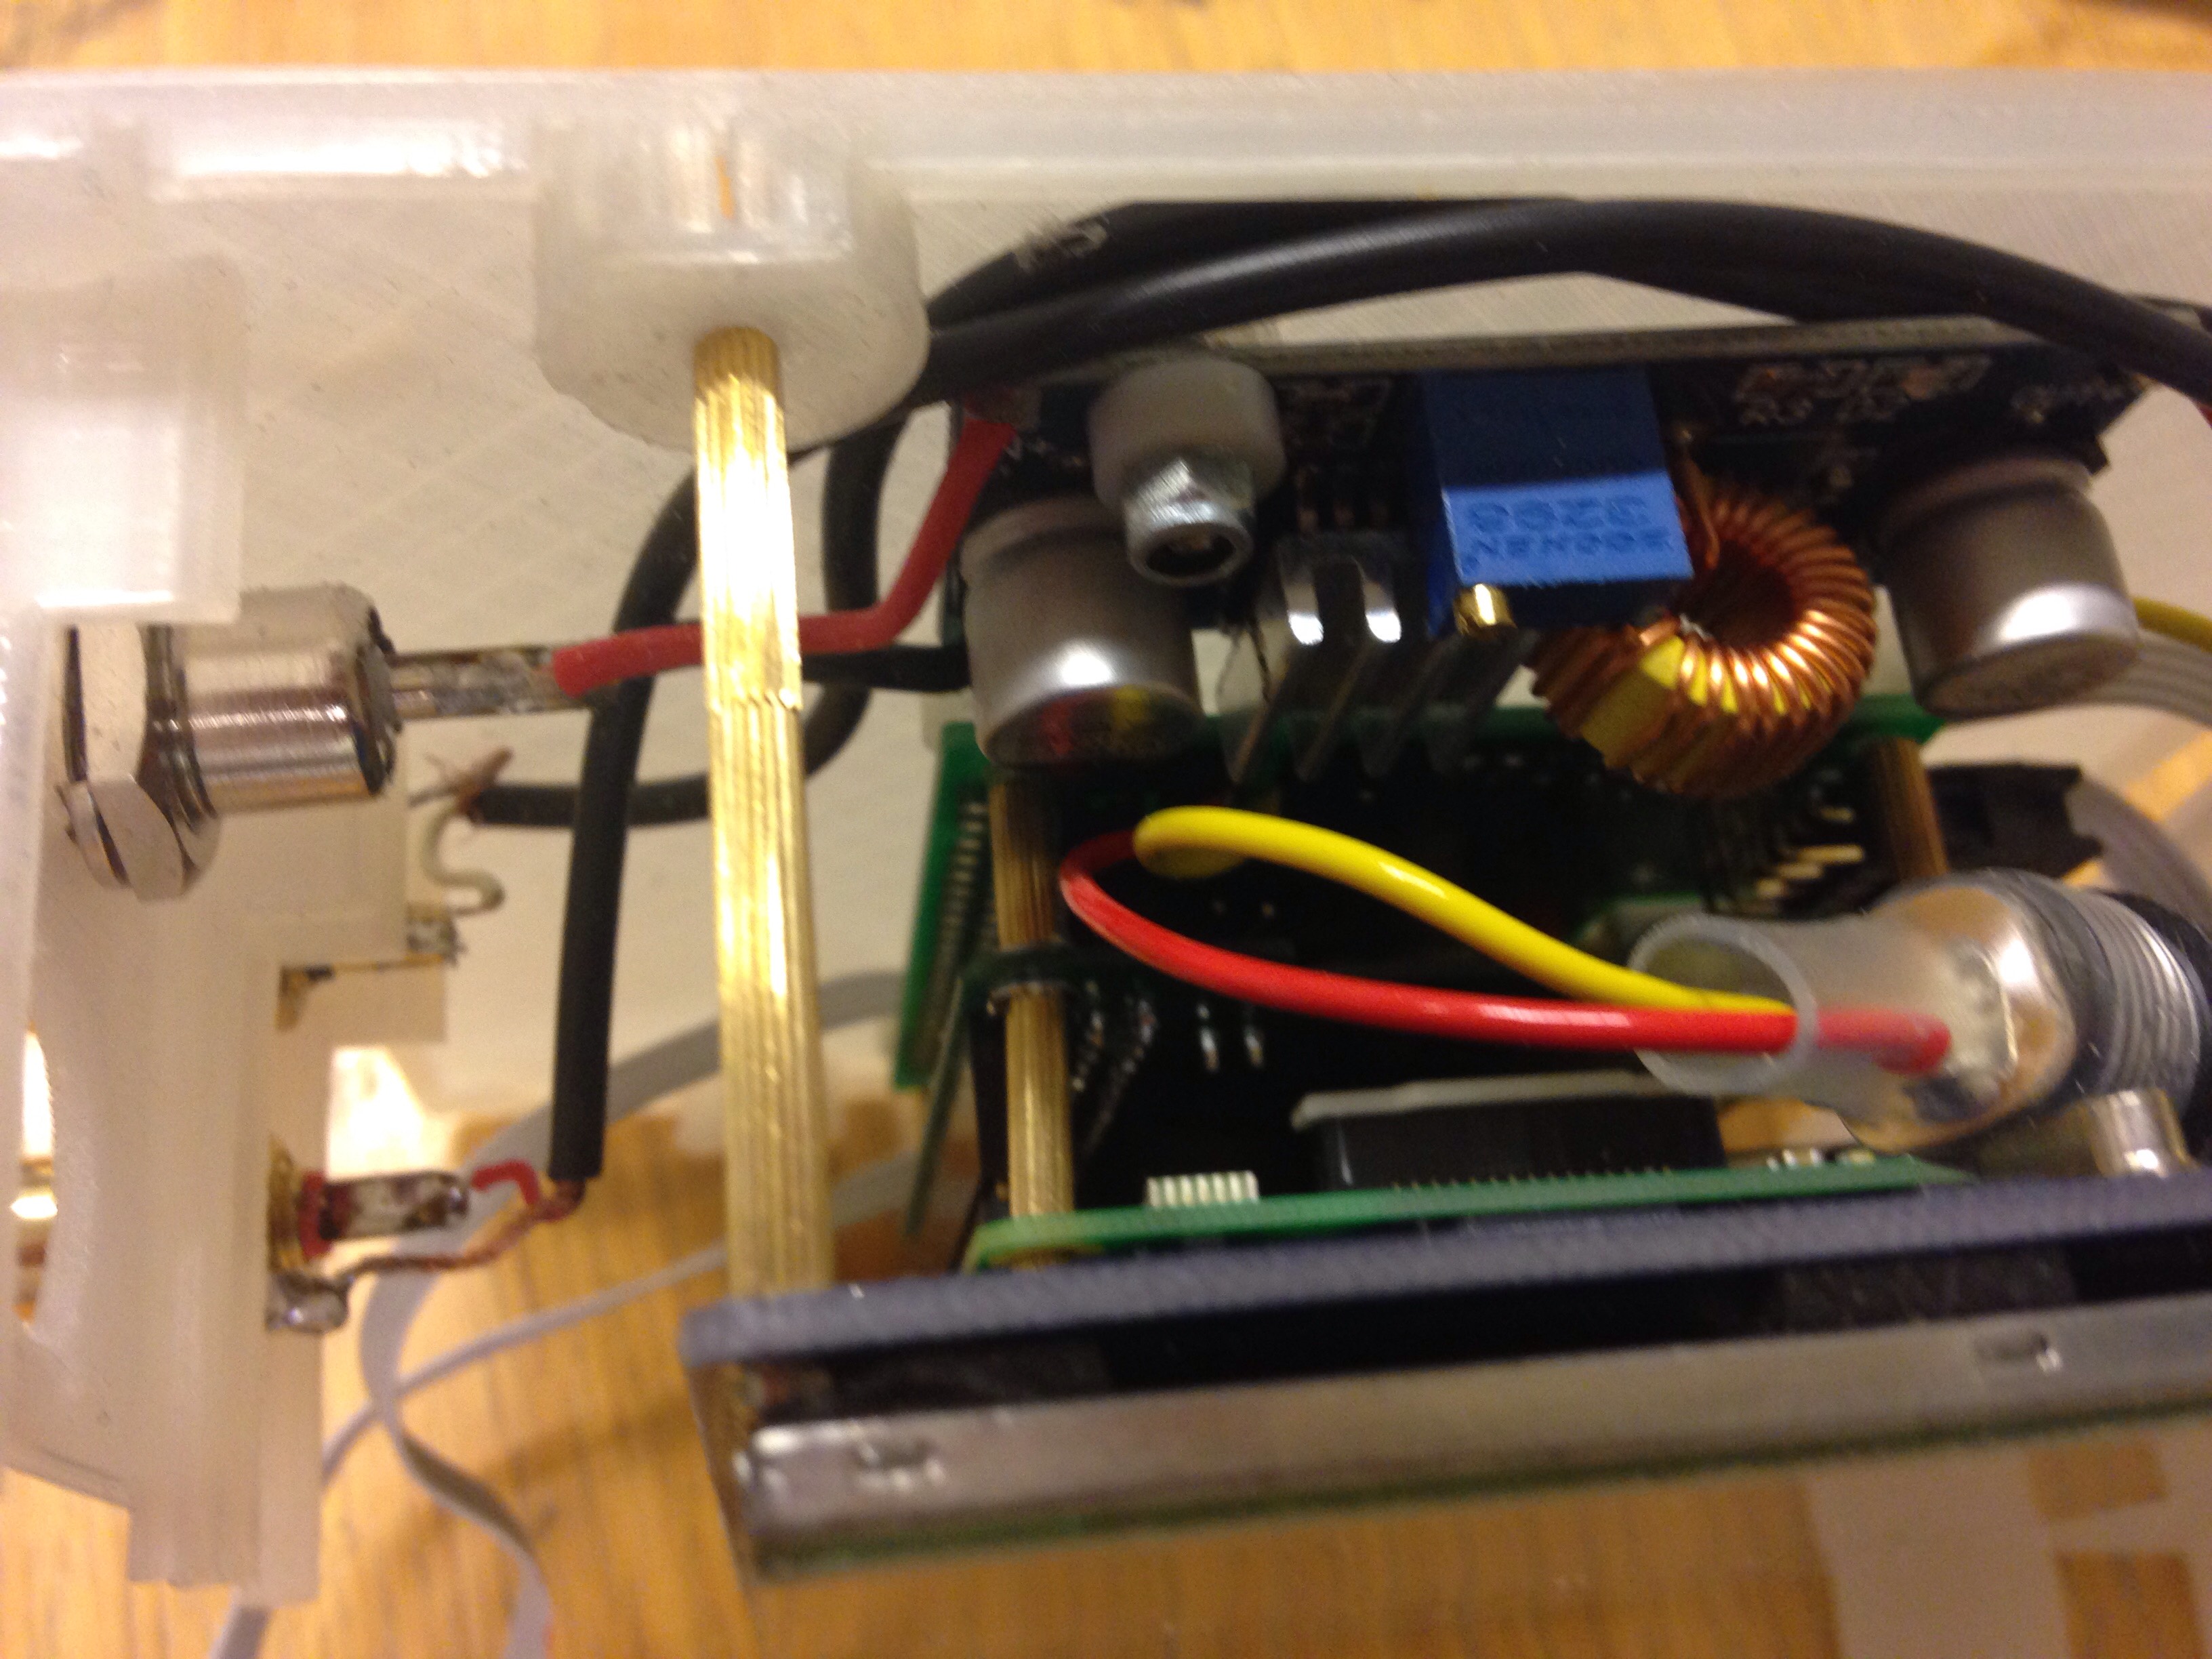
The fireside glow in the case comes from a 12V-5V converter. I tried for a long time to power the Zynthian from a 5V USB phone charger but I couldn’t find a combination of charger & cable that would function, since the voltage drop over the cable was too high. So I’ve got an old 12V ‘wall-wart’ supply that I’m regulating down to 5V inside the box. The result is very robust.
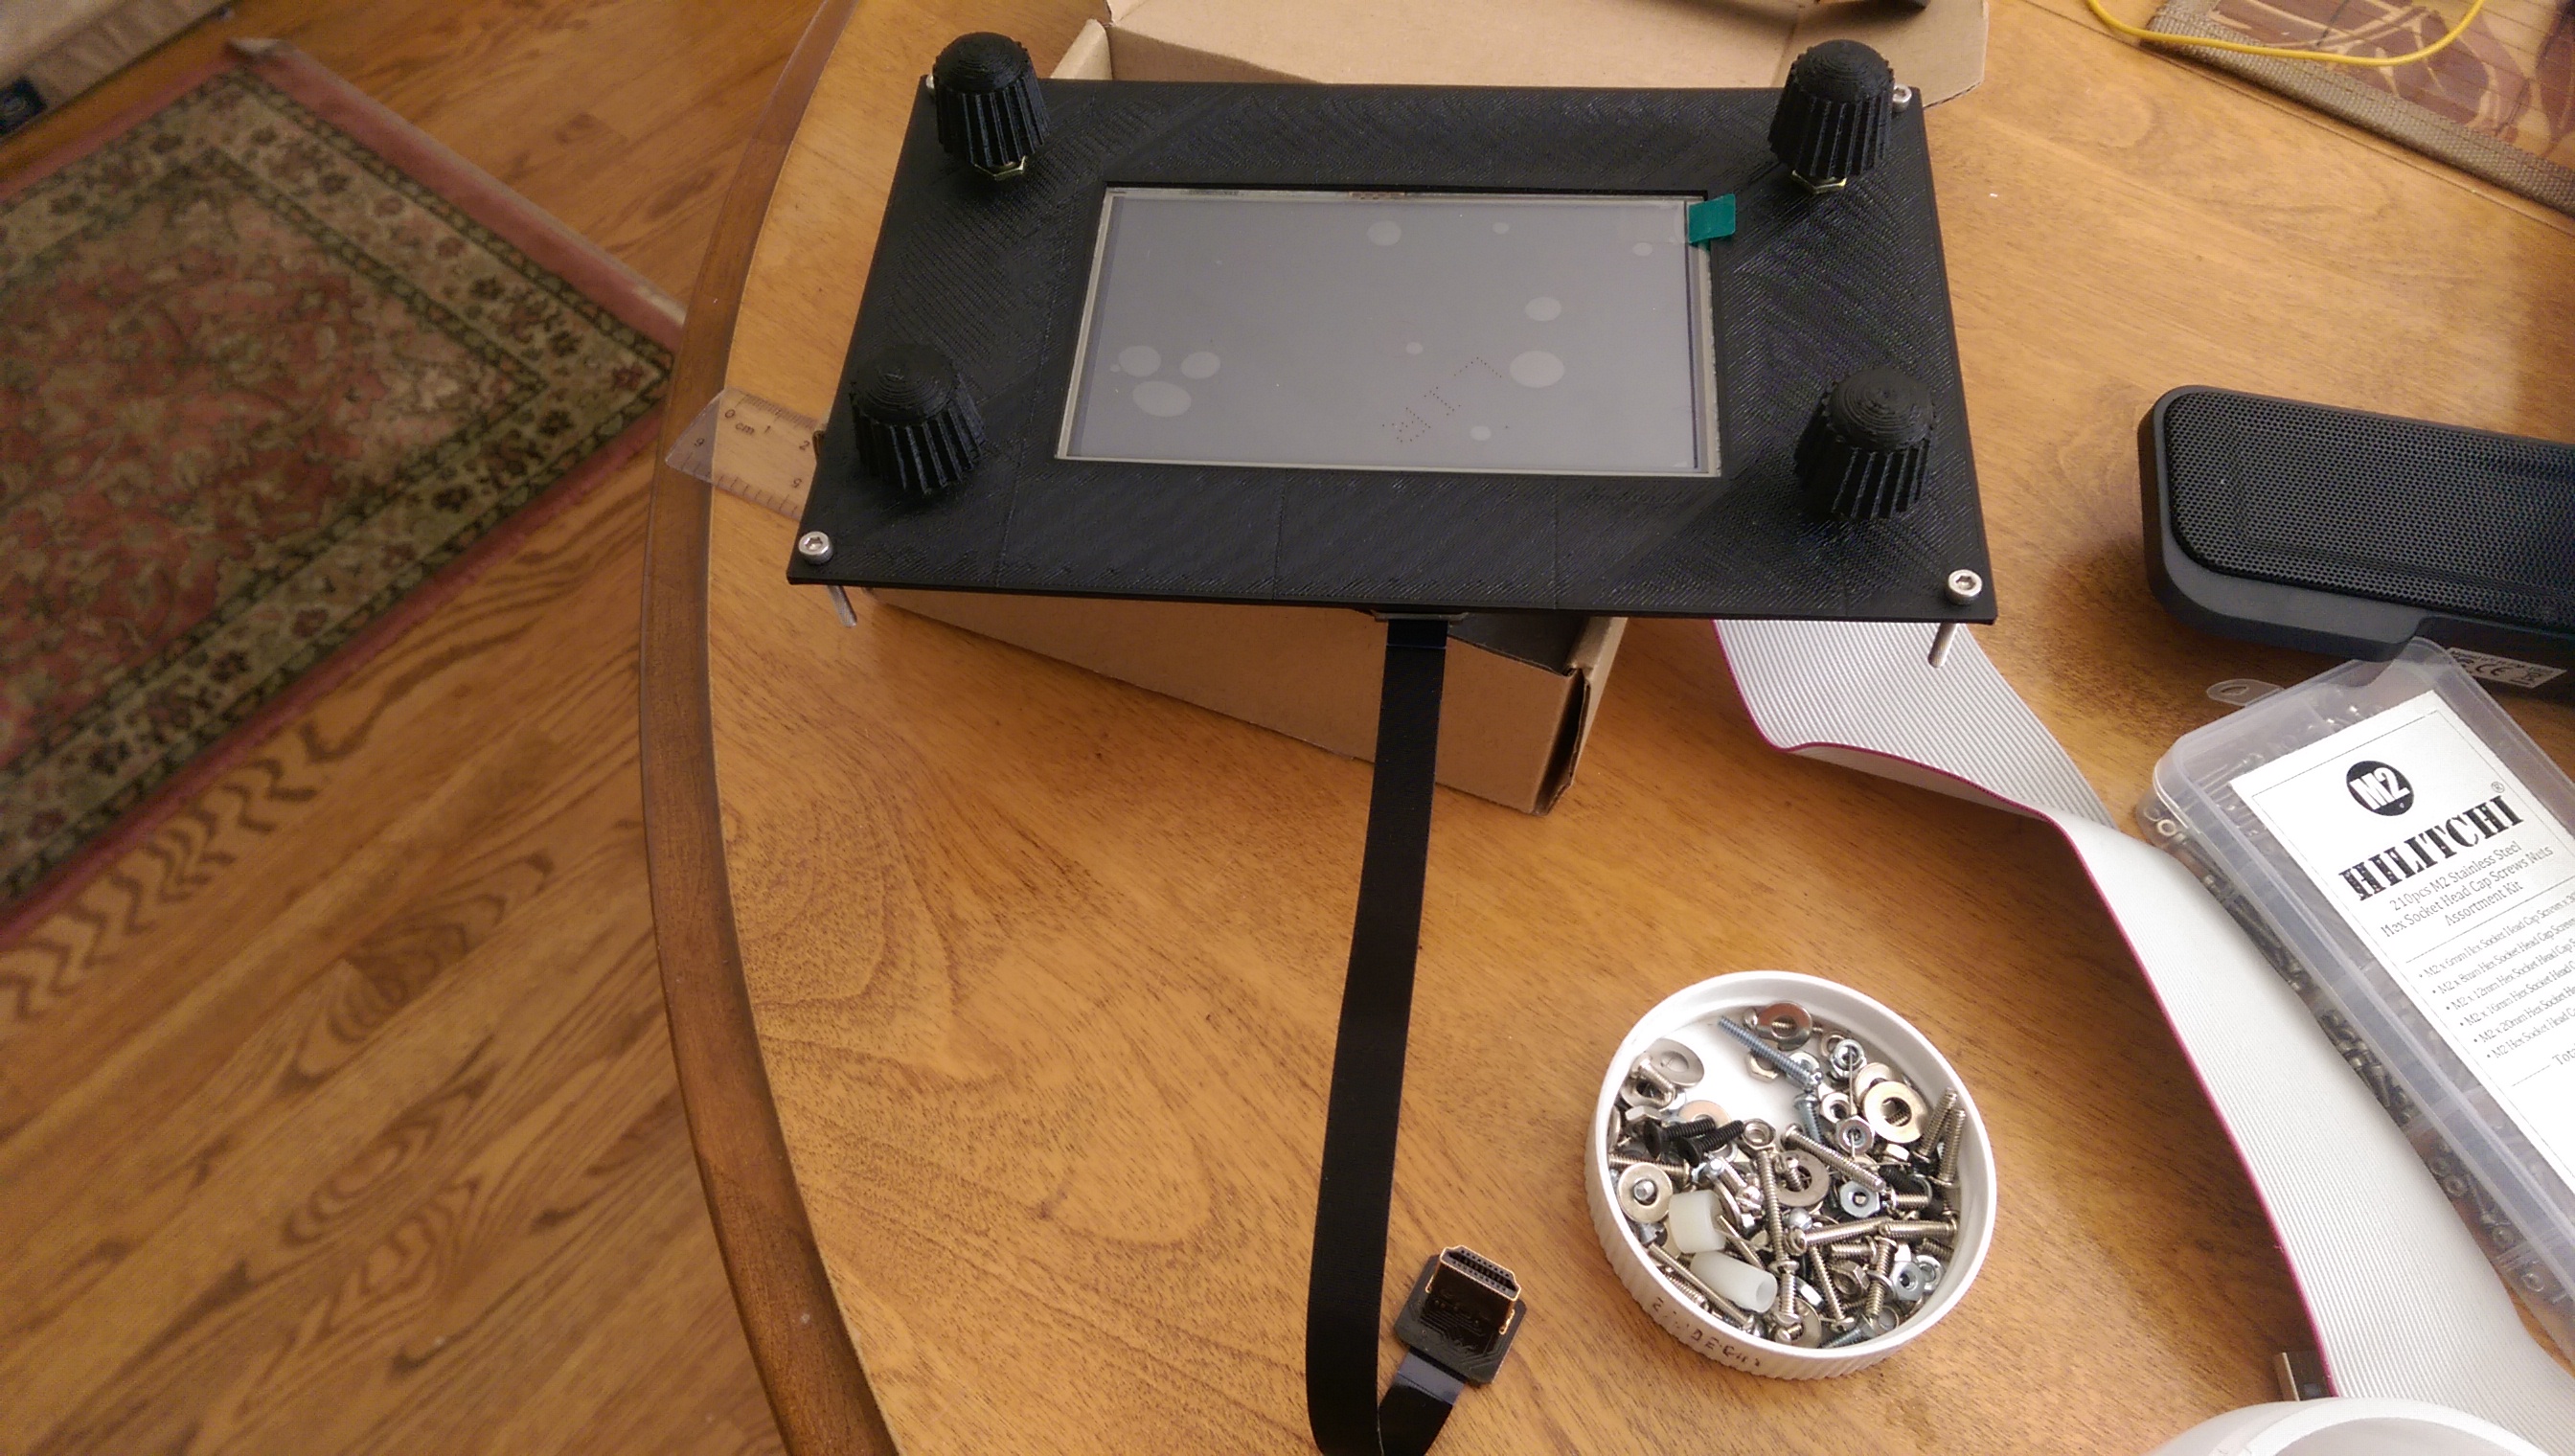
Whoops! I forgot to add the knobs…
Congratulations @Andy!! You are a brave maker!! 
 … but as we say in spanish, “para gustos, colores”
Have you updated the software? If not, you should do it ASAP. And do it twice!! Also update the “library”.
After doing so, you will have new features, like the new multi.layer engine and the webconf utility that you can use to increase the font size.
Finally … could you send some photo of the inner and back sides? It would be nice to see how you solved the details.
Kind Regards!
I don’t like the colour of the case either! I’m not too impressed with our 3D printer. I tried a few times to make a print with bright red ABS-PC, but these failed. The prints in the picture are using ‘transparent’ PLA which is much easier to print with, but not as durable.
Here are some more pictures…
Here is the side with the USB & Ethernet ports visible.
This is the back with the power & audio connections. There’s another hole for me to mount the midi port.
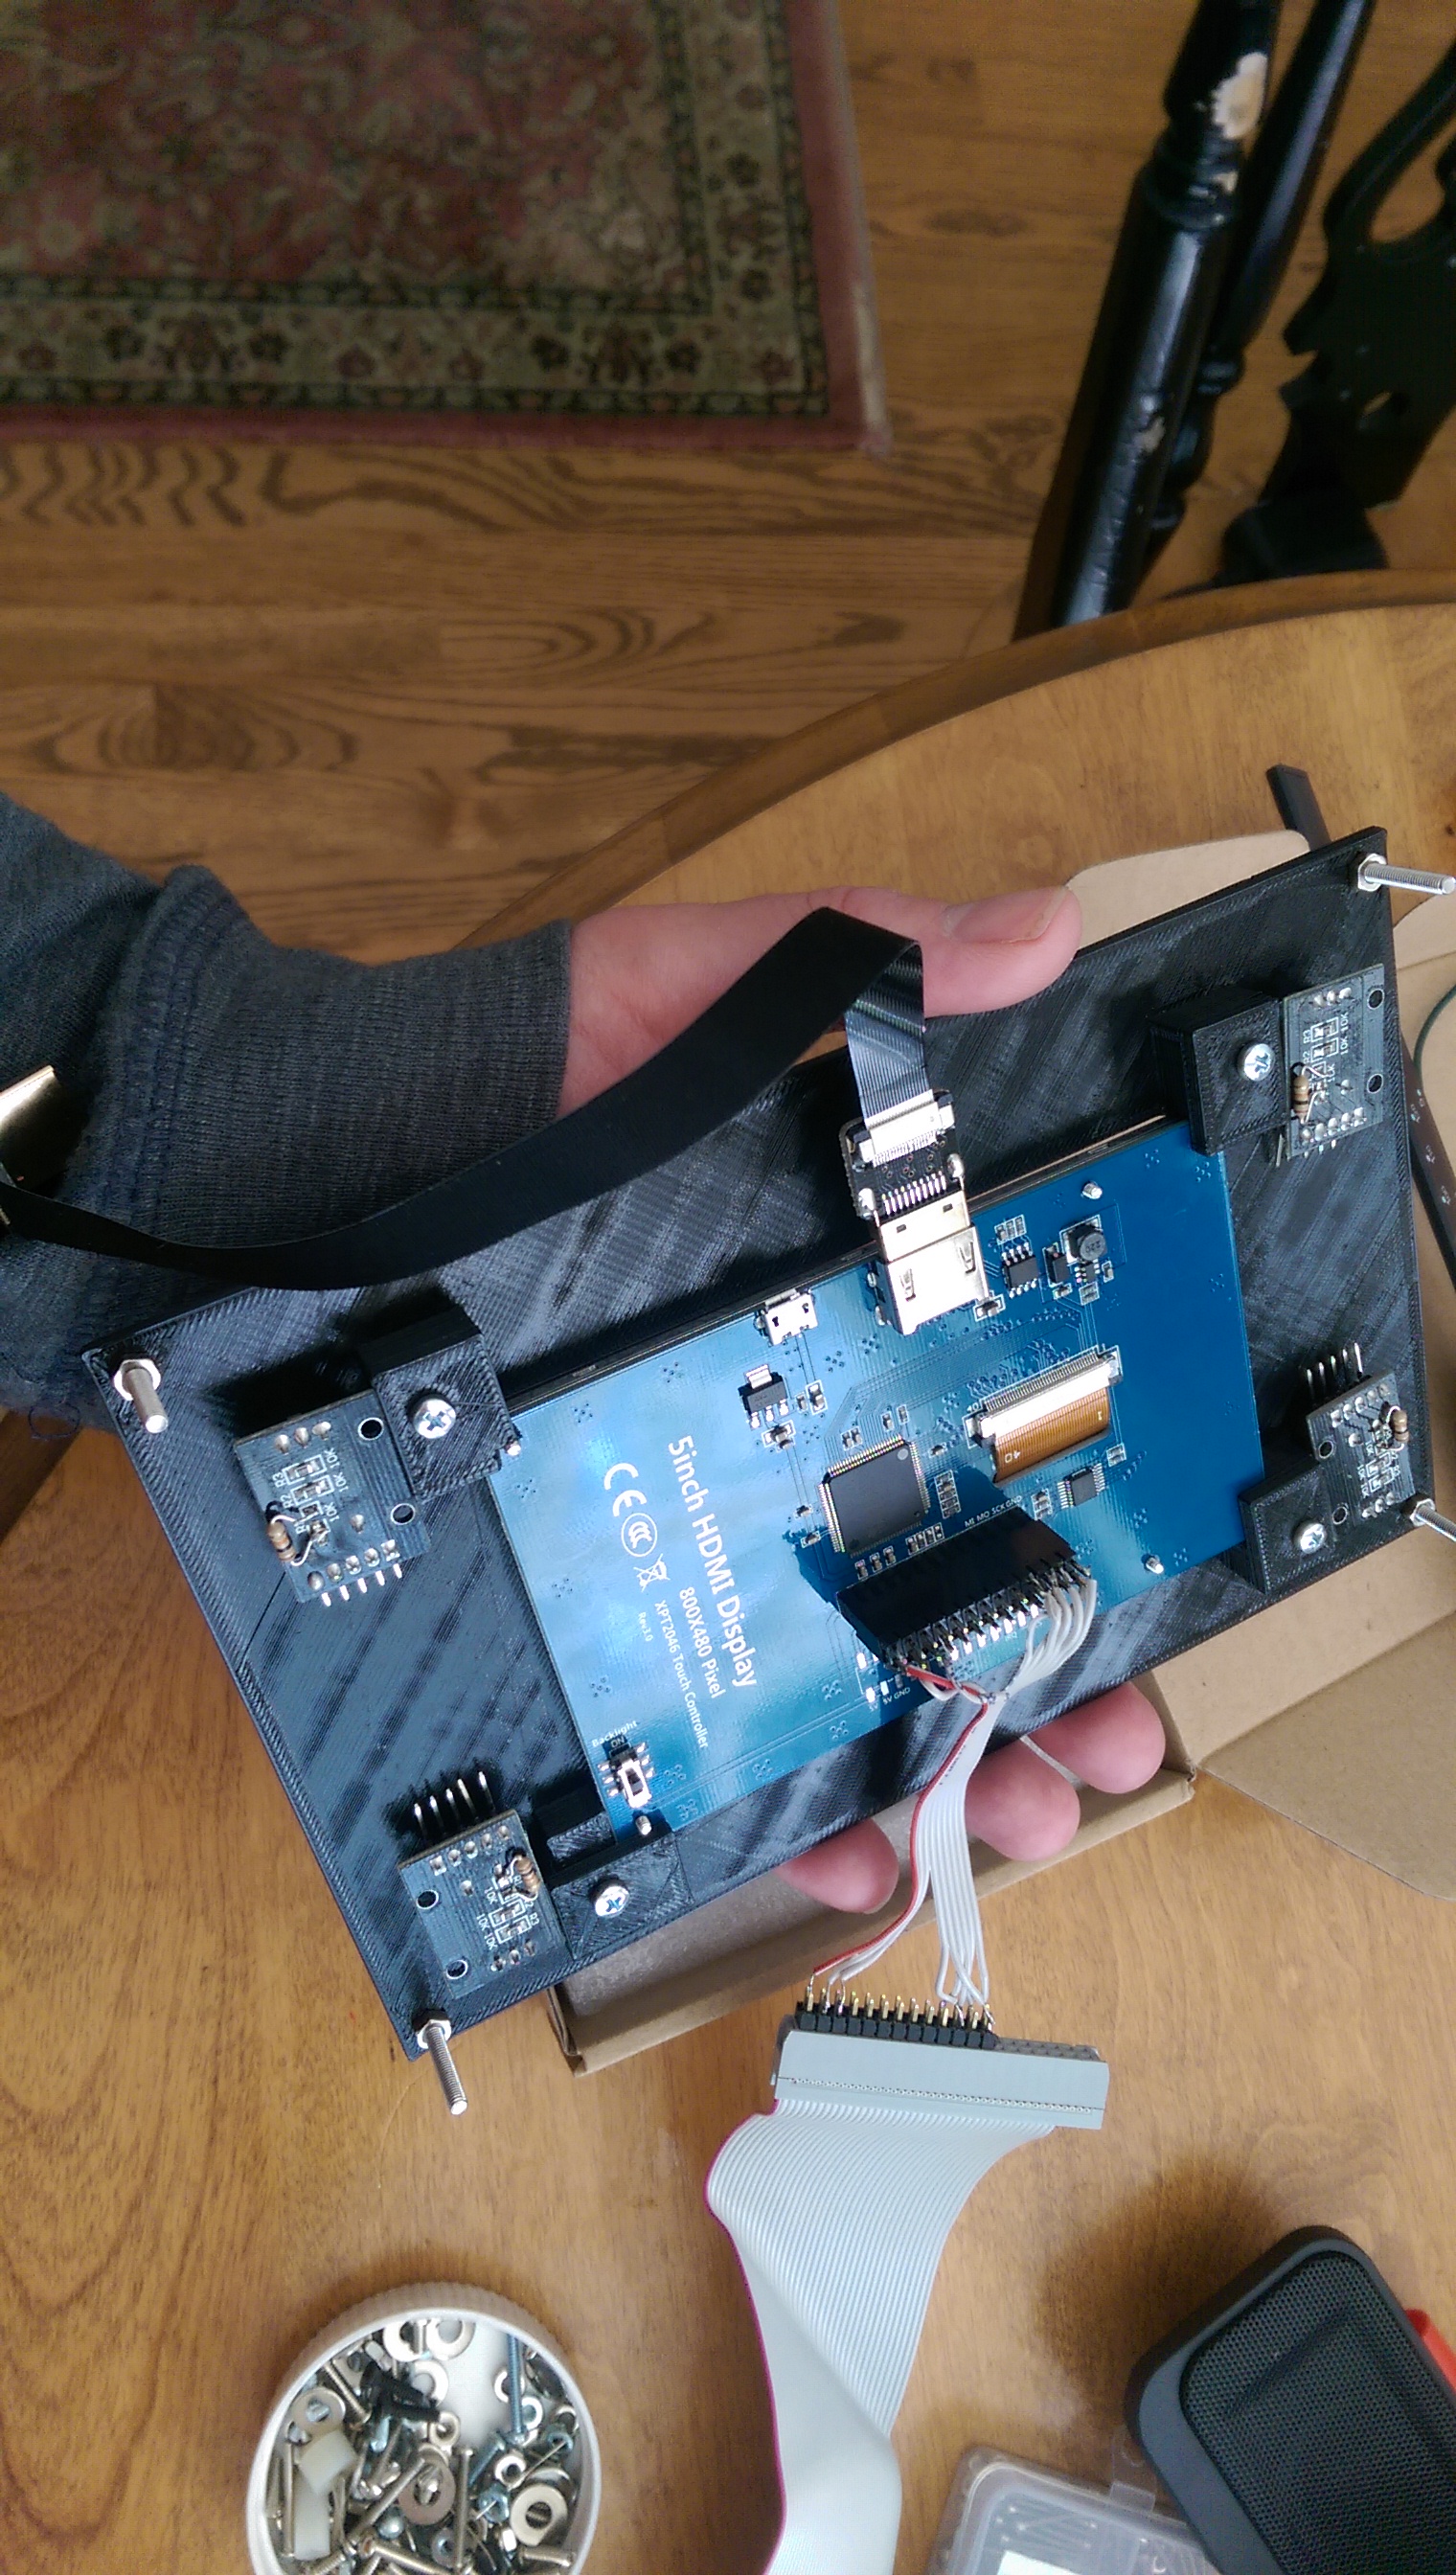
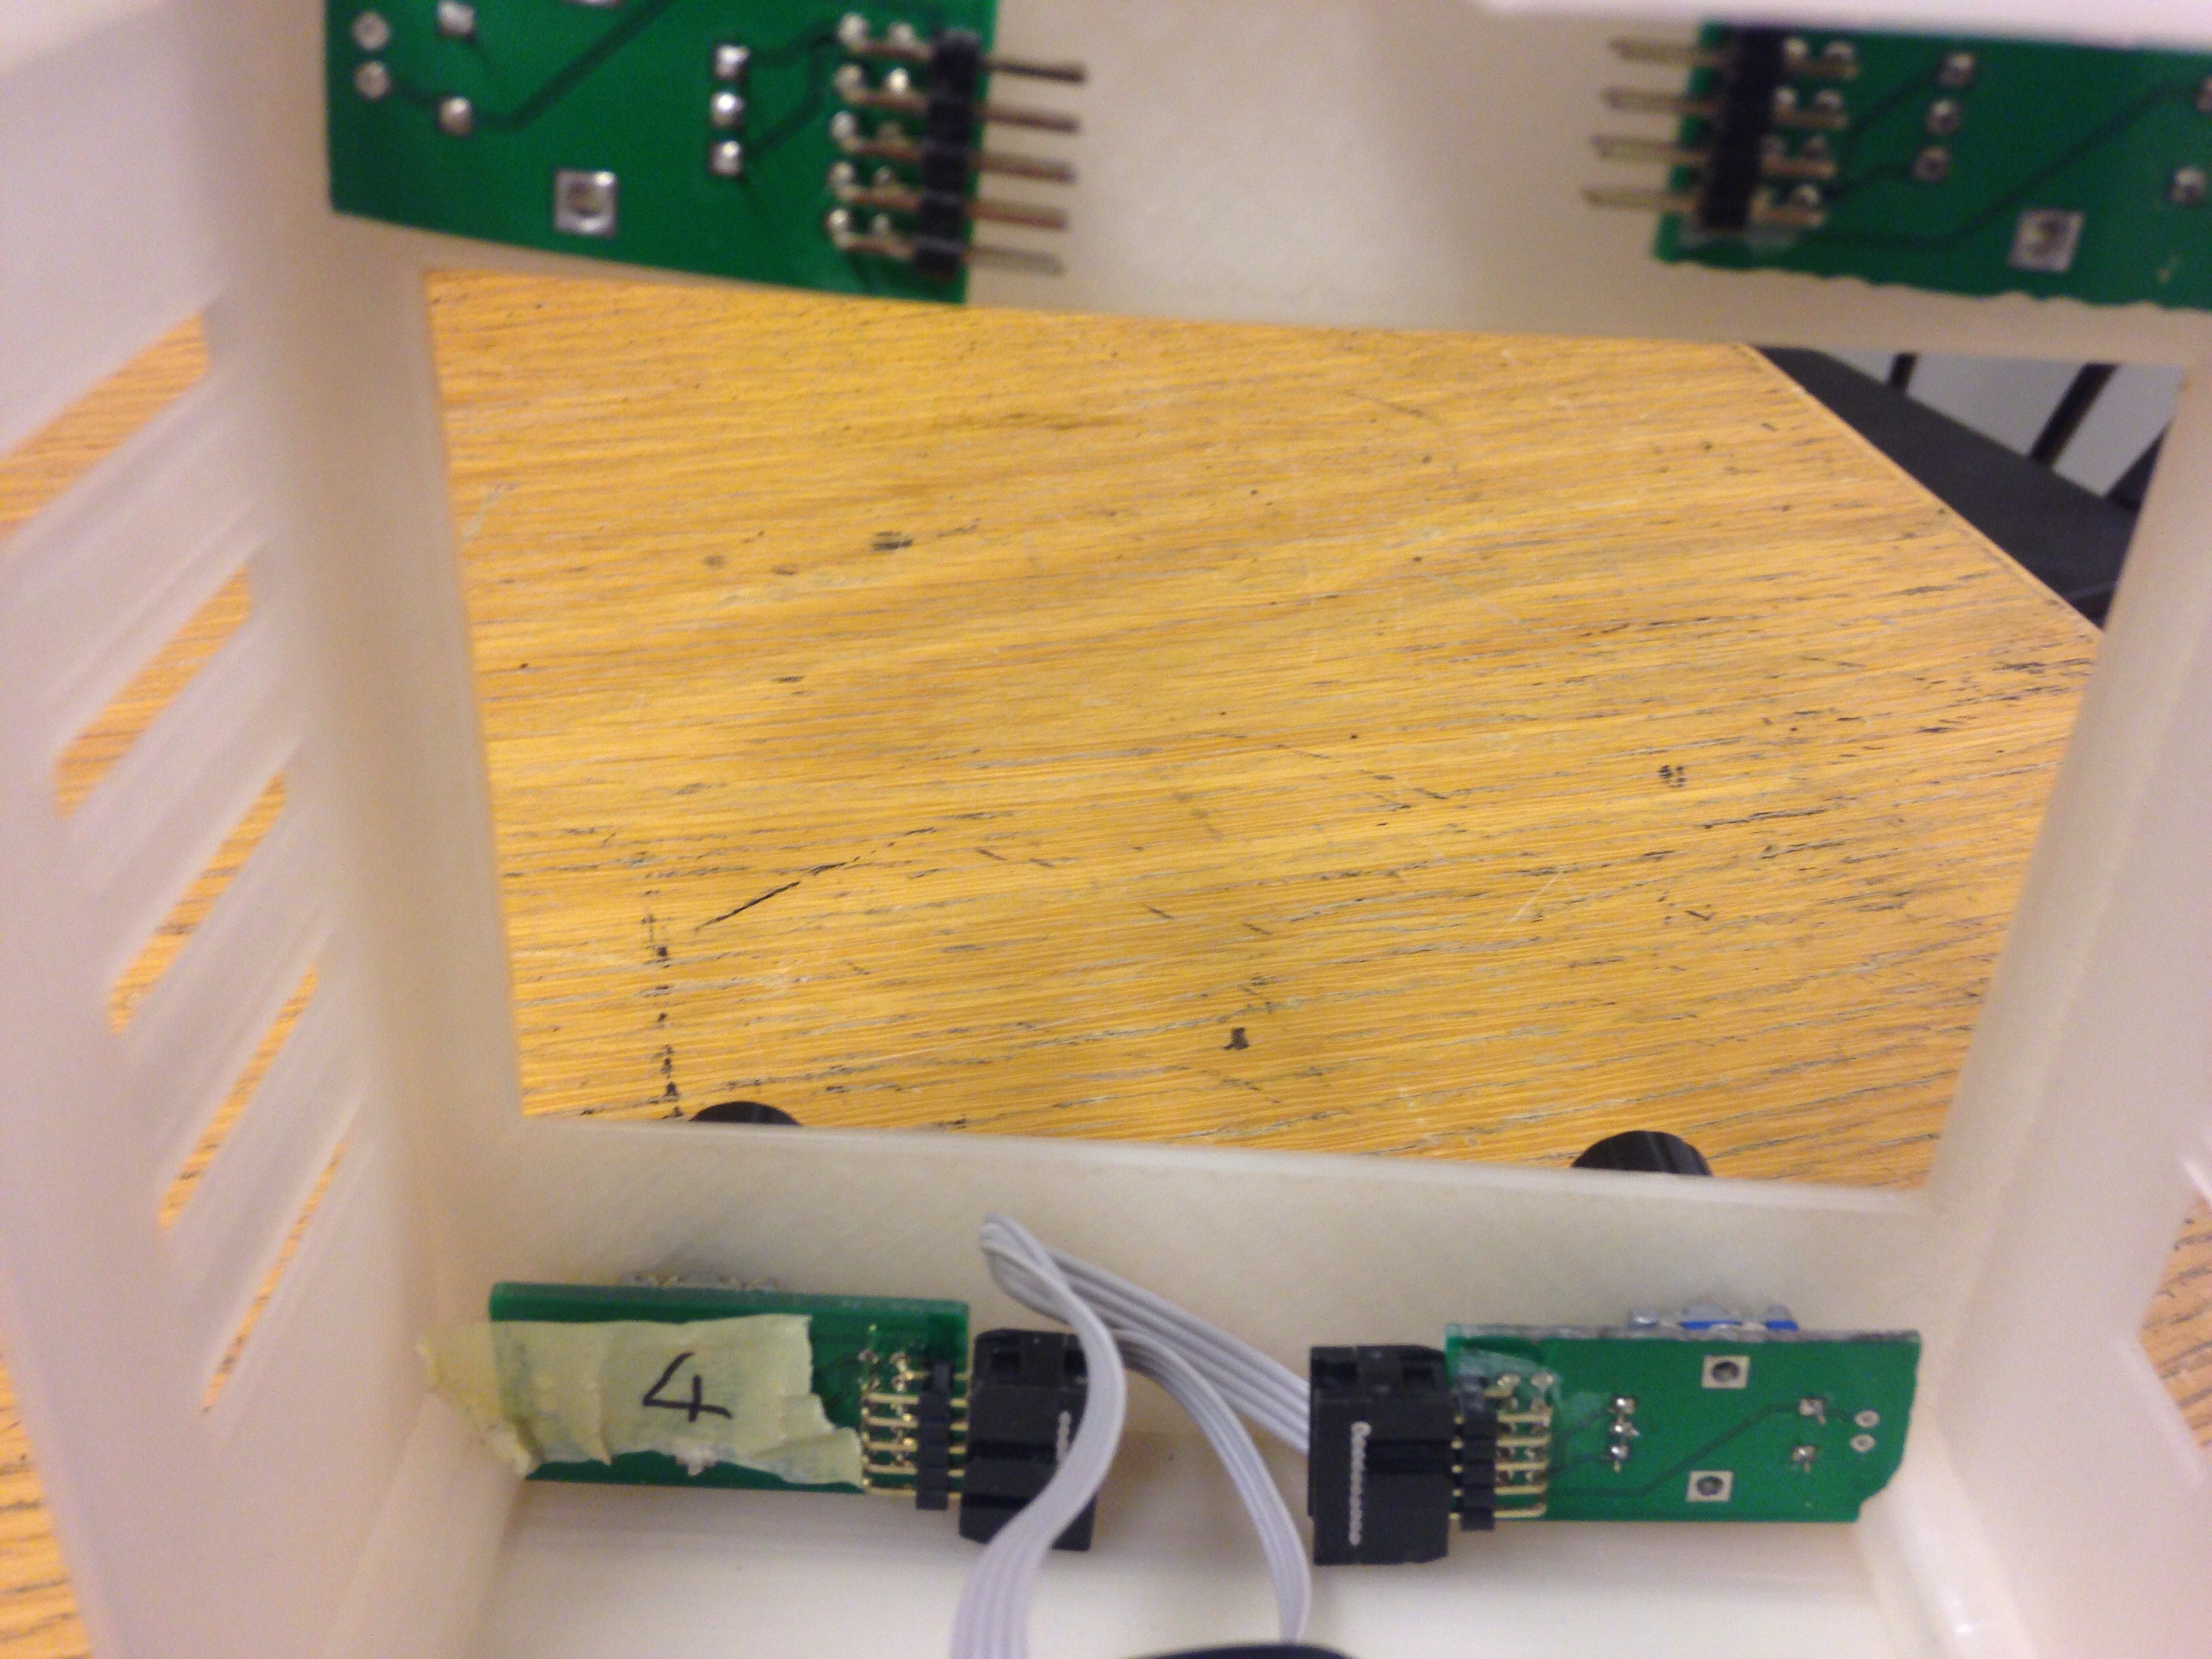
Here are the encoders inside the lid. It’s a tight squeeze and I had to dremel the corner of my PCB away to get it to fit. The IDC headers are a bit bigger then needed, but I had a whole pile of them left over from an earlier project. You can also see the vent holes in the case to help with airflow.
This is the 12-5V converter board. The ugly yellow & red wires are connecting 5V to the RPi via my adapter board.
Finally, the stack of the display, the RPi, the HifiBerry & encoder breakout board. This 5 inch display has the RPi mounted ‘upside down’ so that I can plug the HifiBerry & encoder boards directly to the RPi without a 40 way ribbon cable. They are sandwiched together with metal standoffs. I did plan to push the standoffs into the back cover, but the assembly is solid enough without them. I like the mini Hdmi-Hdmi connector that came with the display since it’s a lot smaller than a regular HDMI cable.
Now this Zynthian is working & I’m already dreaming up the next one. After struggling to squeeze everything into a small package, I’m now thinking about using a 19 inch rack.